Sunday Crafting
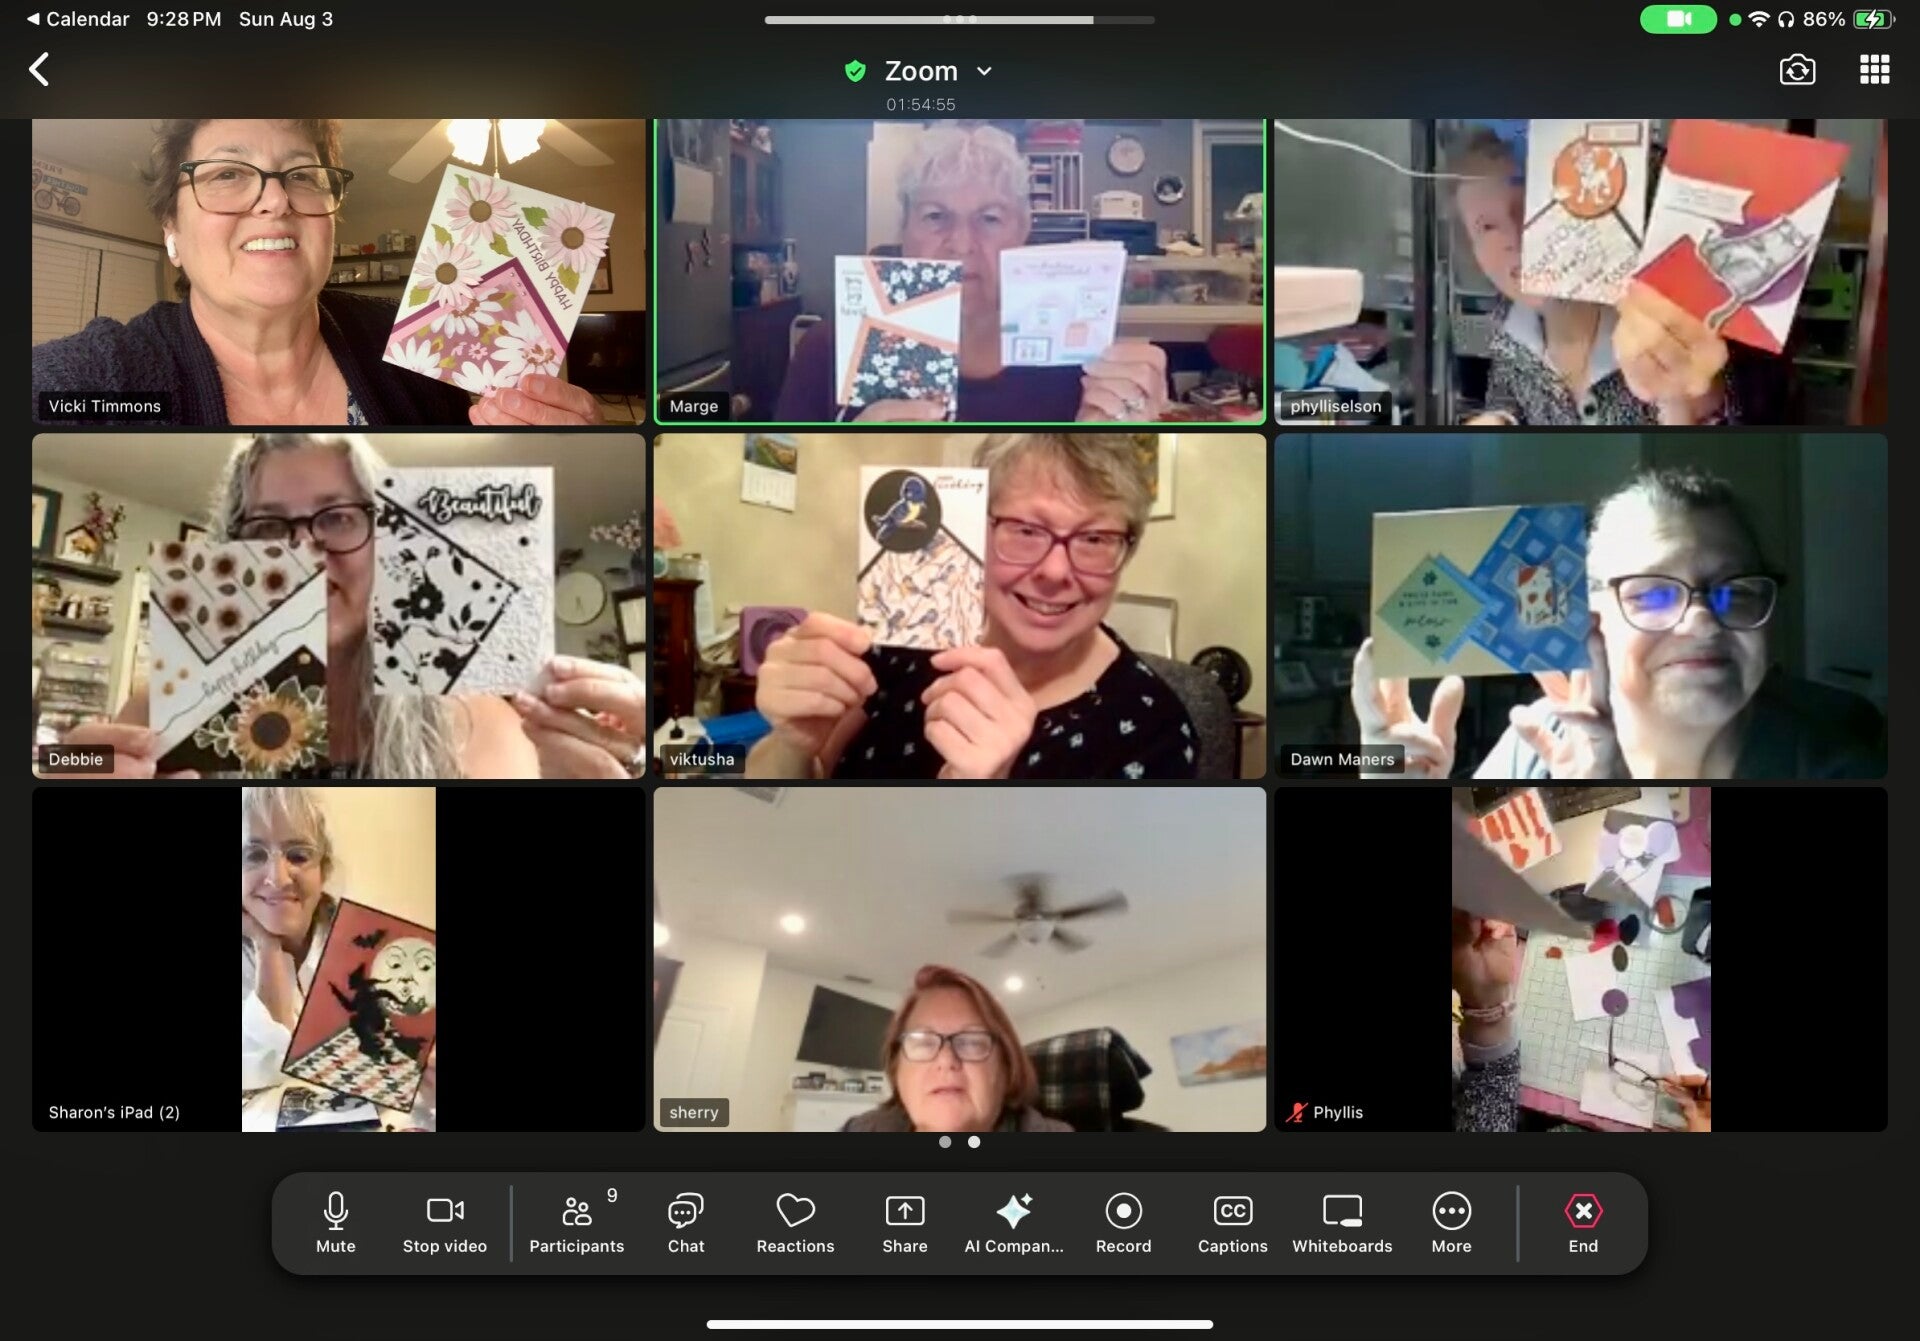
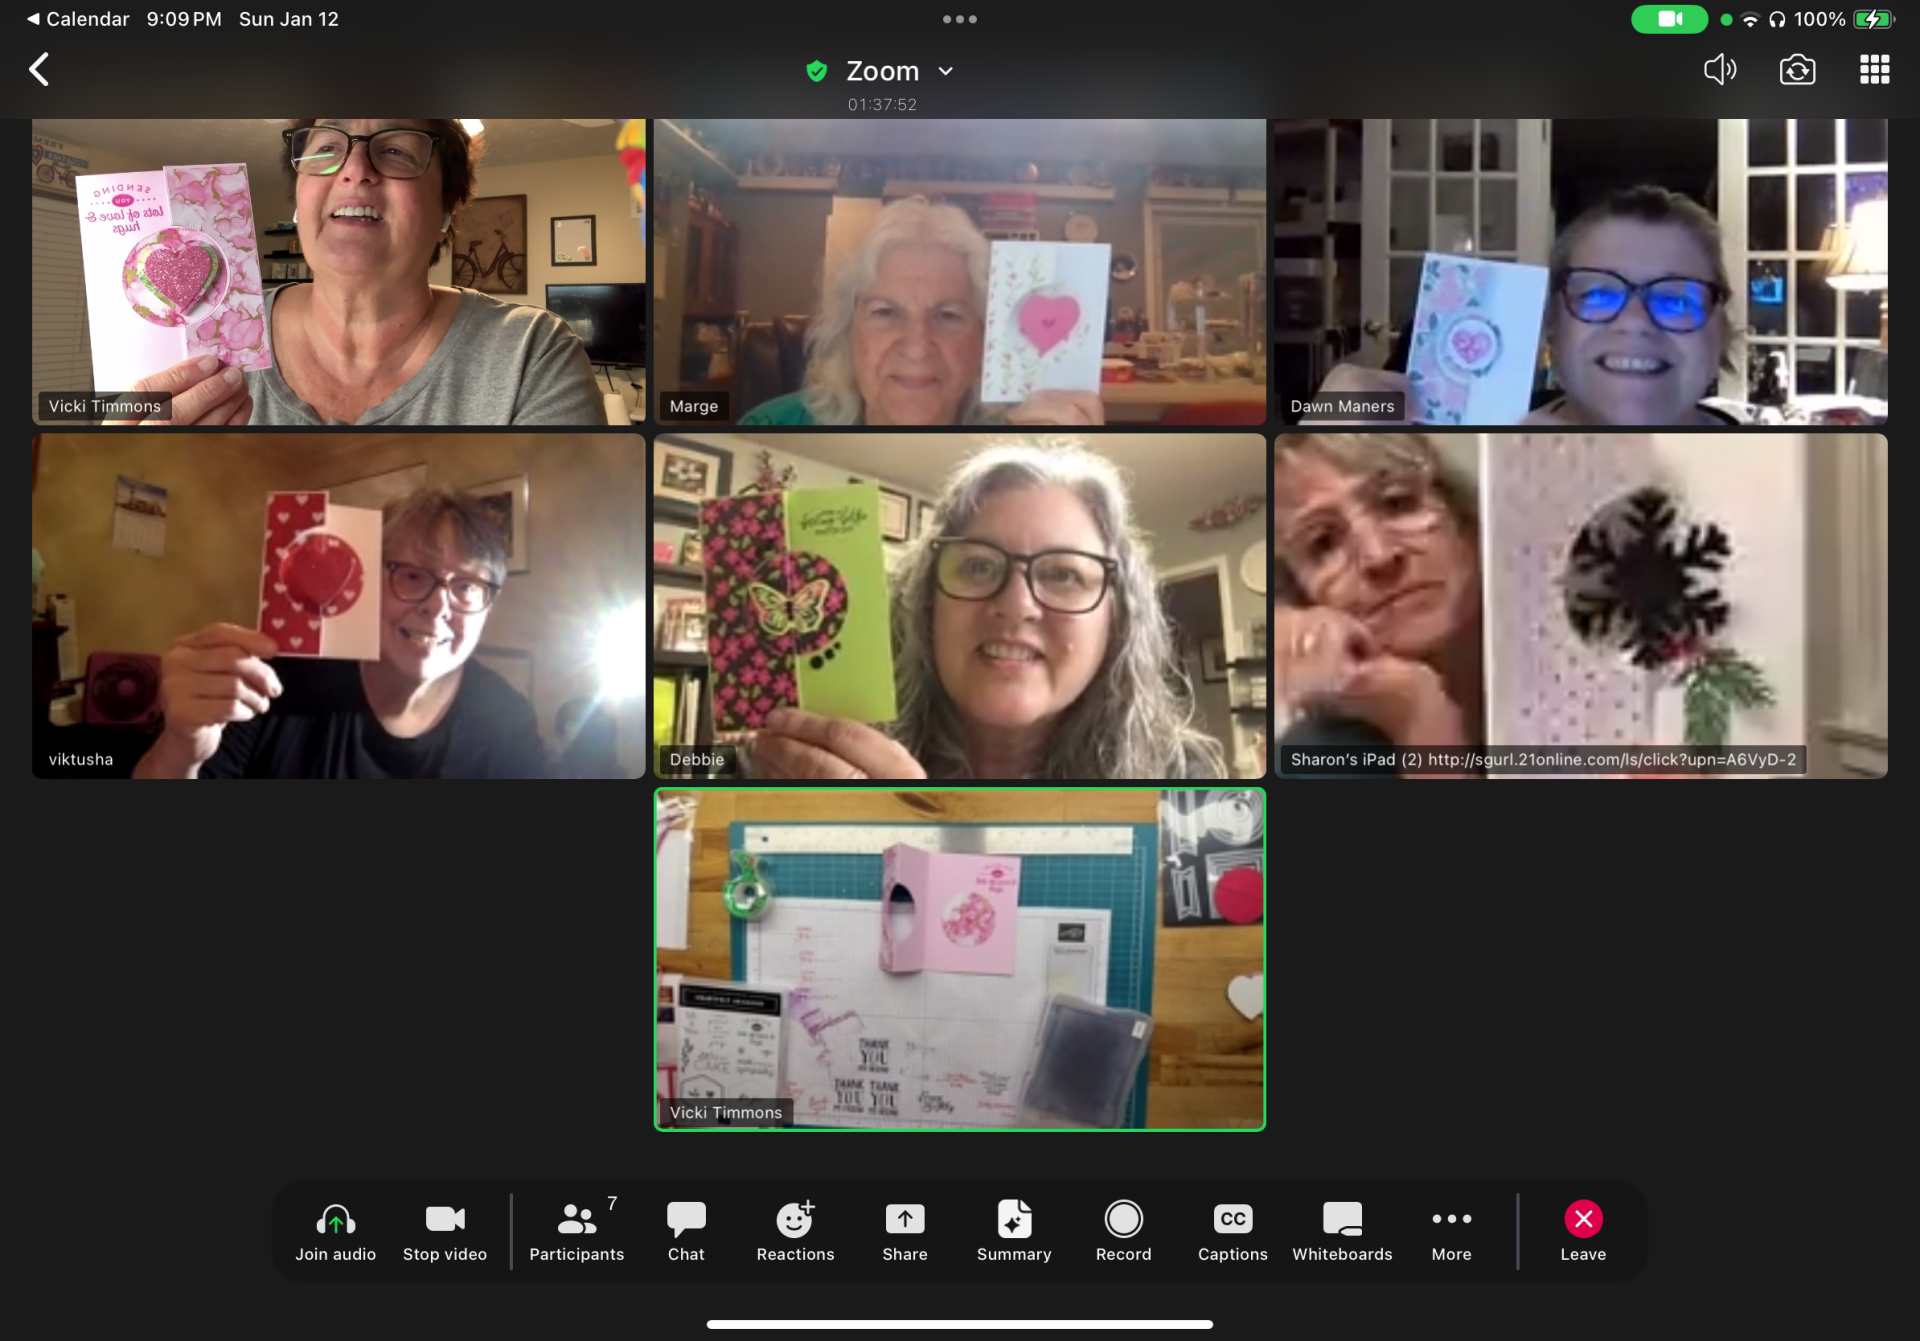
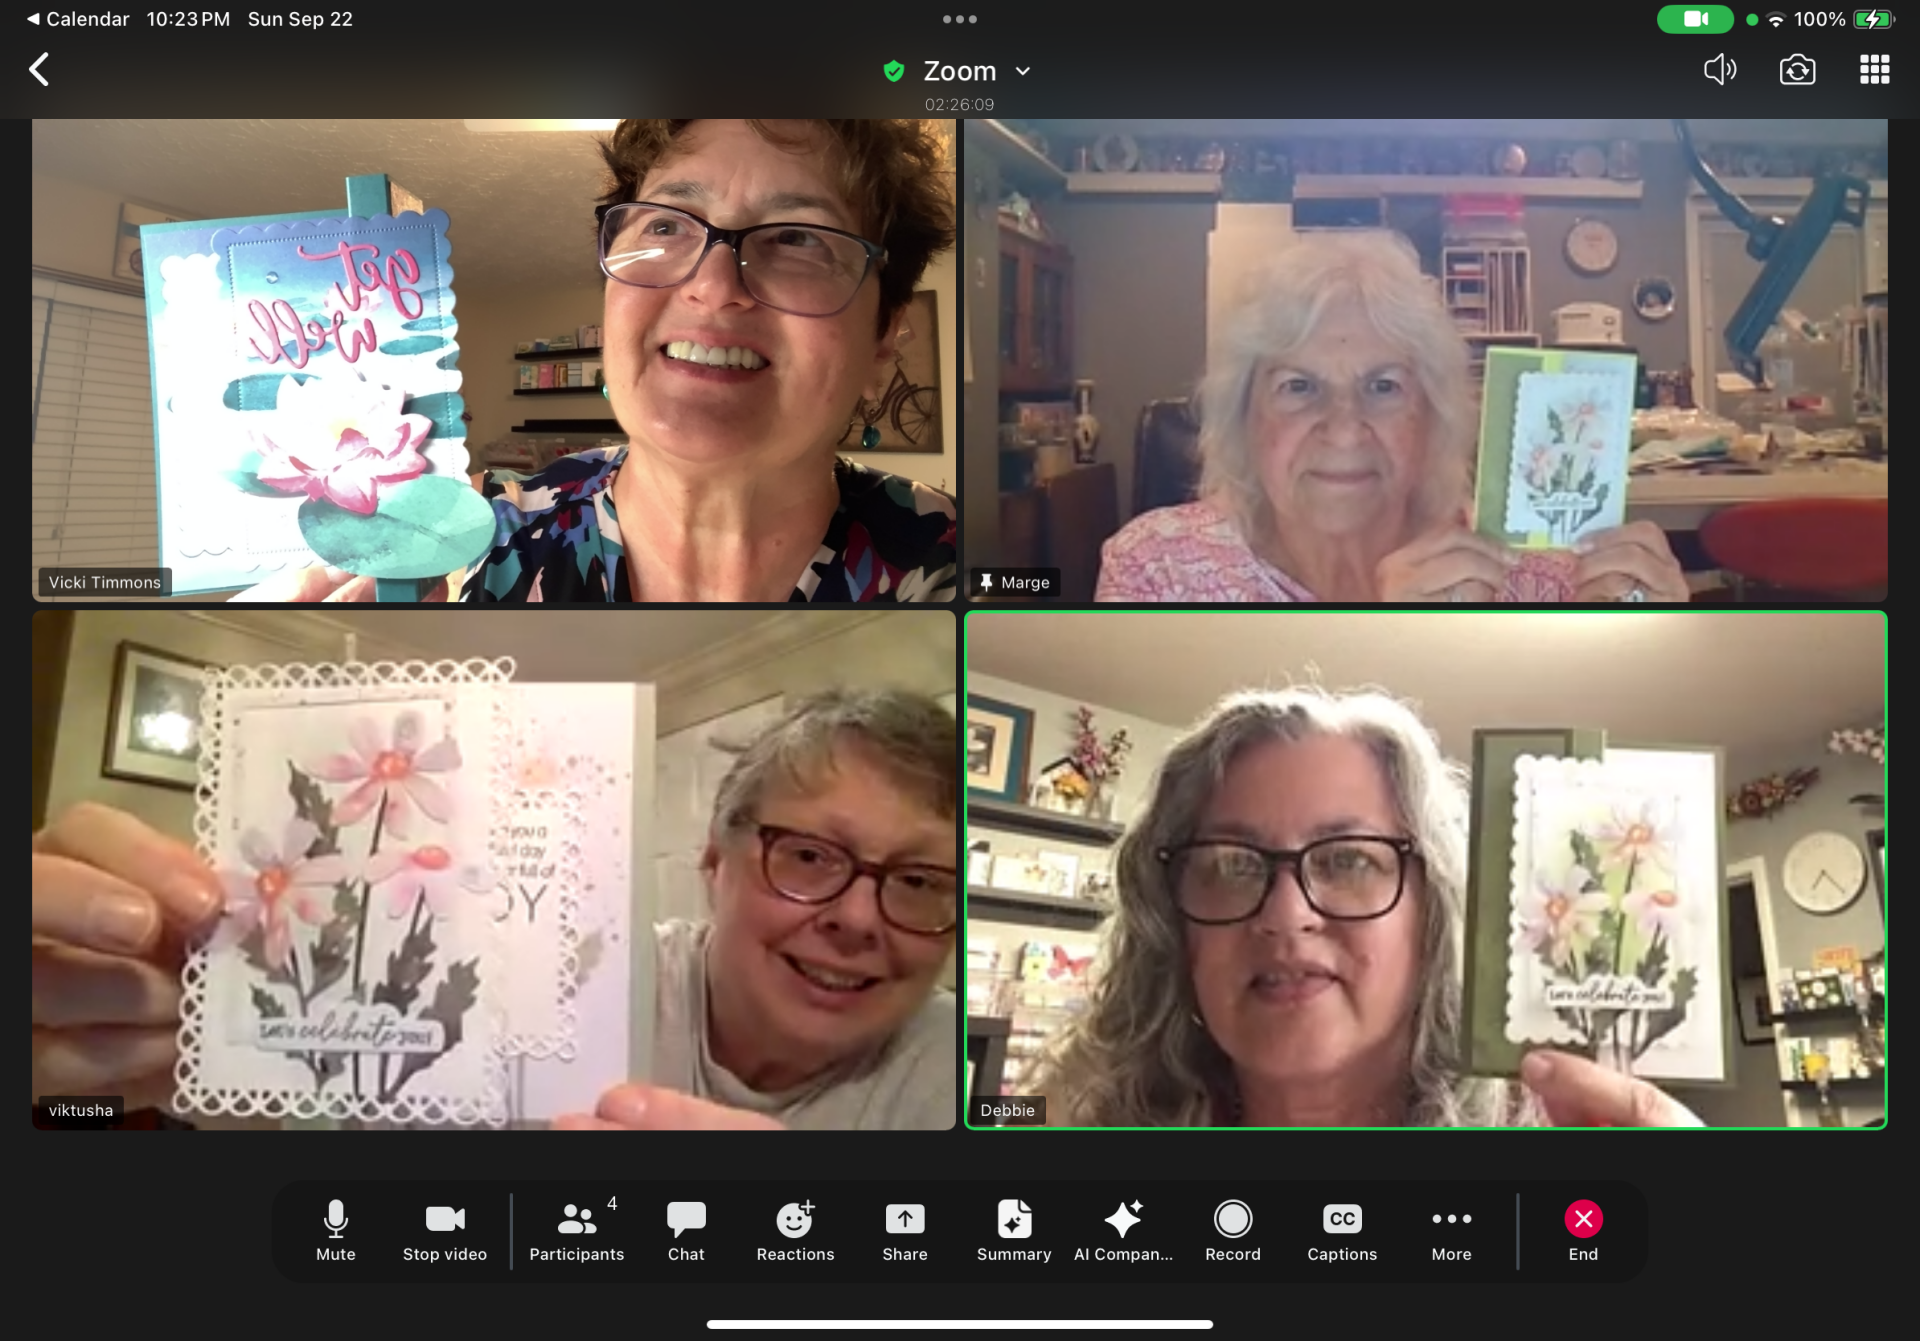
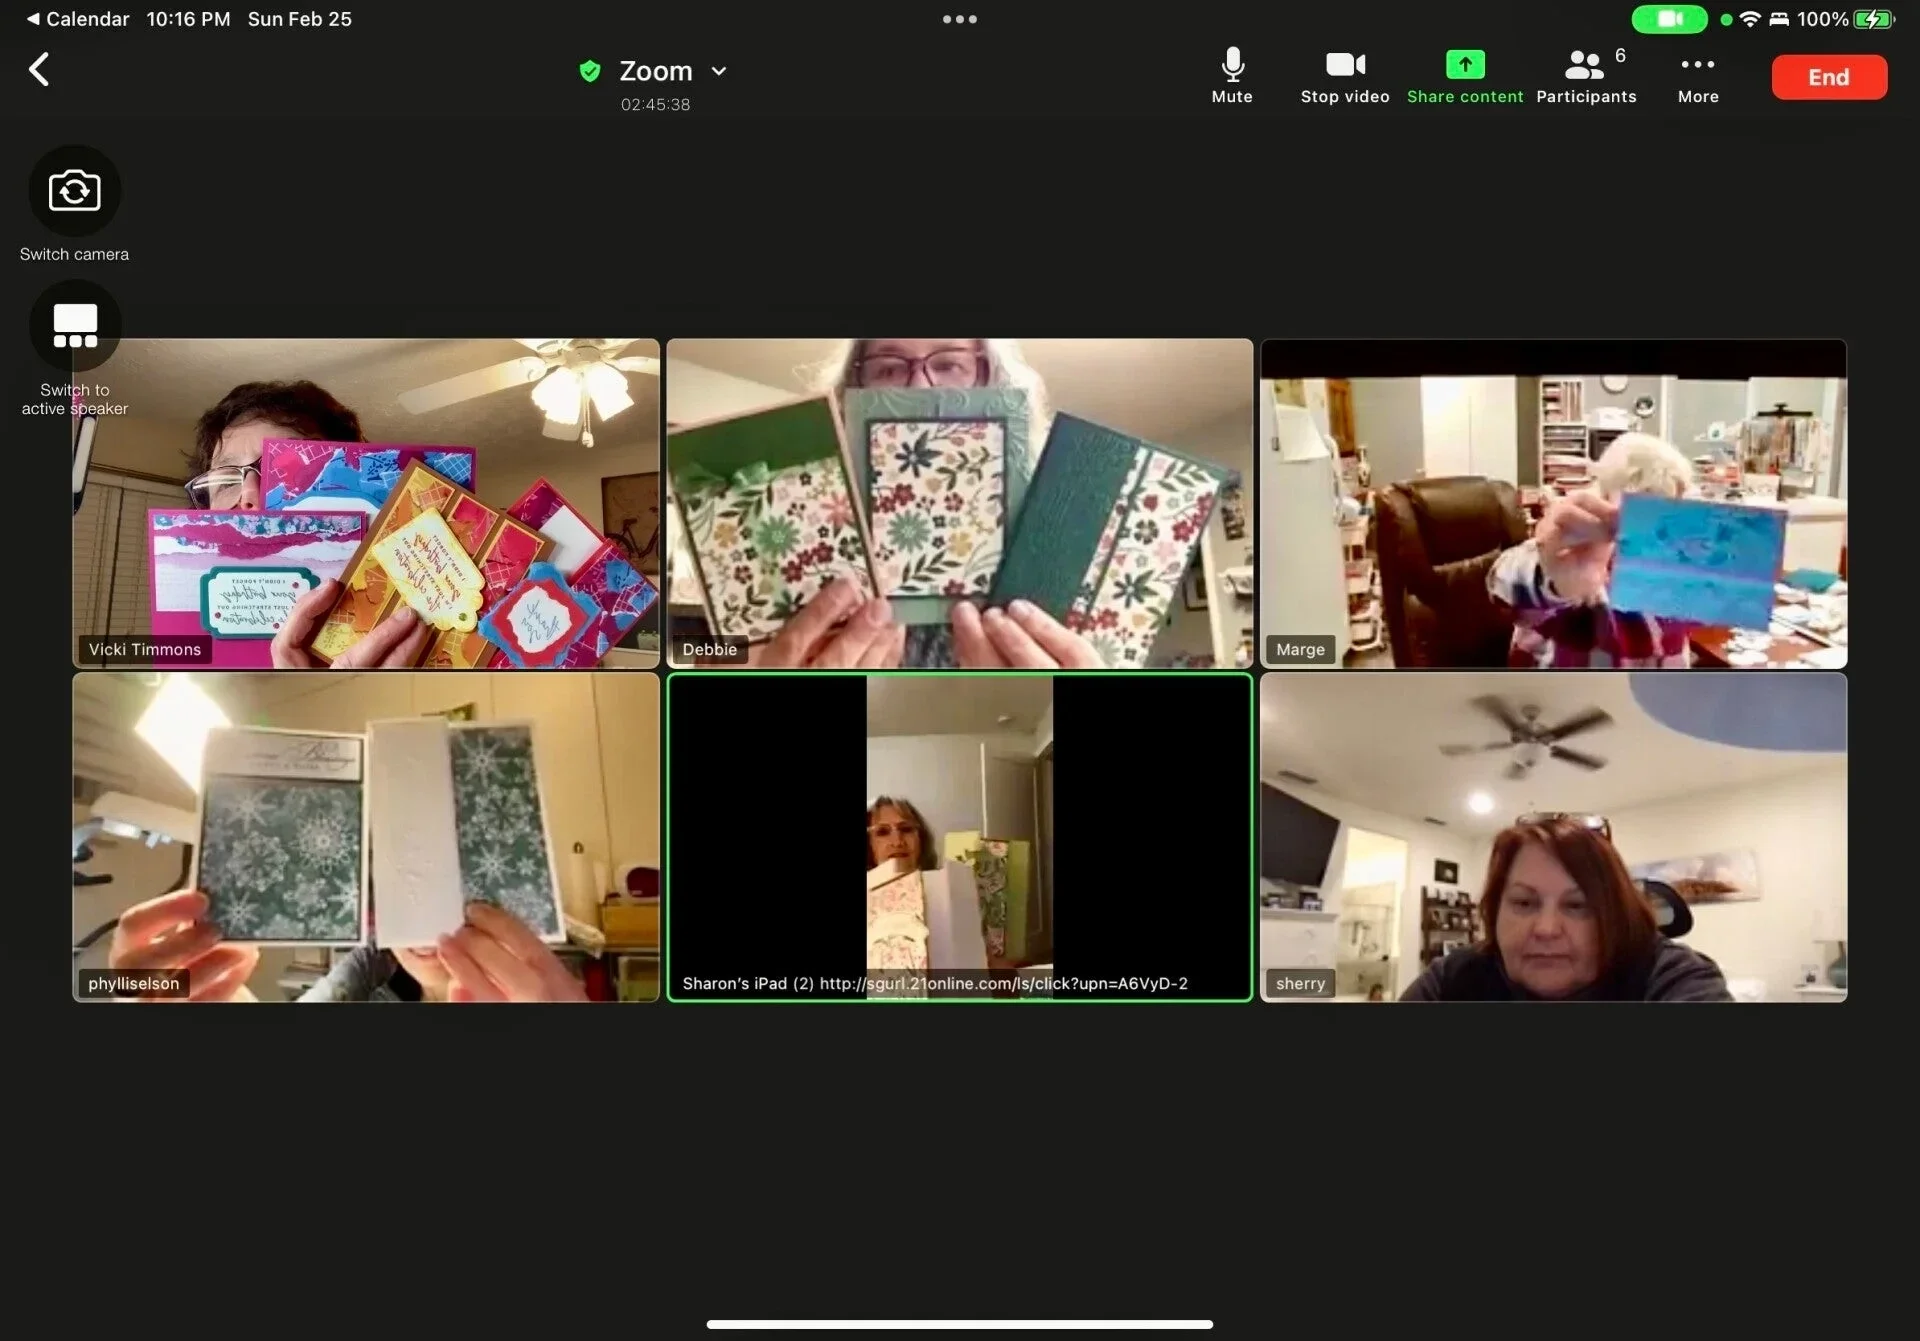
Every Sunday we craft via zoom and create fun stuff. Sometimes cards, sometimes mini albums, sometimes sharing techniques, and sometimes just crafting and chatting. Interested in joining us, just reach out to me!
During the summer we meet at 7:30 PM EST. Starting 10/19/25 we will meet at 6:30 PM EST.
Here are some of our recent creations...
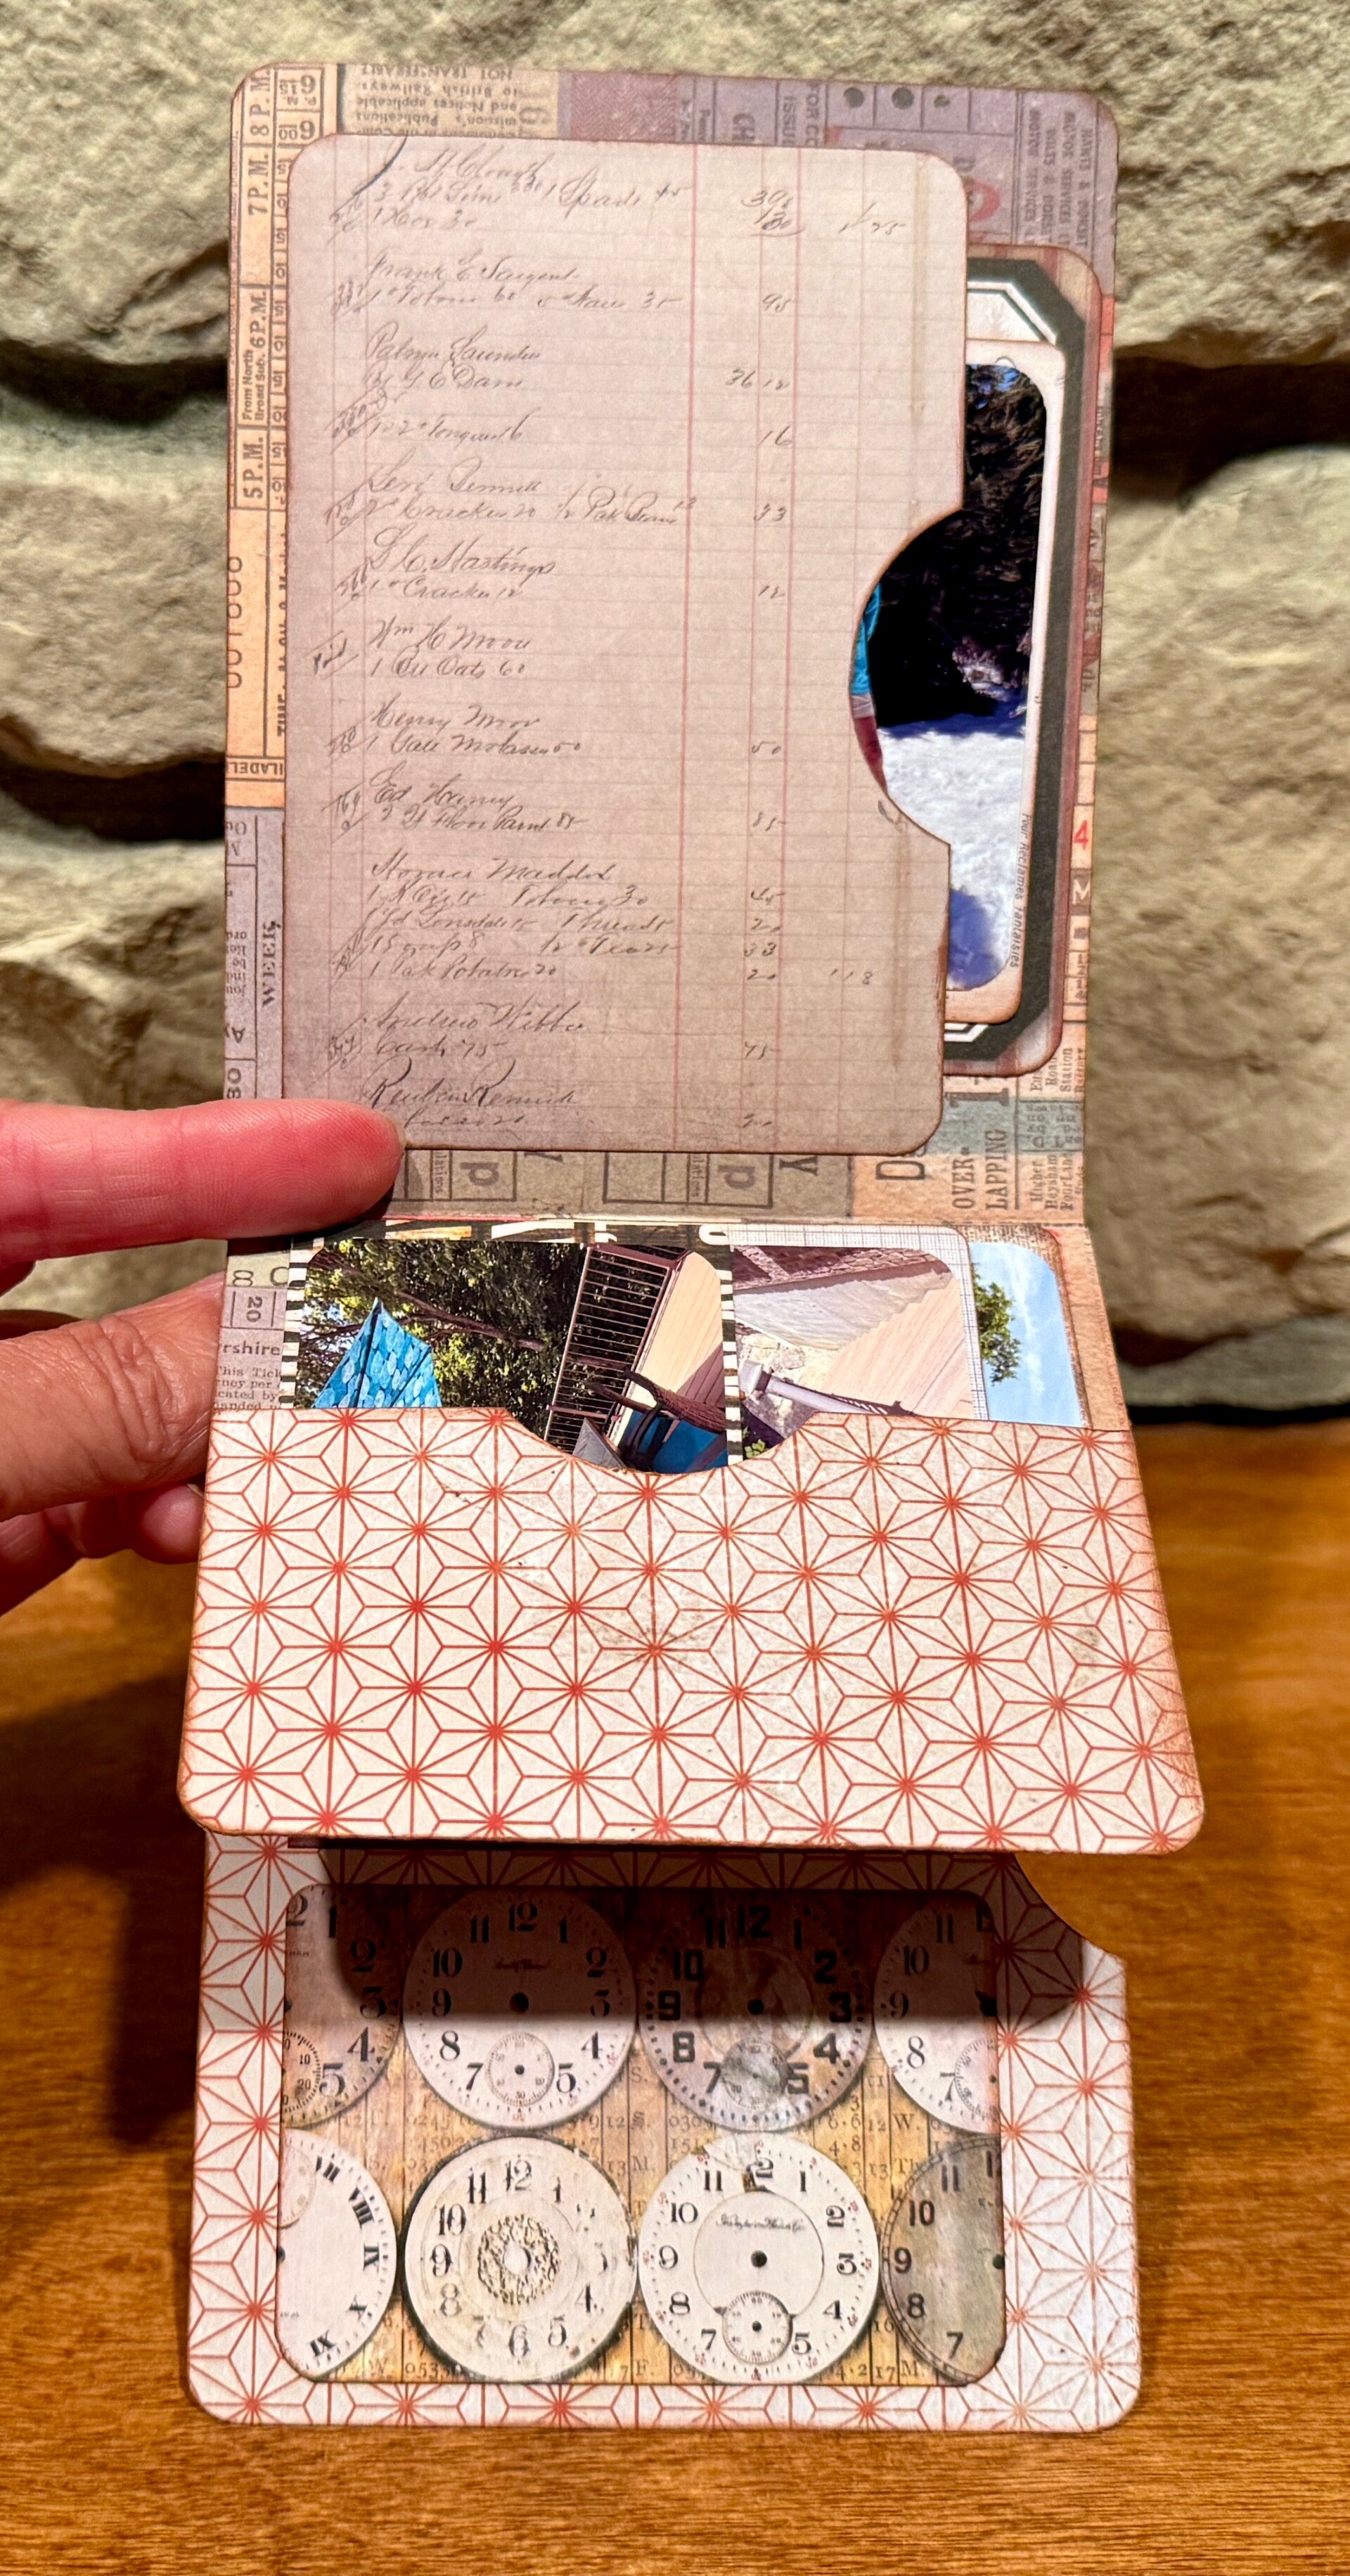
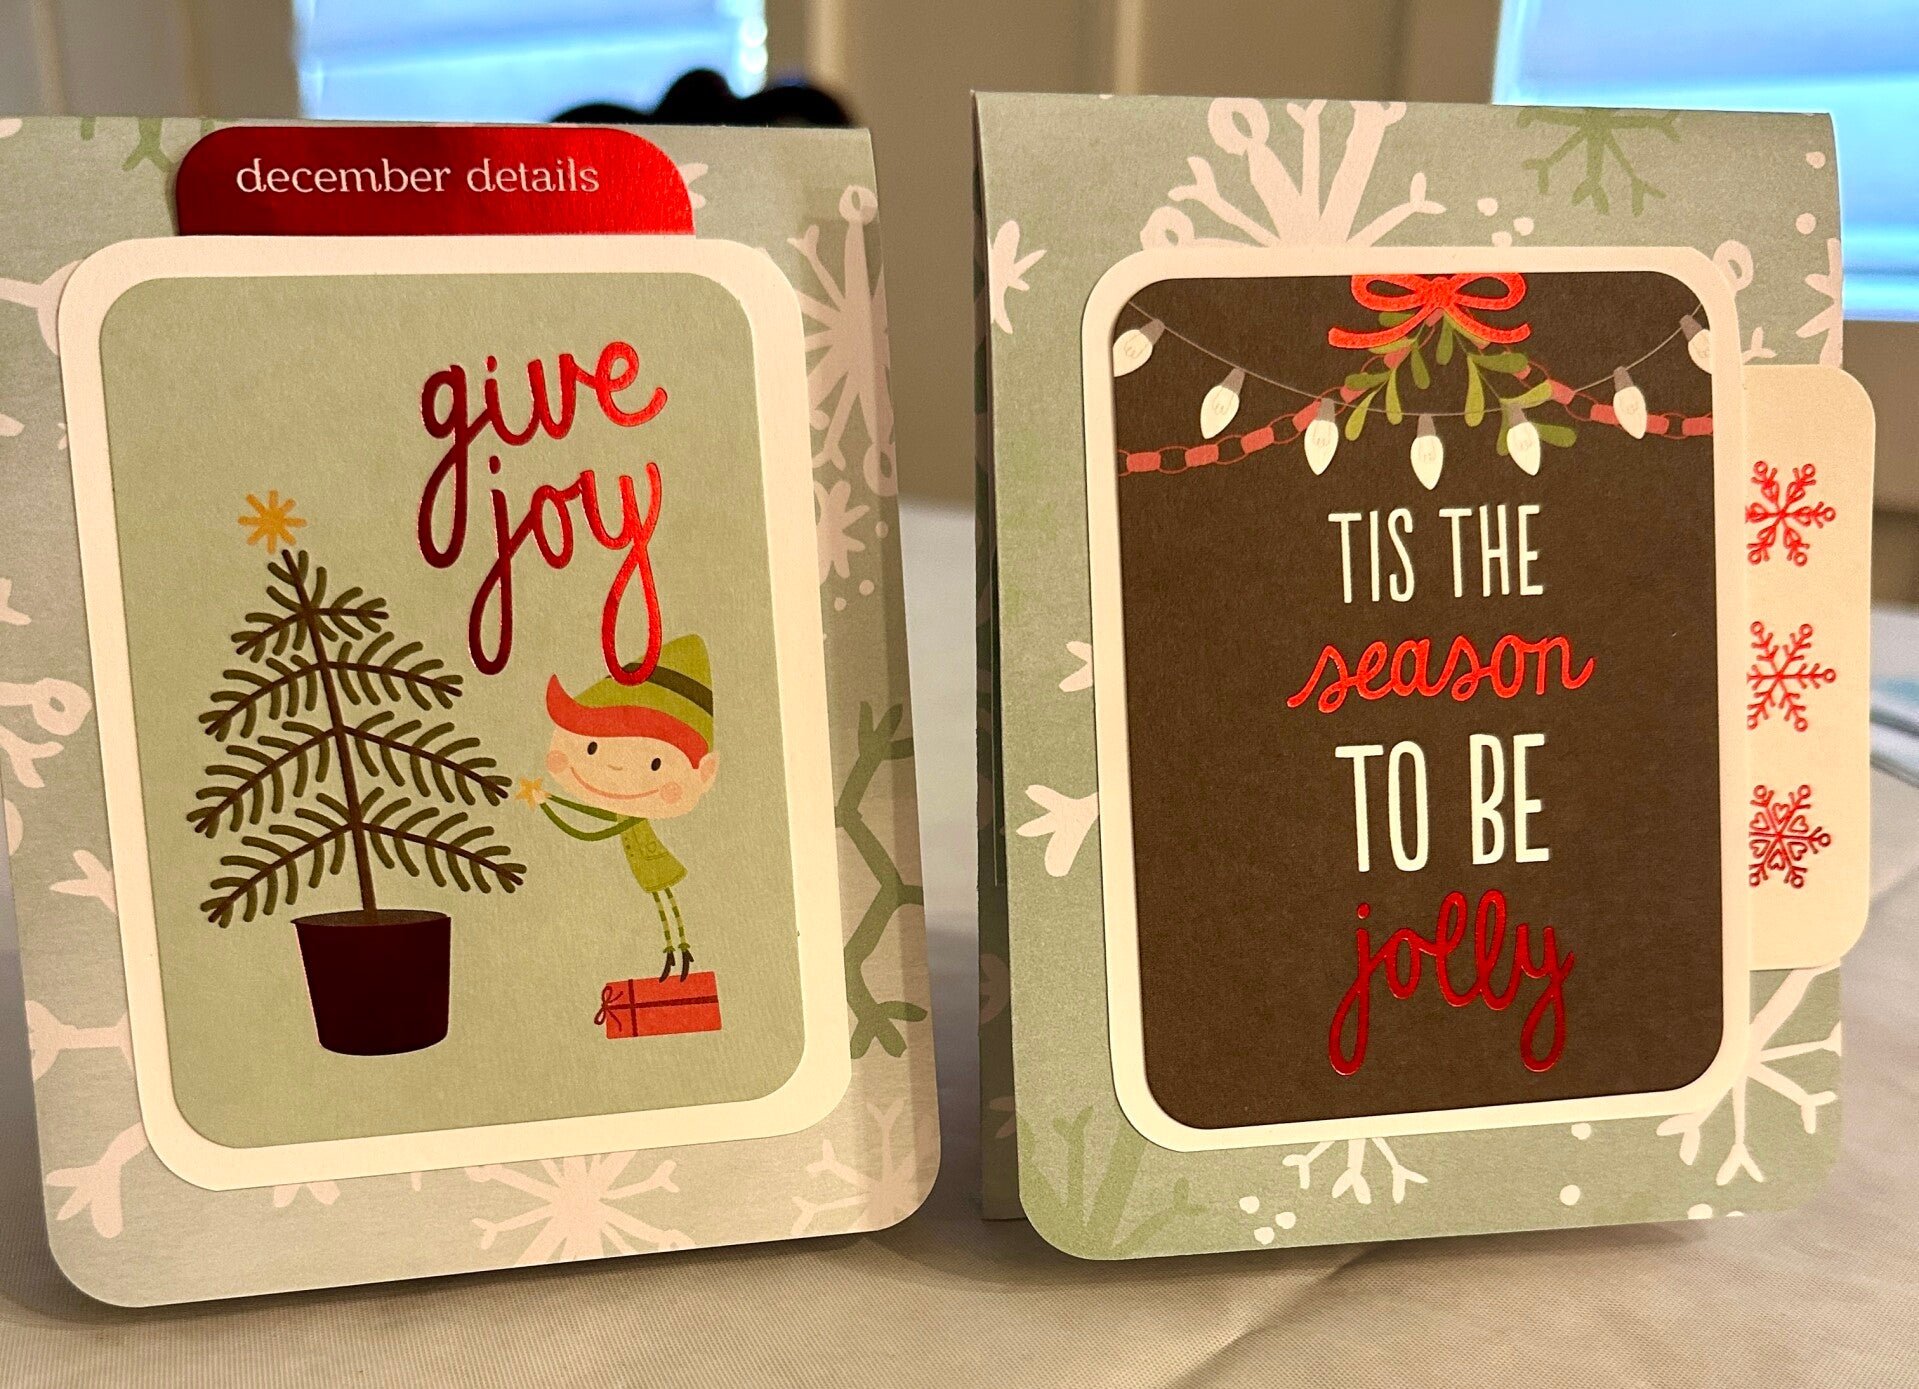
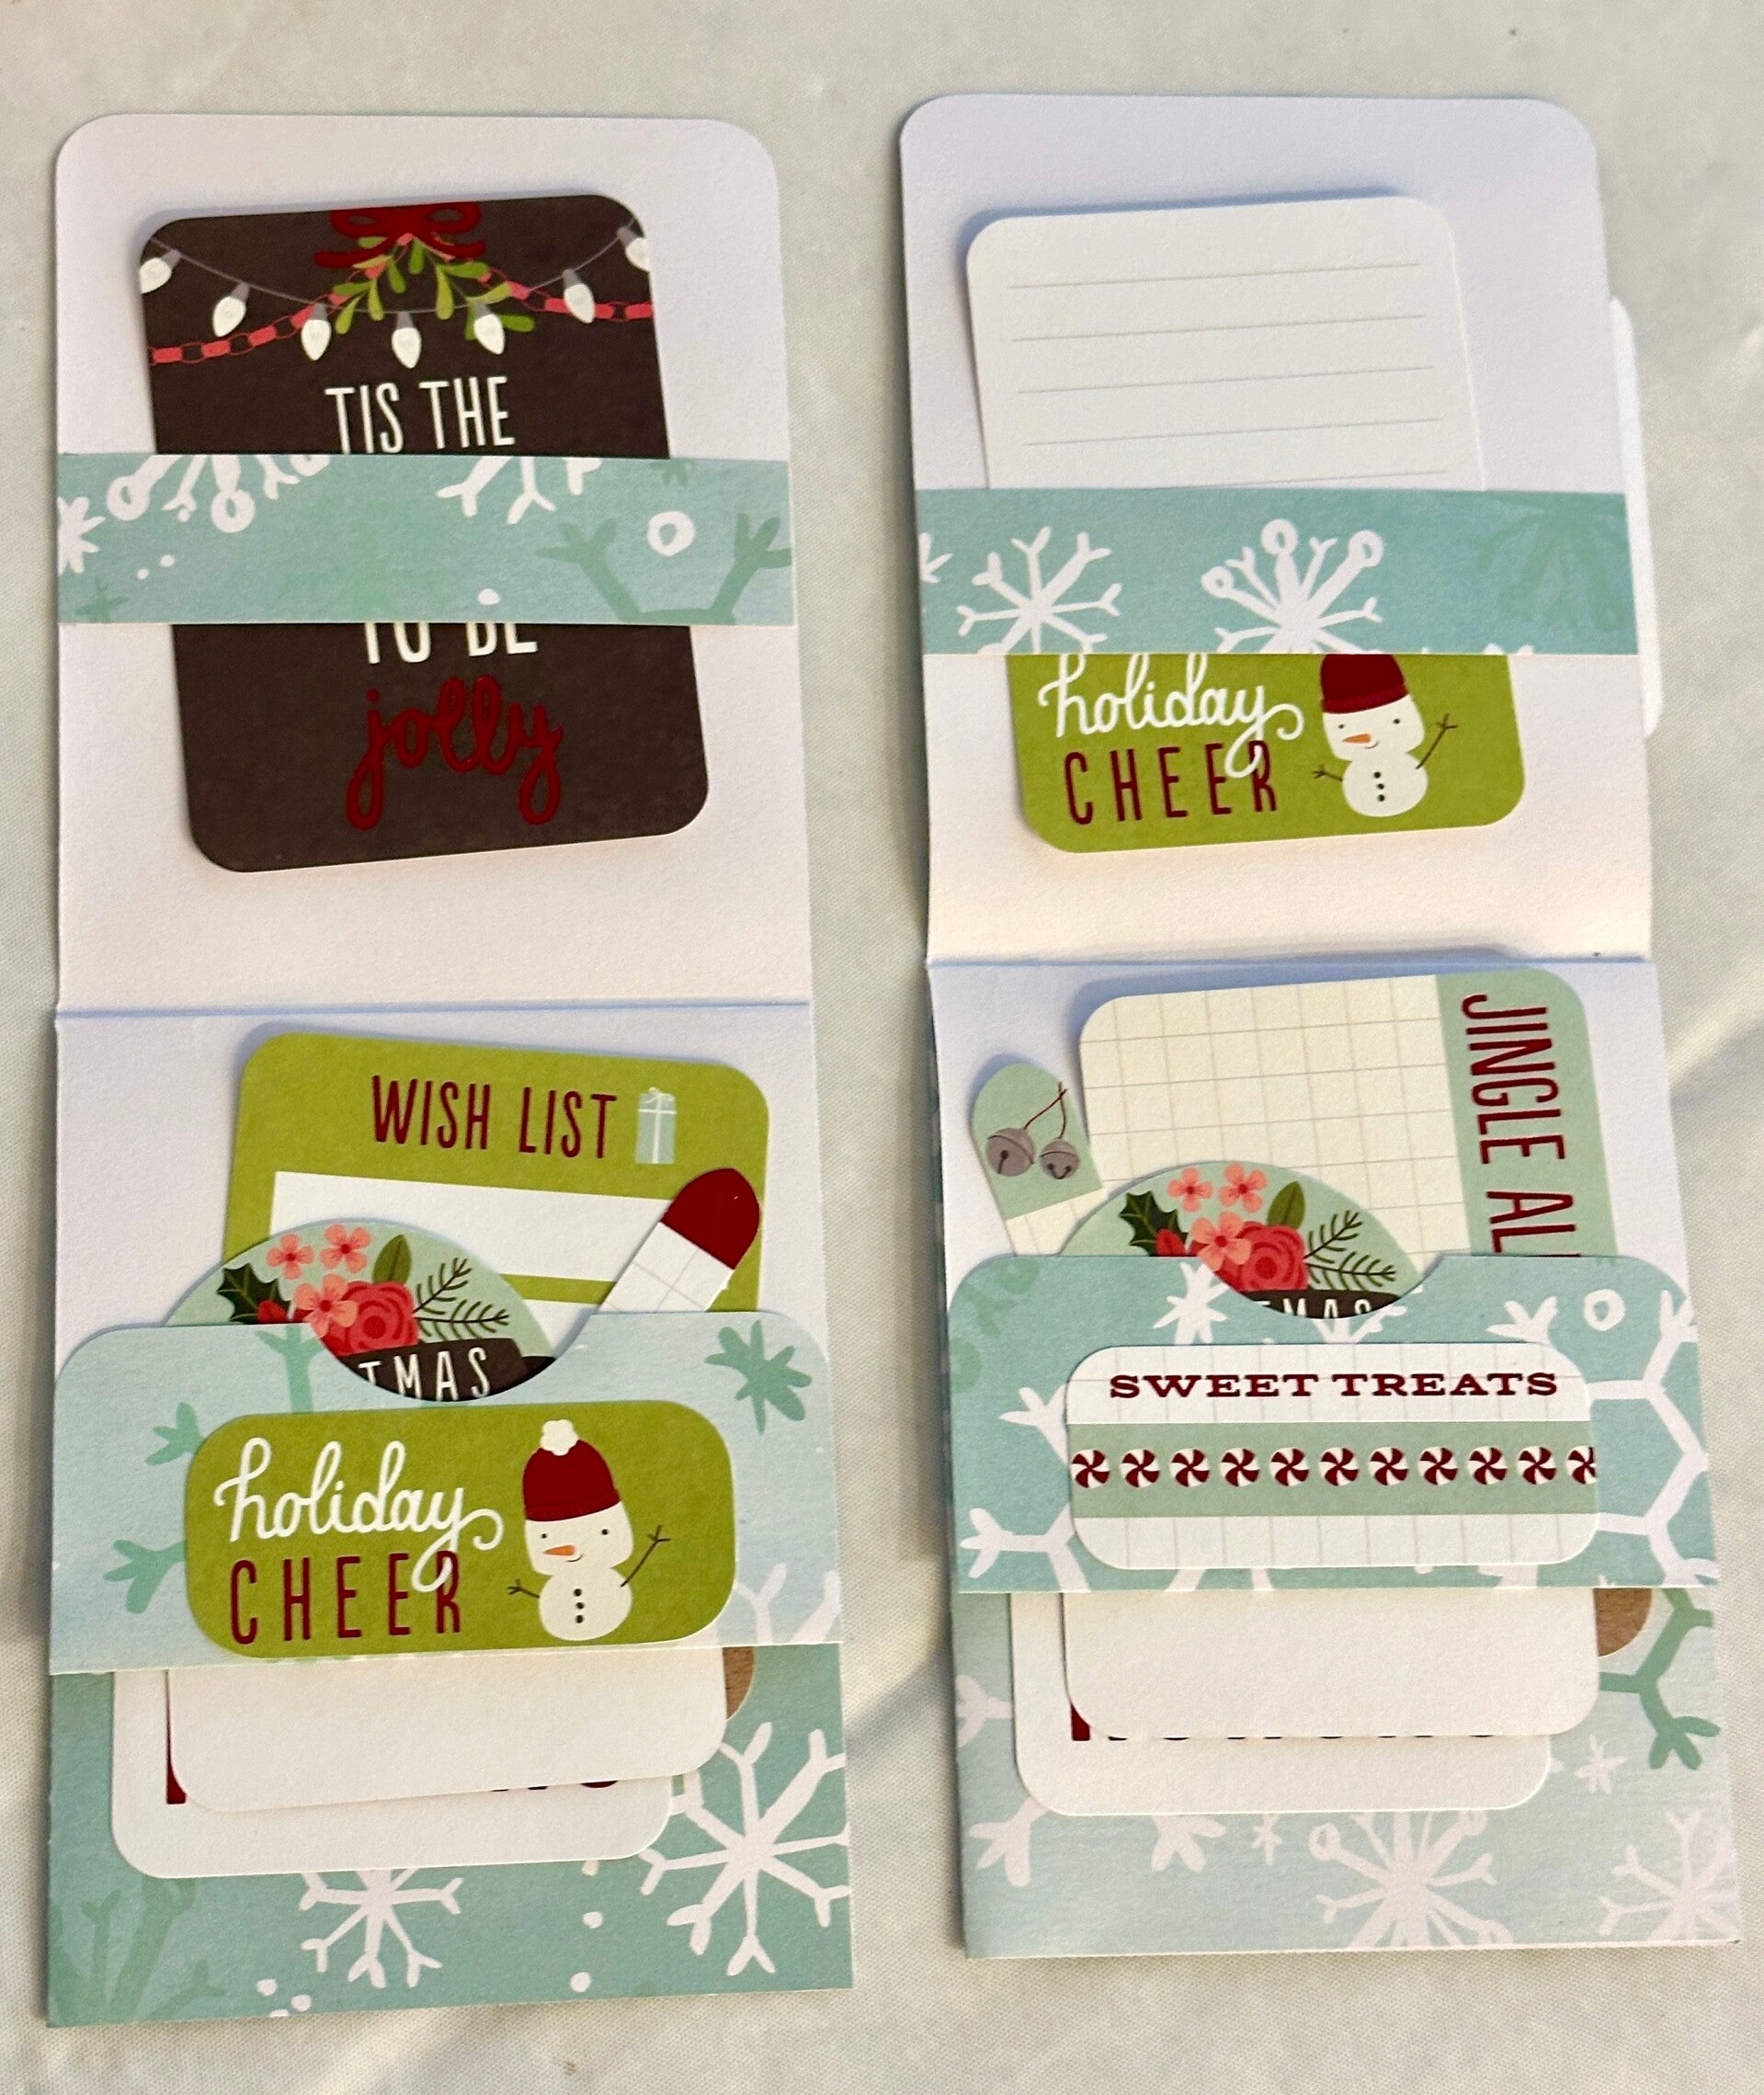
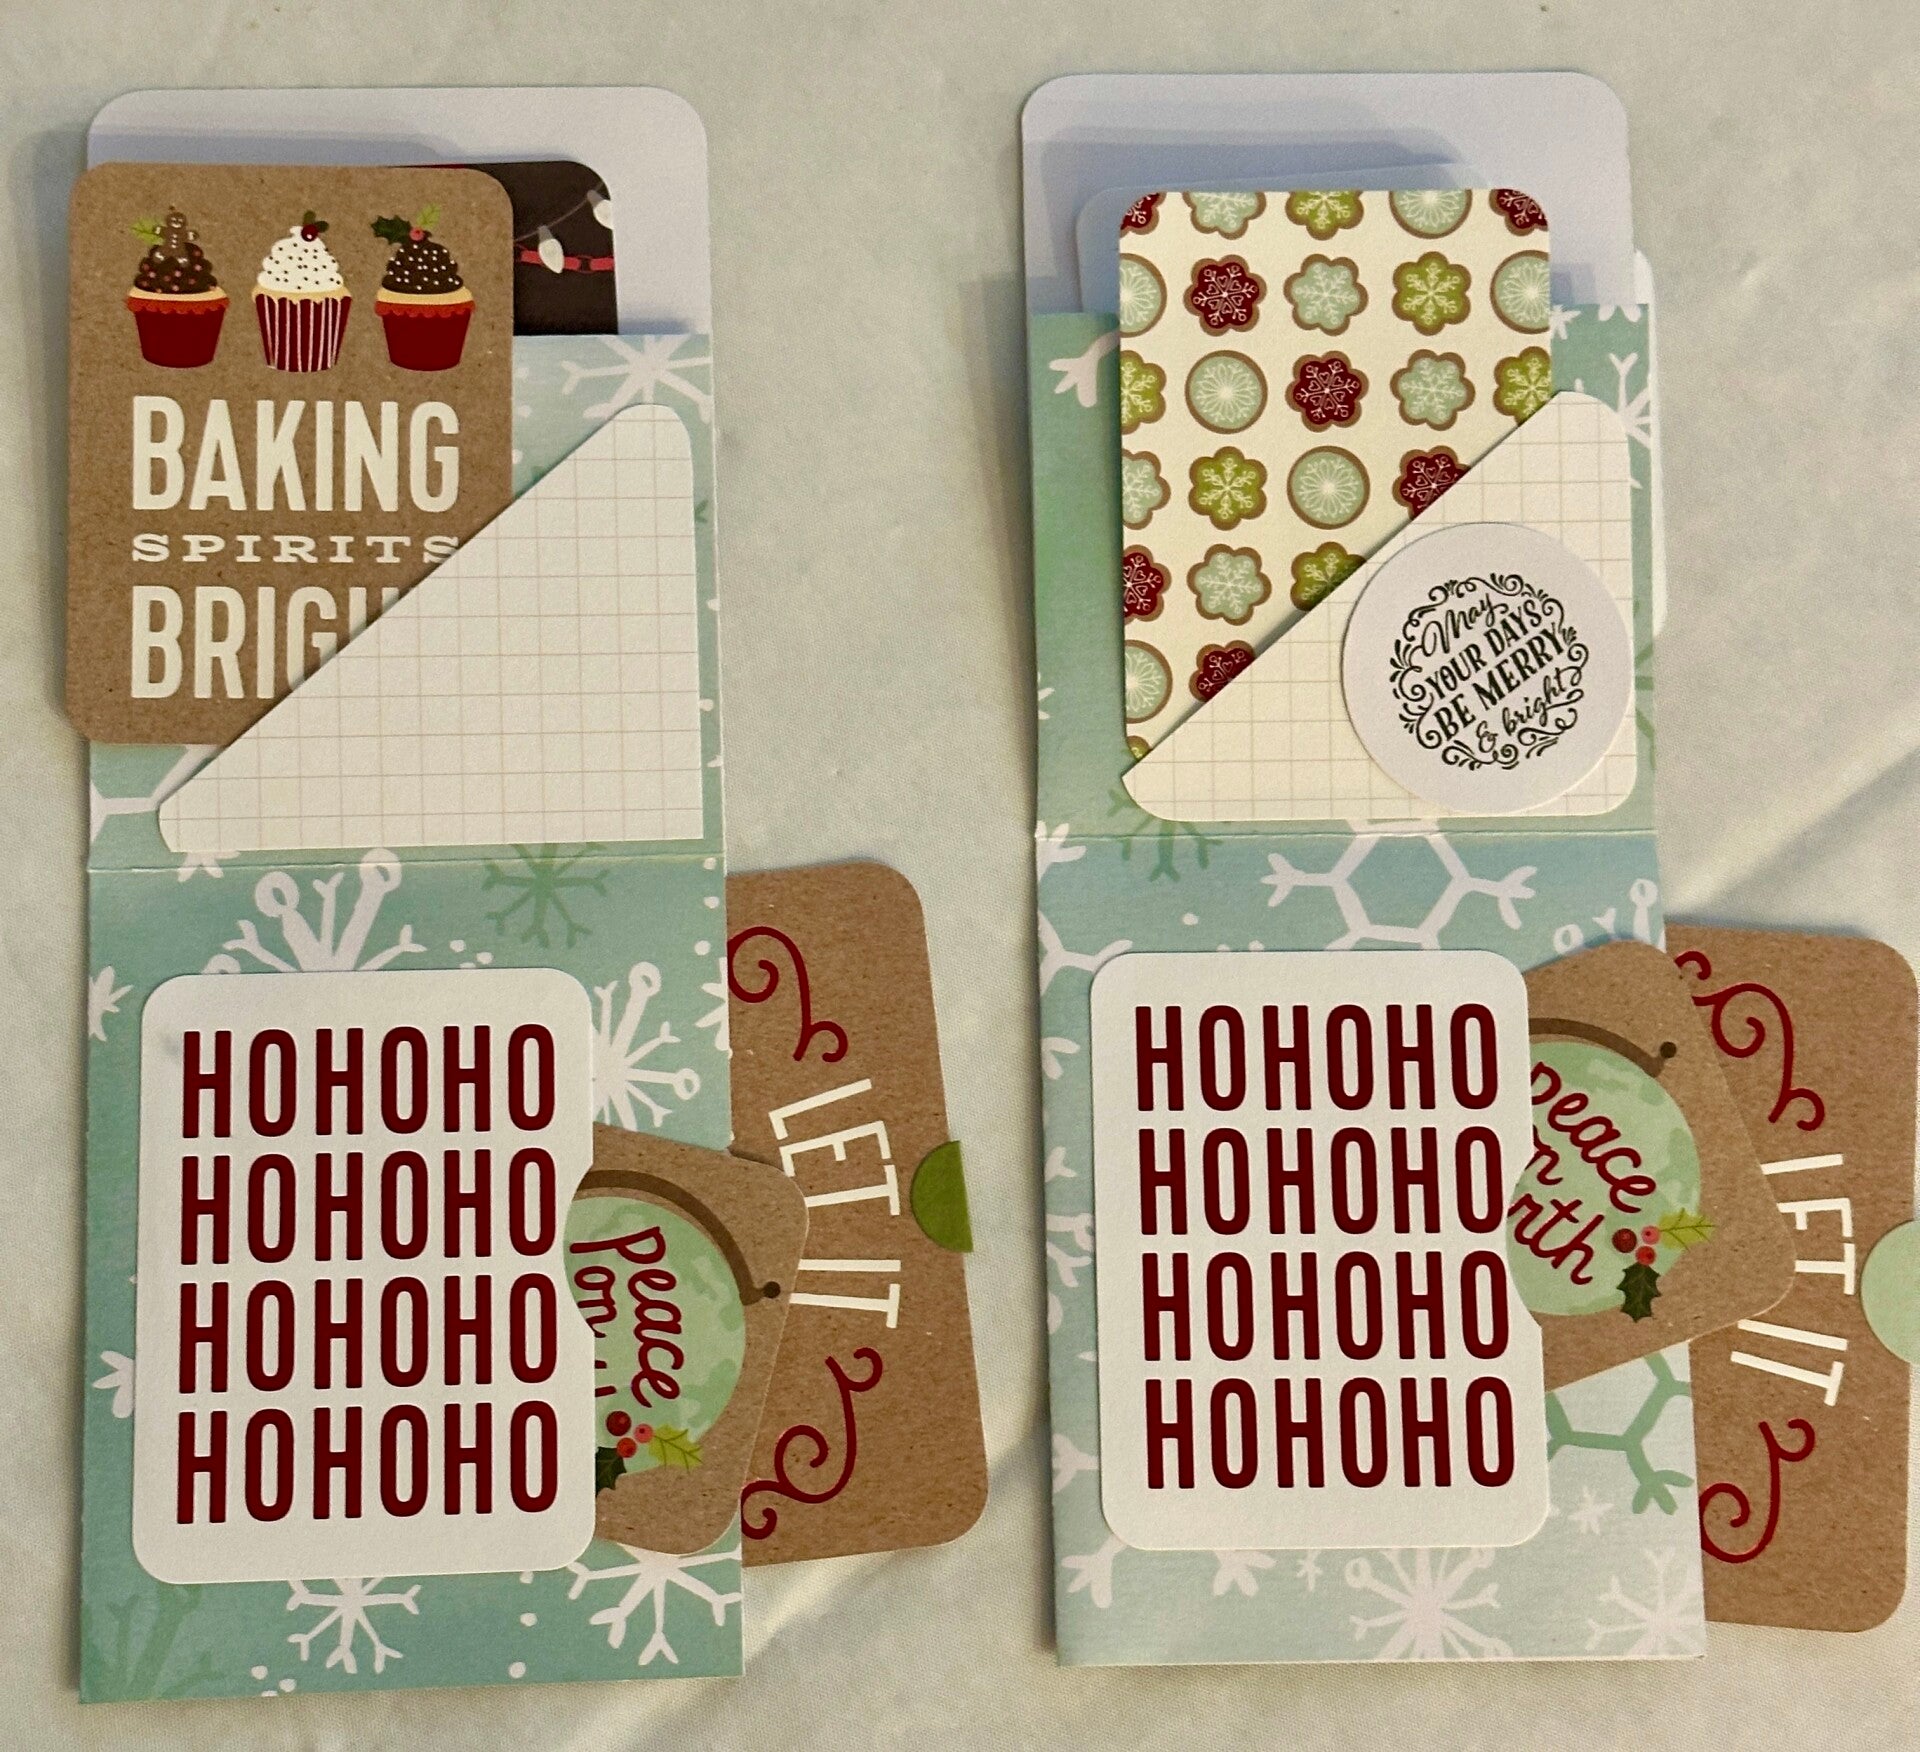
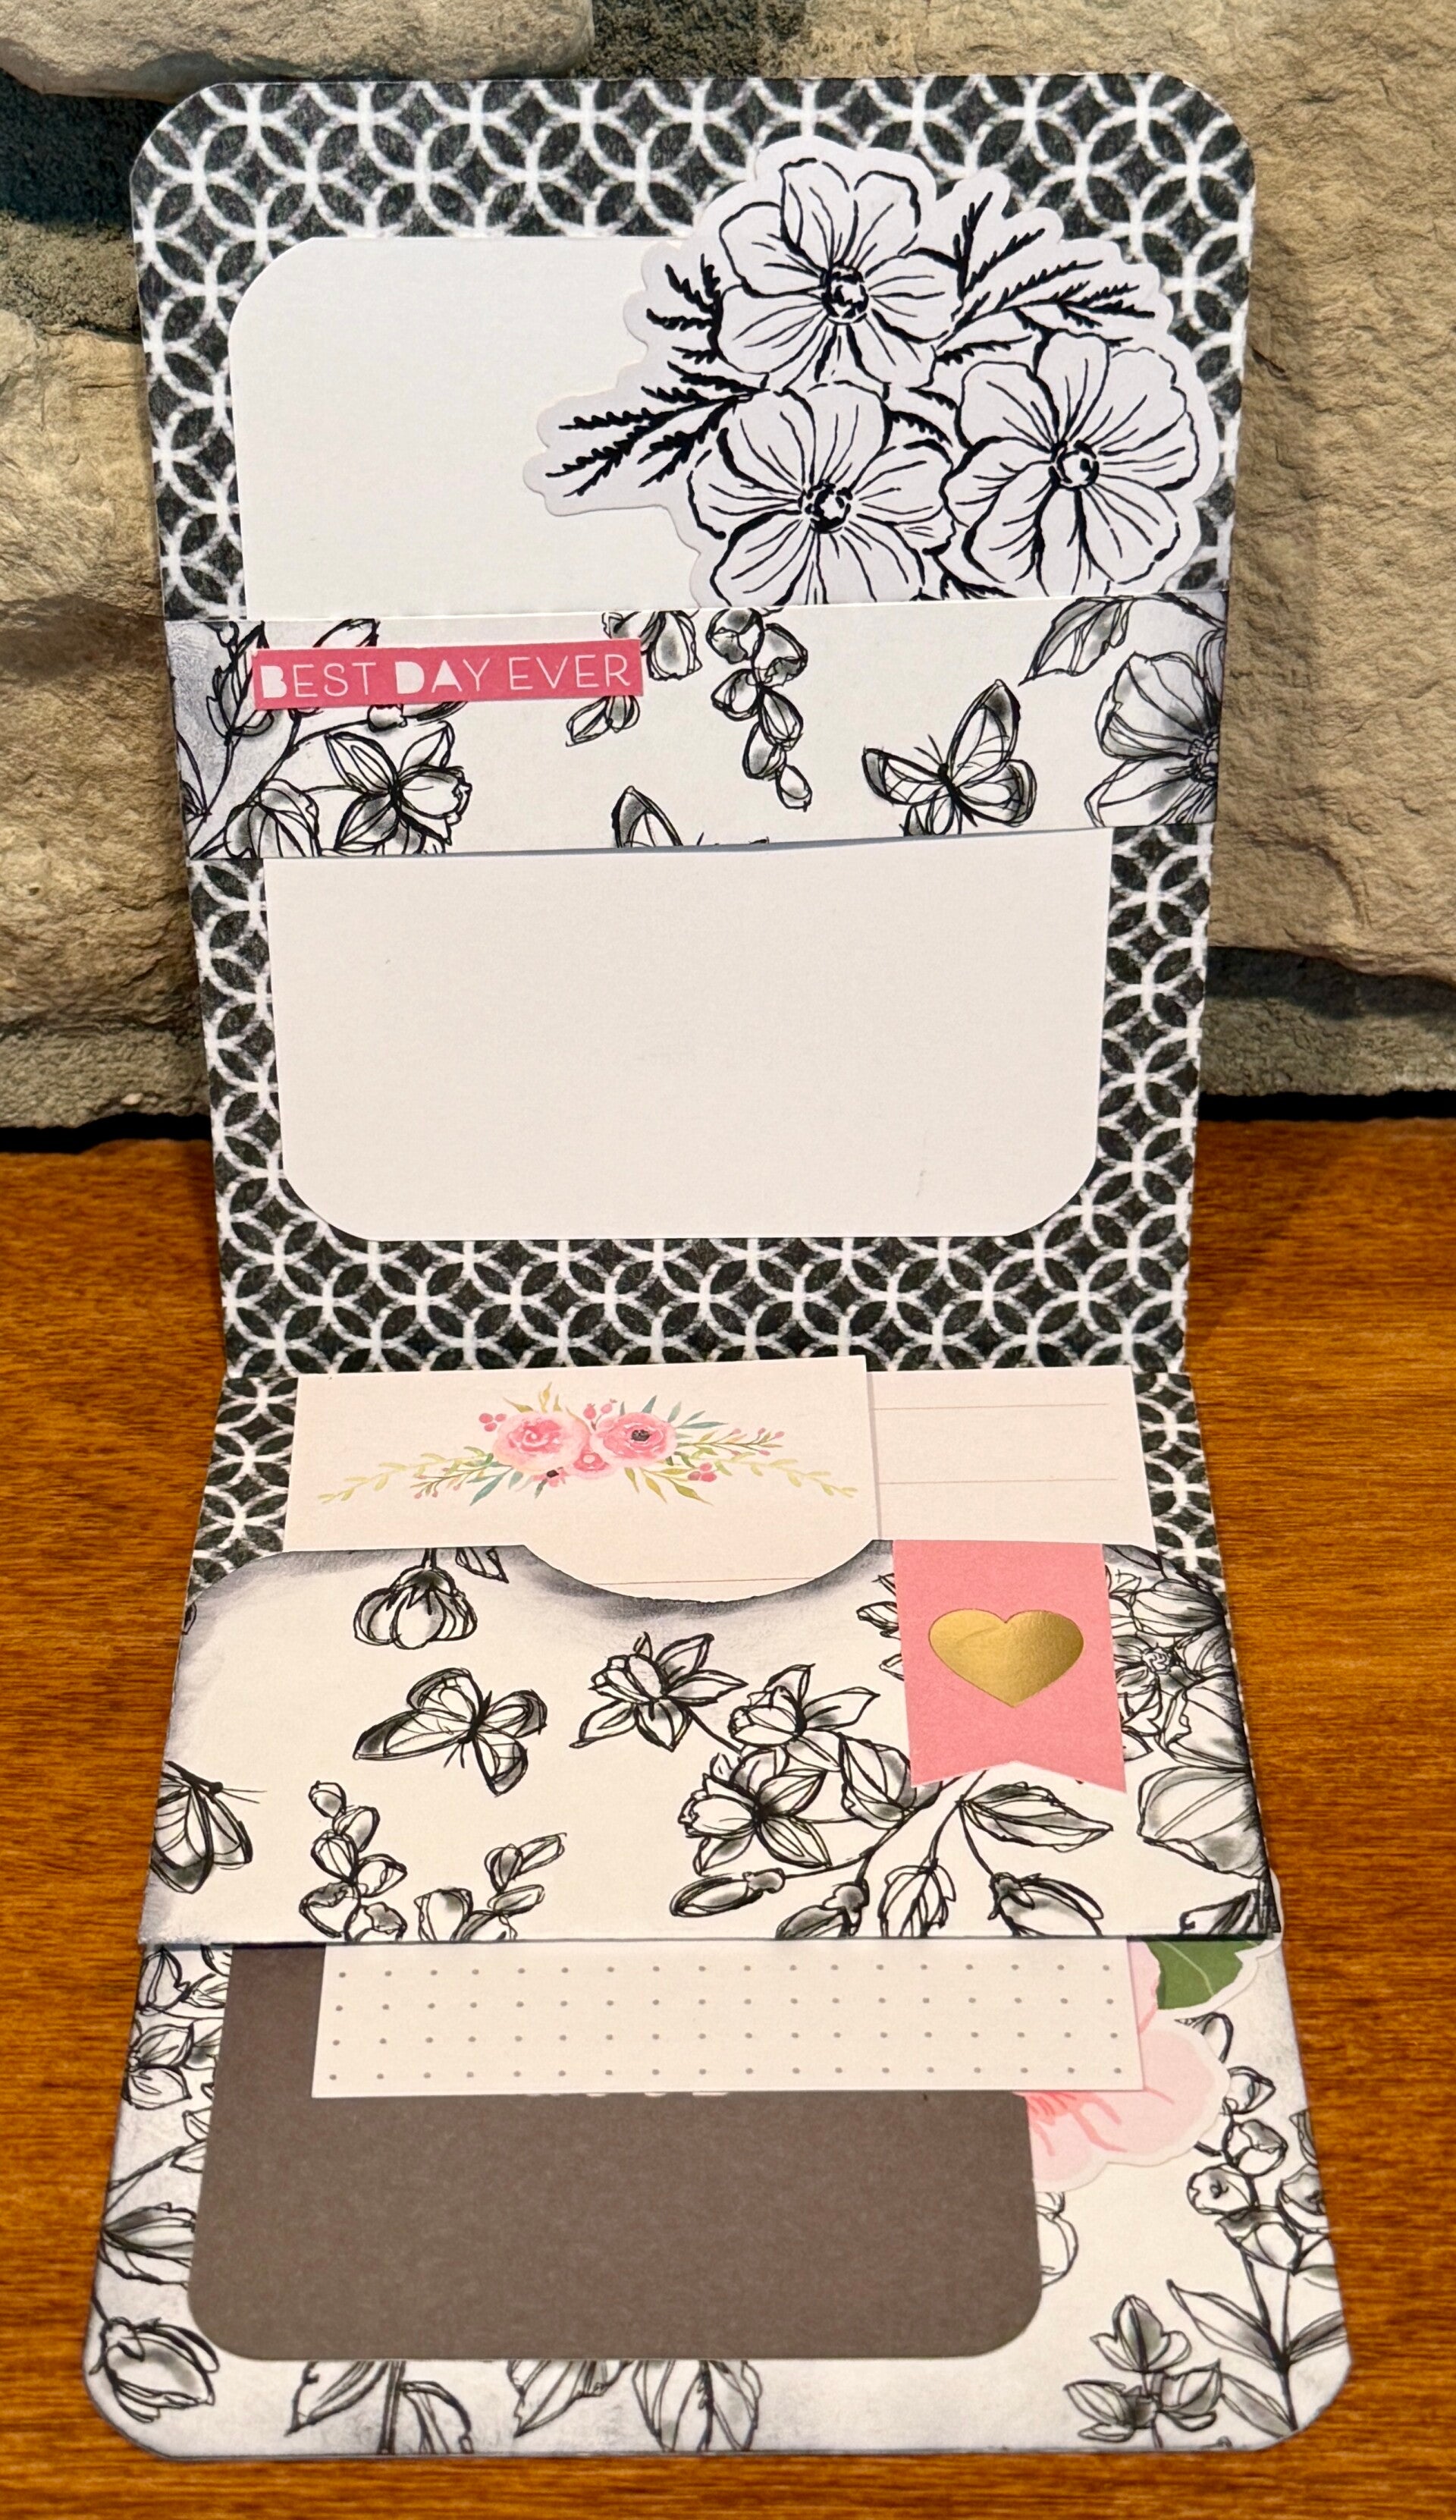
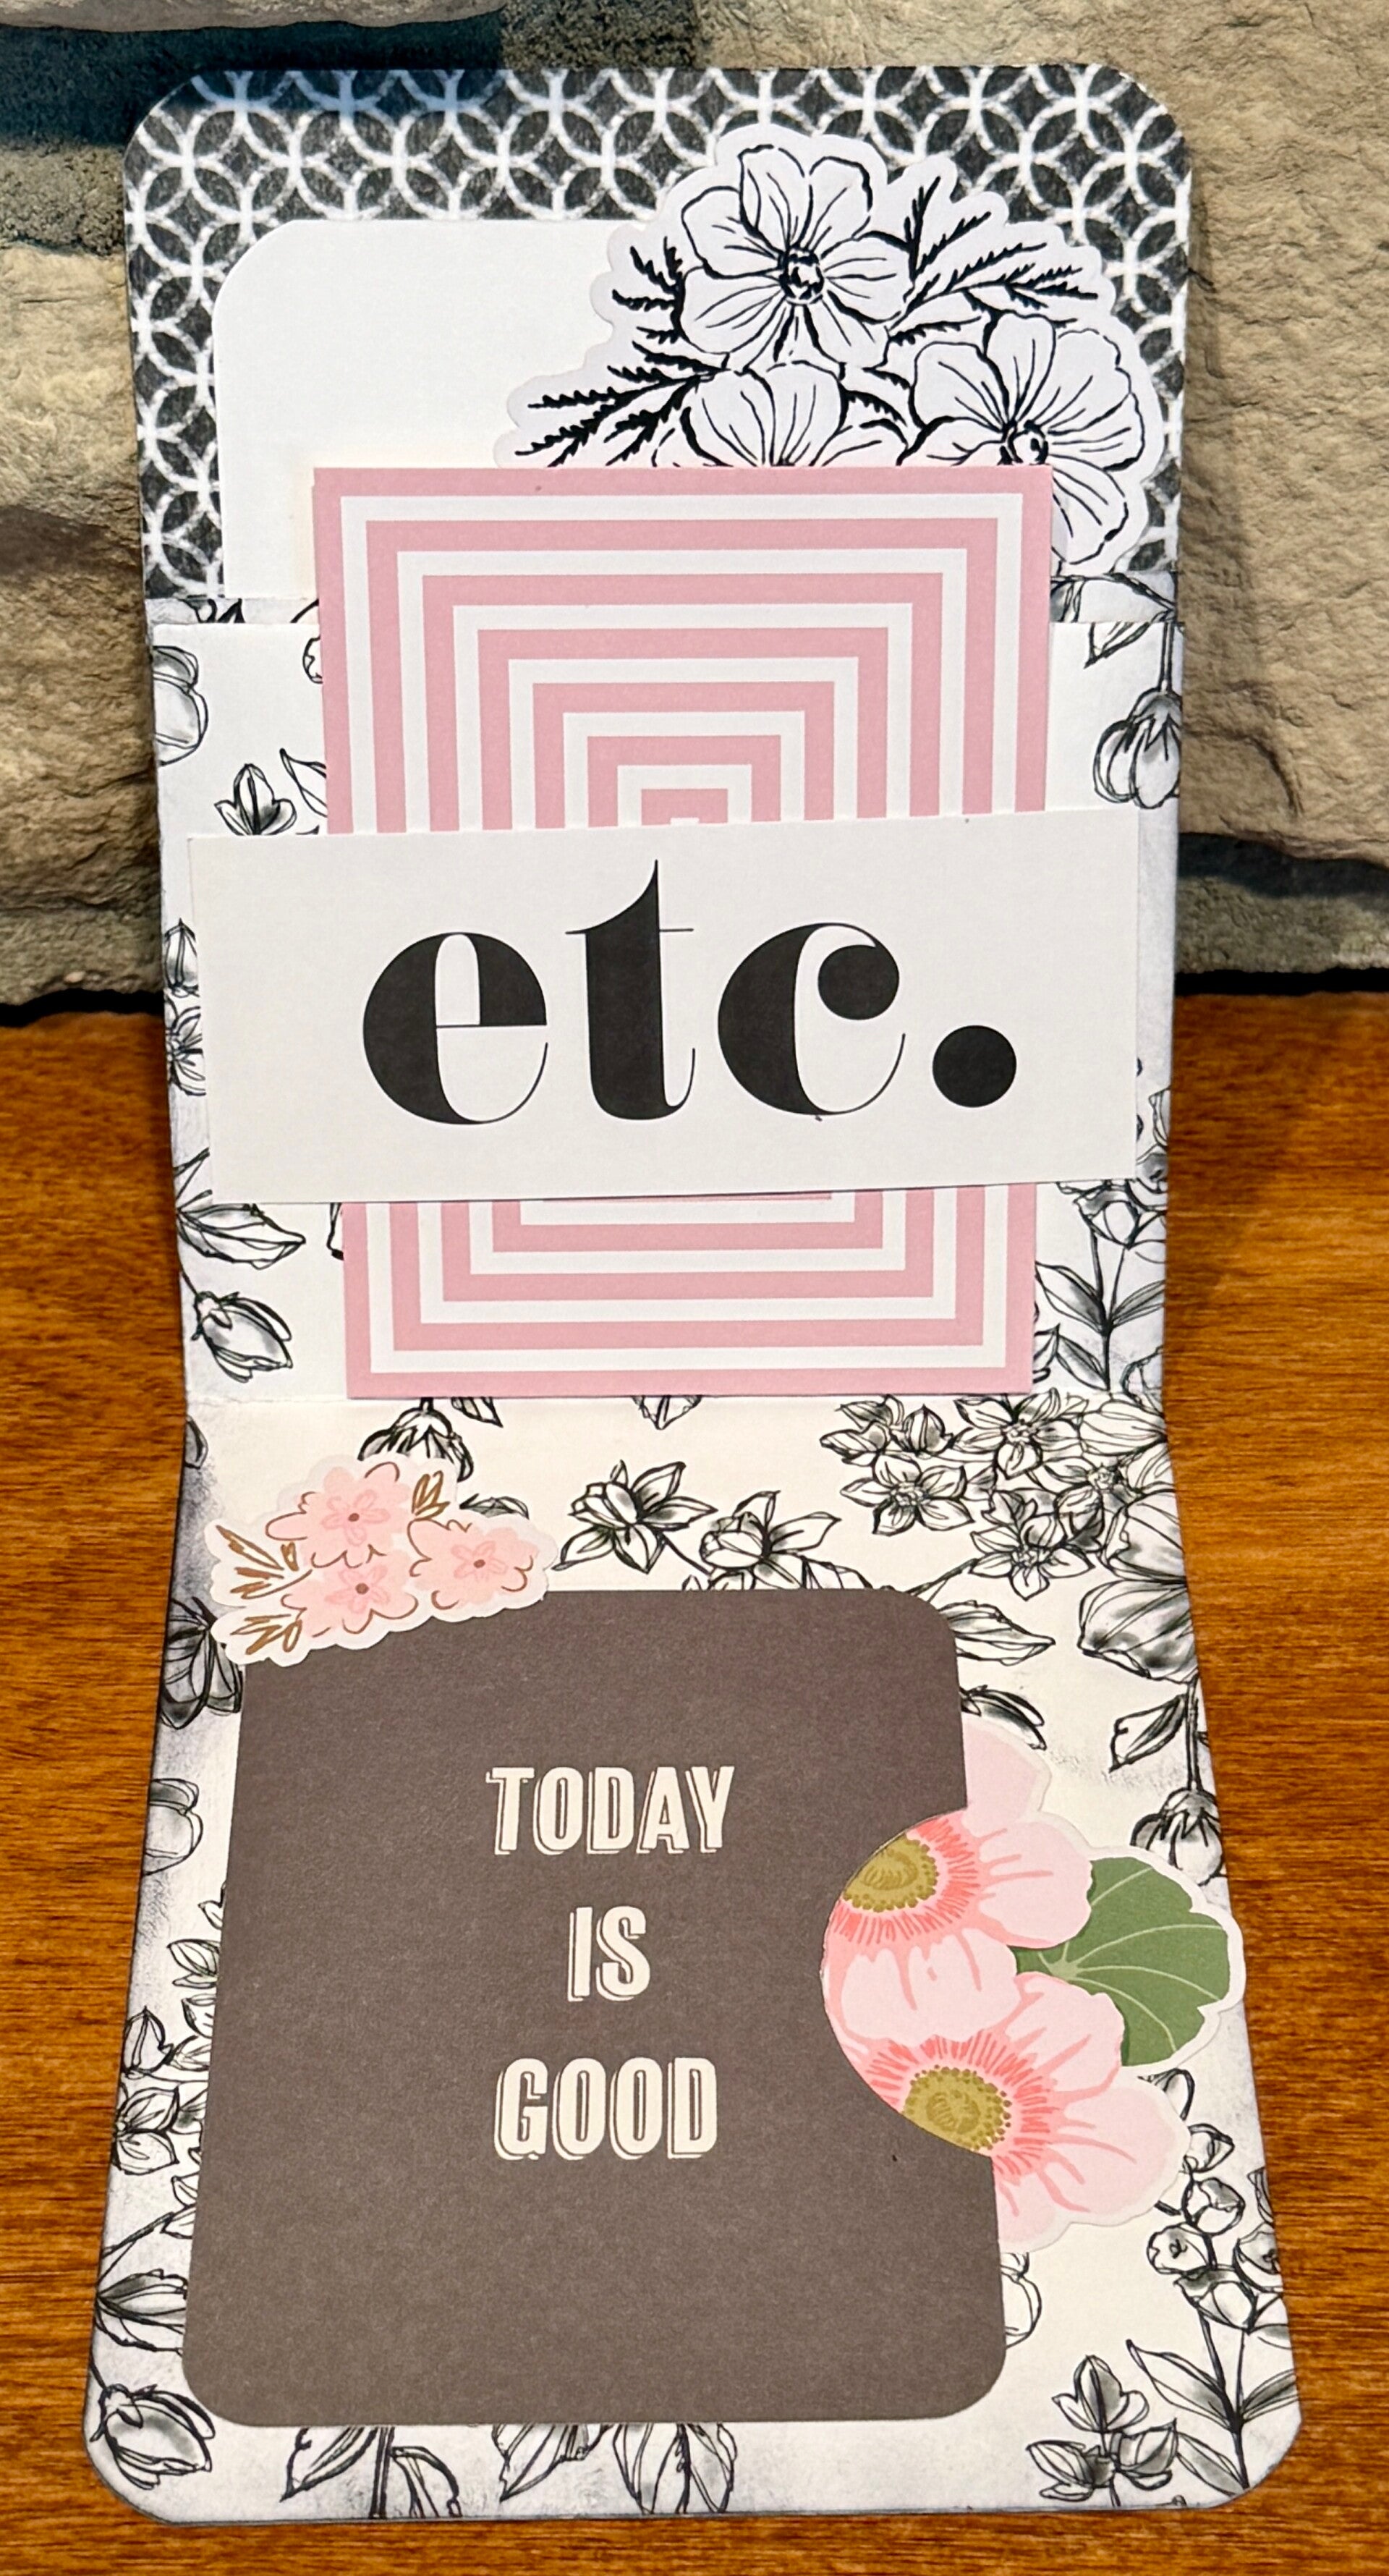
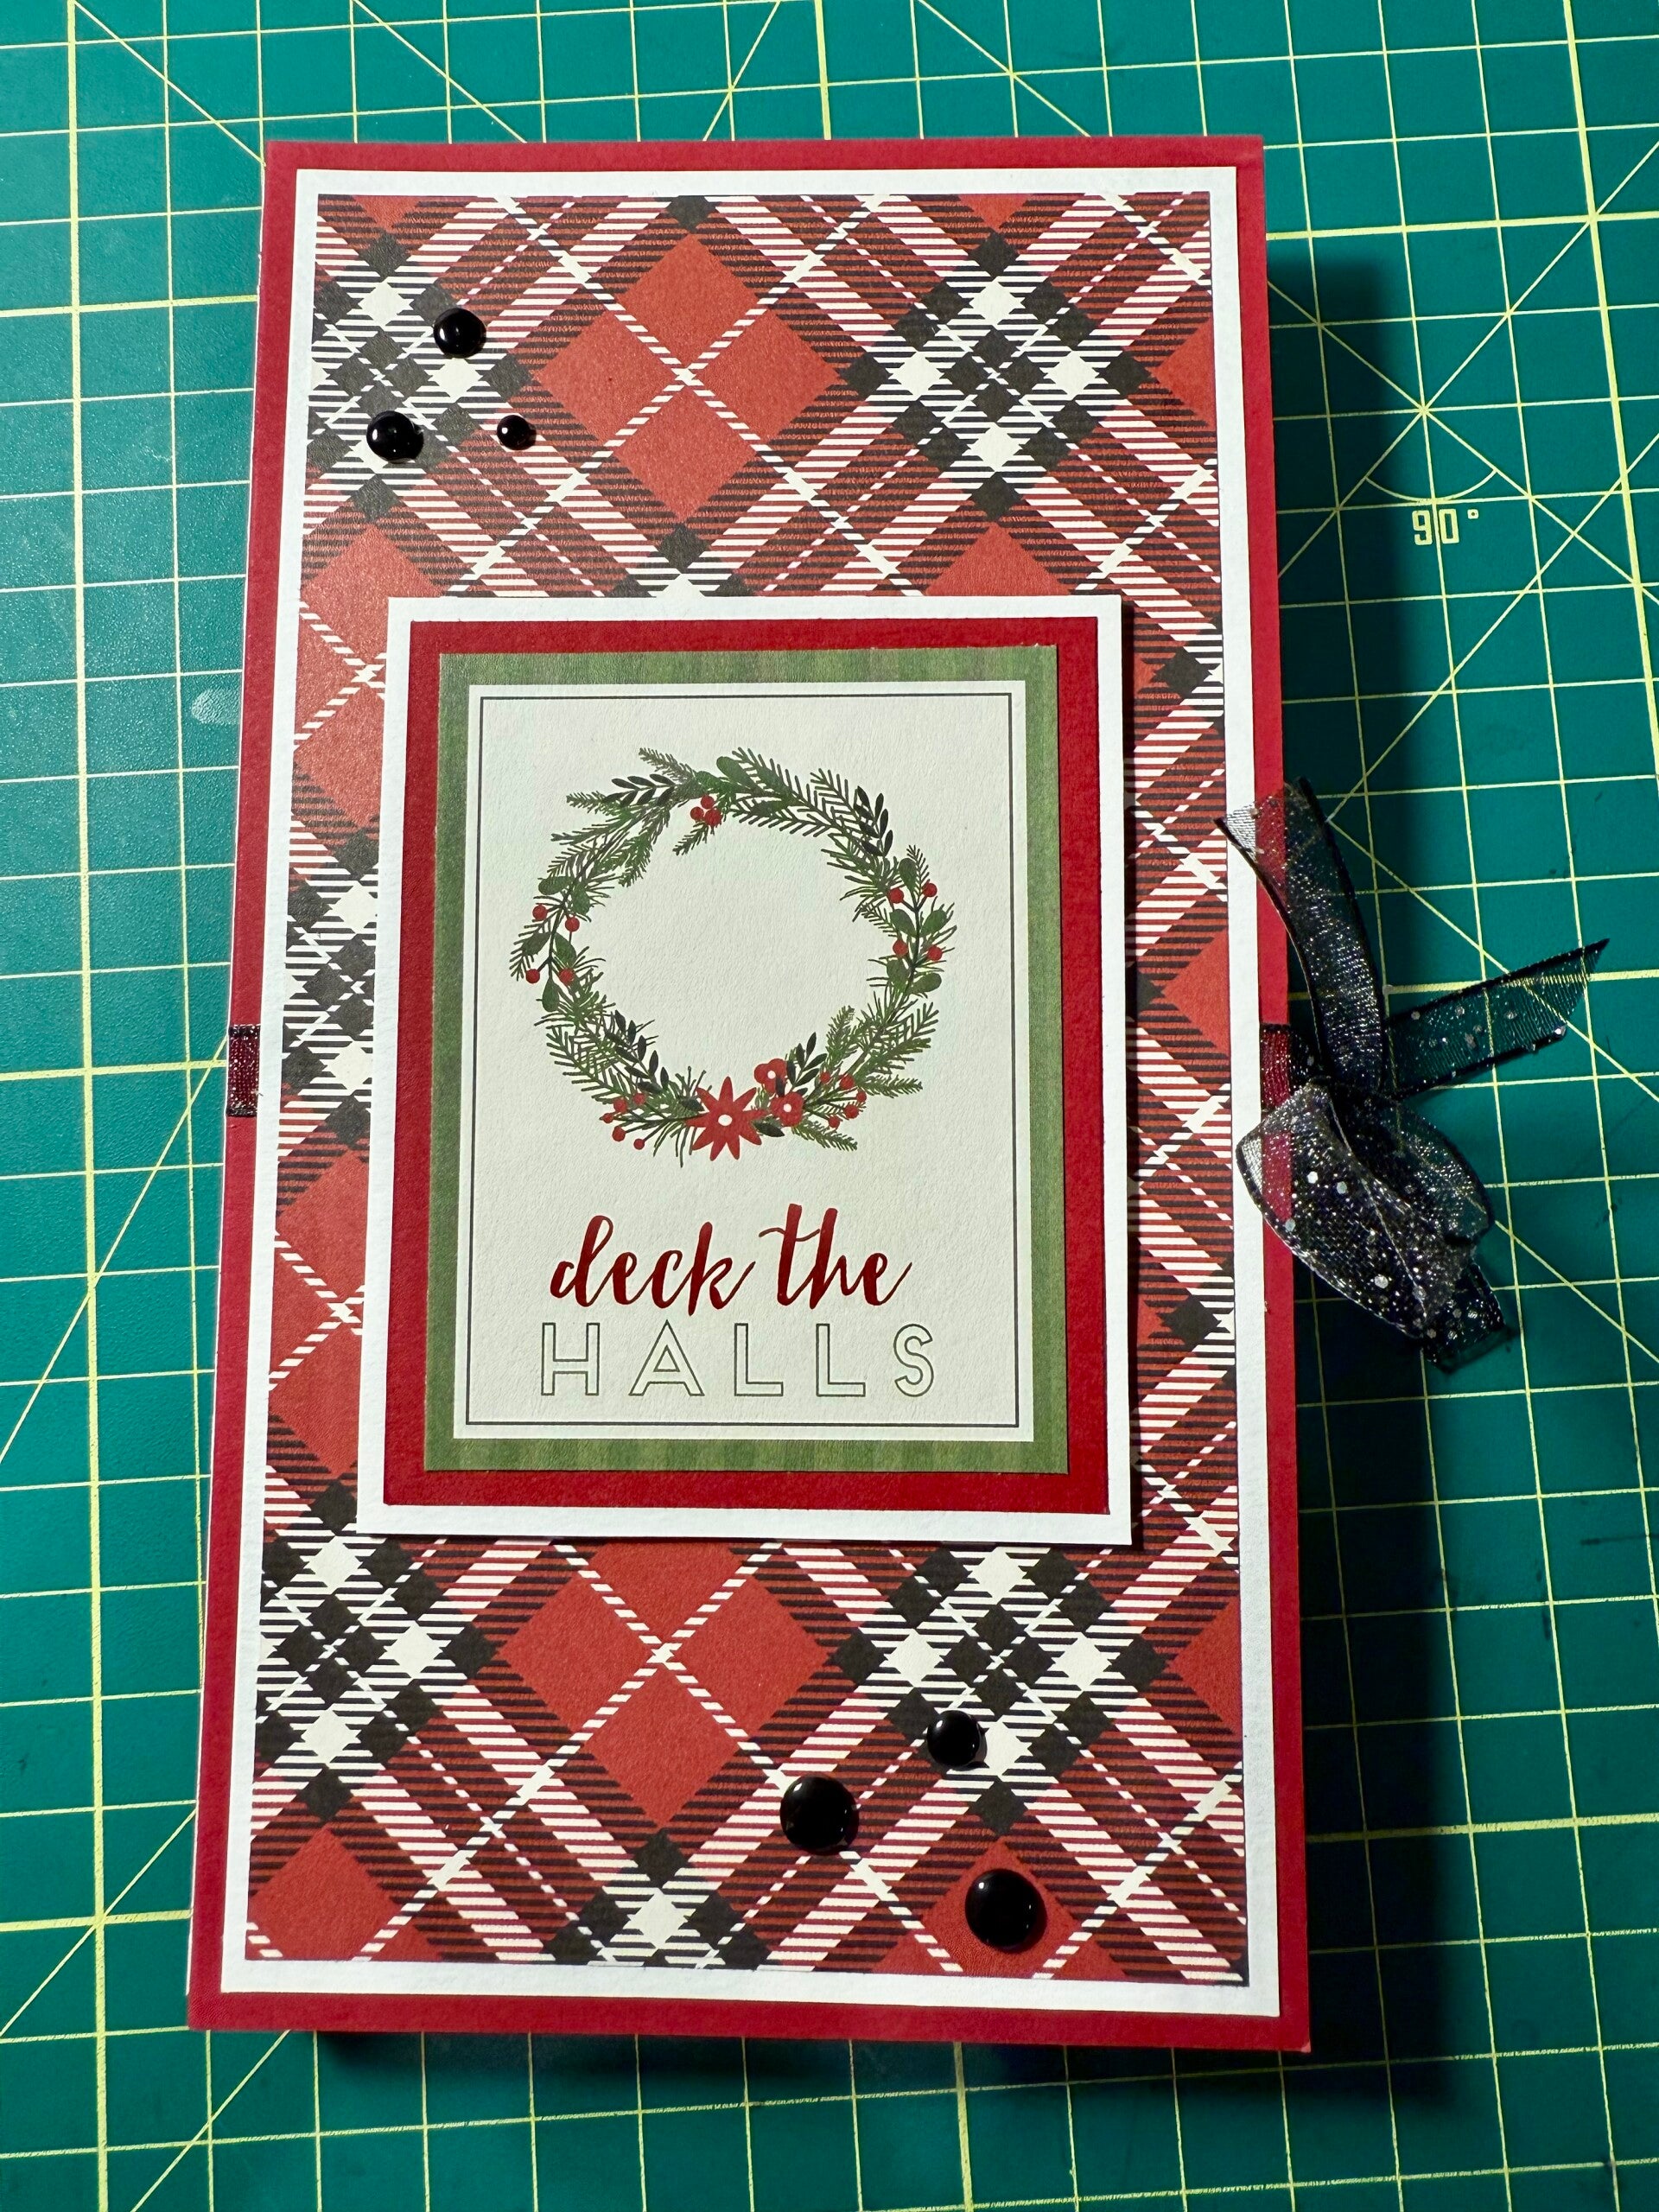
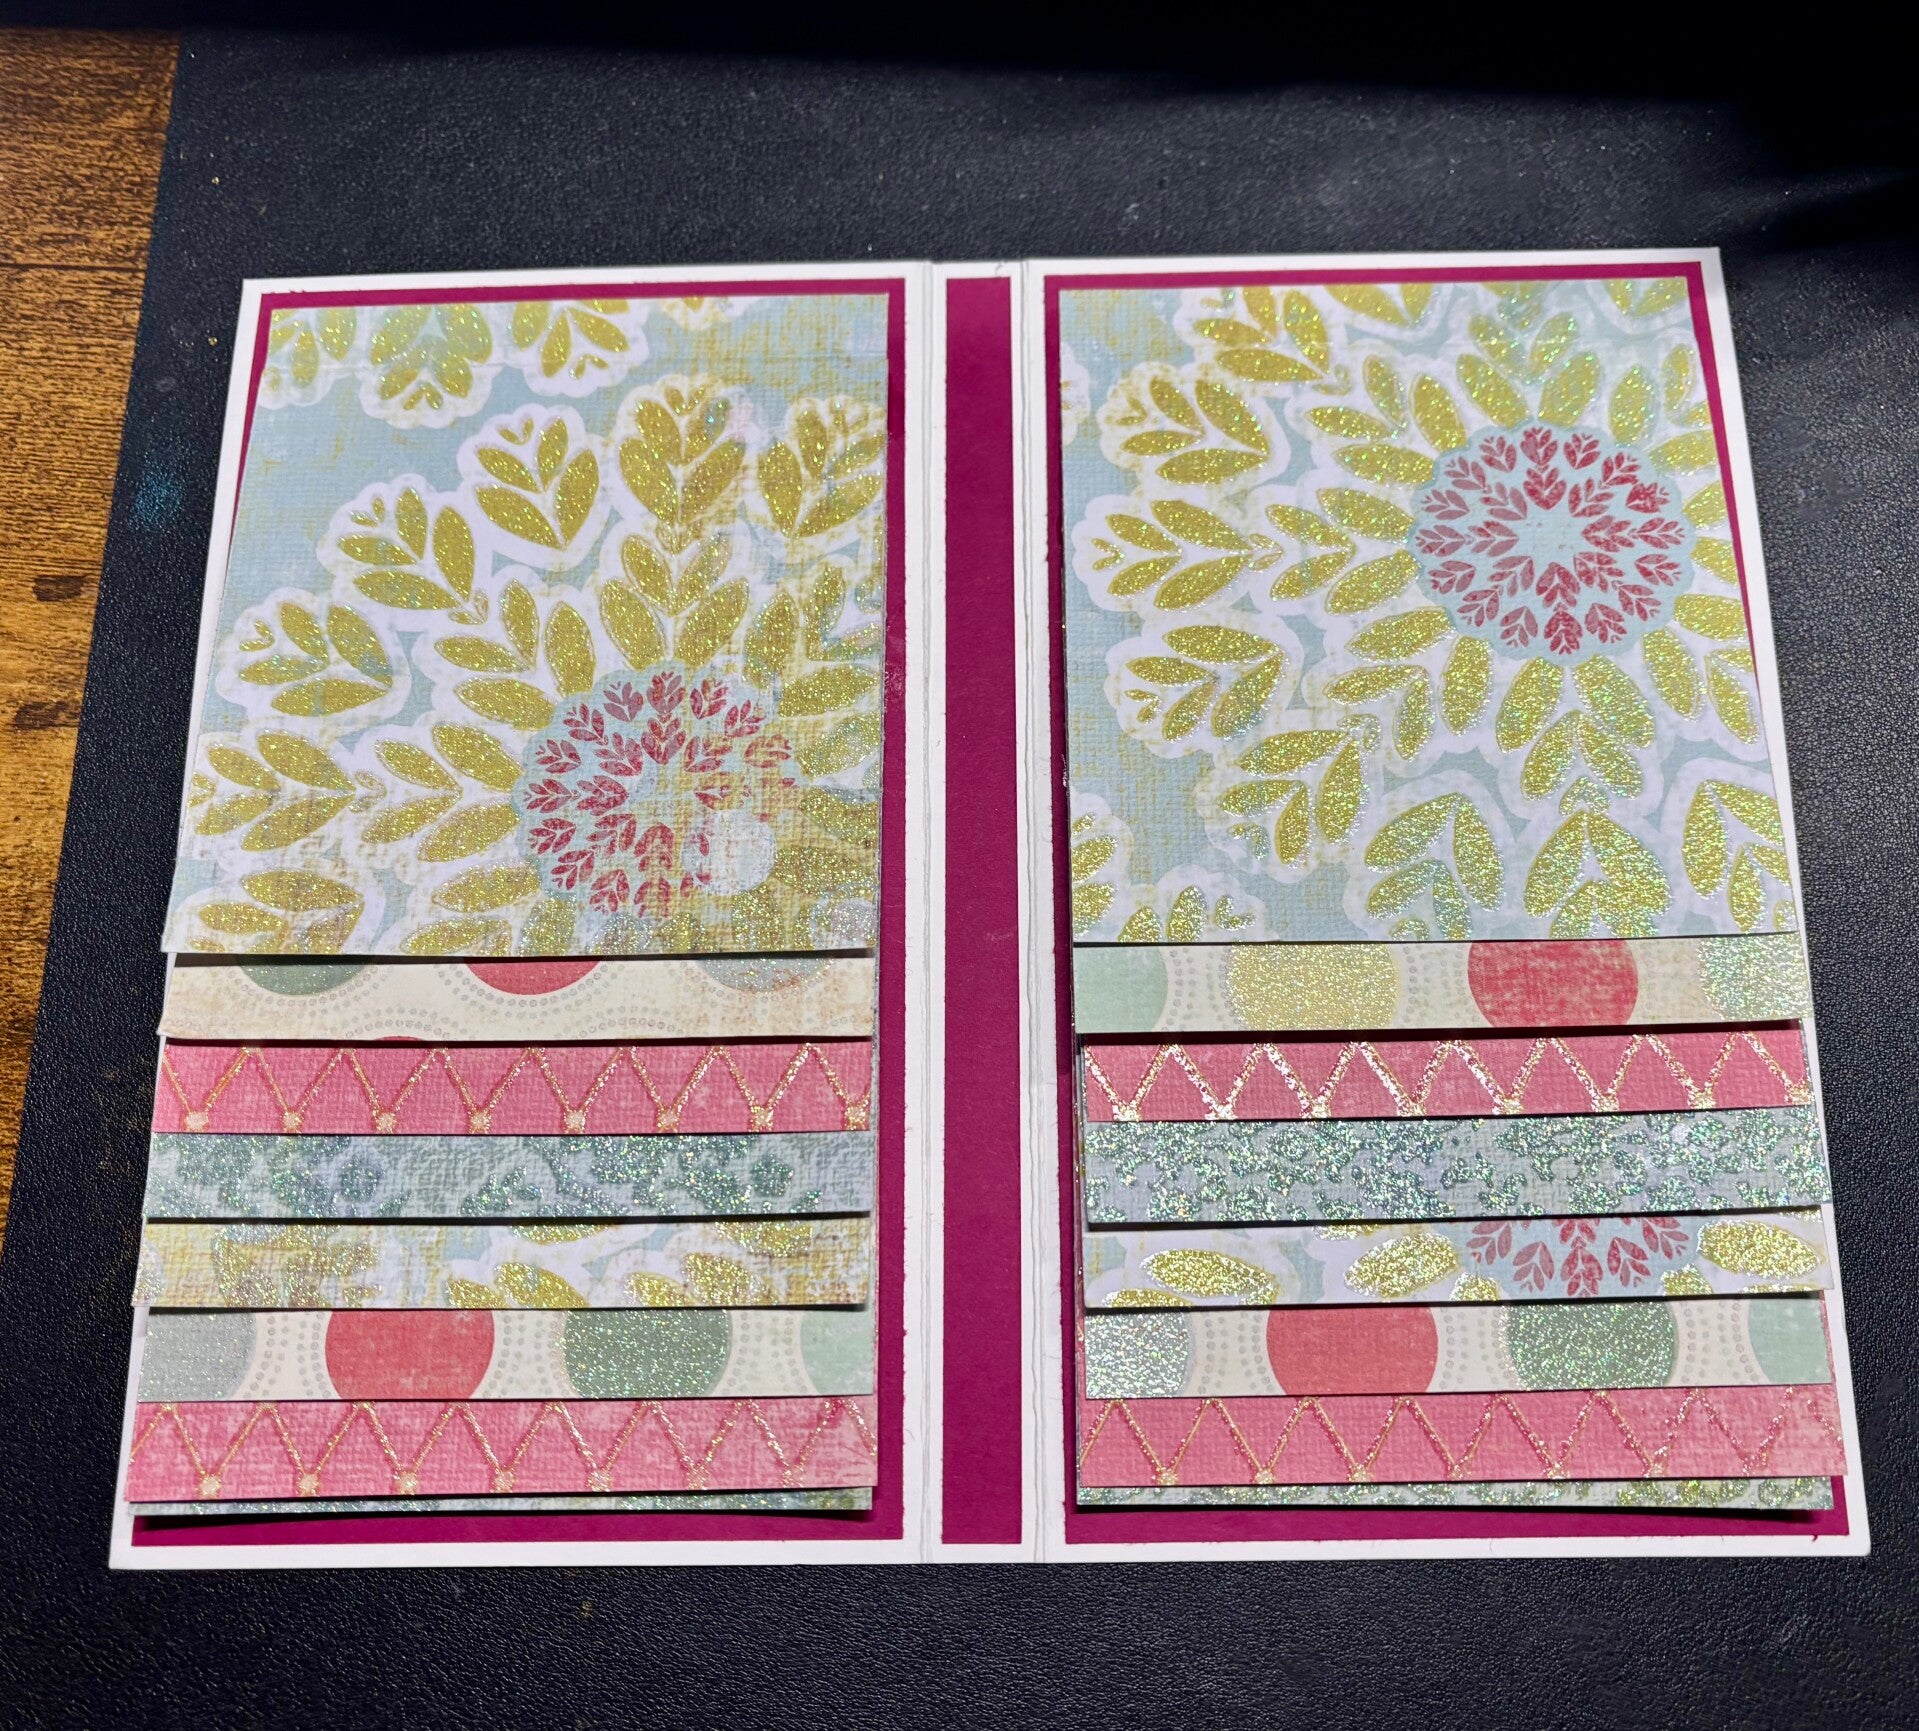
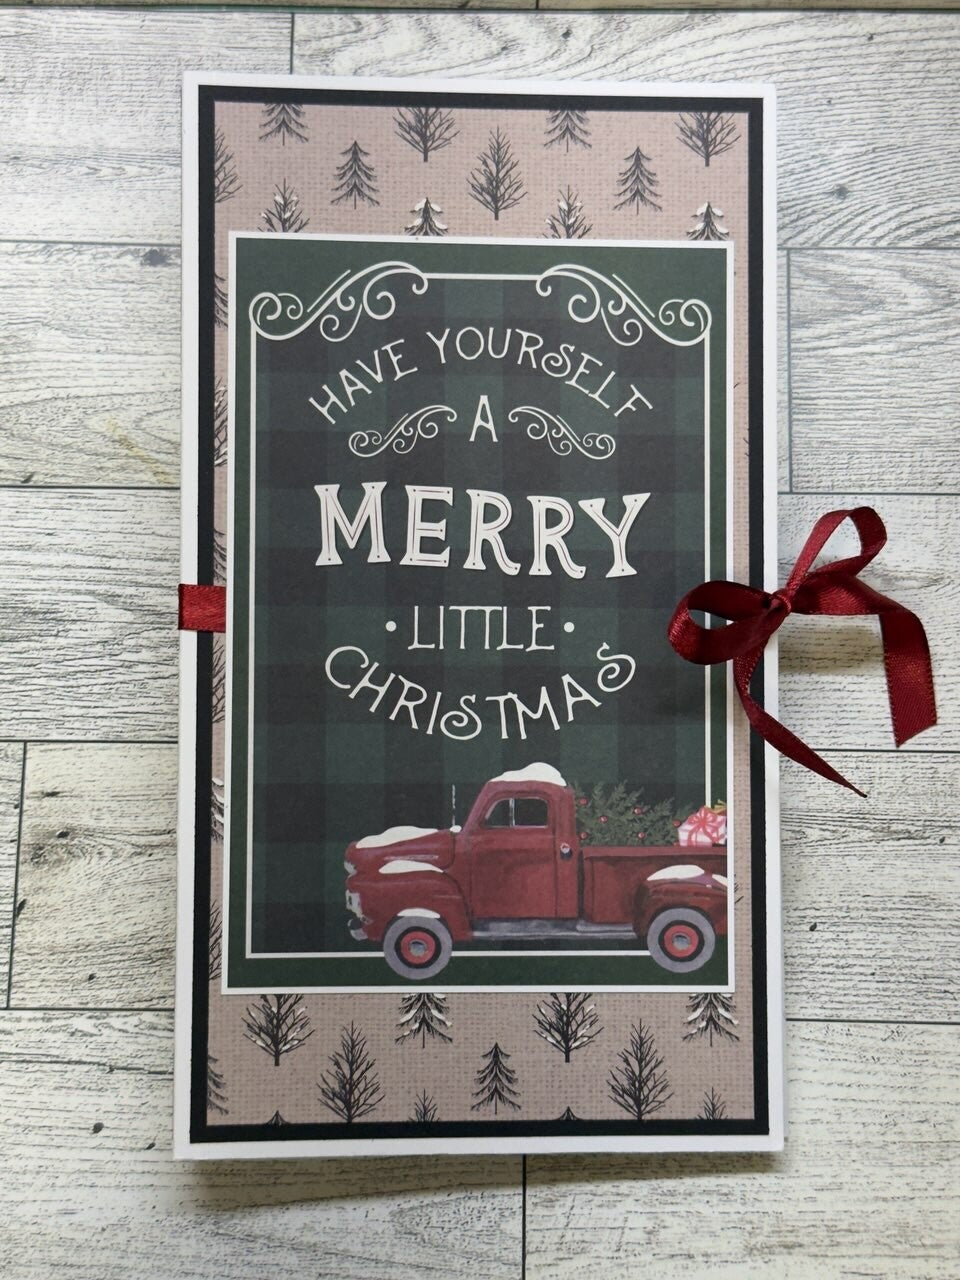
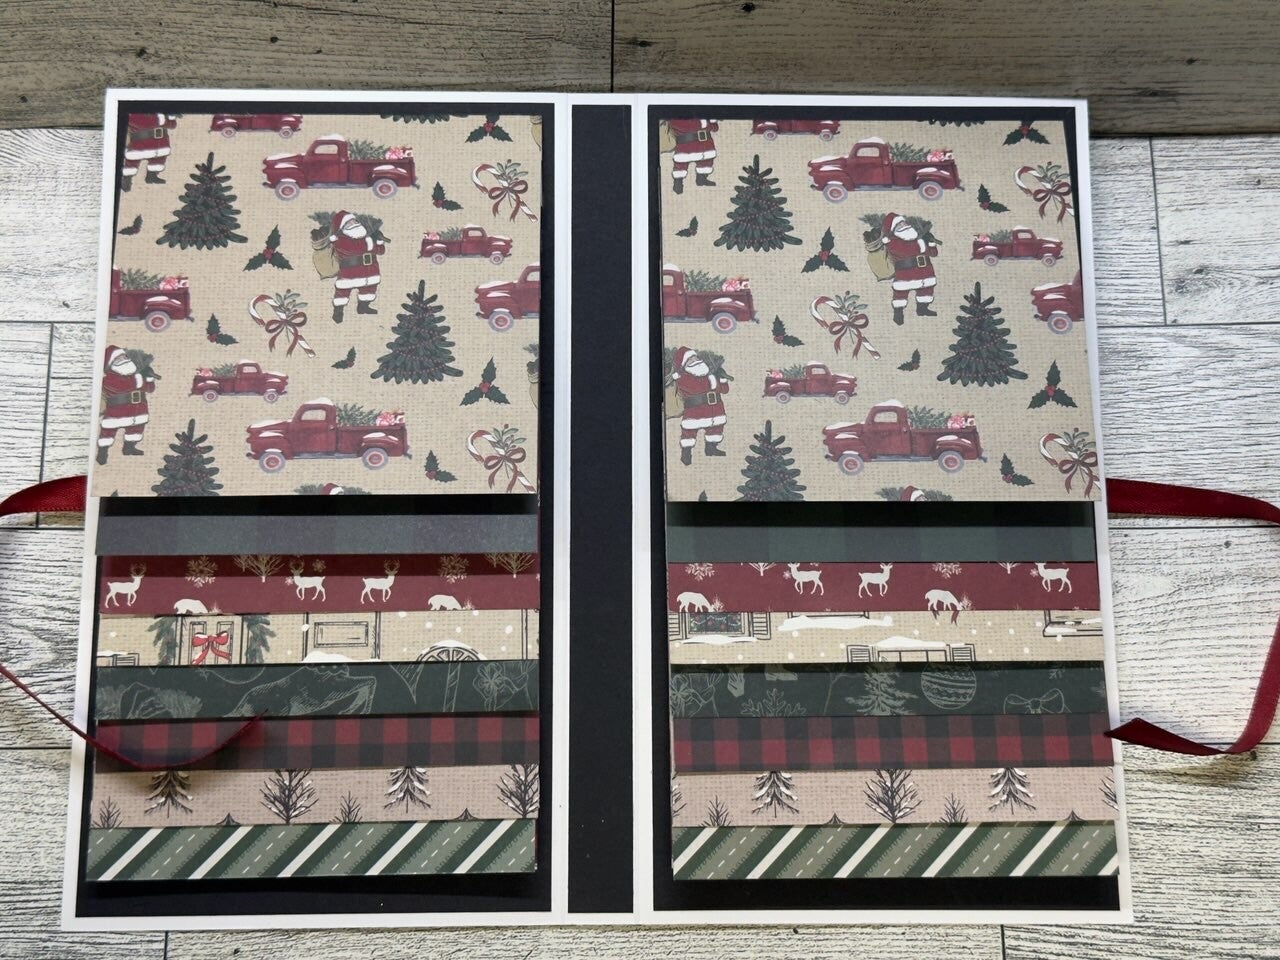
Sunday May 31, 2026 - Tonight we made this fun and easymini folio that Vicki found on Facebook made by Eana's Crafty Club. You take a 8 1/2 x 11 piece of paper, fold it in half portrait and fold it in half landscape. Turned to landscape cut the fold line at the top down to the center. Fold the bottom section and only glue the top and bottom edges to make right opening pocket. Then fold the "middle" flap up partway to make a middle pocket. Add additional pockets and bands and decorate as desired. It takes about 5 minutes to make the base. Then the fun begins in how you will decorate it!

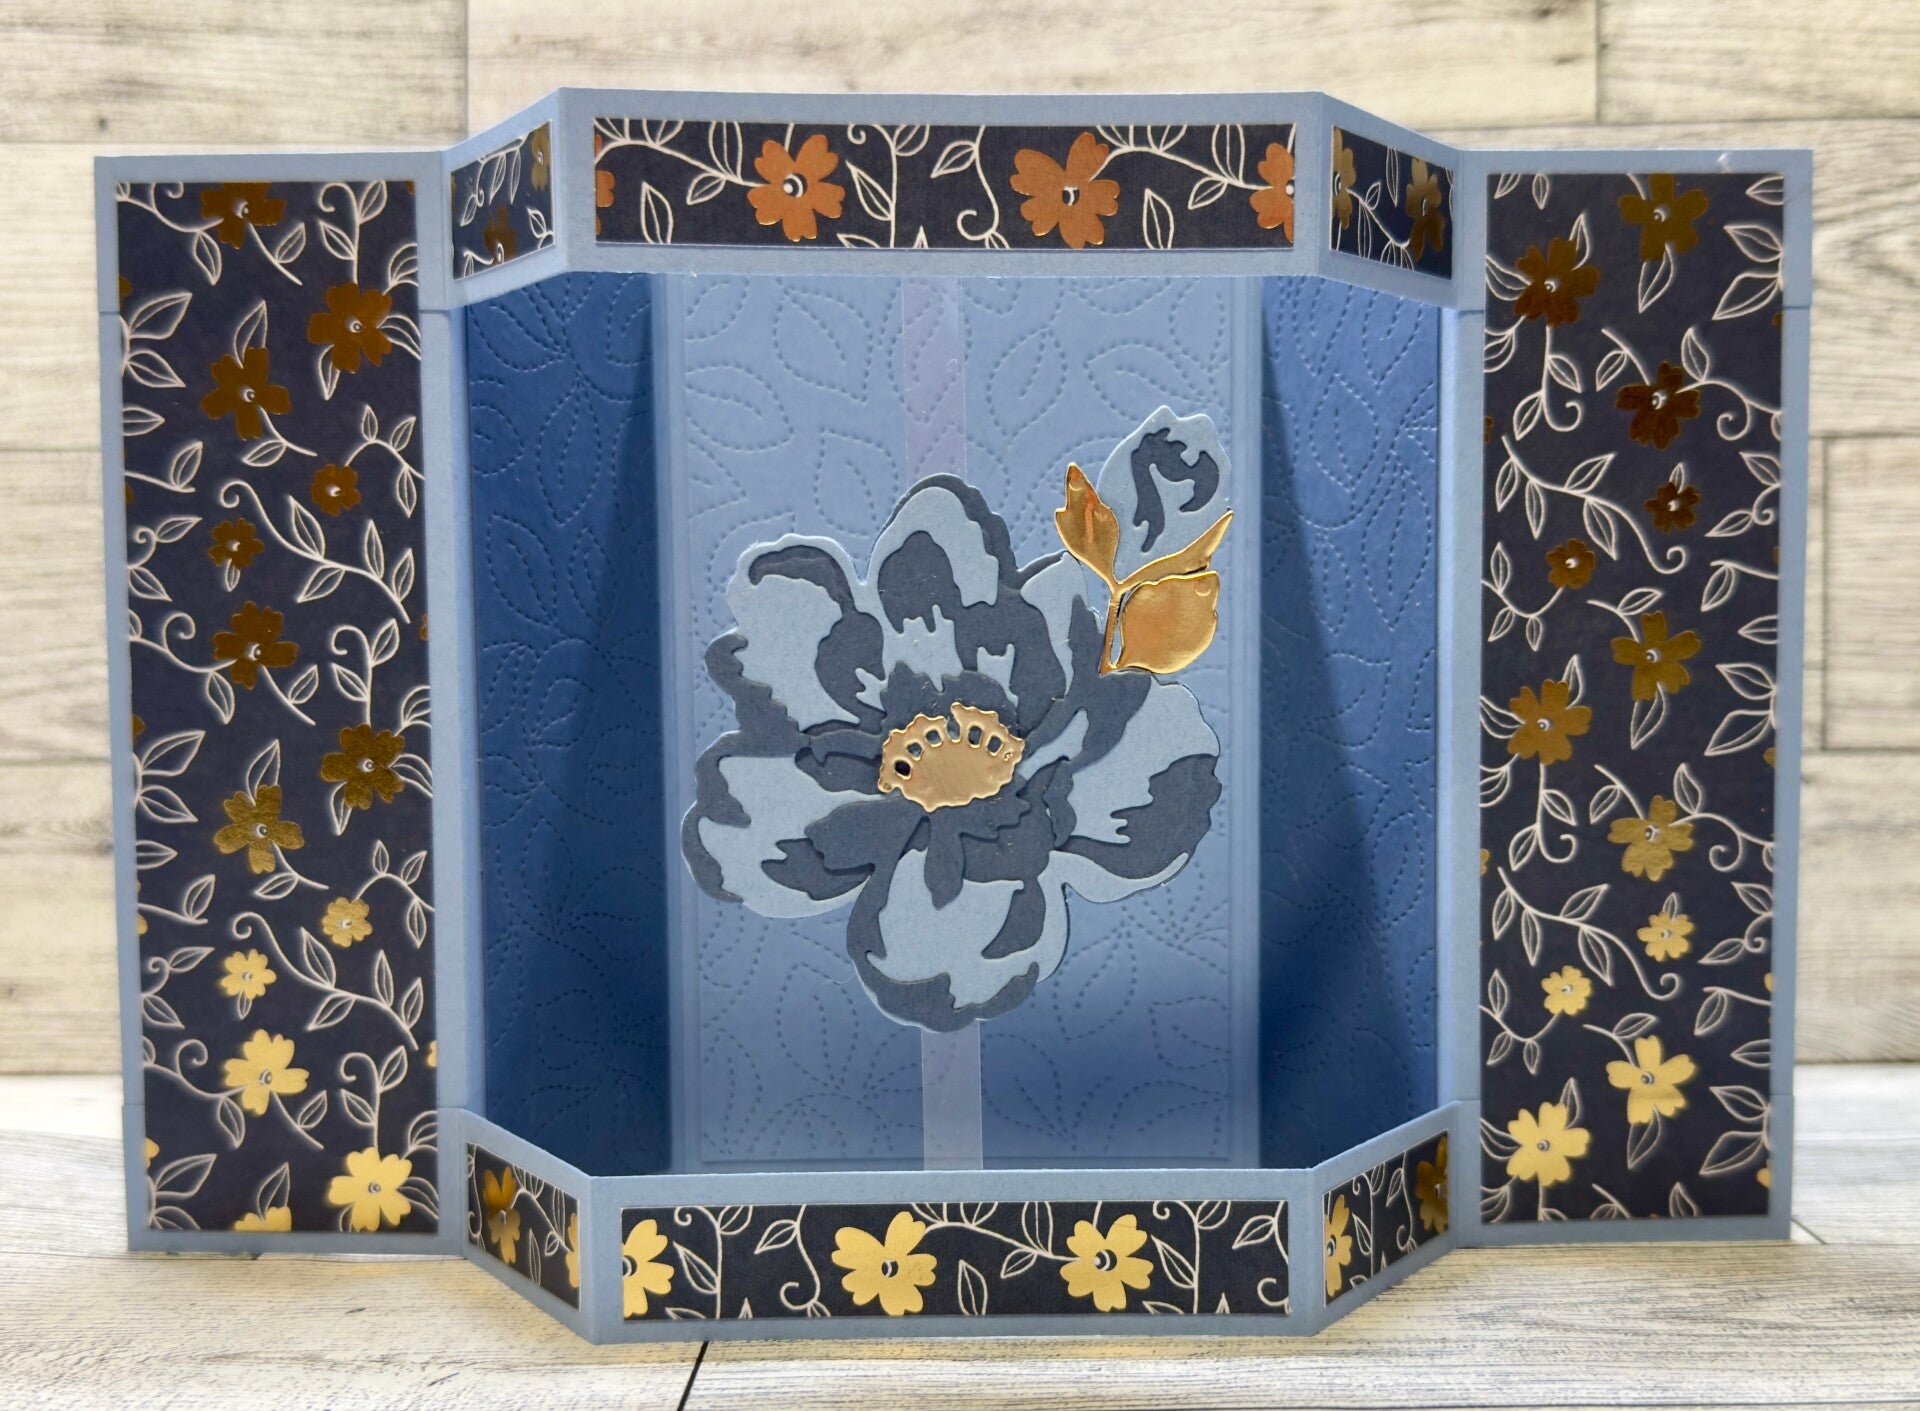
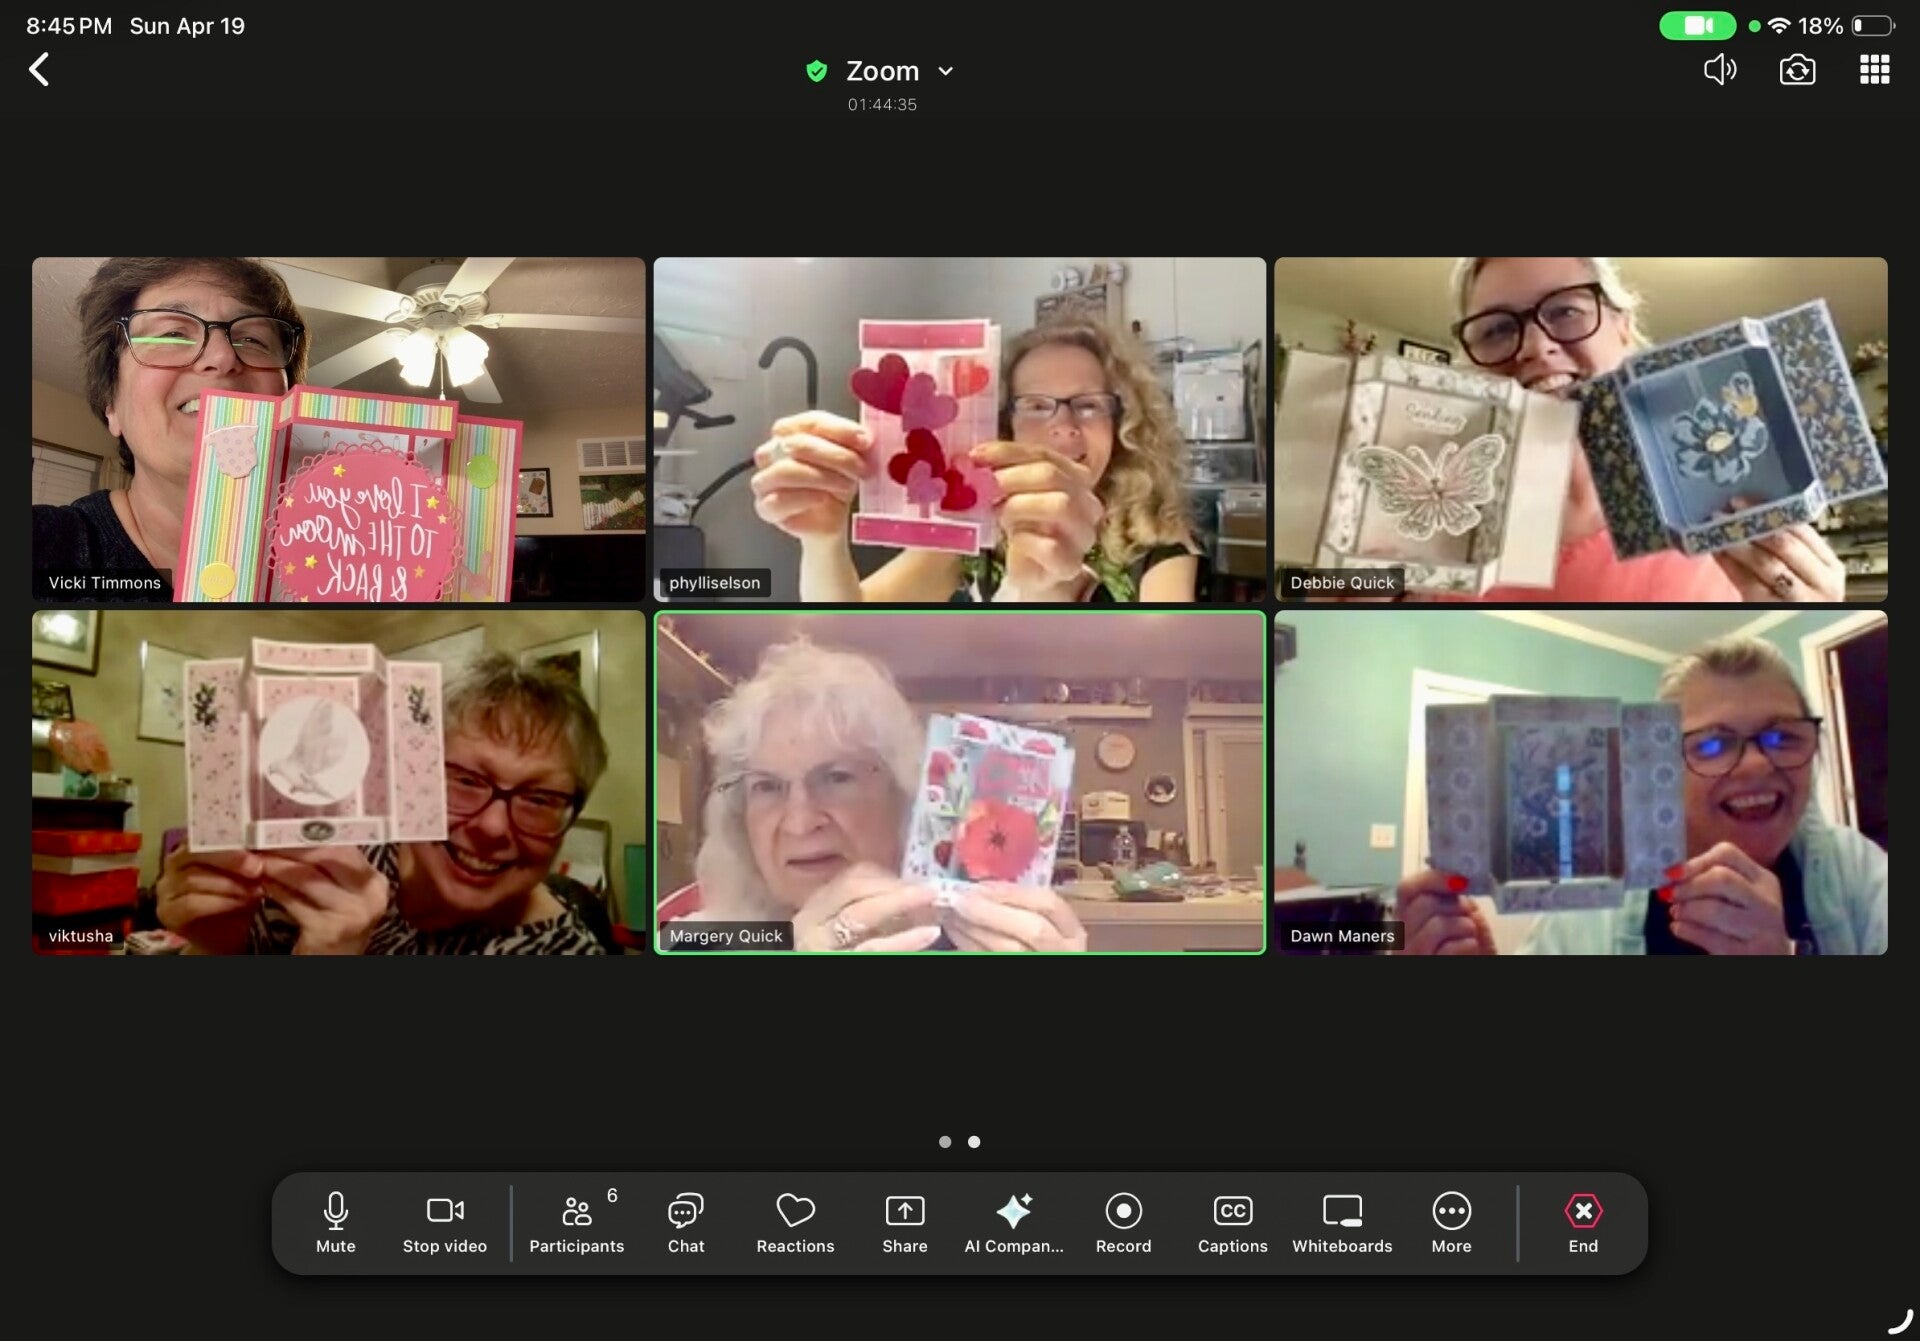
Sunday April 19, 2026 - Debbie taught us this Grandstand Card tonight. It is super easy and lives large! Thank you Debbie!
Cutting Directions
Card Stock:
- Cut card stock to 10" x 7", with the 10" edge on top score at 1 3/4" and 3 3/8", flip the card stock over and score the other side at 1 3/4" and 3 3/8".
- From the above piece, cut two pieces off that are 3/4" x 10", this will leave you with the following:
- Card Base - 10" x 5 1/2" with two scores on the left edges and two scores on the right edges
- Card Top & Bottom Rails - 3/4" x 10" (two pieces) with the same score lines as the card base
- White Sentiment Piece for Back of Card - 3" x 5 1/4"
Designer Paper:
- Back Panel - 3" x 5 1/4"
- Outer Wings - (cut 2) - 1 1/2" x 5 1/4"
- Inner Wings - (cut 2) - 1 3/8" x 5 1/4"
- Top & Bottom Rails - (cut 2) - 3" x 1/2", (cut 4) - 1 3/8" x 1/2"
Additional:
- Acetate - 1/4" x 5 1/2"
- Large Piece or Sentiment to "float" on the acetate piece
Assembly Notes:
- Adhere designer paper to the Back Panel and Inner Wings
- Adhere Top and Bottom Rails, aligning the paper with the top edge/bottom edge of the card, adhering only to the Outer Wing sections.
- Adhere designer paper to the Outer Wing Sections.
- Adhere designer paper to the Top and Bottom Rail Sections.
- Add the Acetate Strip to the back side of the middle of the Top and Bottom Rail Sections, centering it on the card. Use a strong double sided tape for this step.
- Add your center sentiment or design to the acetate piece.


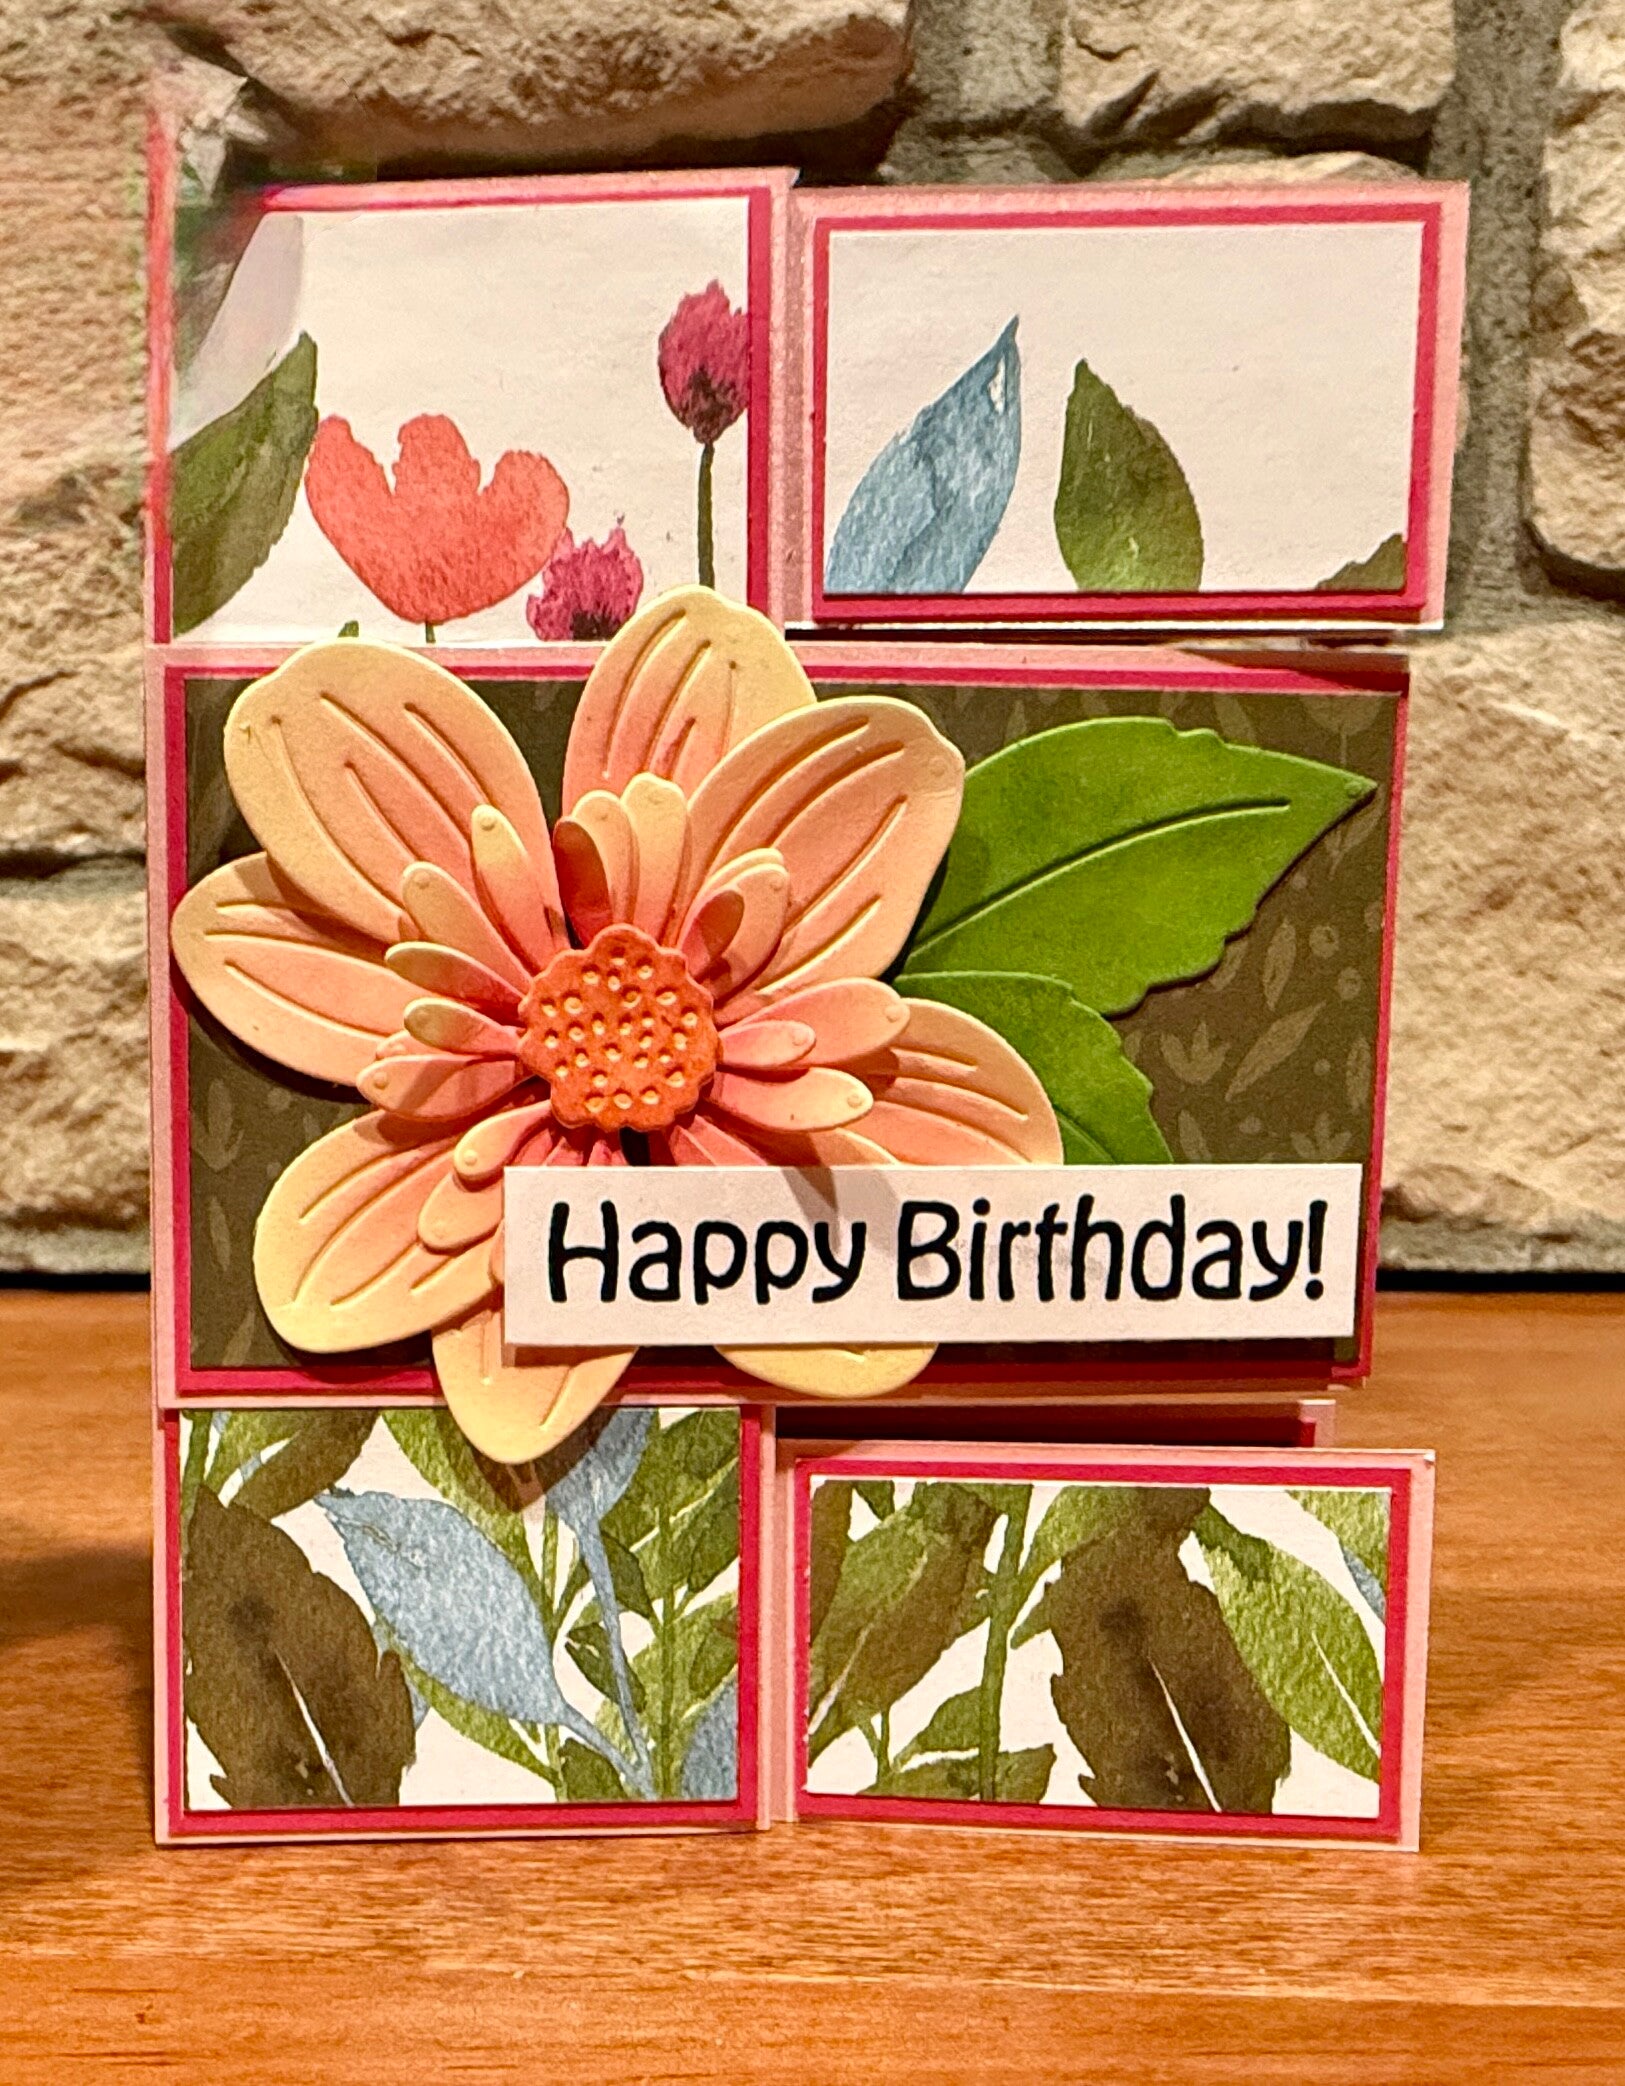
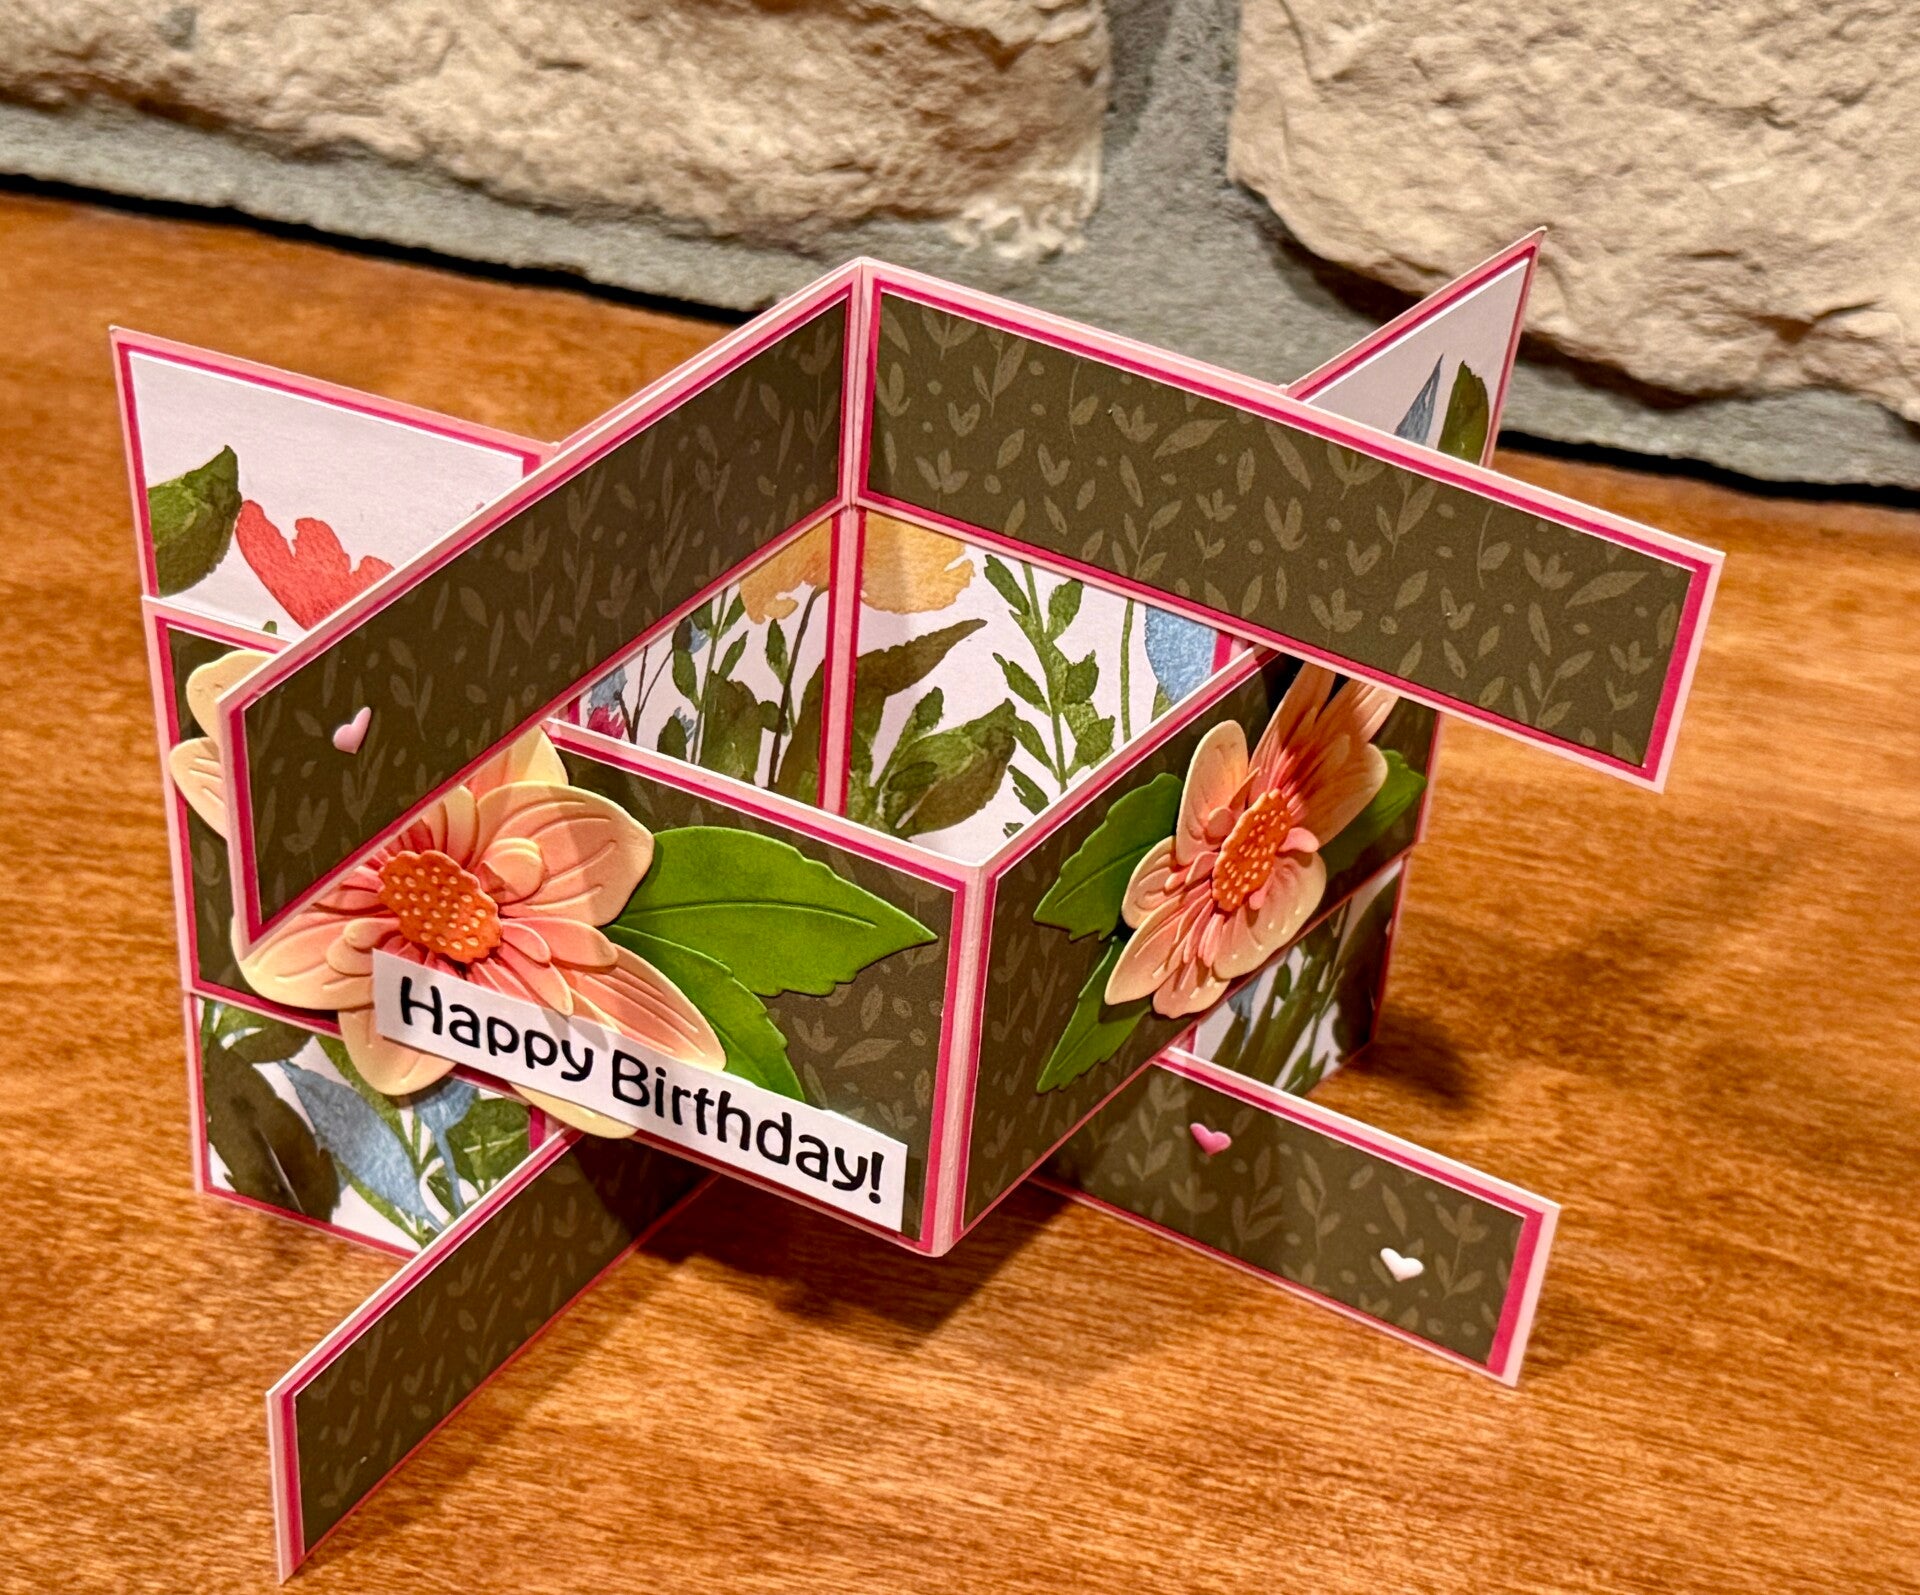
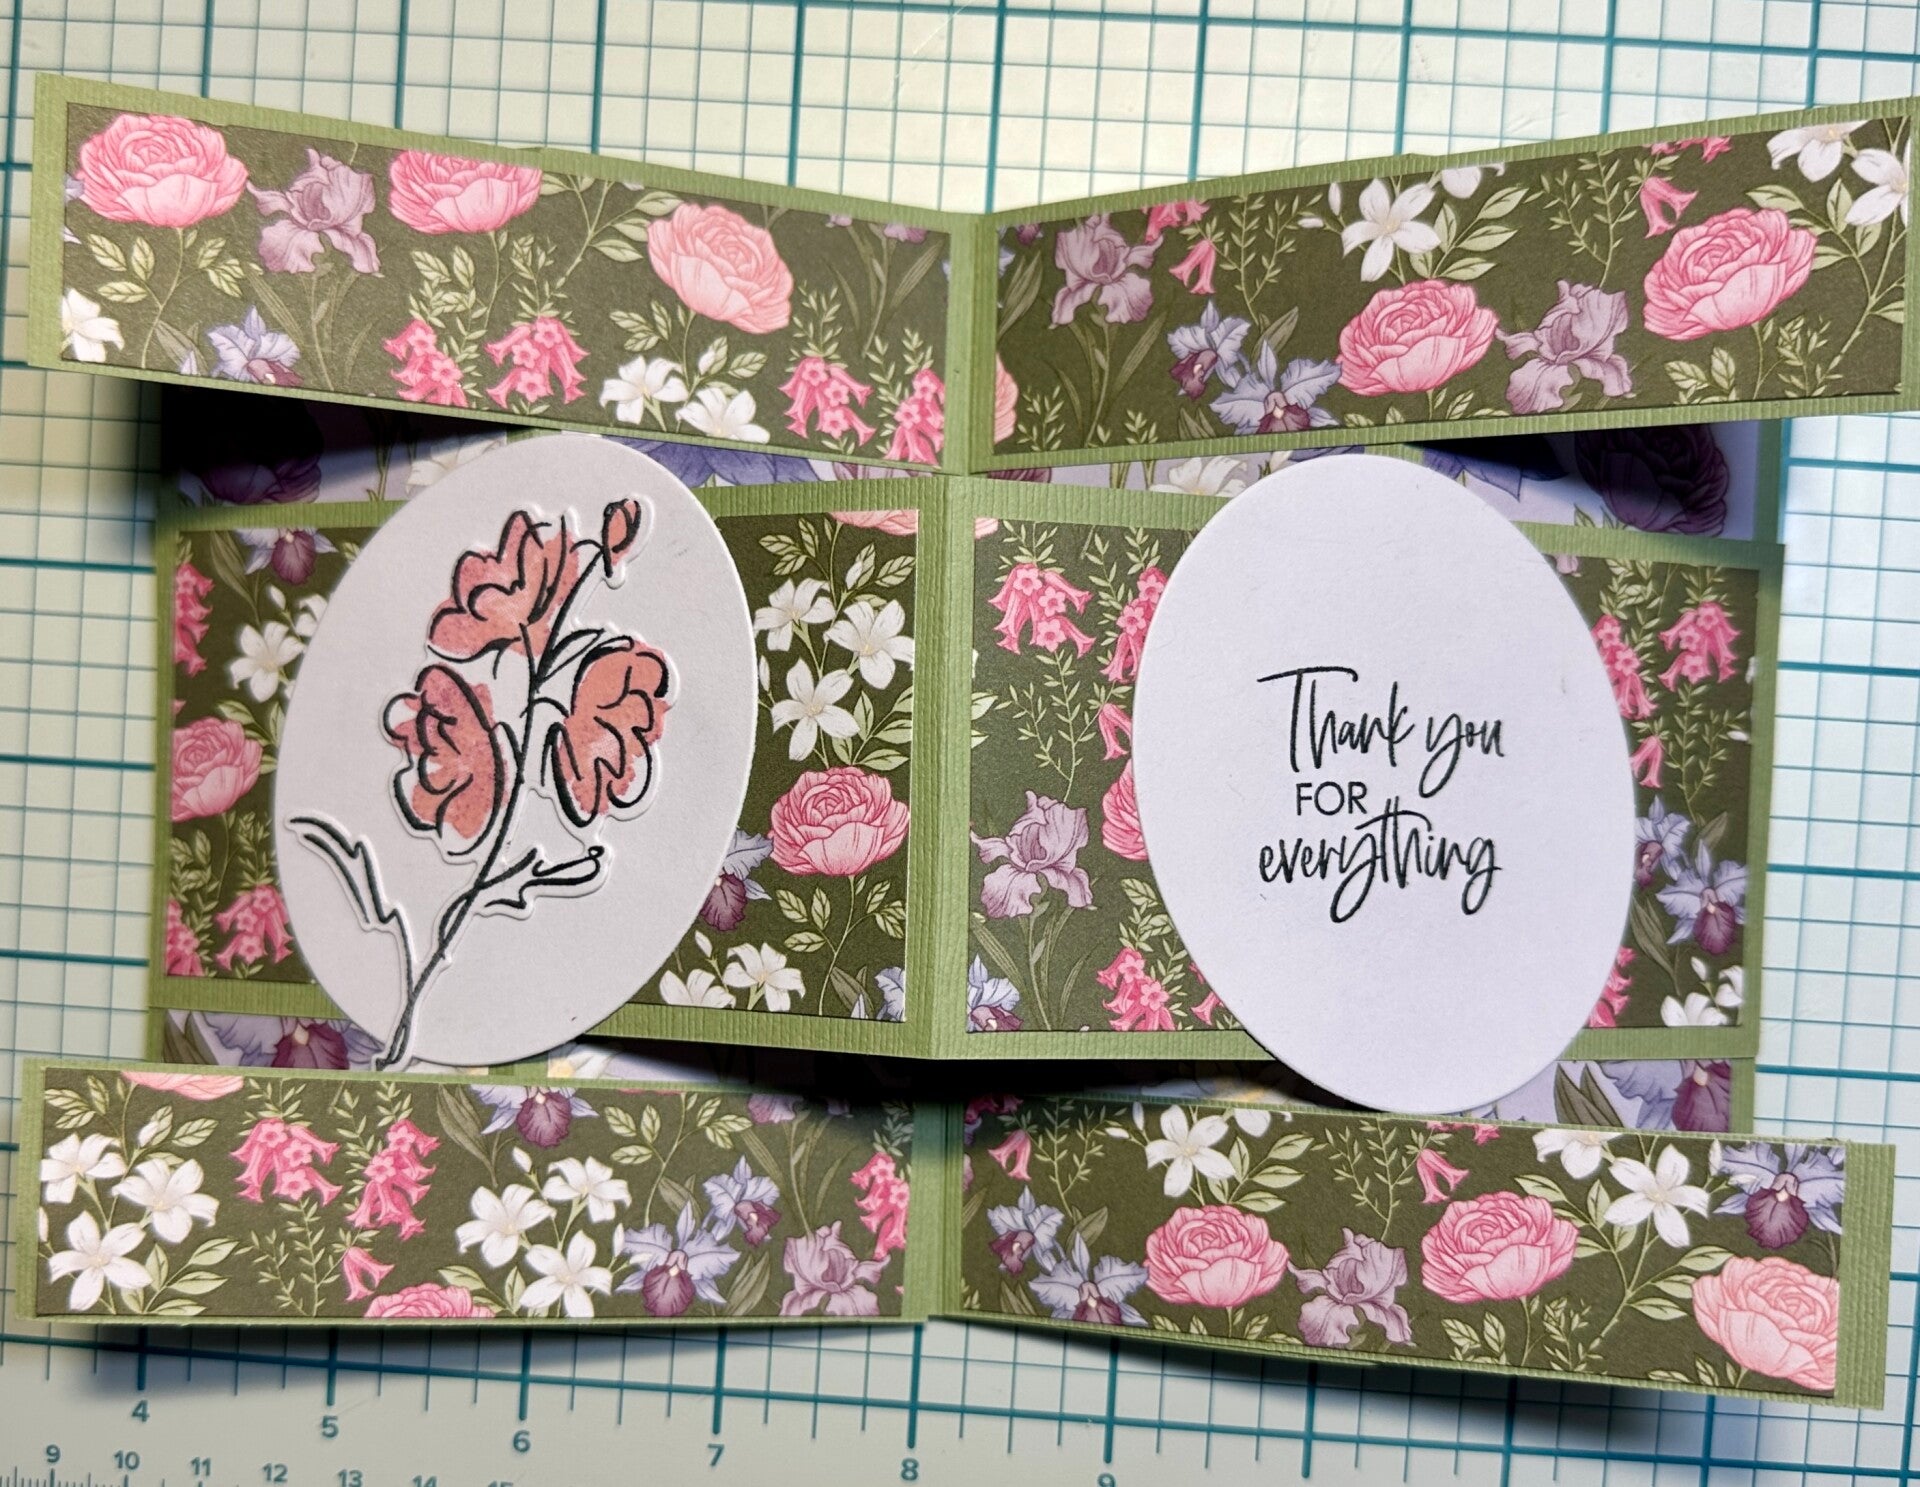
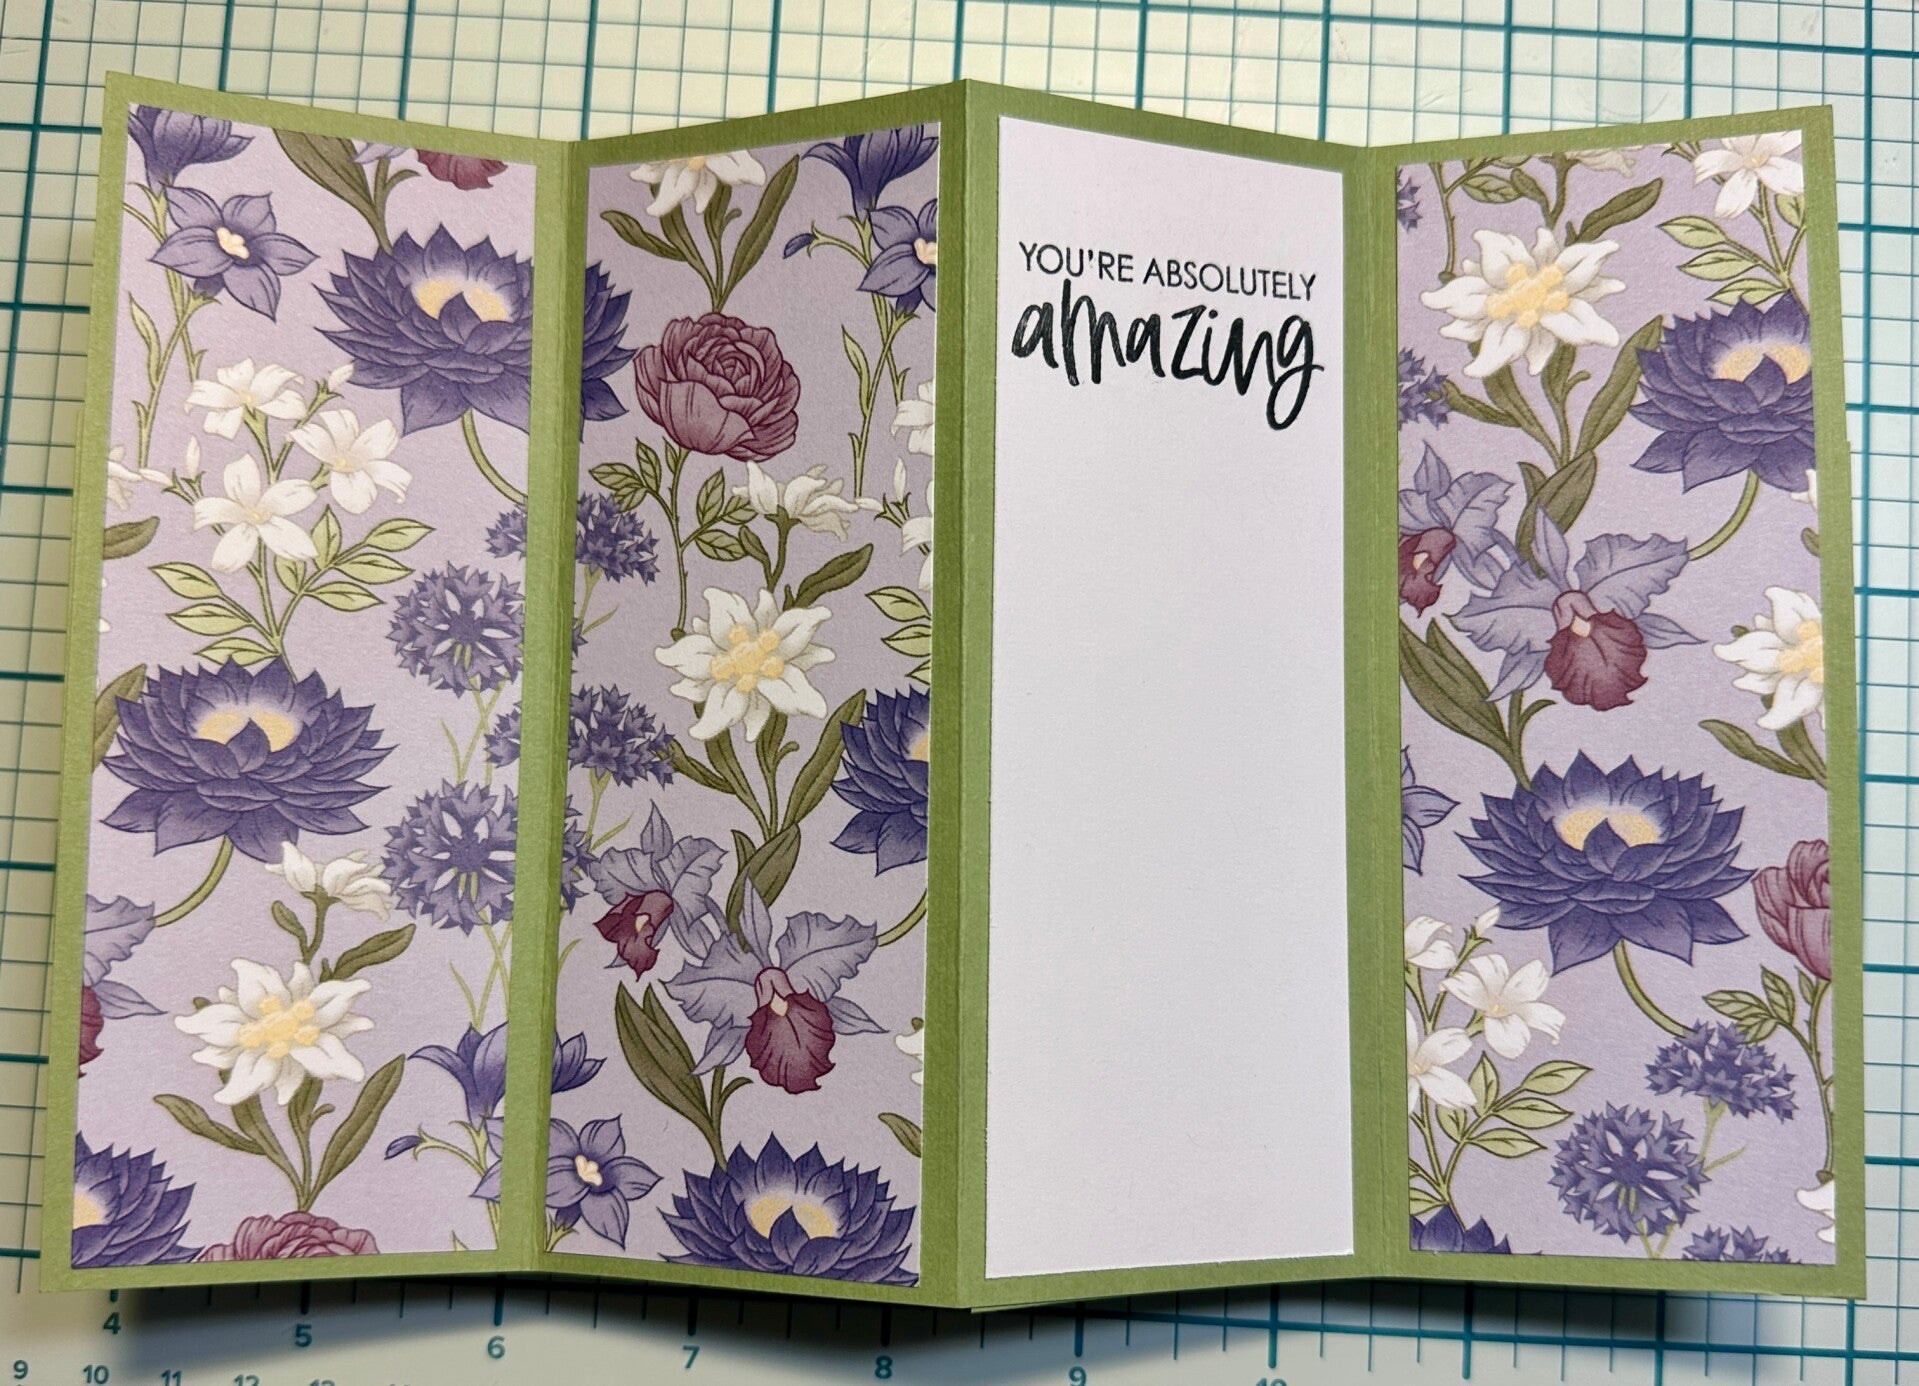
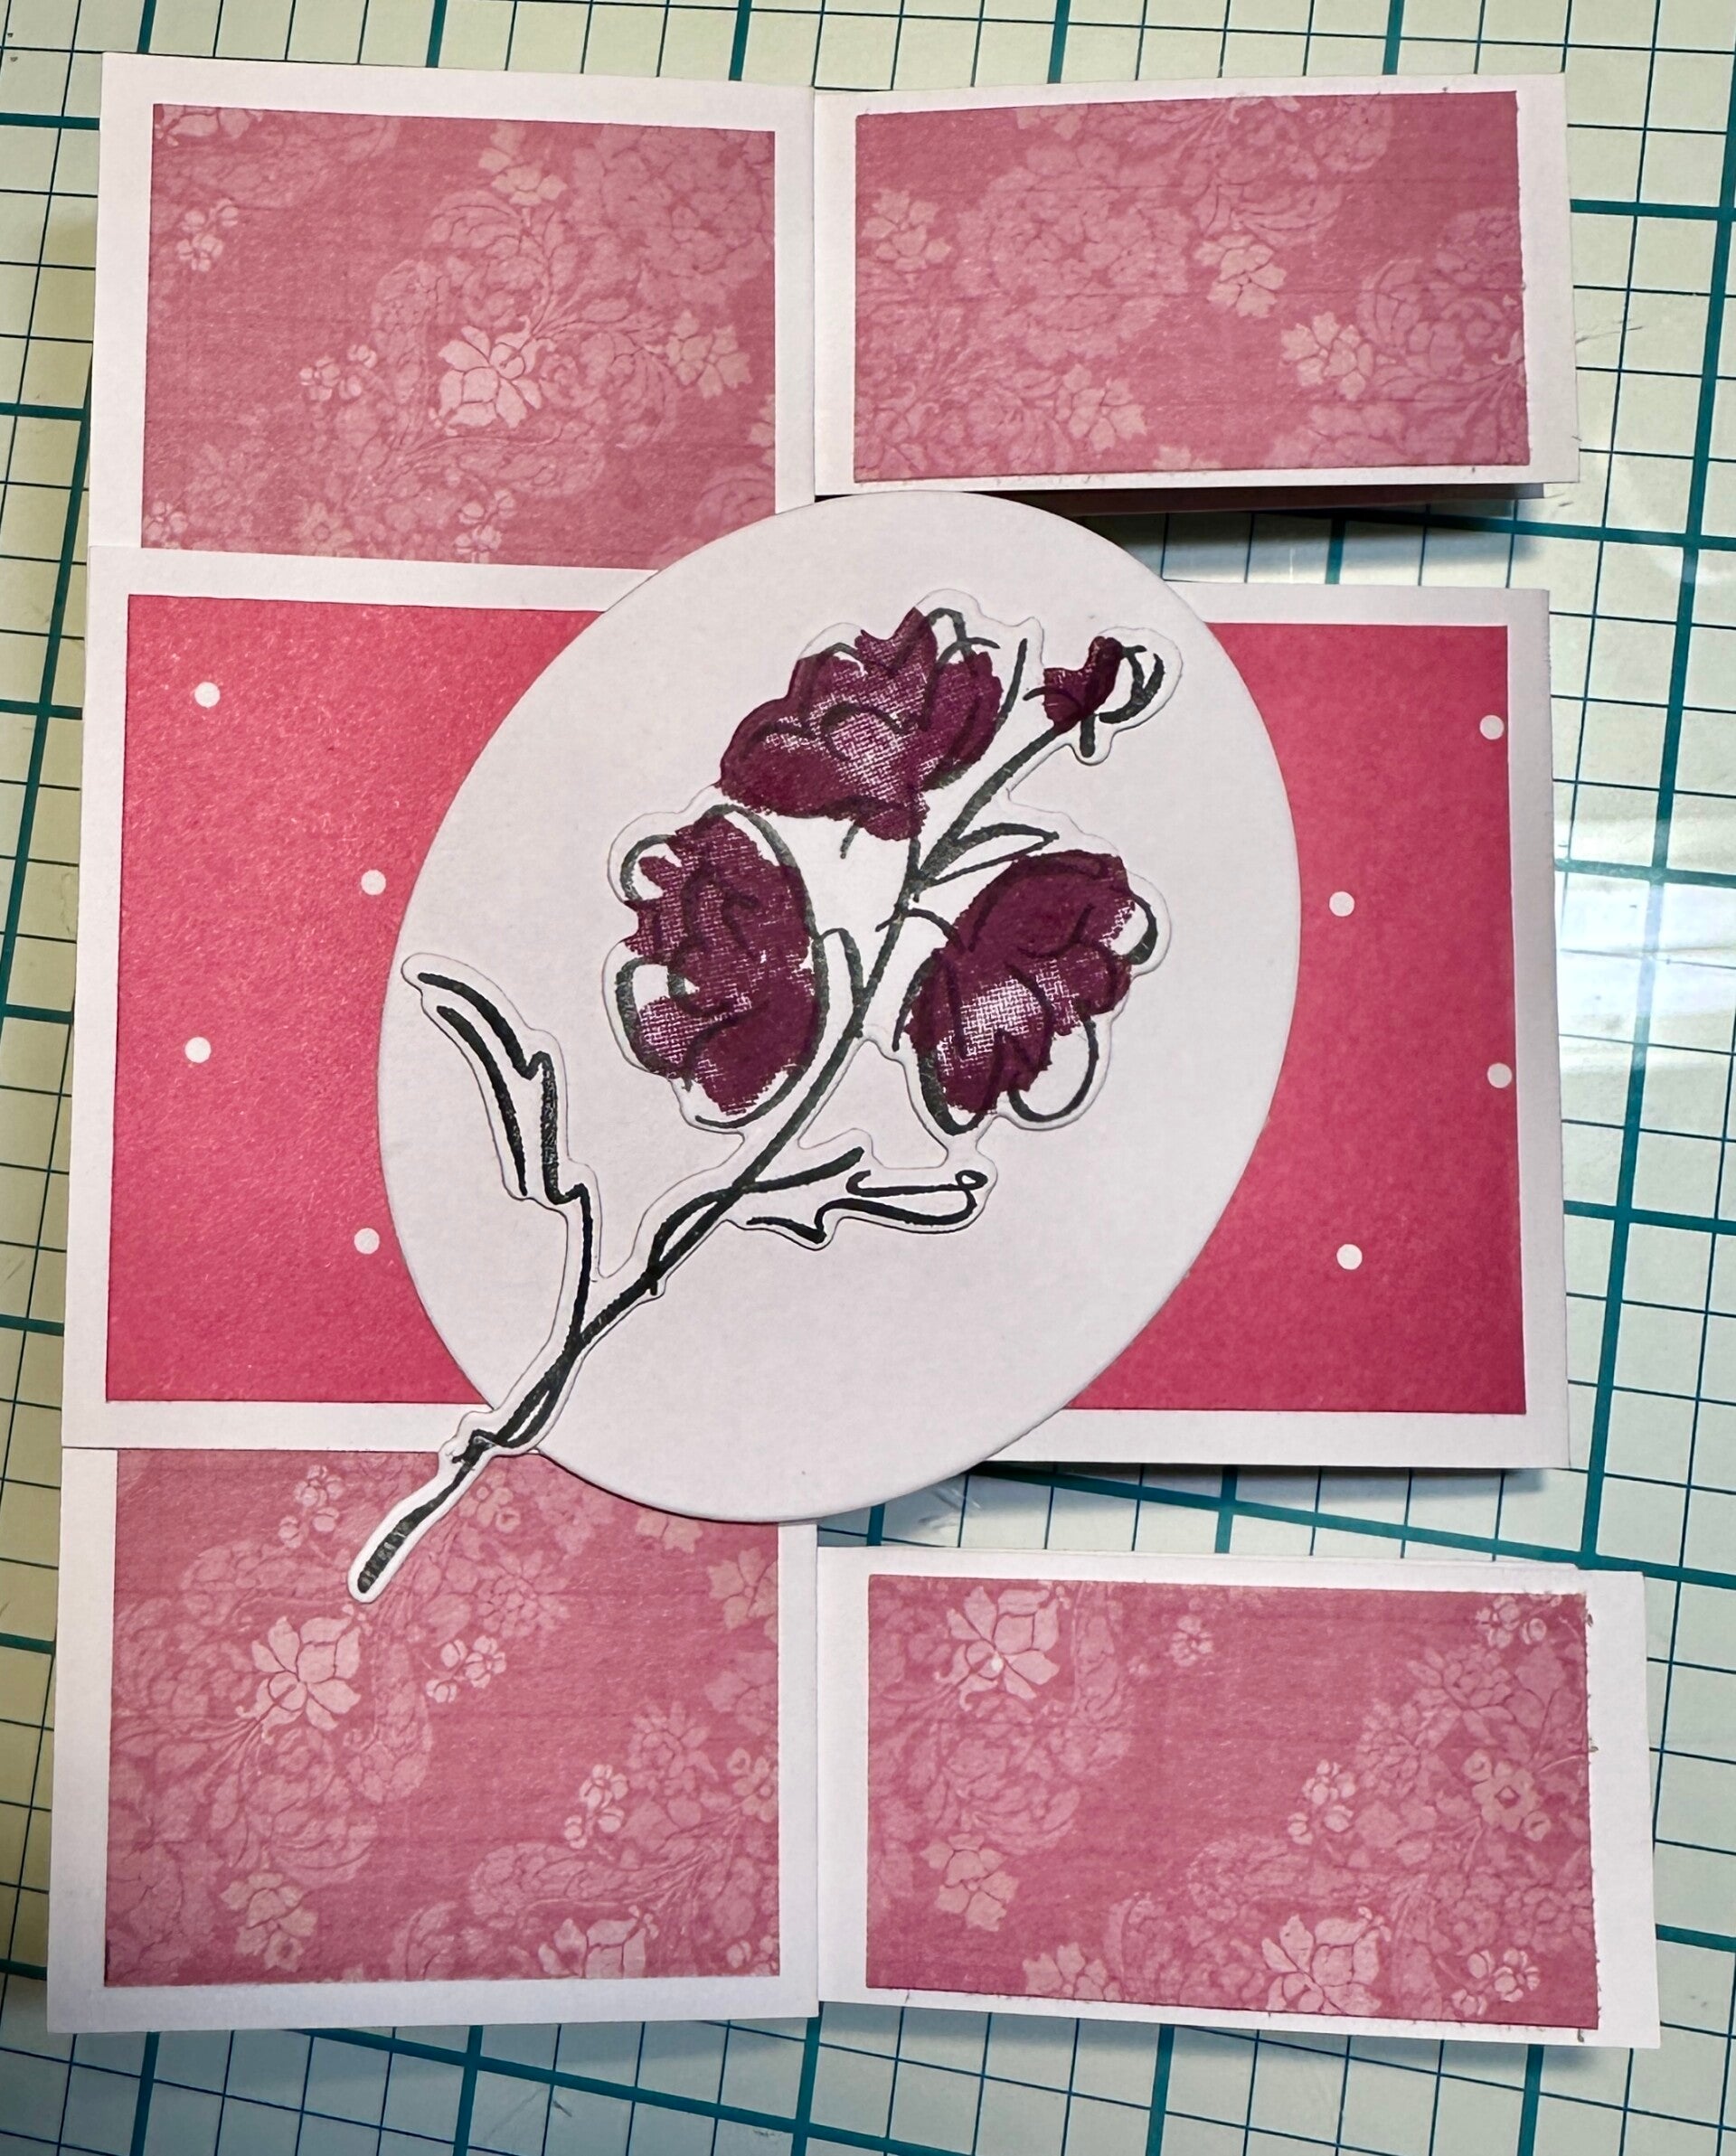
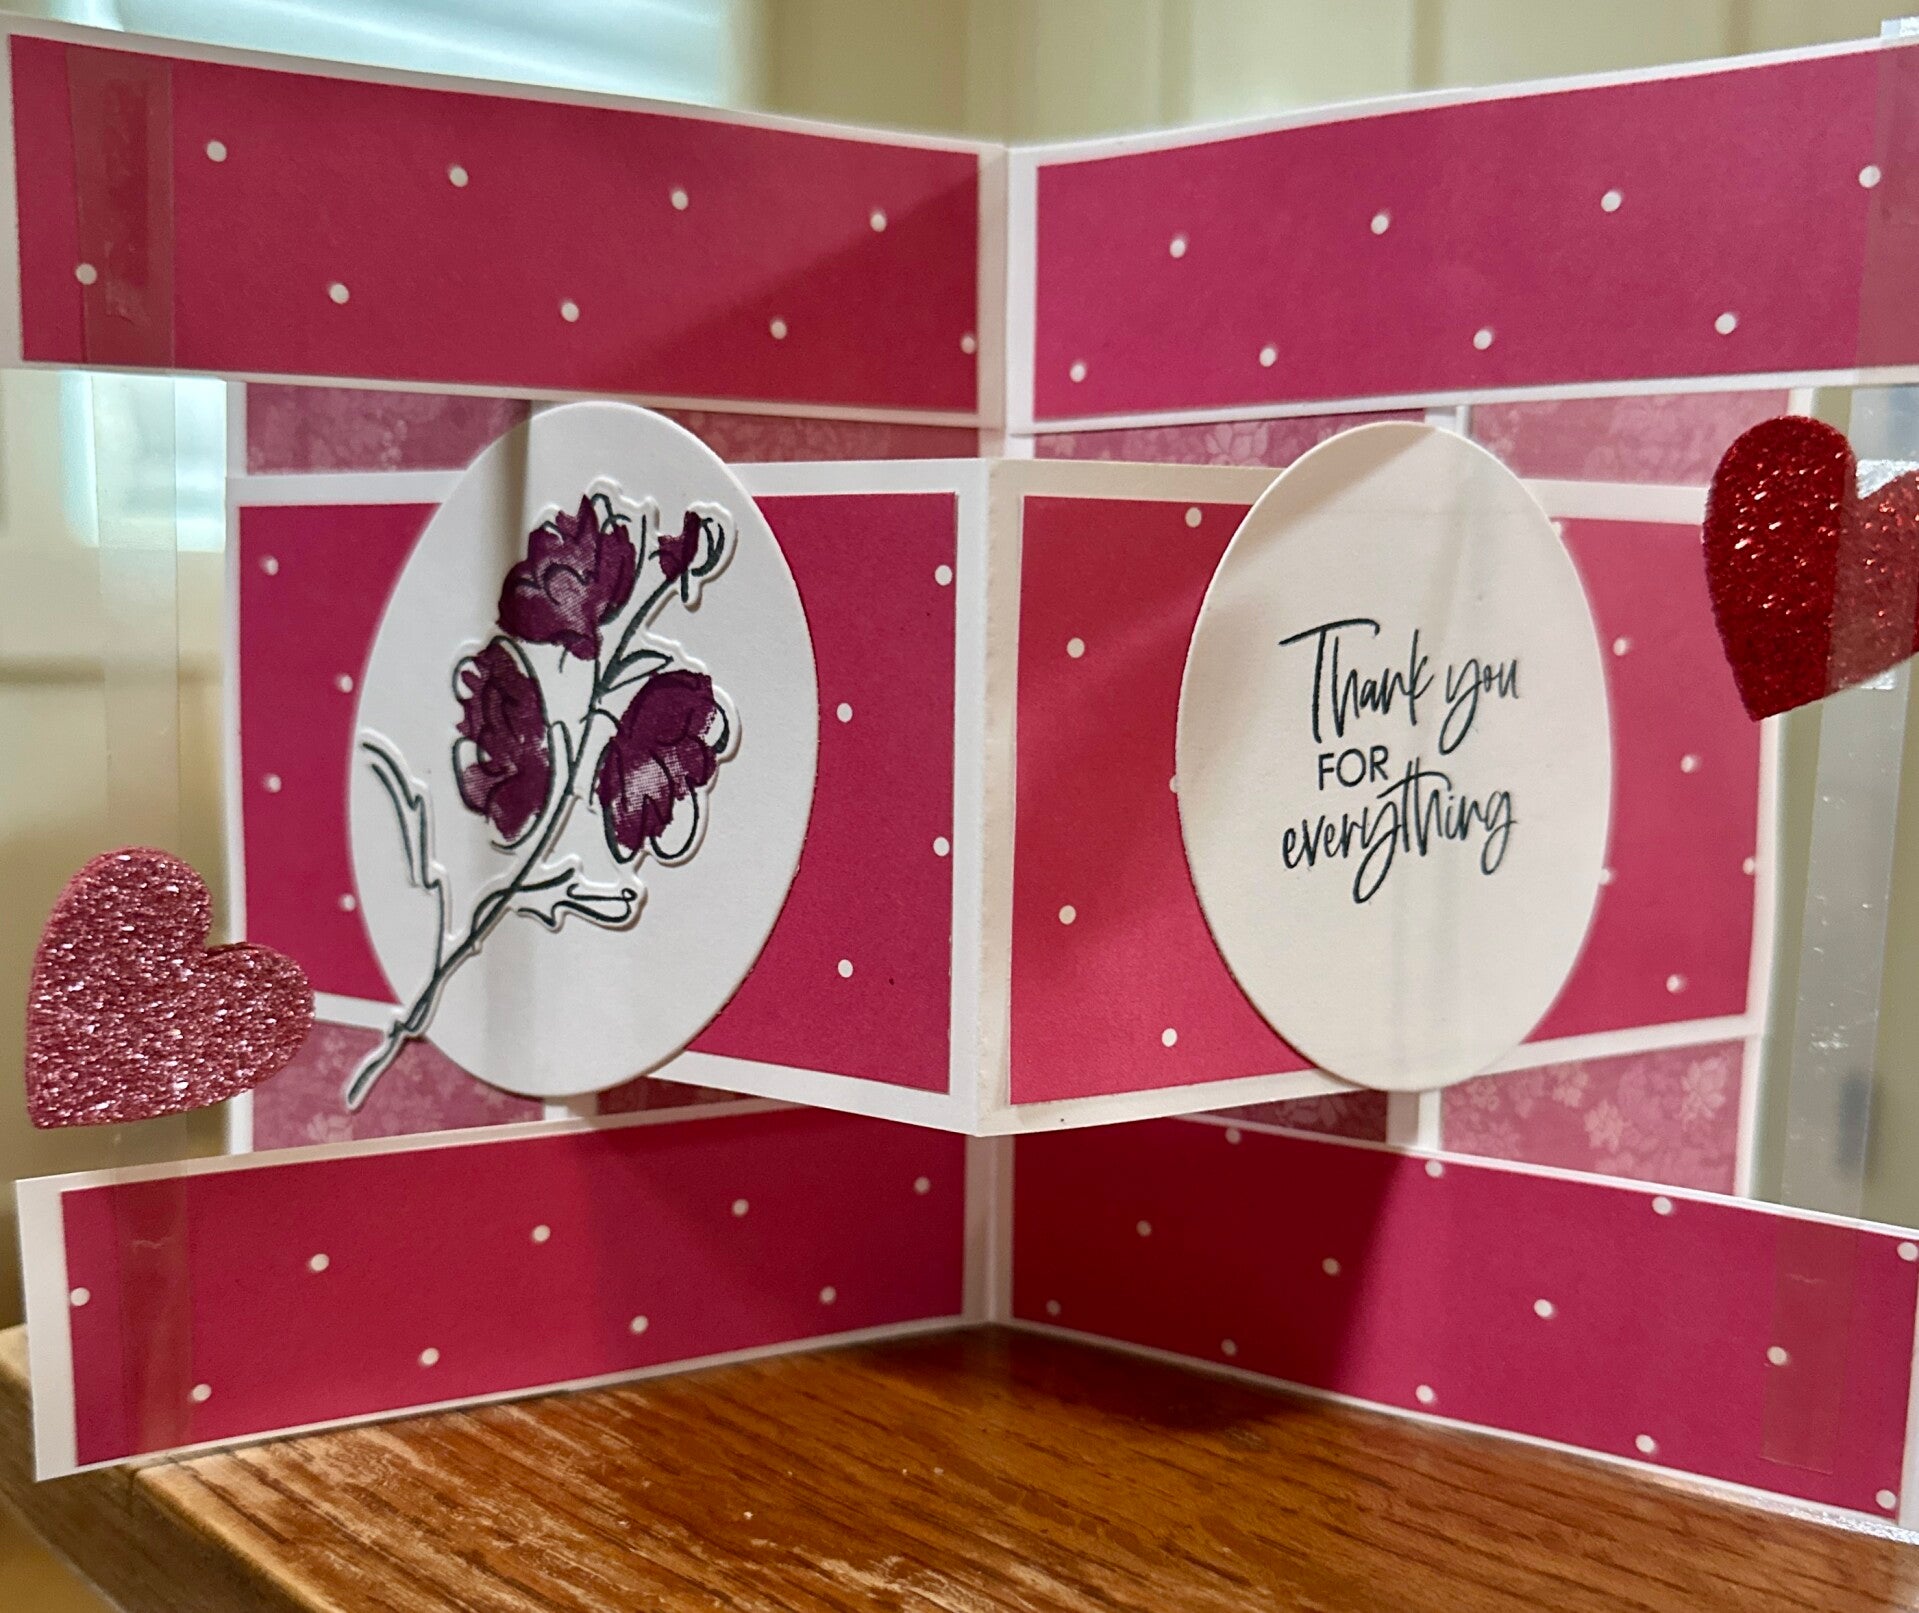
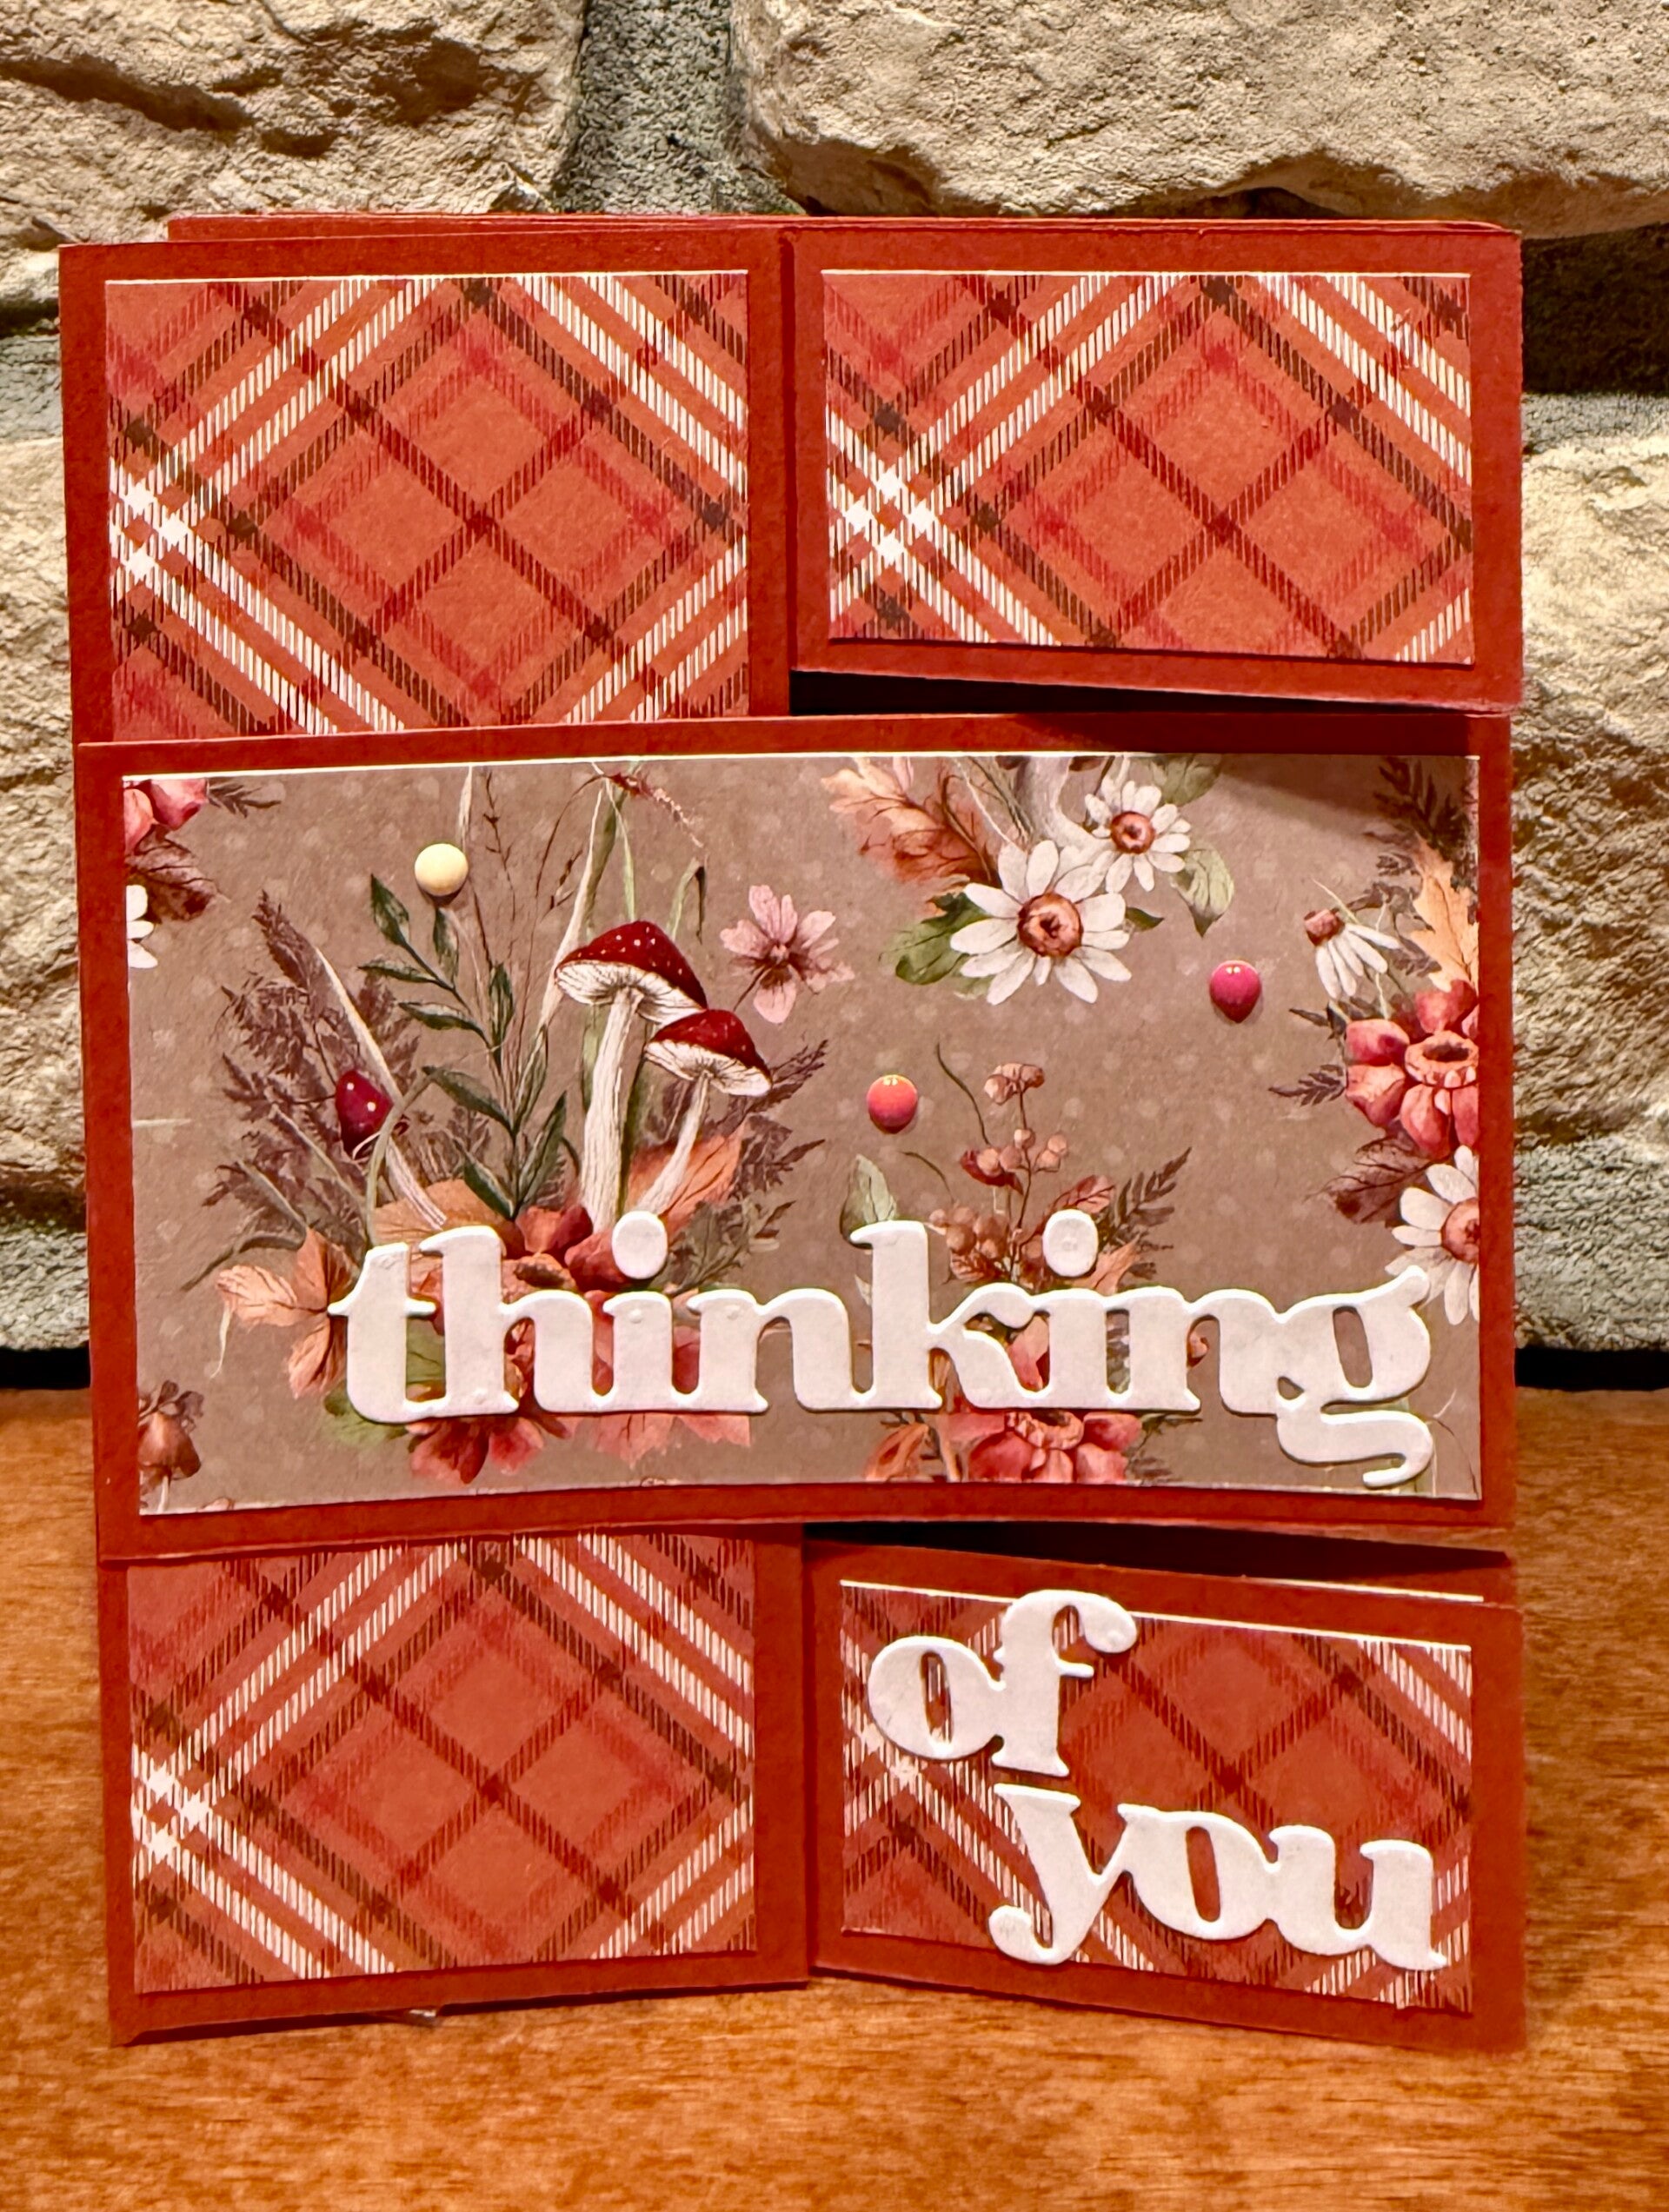
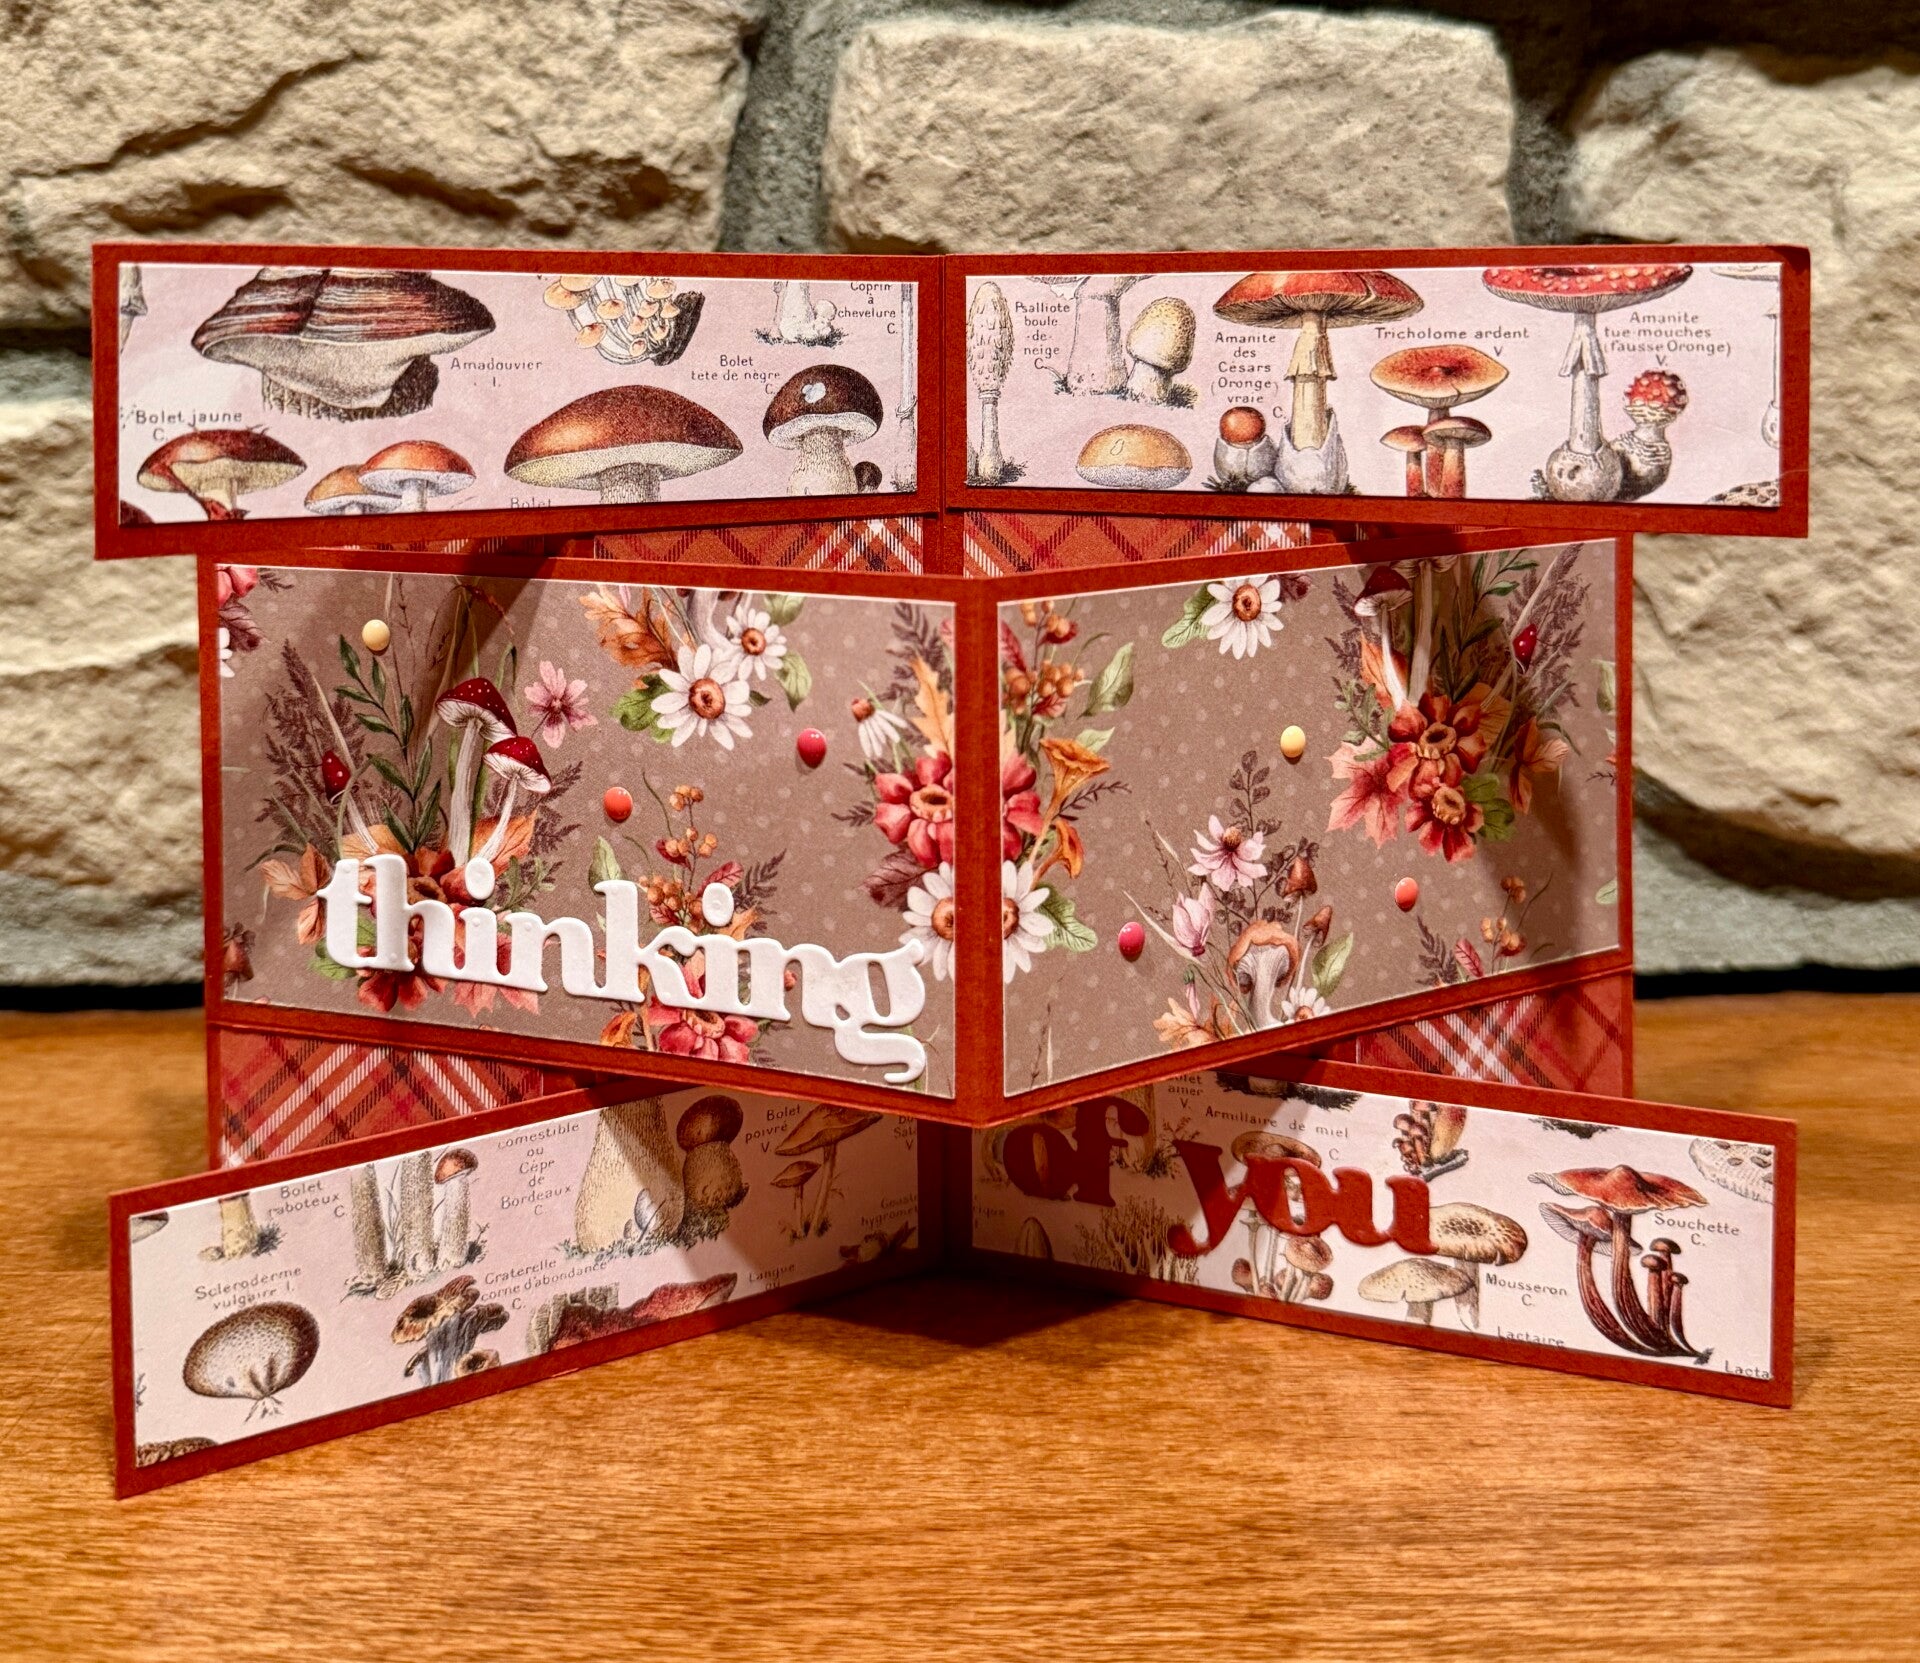
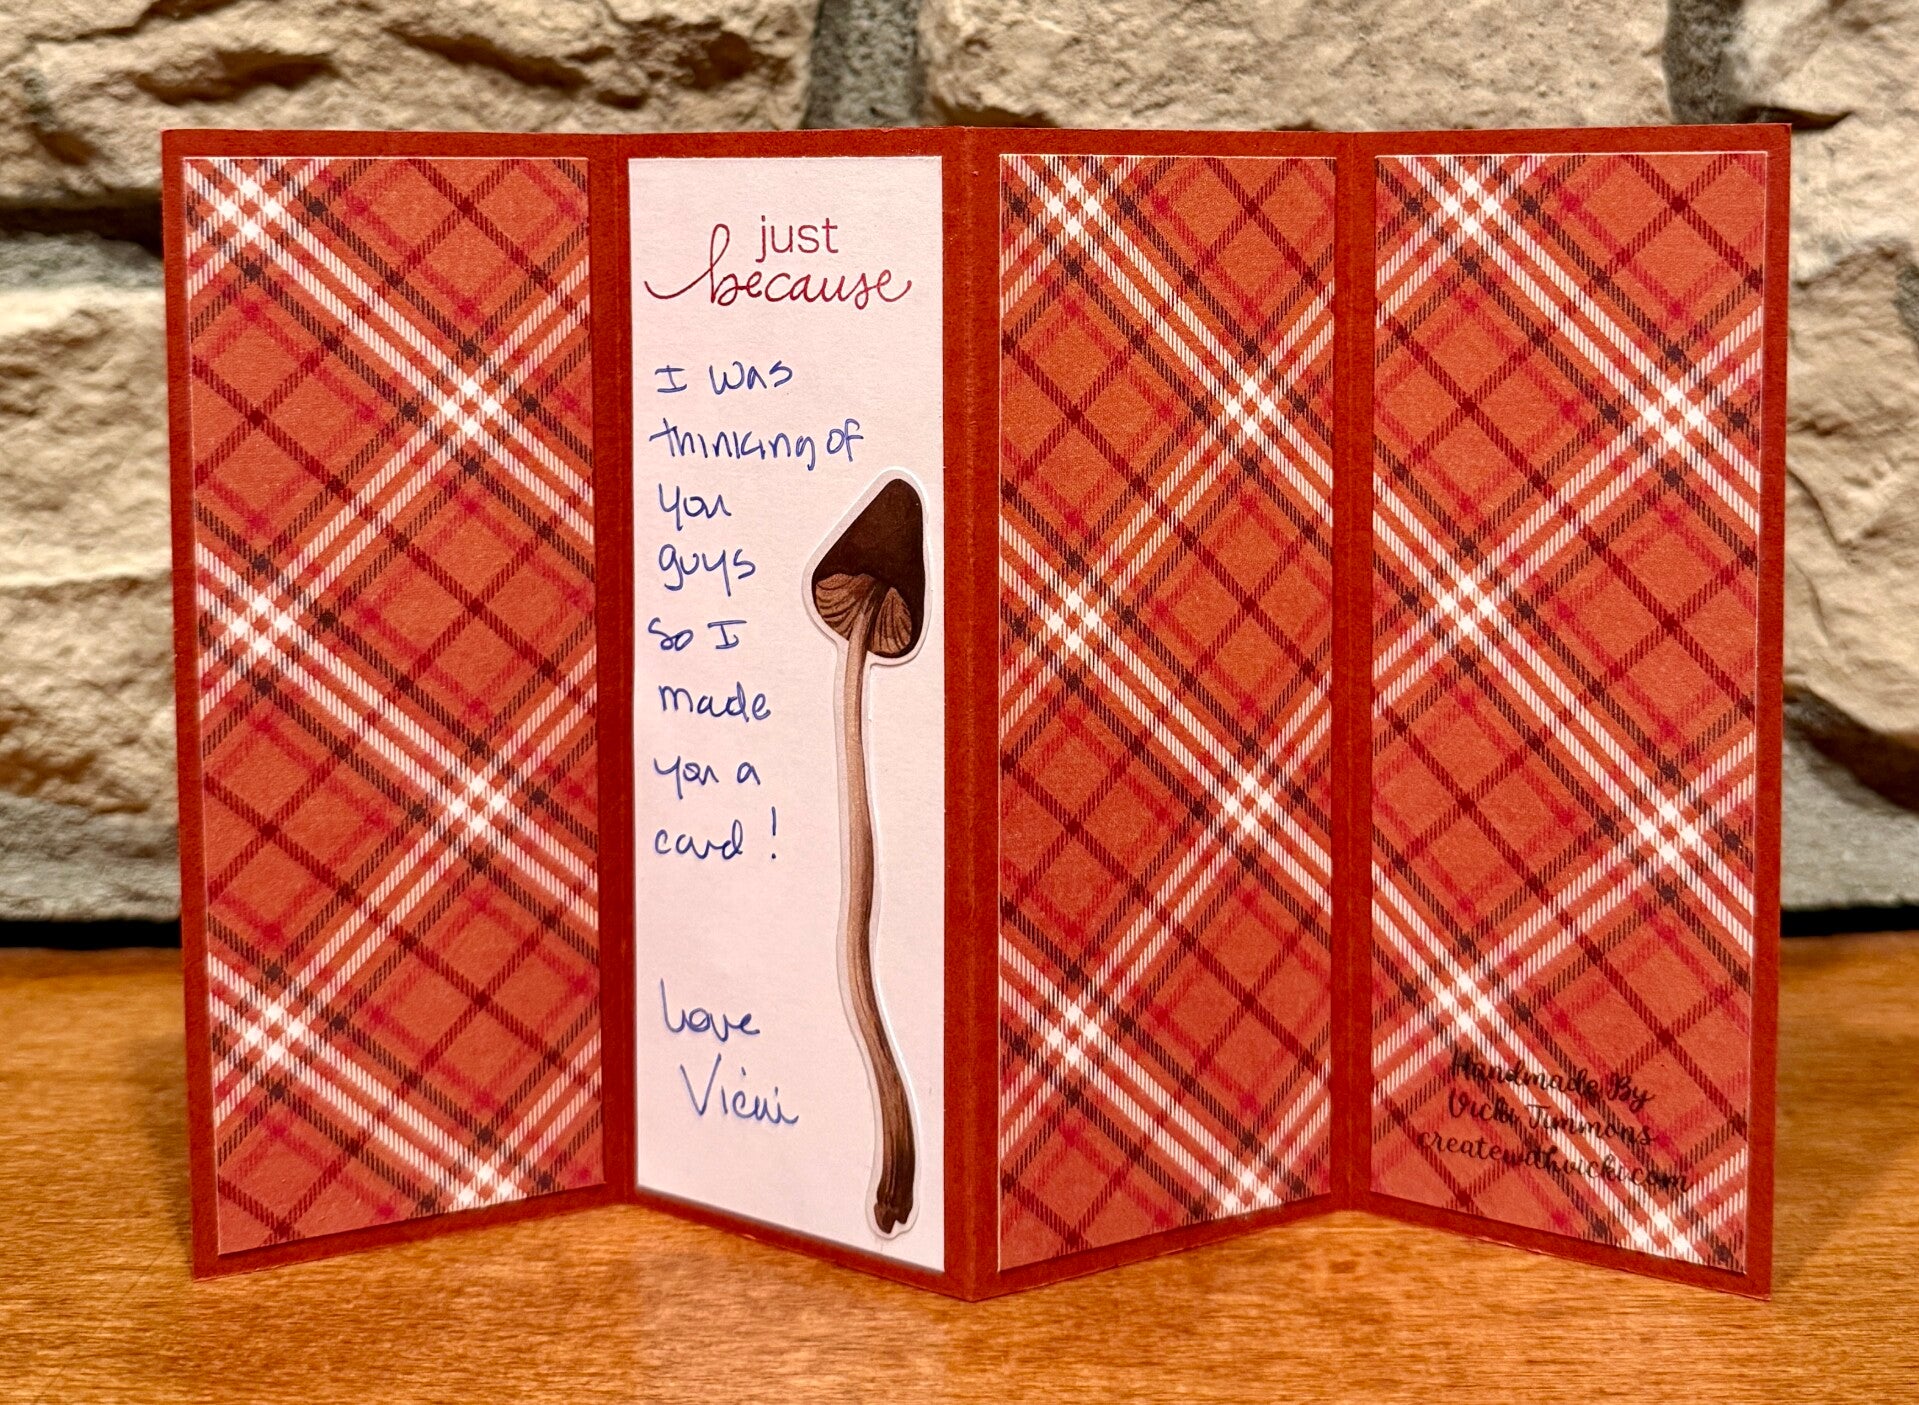
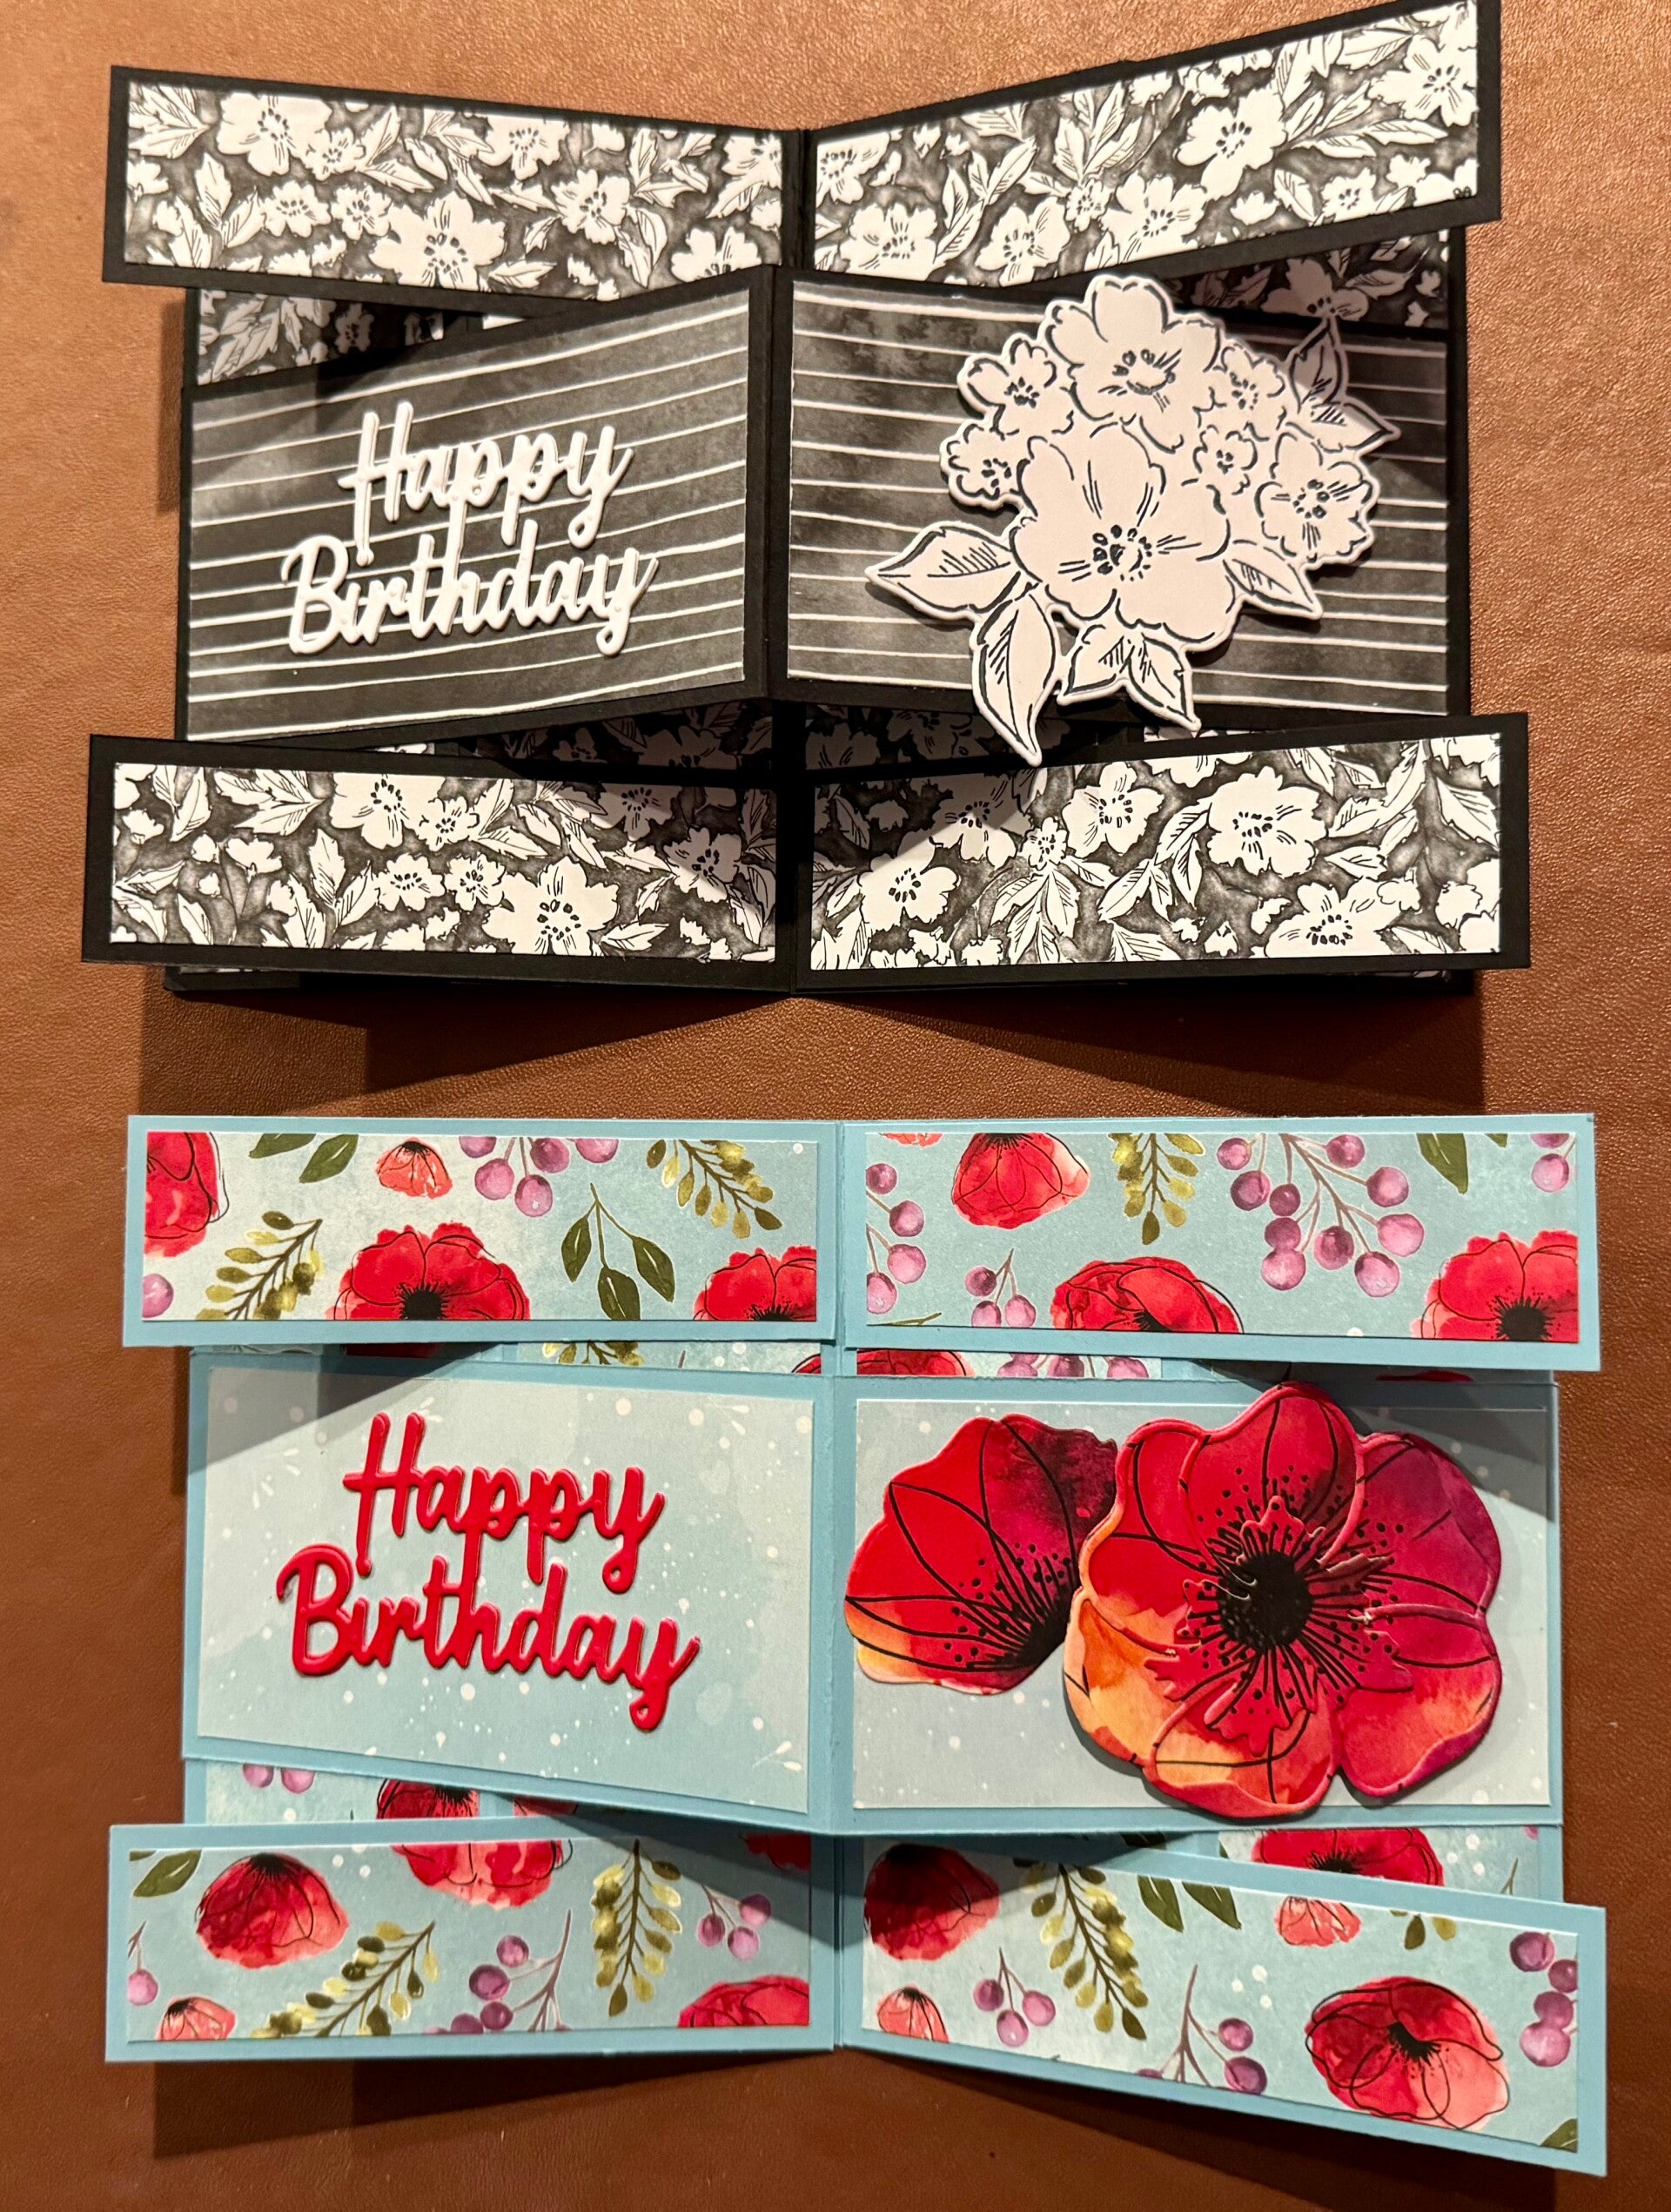
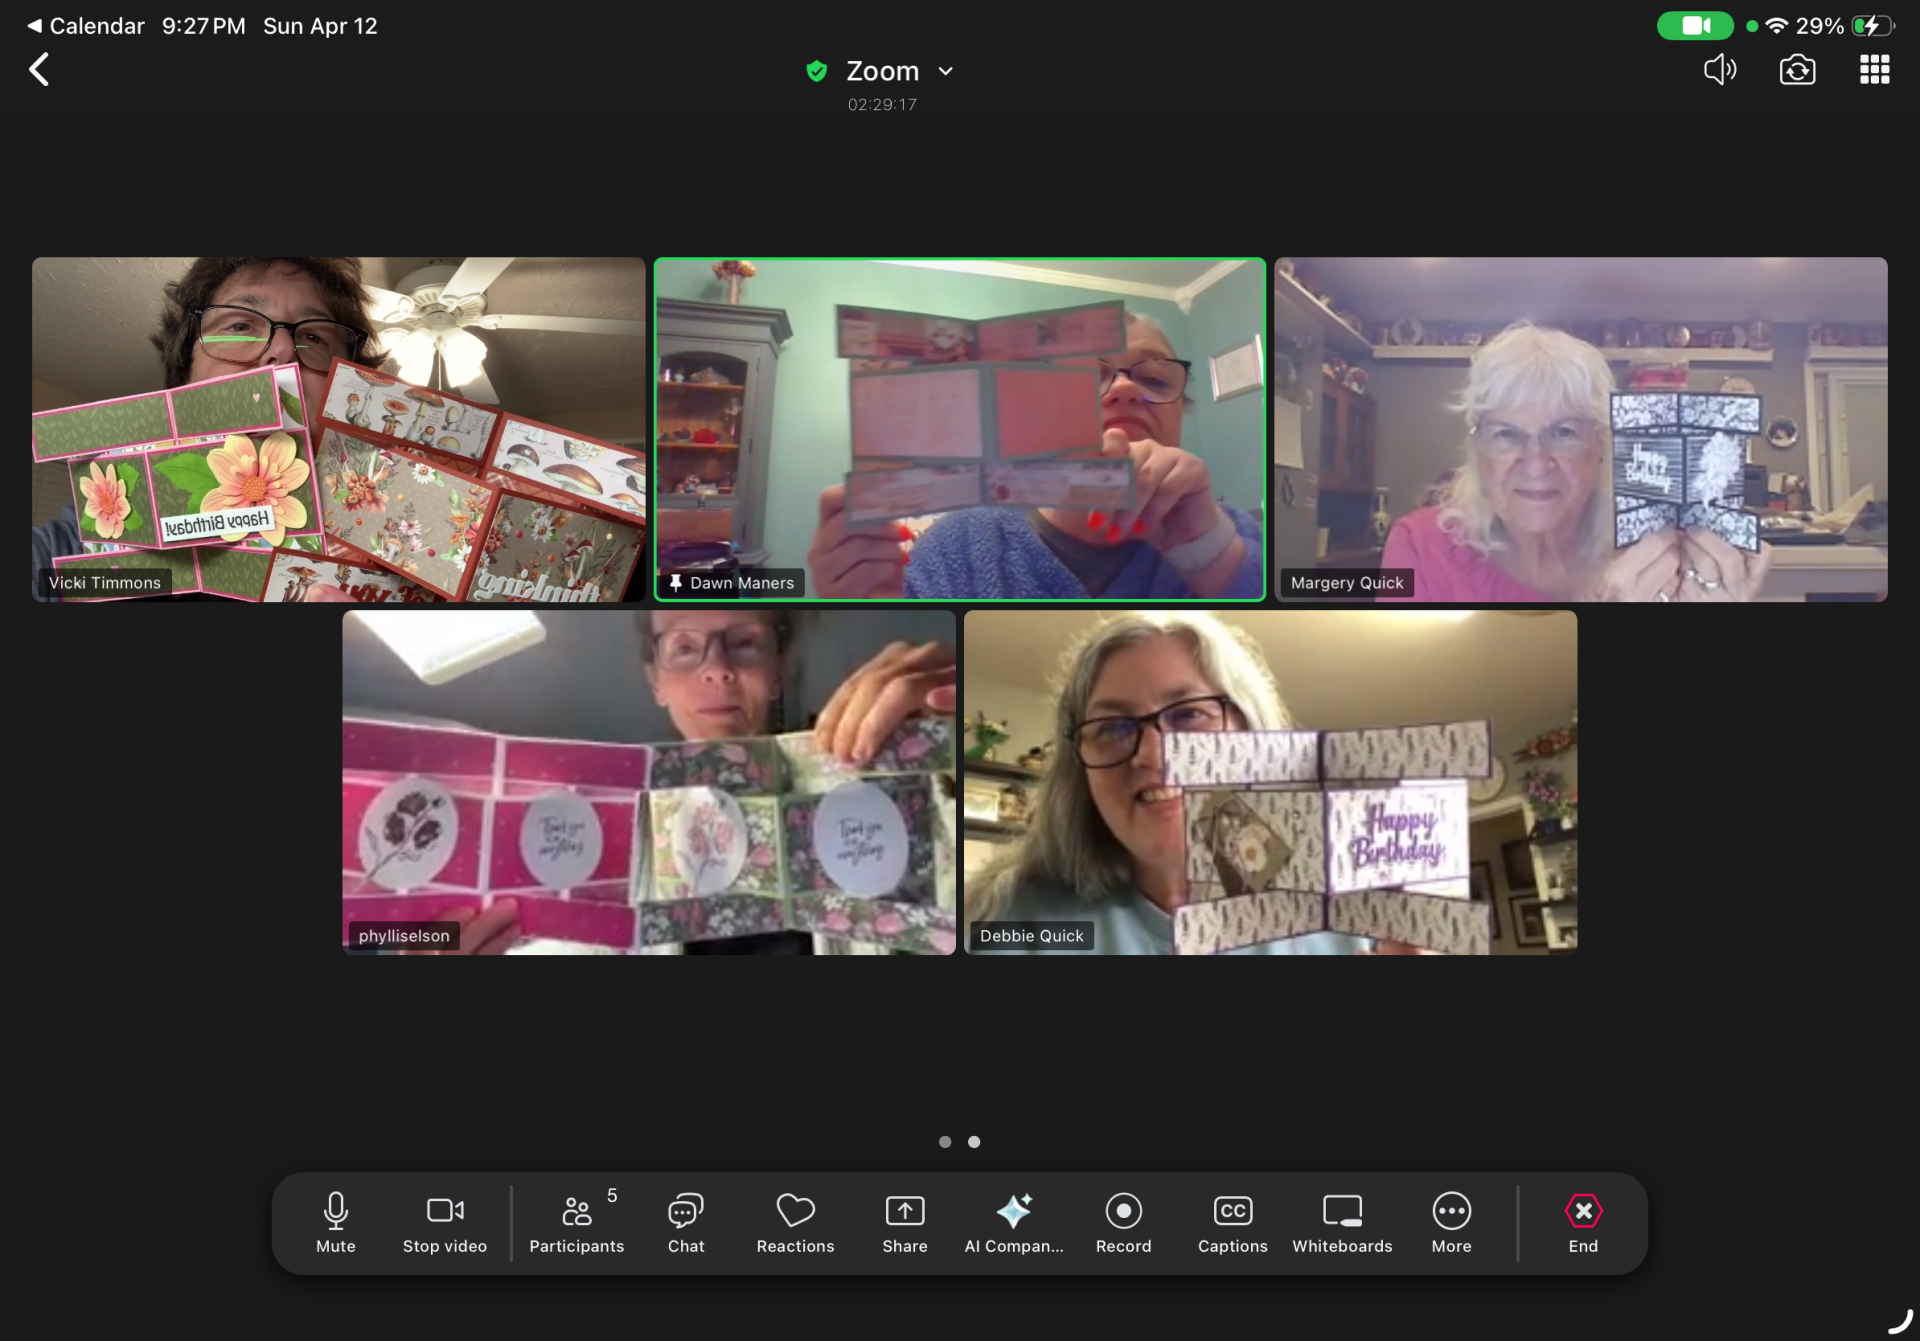
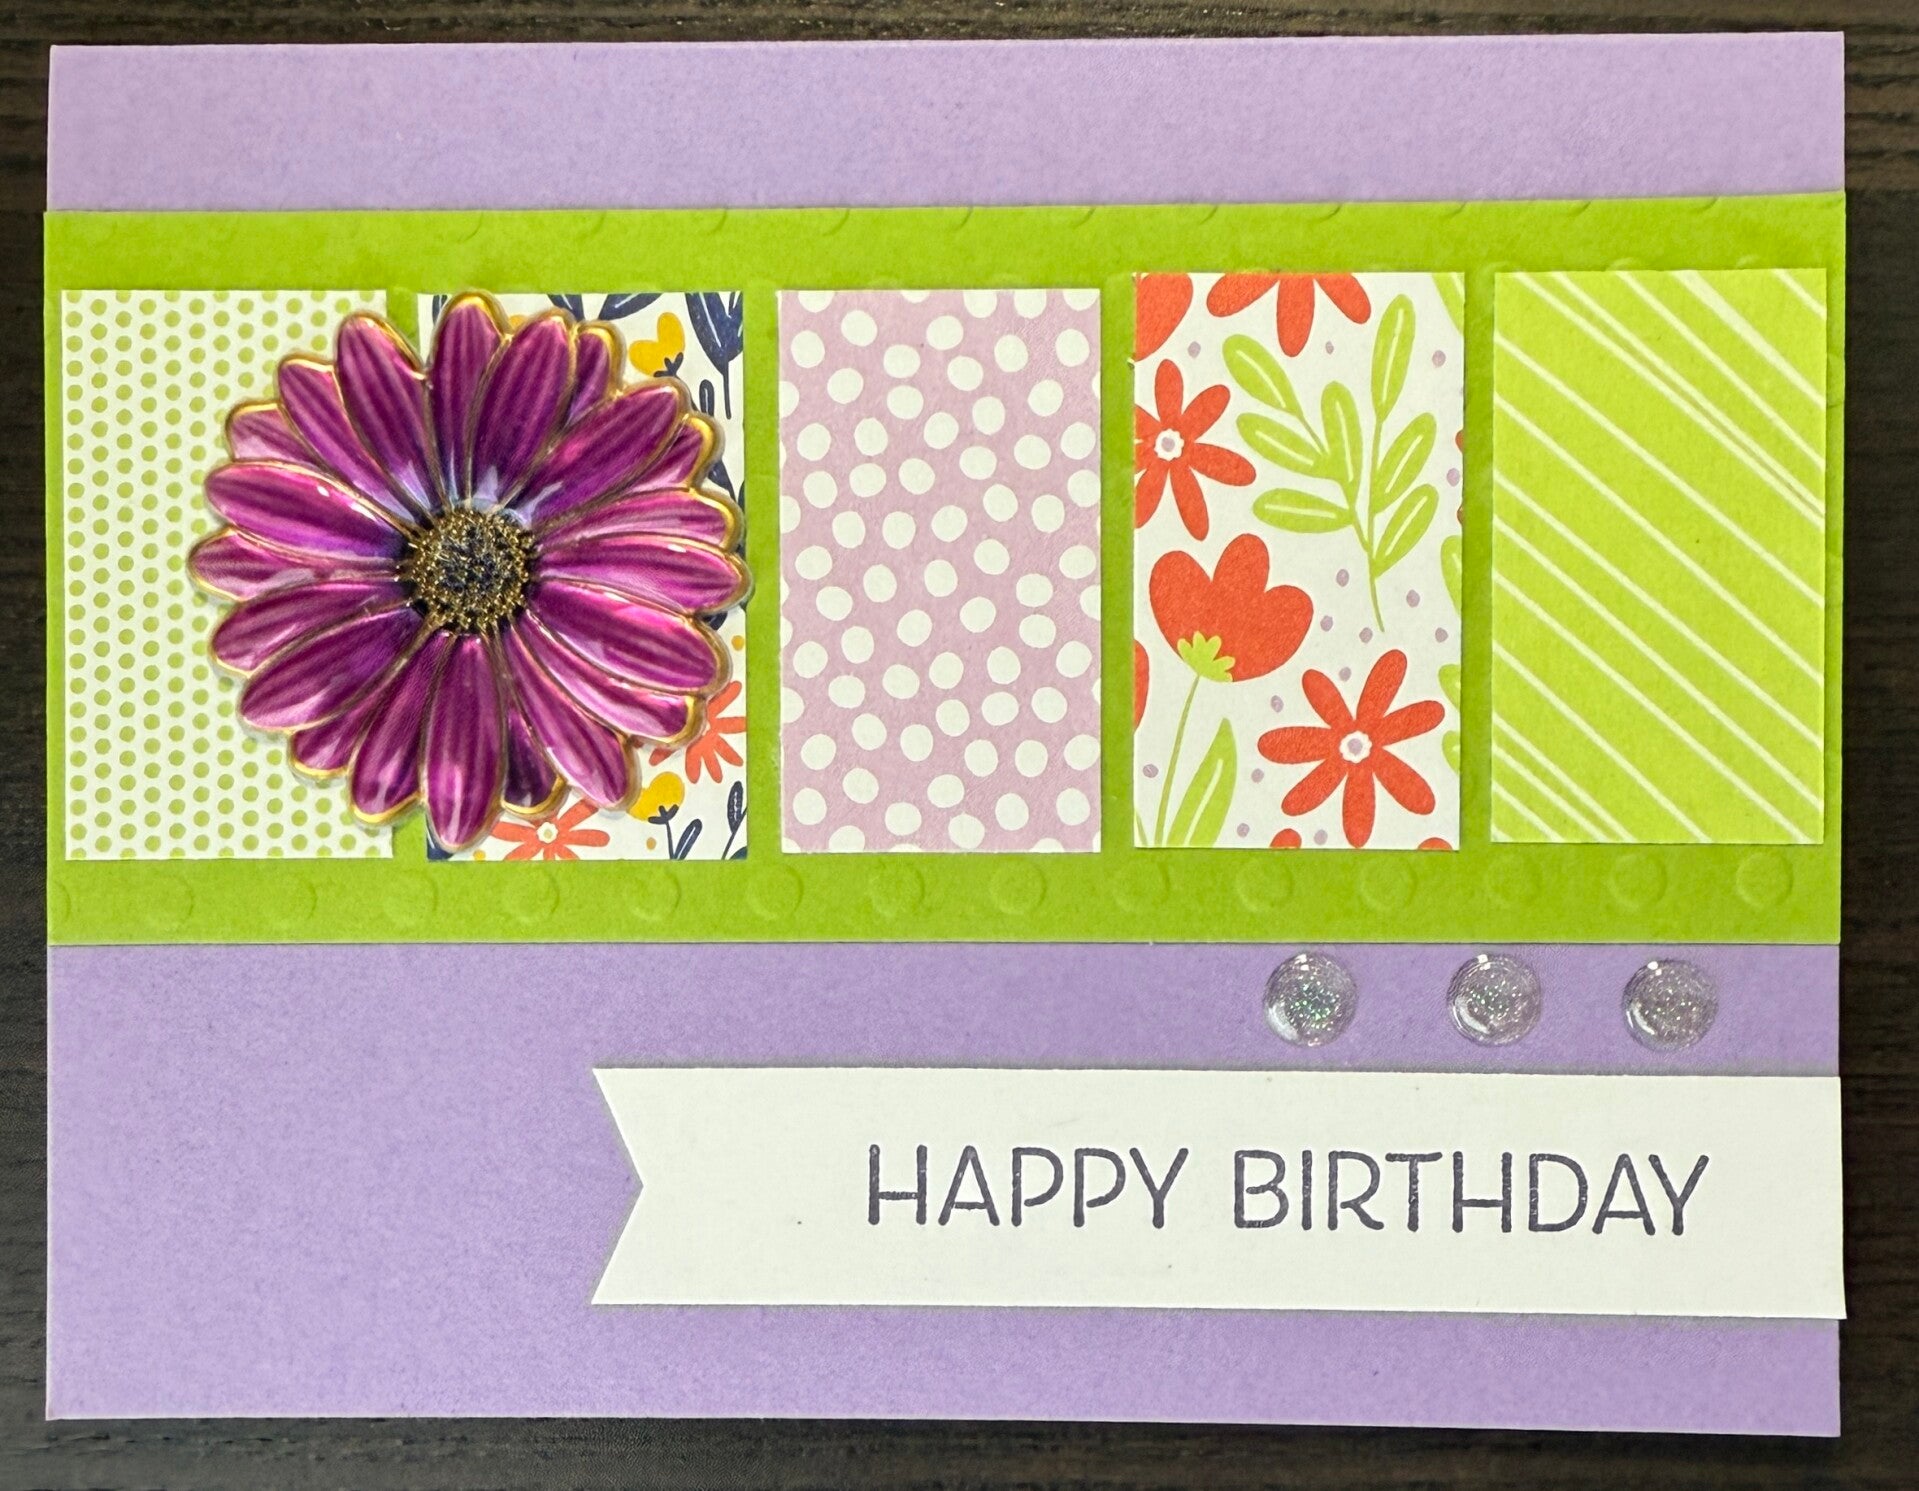
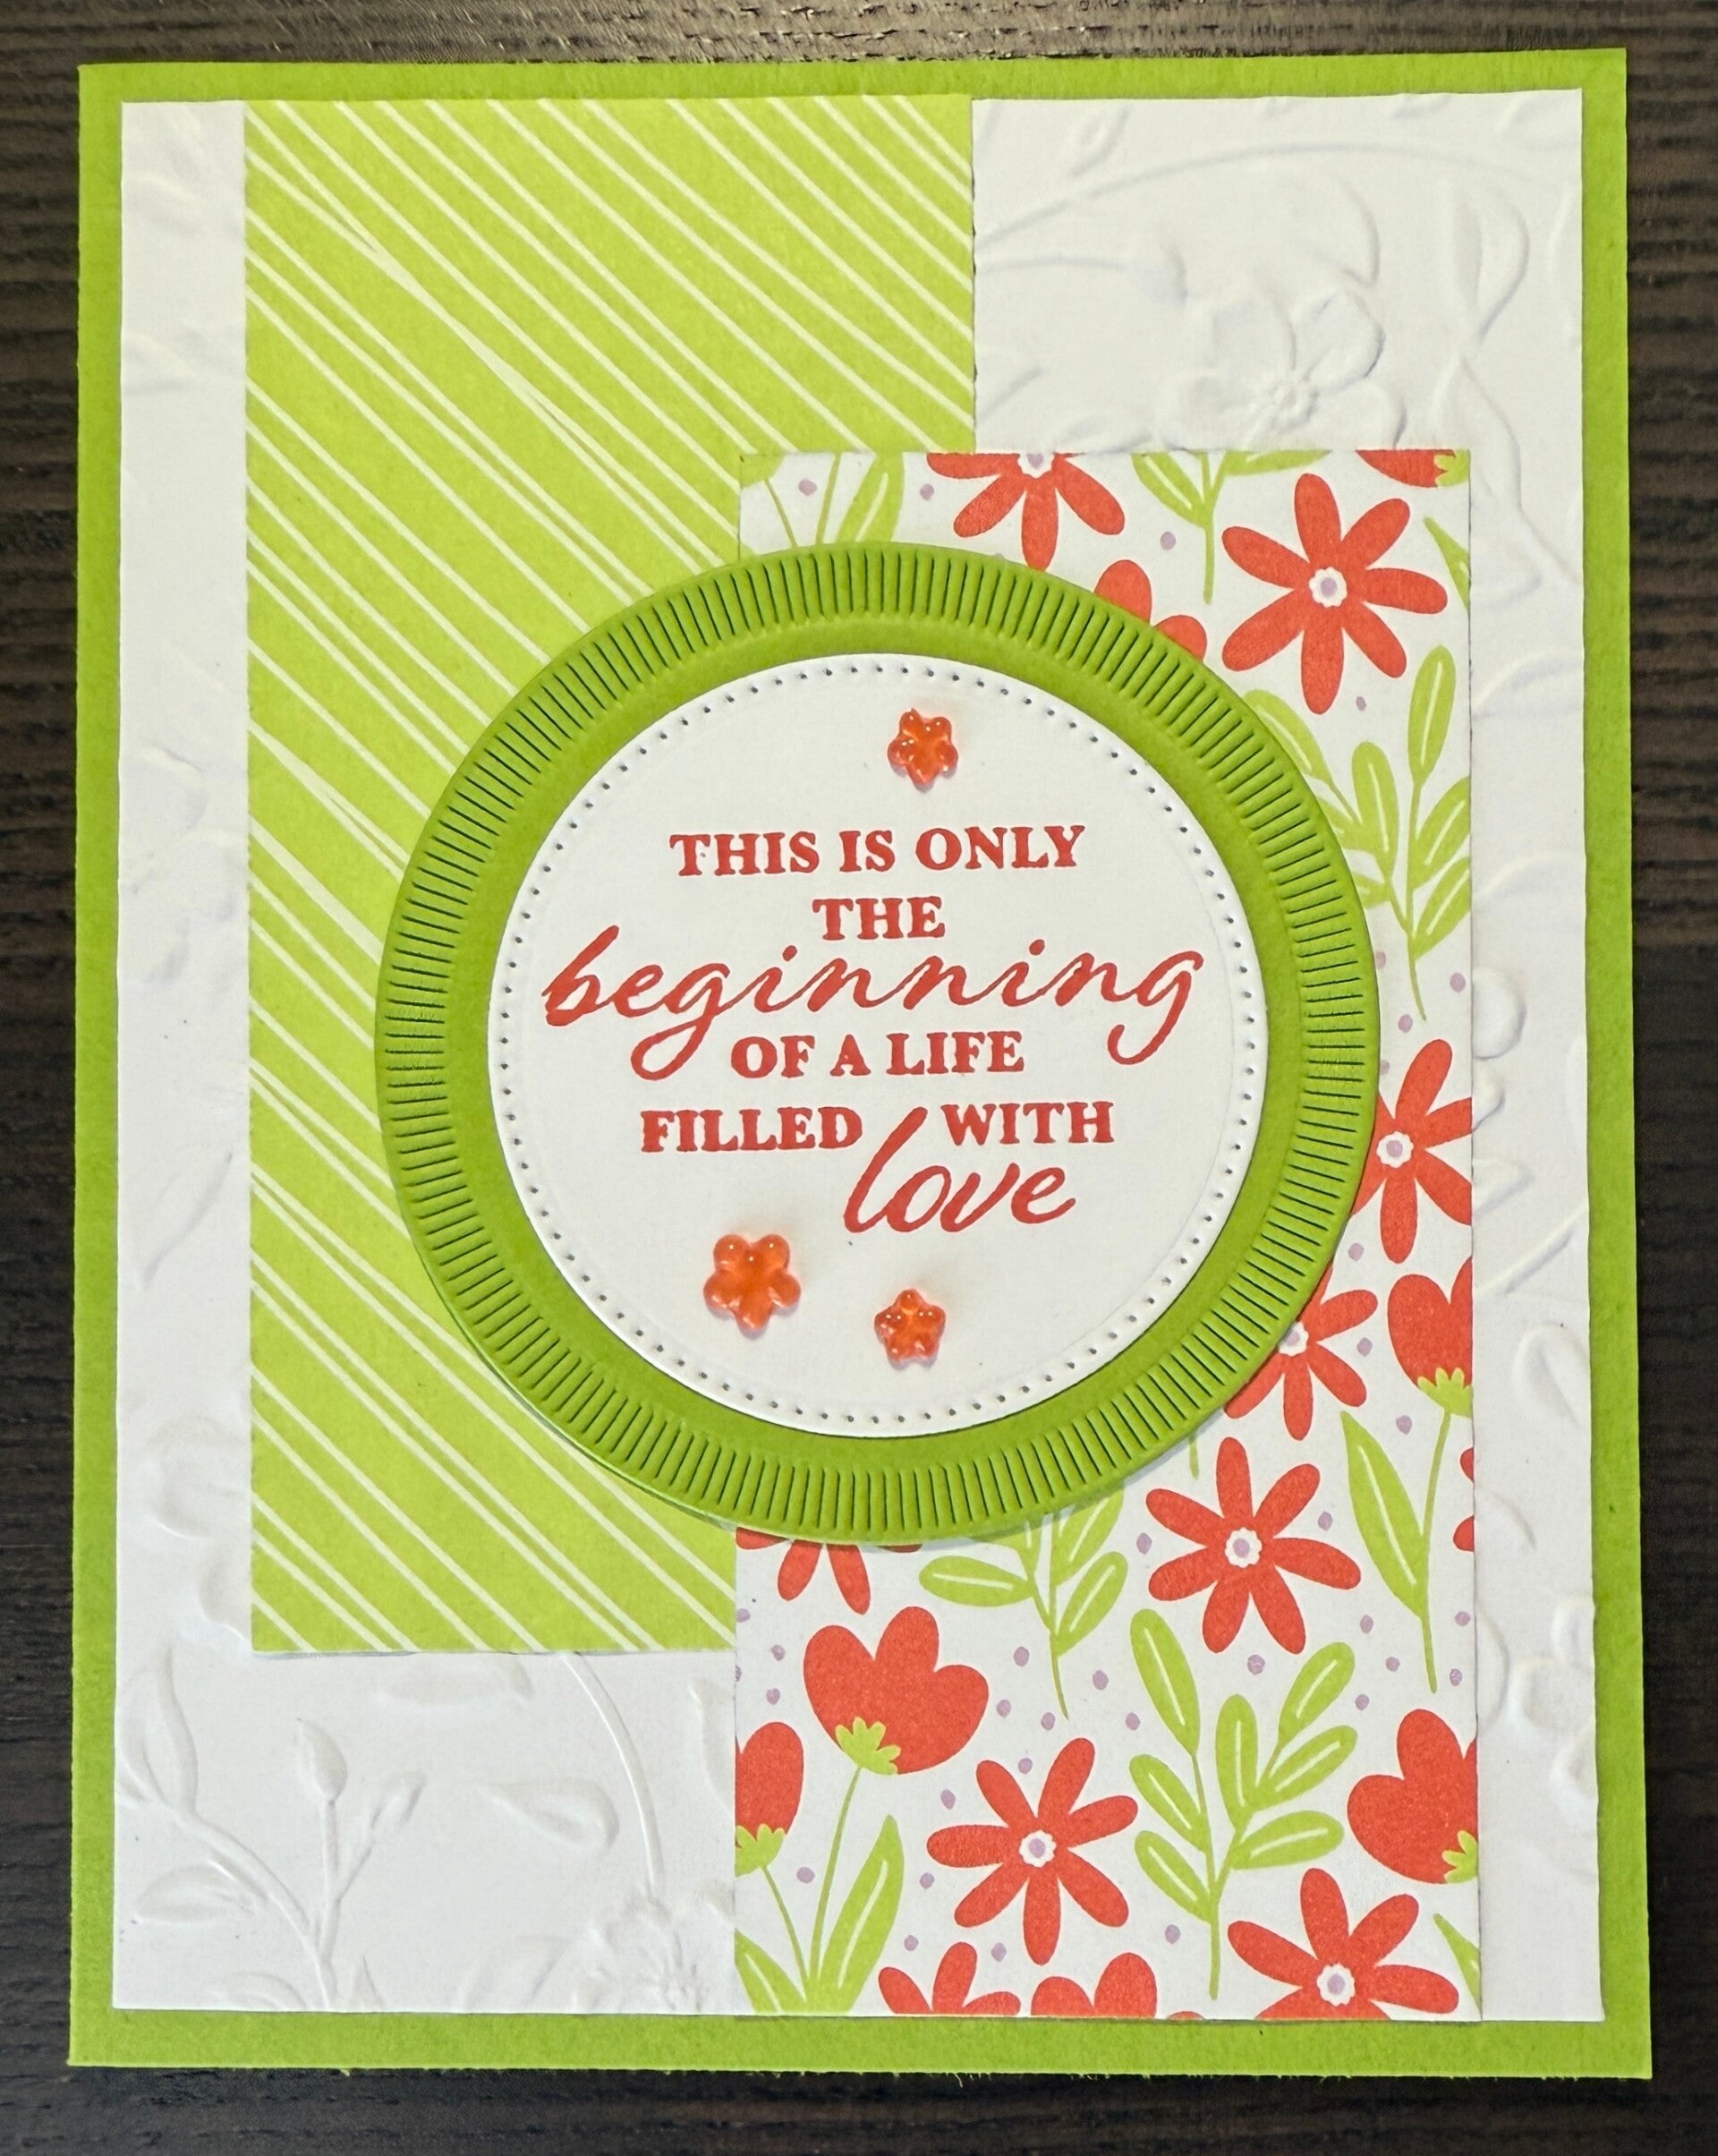
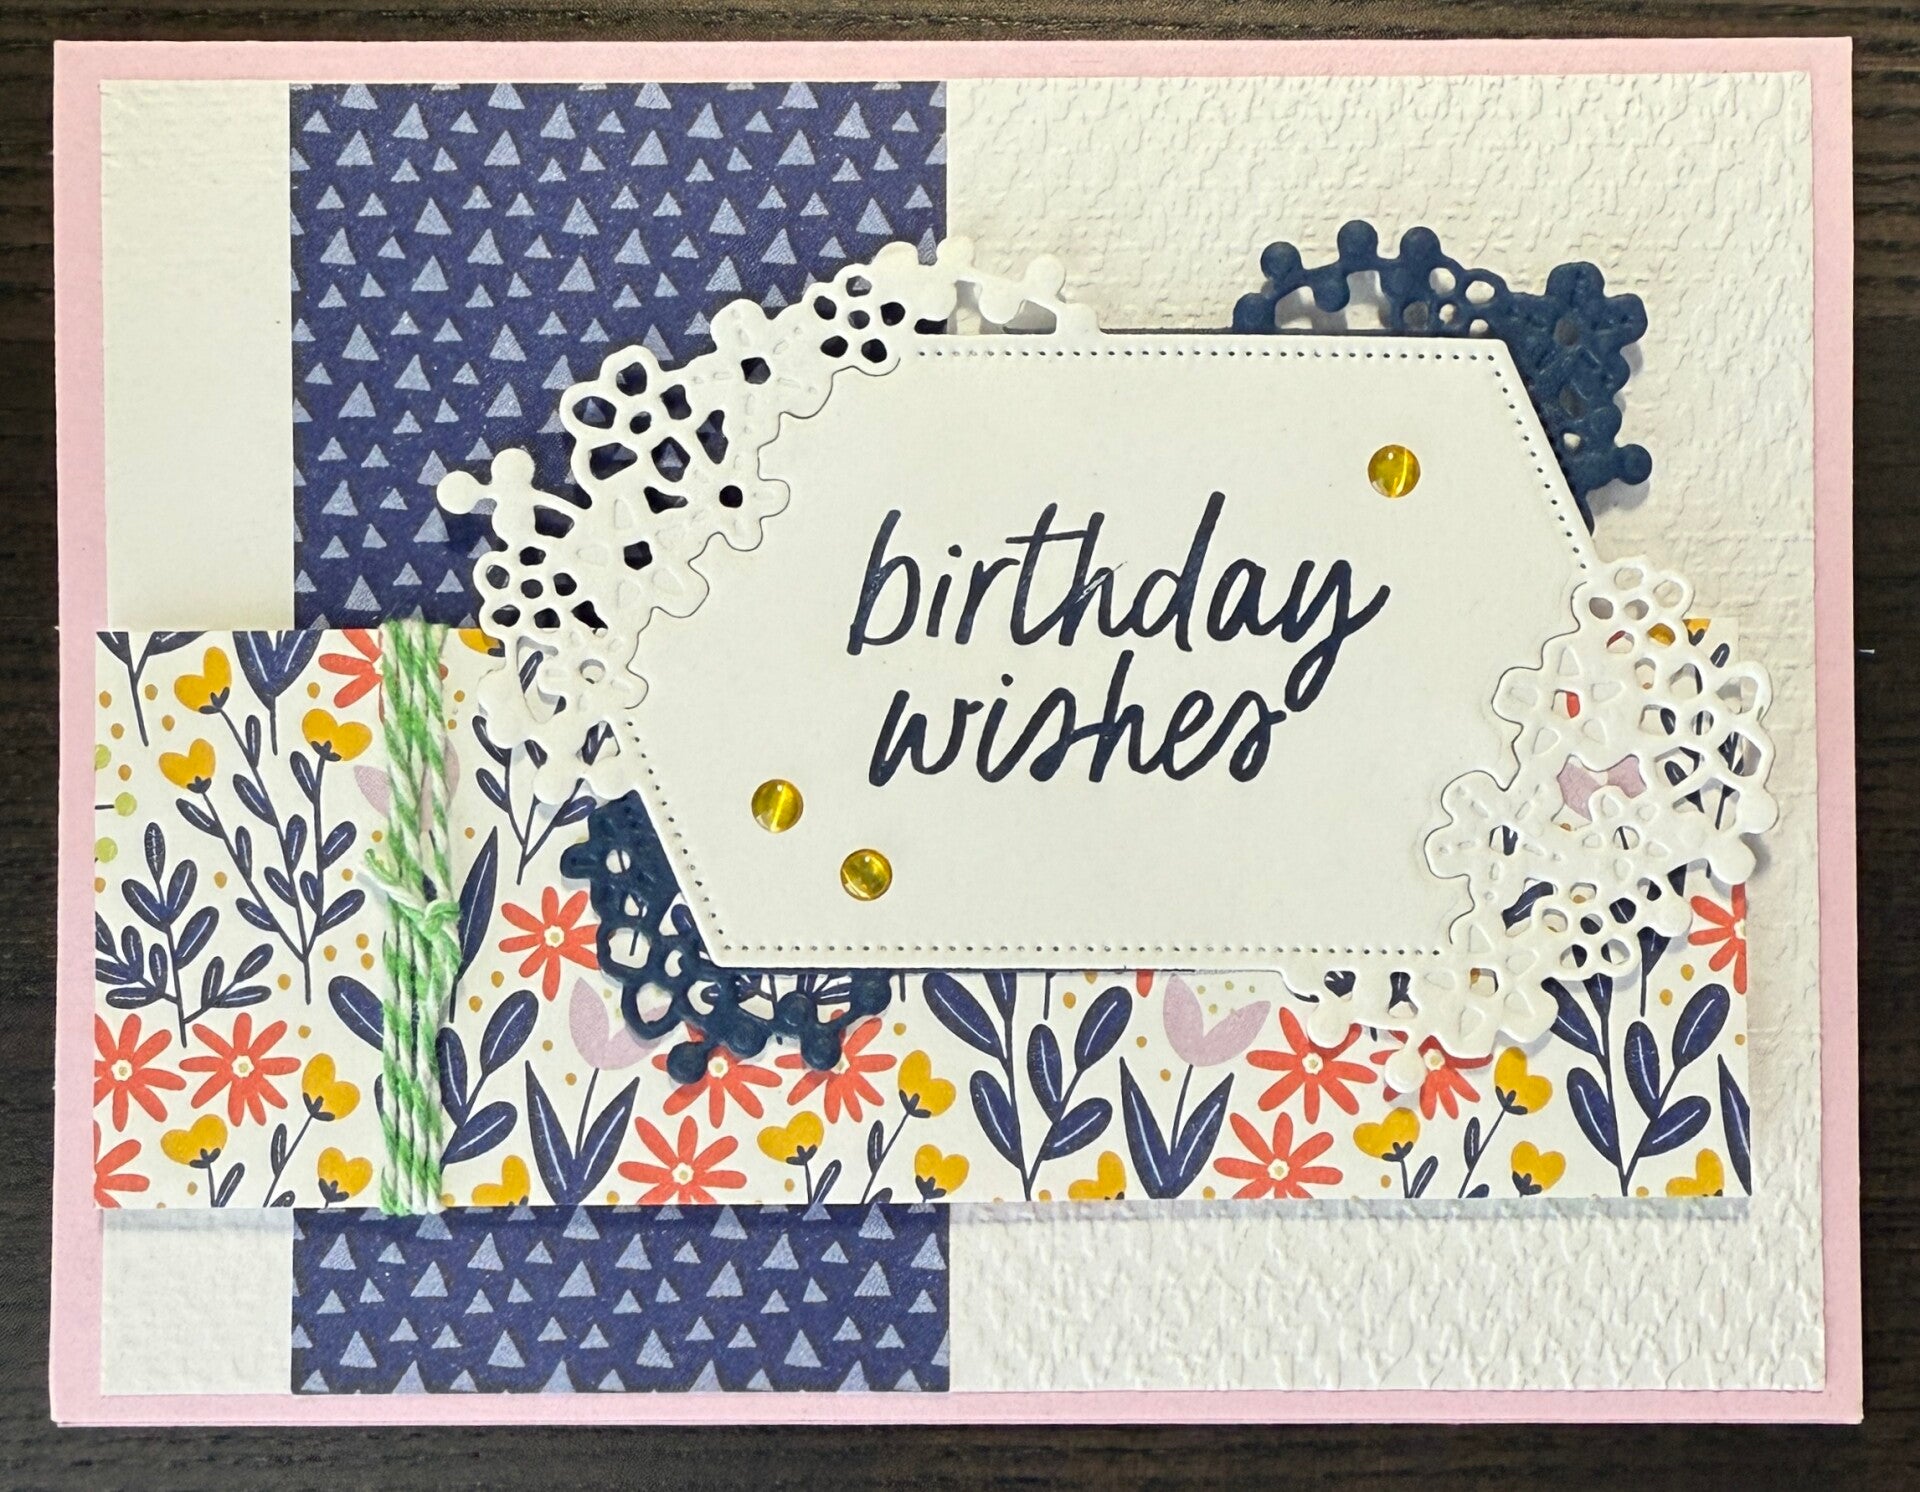
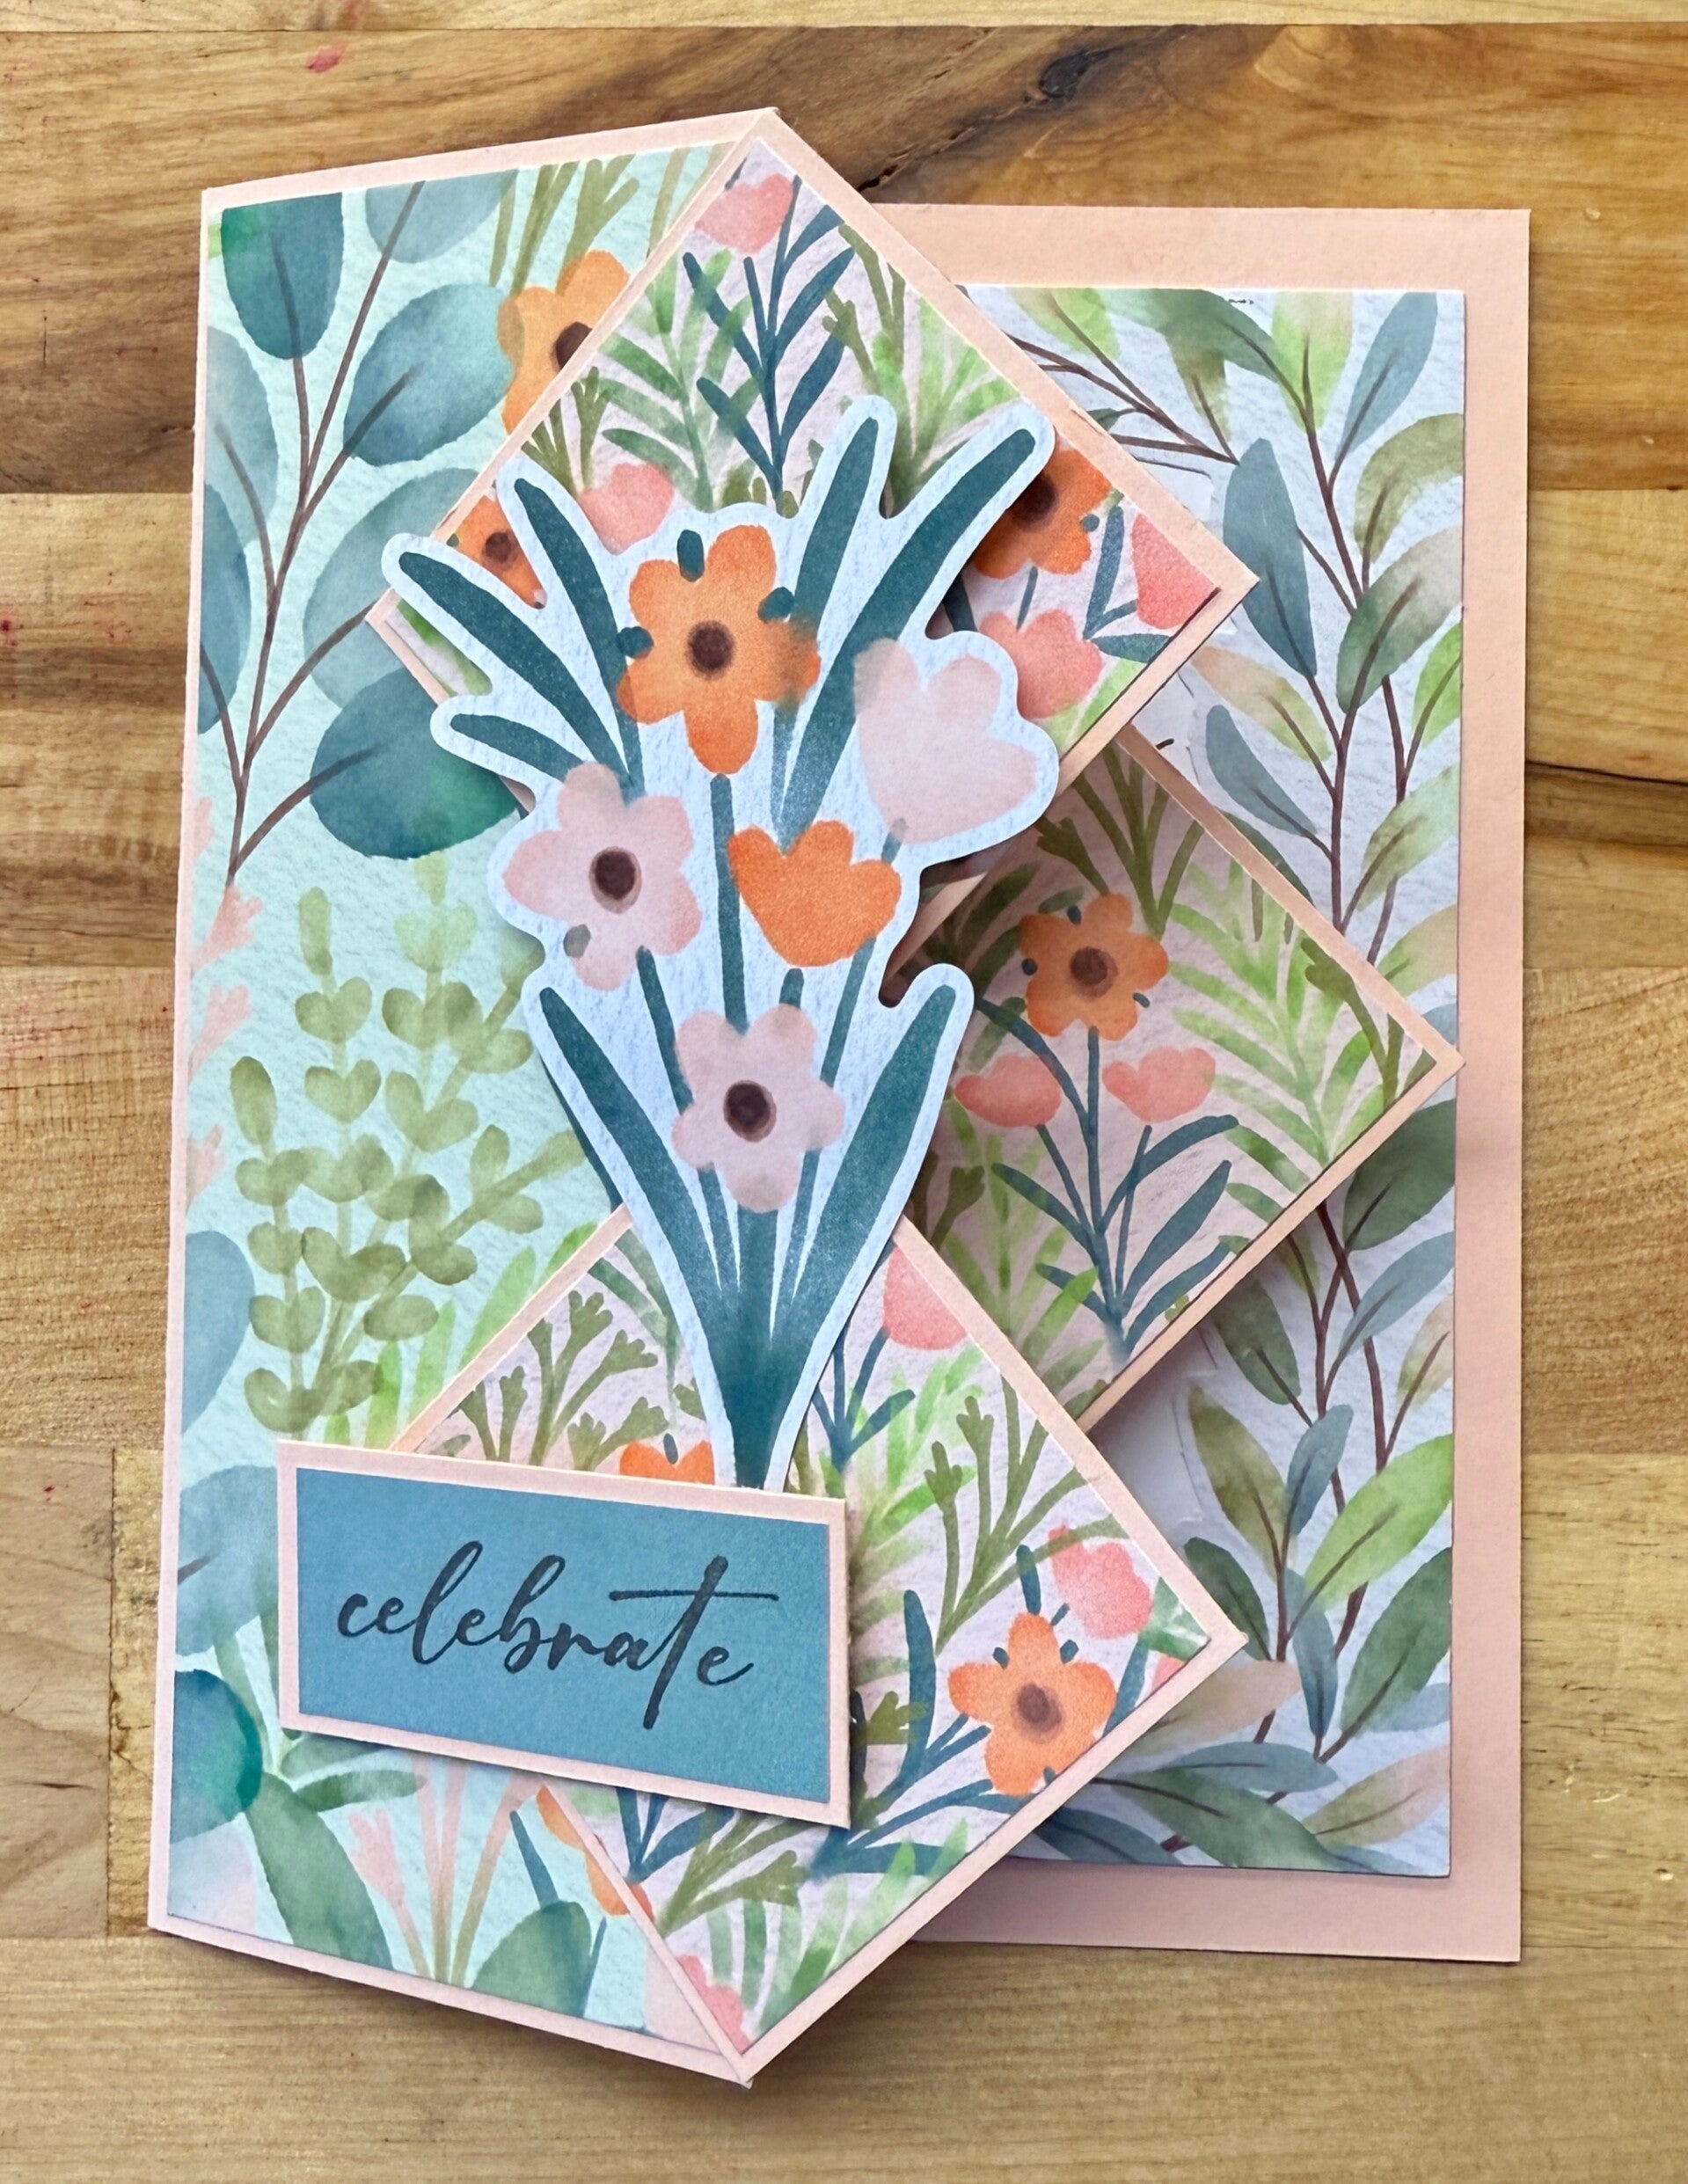
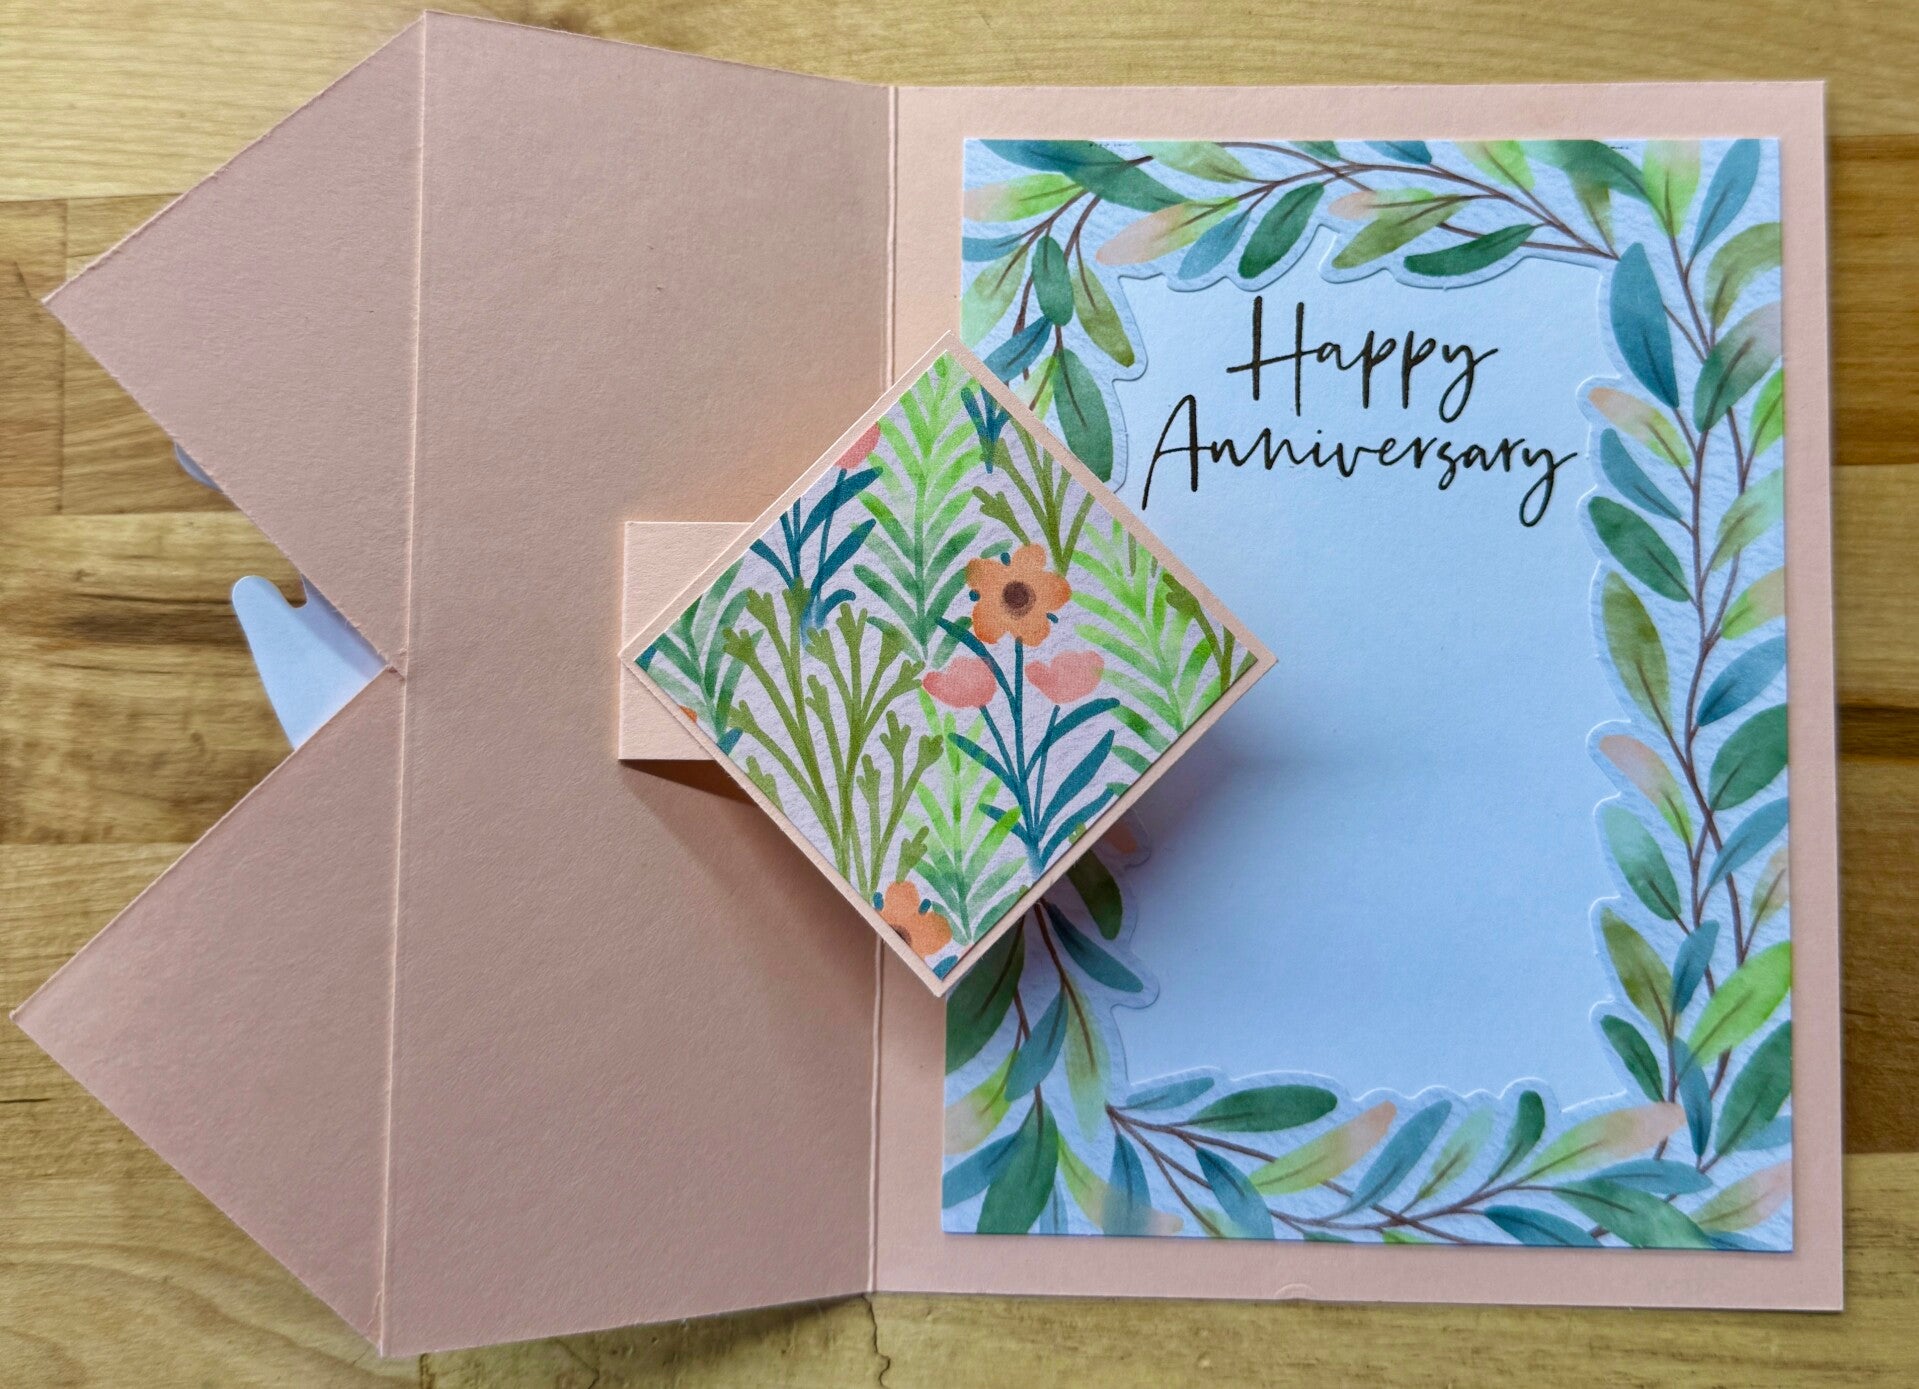
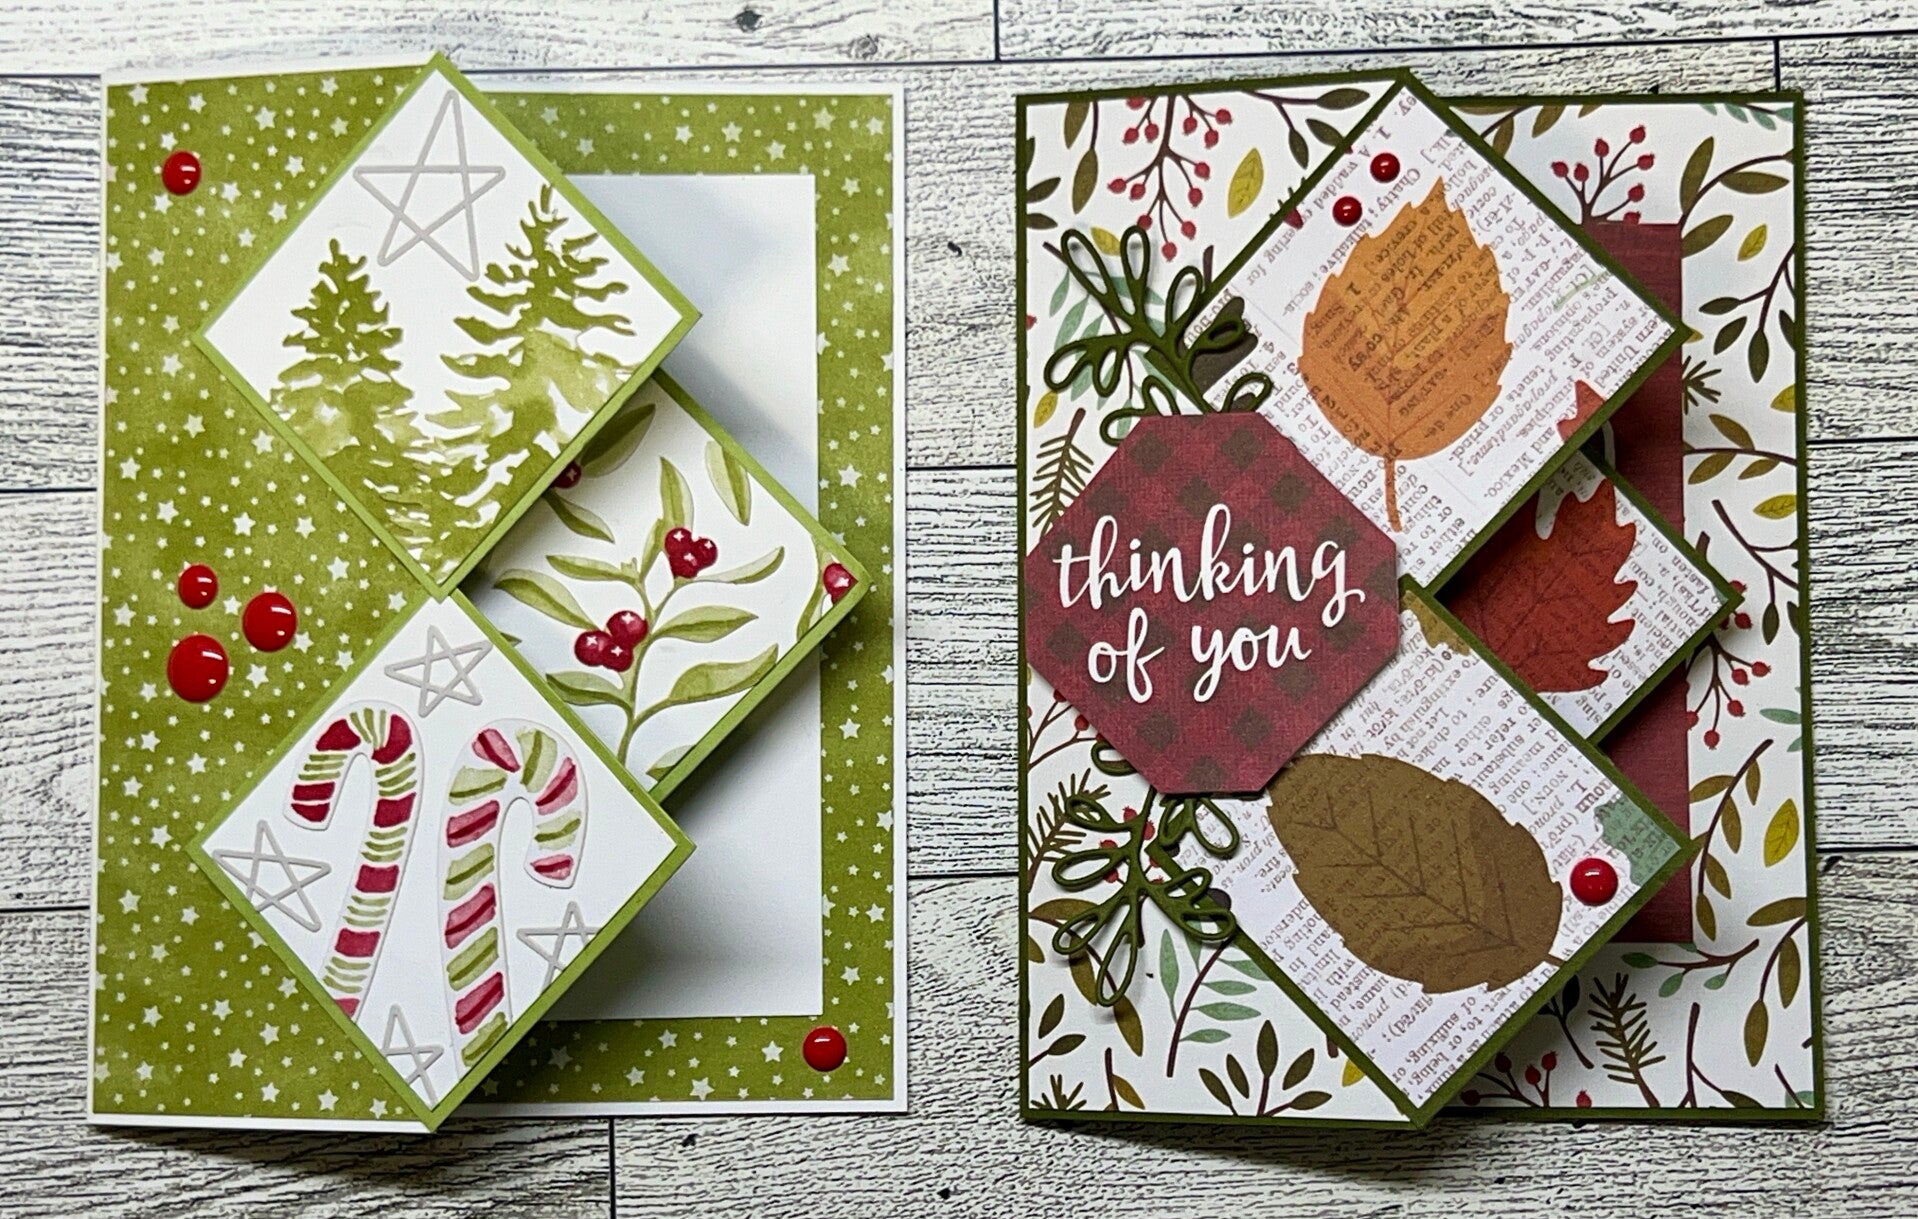
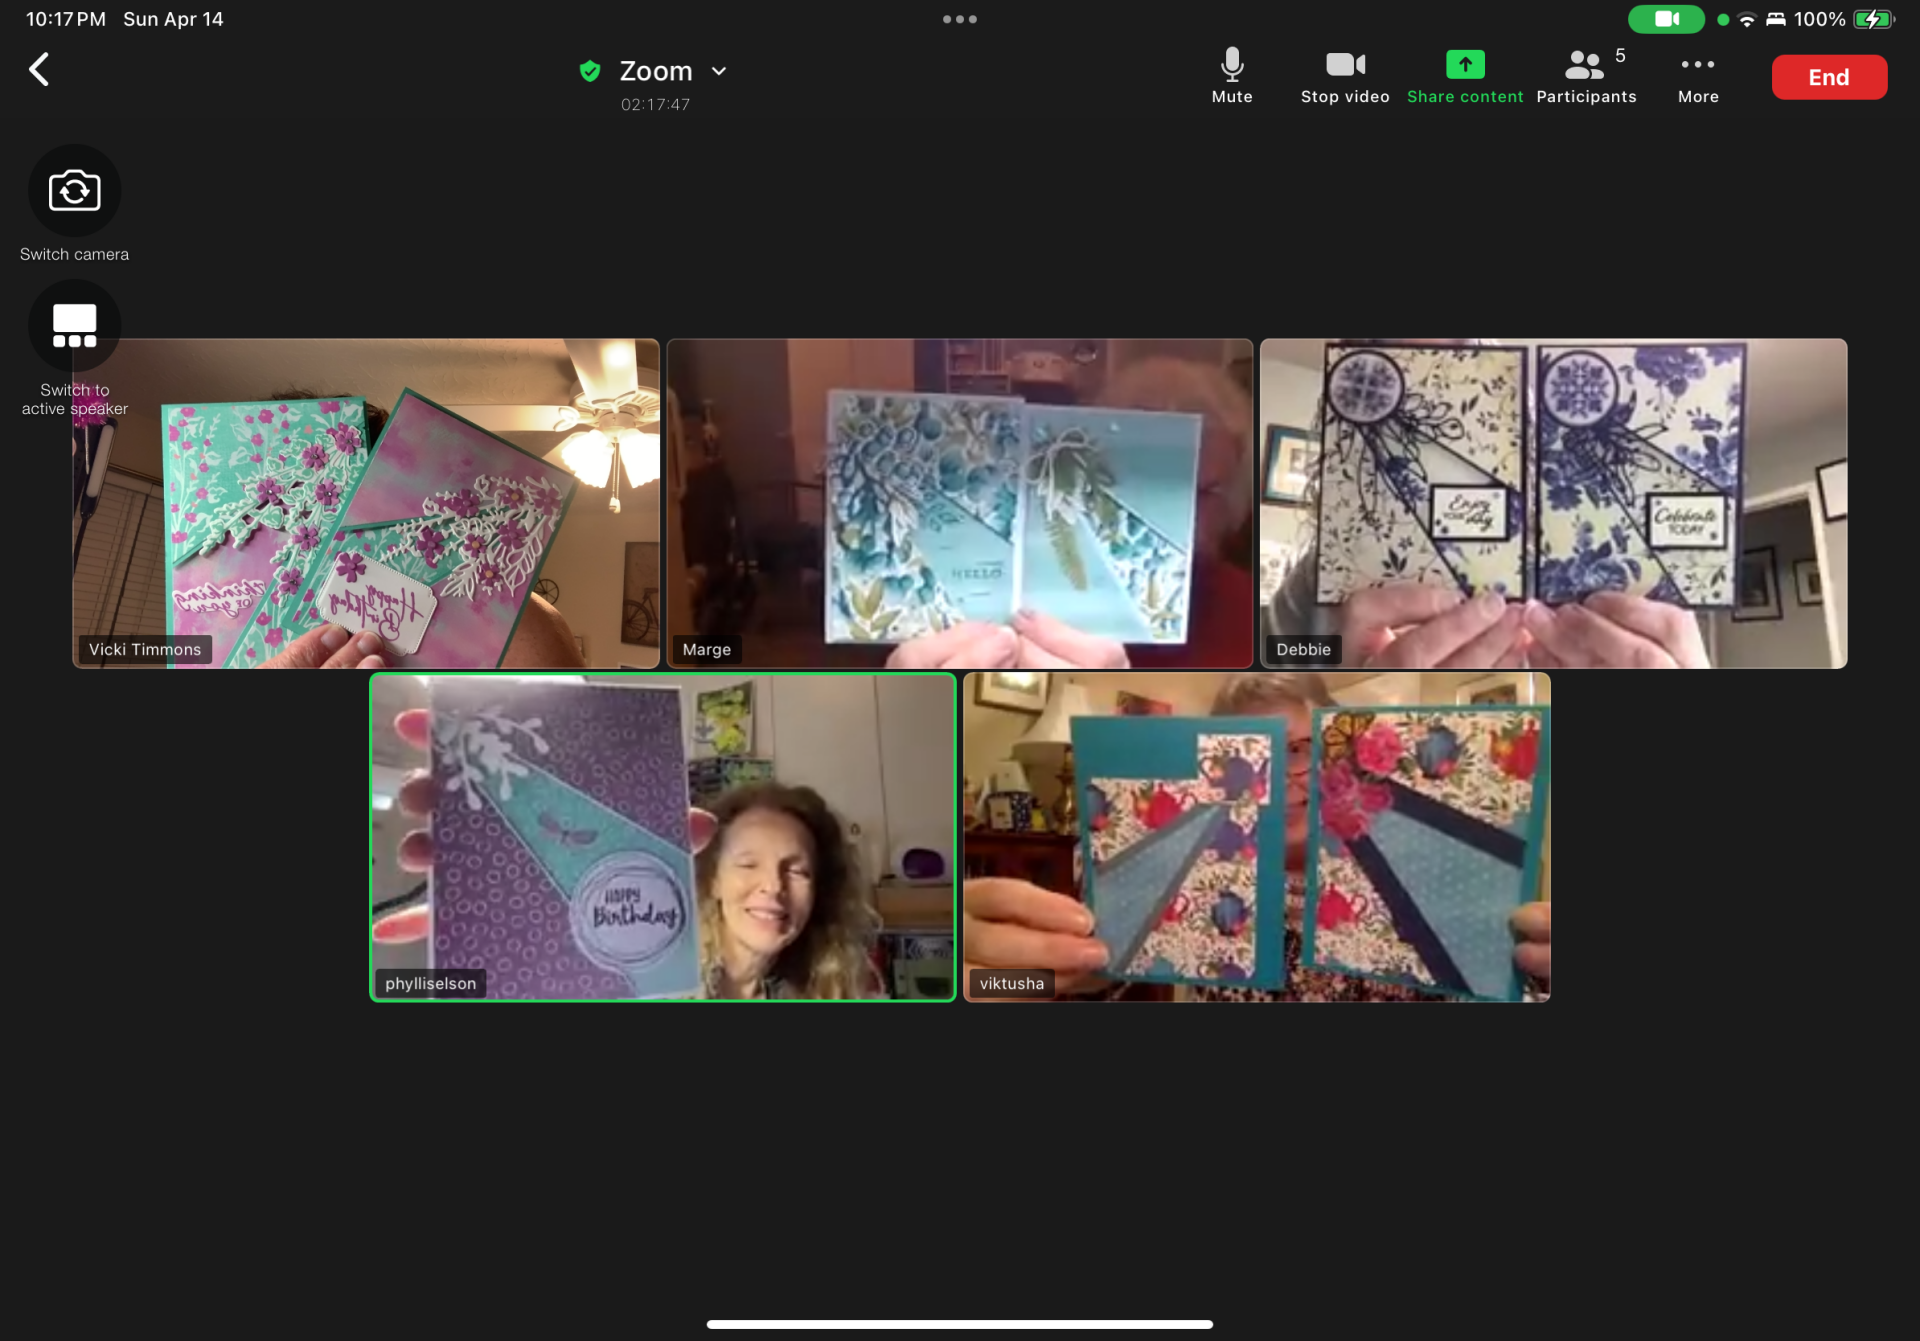
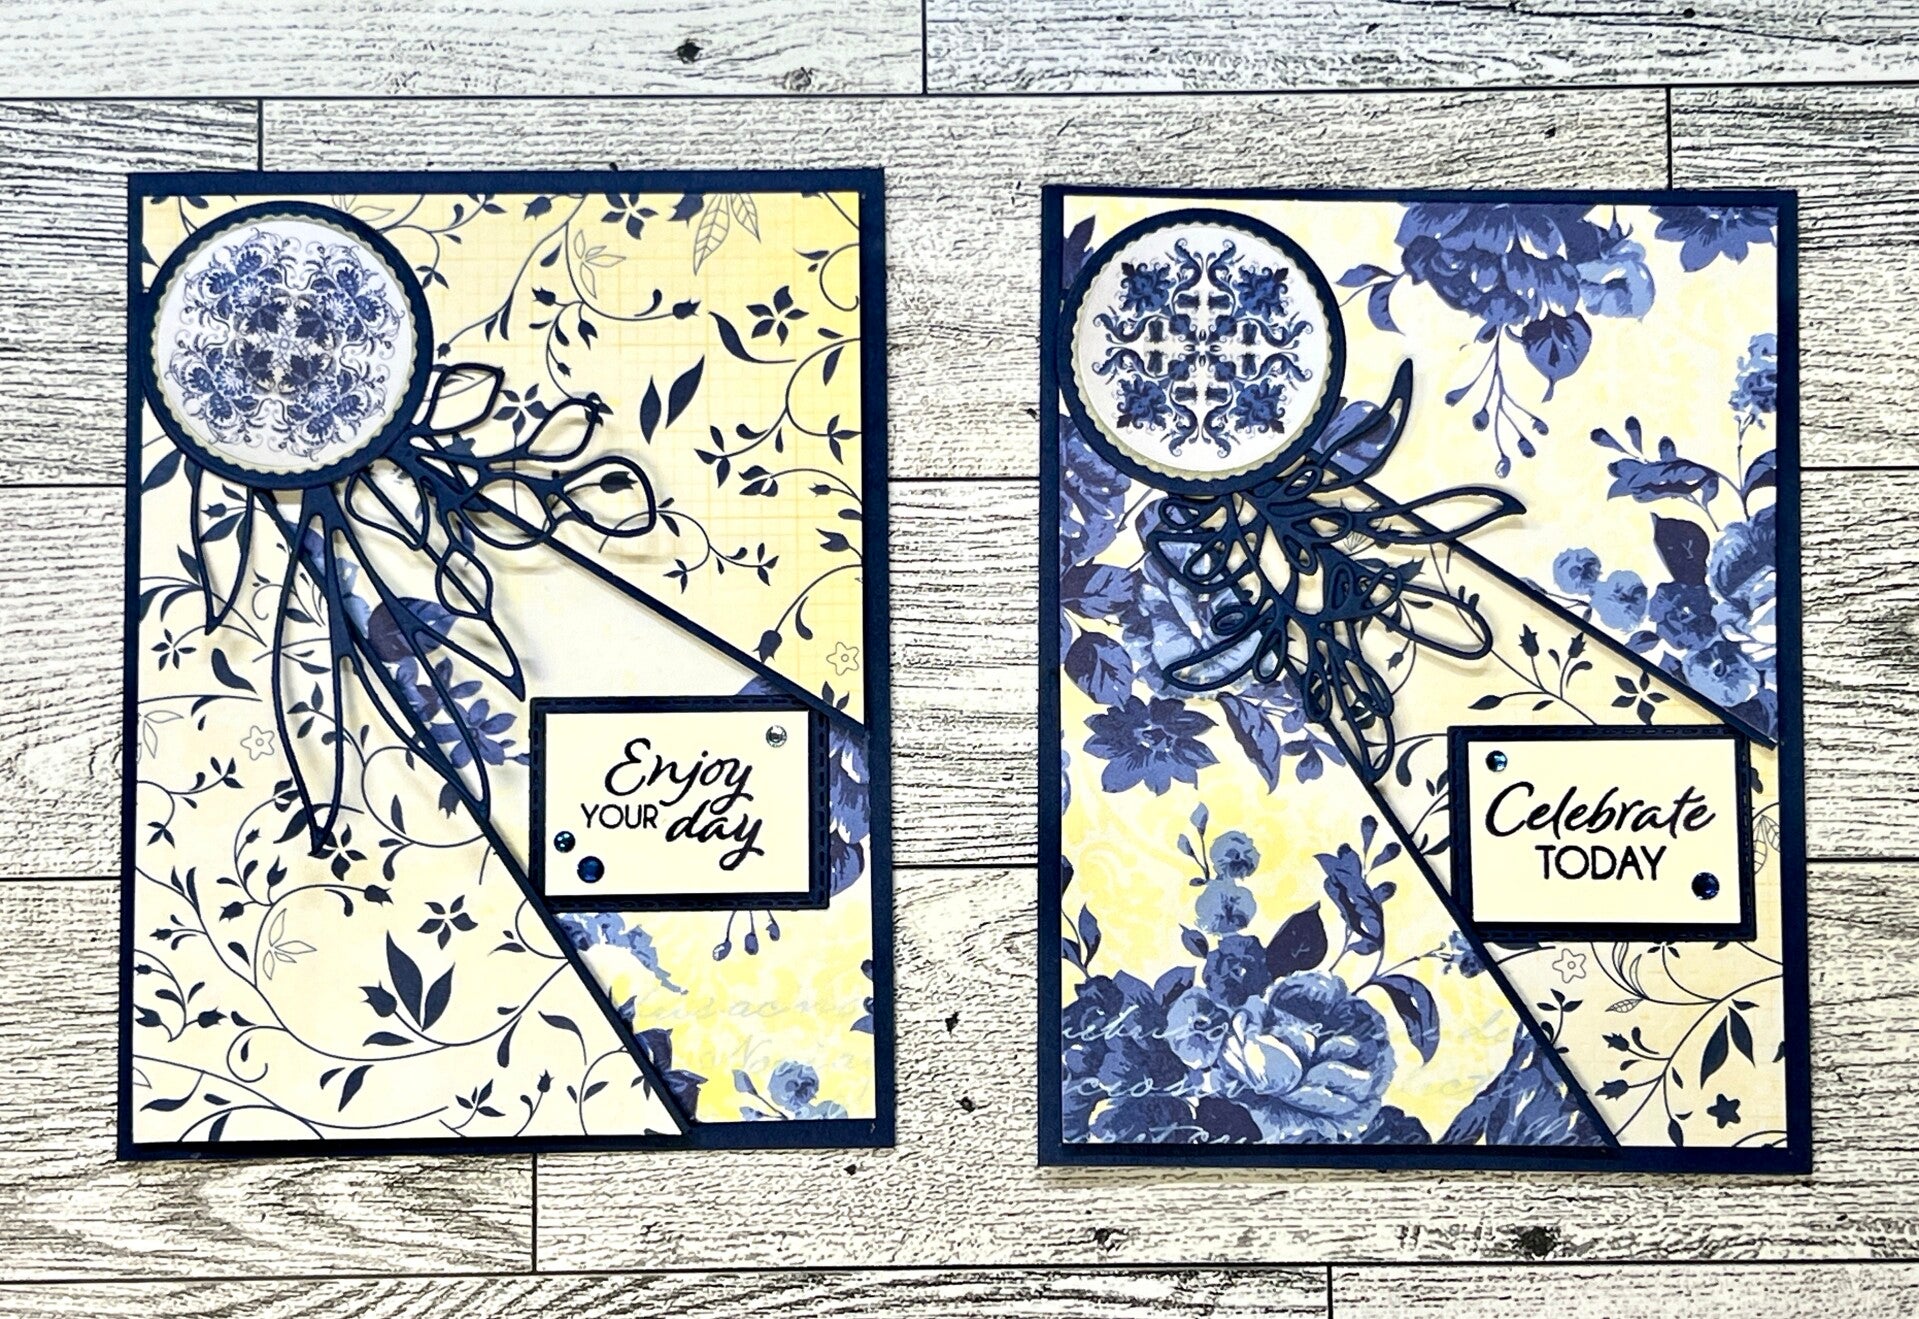
Sunday April 12, 2026 - Tonight's project was a Fun Fold Panel Card inspired by Lisa Curcio. The first card I made I applied all layers as shown in her video. It was REALLY thick, like chipboard thick! For my second card I eliminated the mat layers and I actually liked the card much better. The directions below eliminate the extra mats. Here is a link to Lisa's tutorial.
Cutting Directions
Card Stock:
- Colored Card Base - 5 1/2" x 8 1/2", scored at 2 1/8", 4 1/4", 6 3/8" (for the last score, sometimes it is just easier to flip the card around and score at 2 1/8" on the other side)
- Colored Center Panel - 2 1/2" x 8 1/2", score at 4 1/4"
- Colored Front Flaps - (cut 4) - 1 3/8" x 4 1/4"
- White Sentiment Section for Back - 1 7/8" x 5 1/4"
Designer Paper:
- Card Base Front - (cut 4) - 1 7/8" x 5 1/4"
- Card Base Back - (cut 3) - 1 7/8" x 5 1/4"
- Center Panel - (cut 2) - 2 1/4" x 4"
- Front Flaps - (cut 4) - 1 1/8" x 4"
- Back of the Flaps (this is the small section you see when the card is closed) - (cut 4) - 1 1/8" x 1 7/8"
Additional:
* Embellishments to decorate center panel
* Notes: Adhere all designer paper (except tiny pieces for the back of the flaps) before assembling. The top and bottom flaps on the front align with the top and the bottom of the card, and are adhered only to the panel closest to the middle. The Center Panel is centered between the top and bottom flaps (there will be a slight gap) and is adhered just to the outside panels,
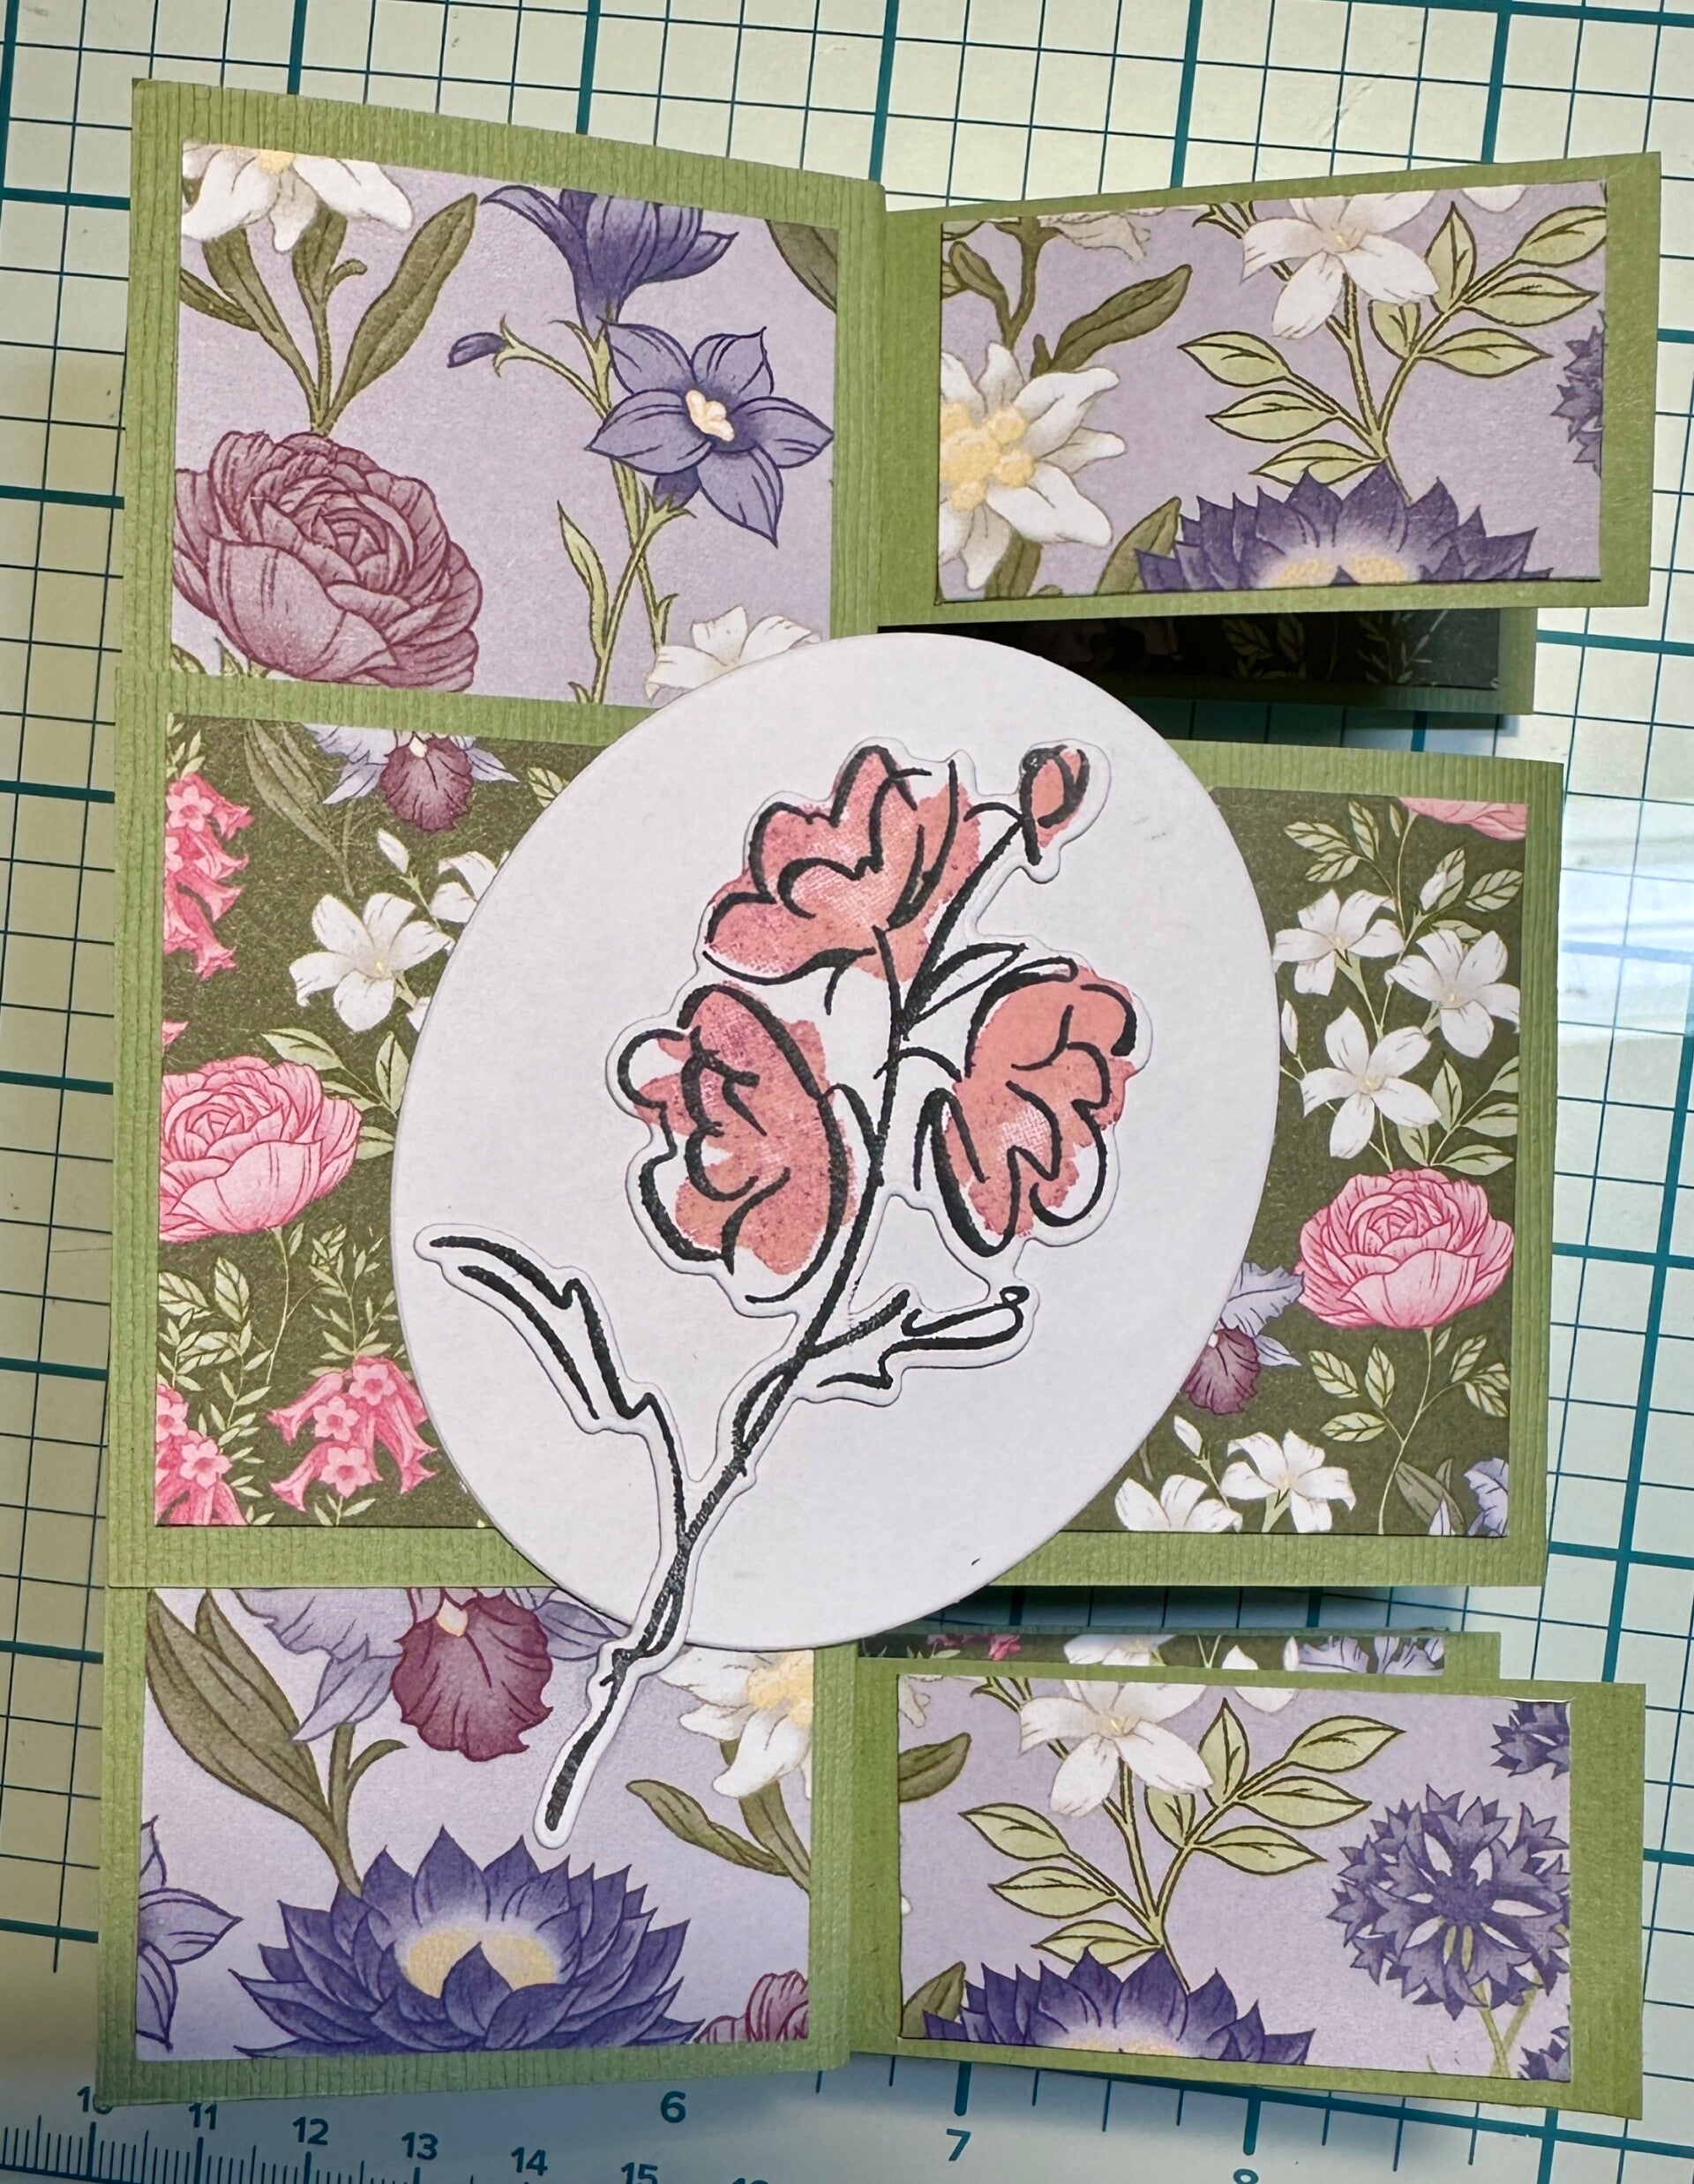


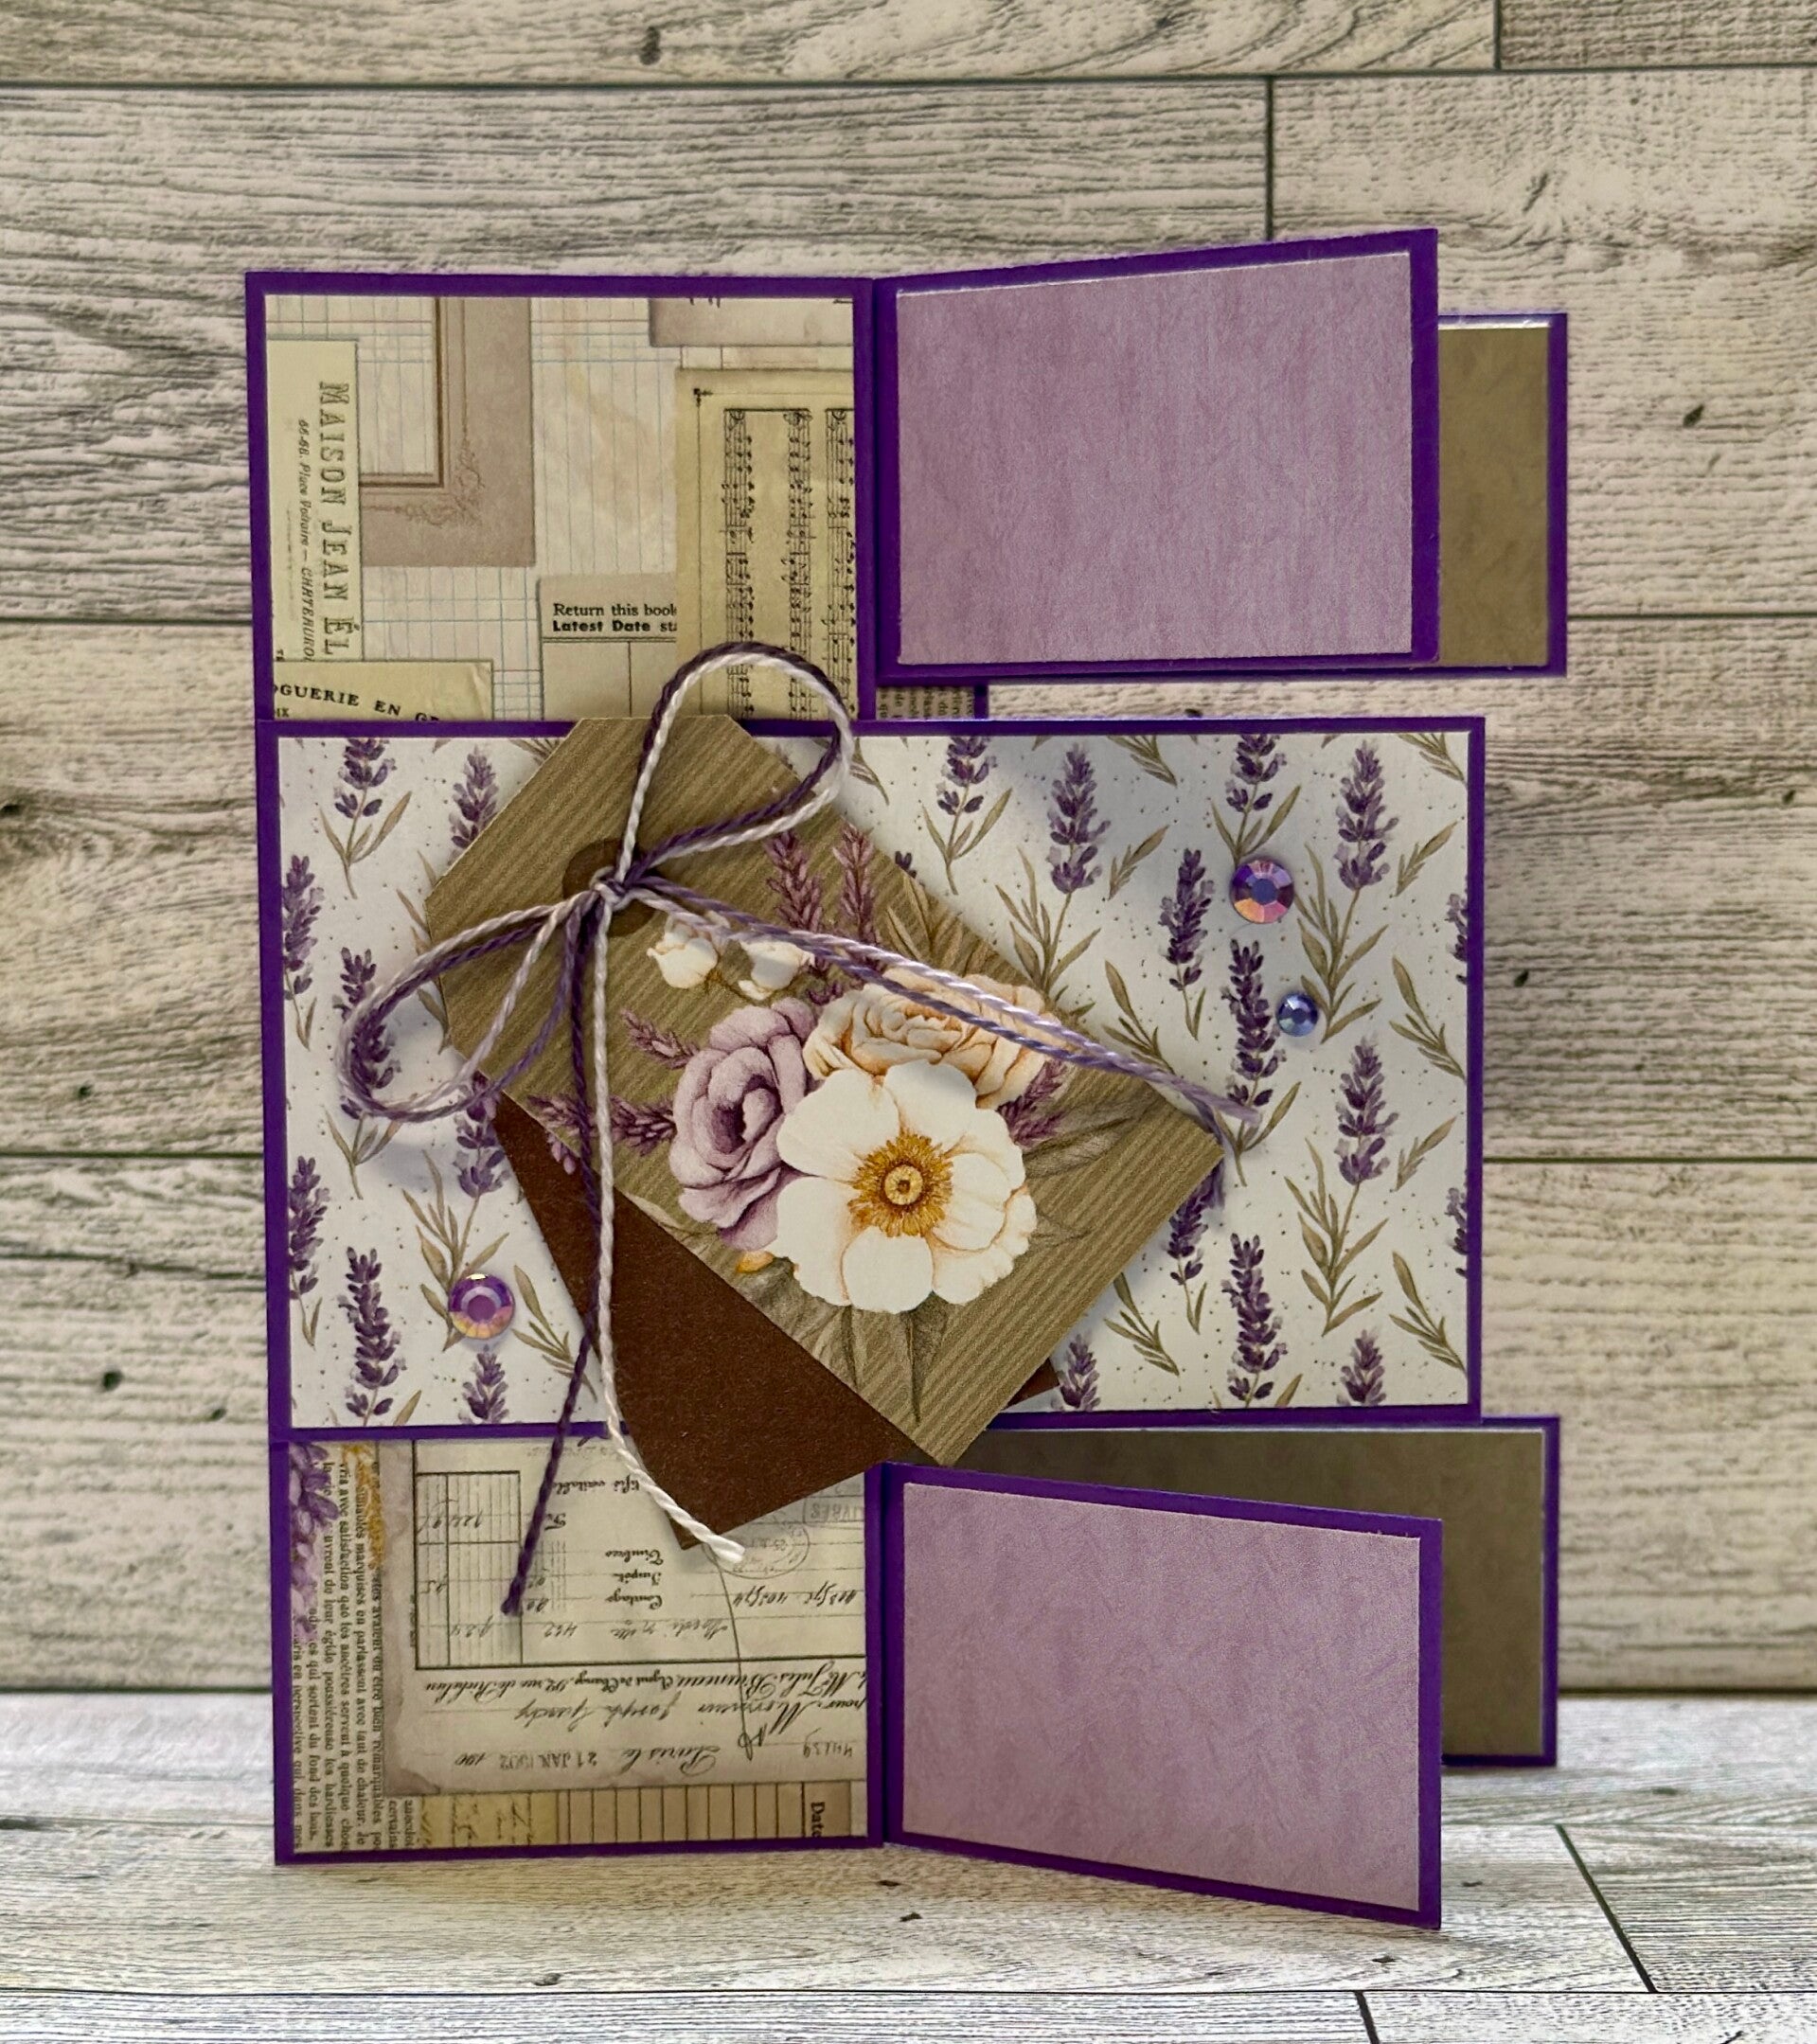
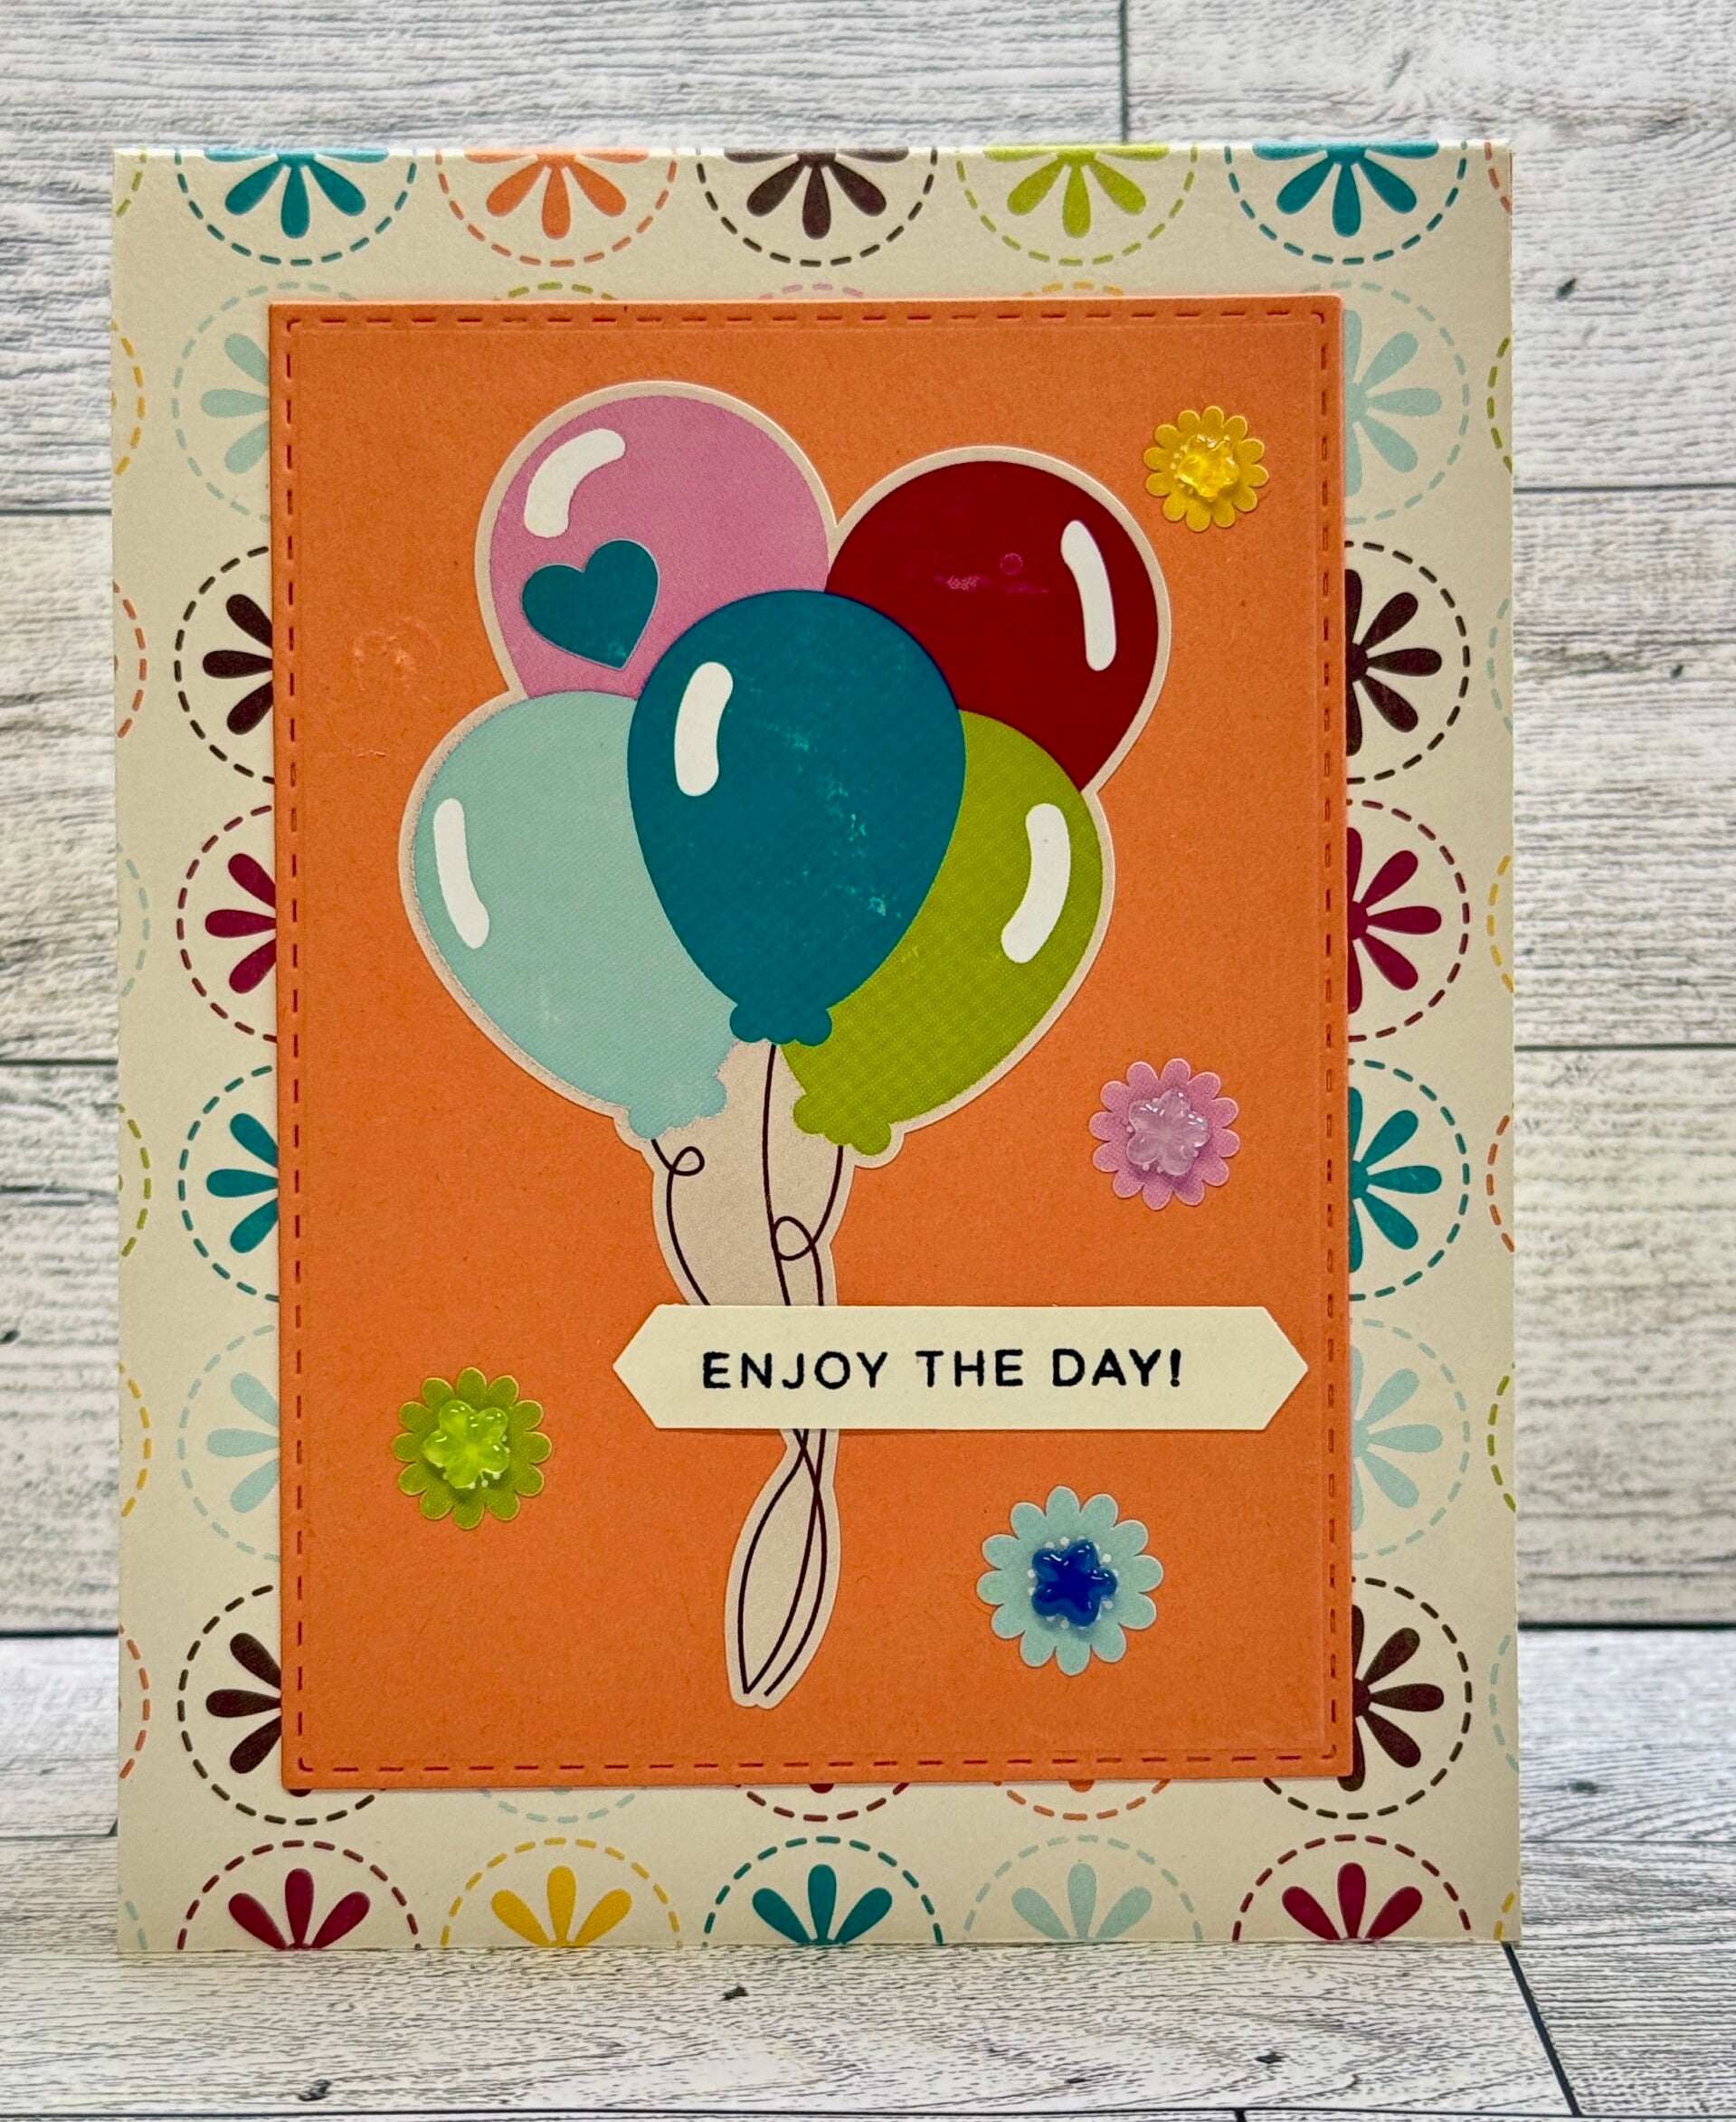
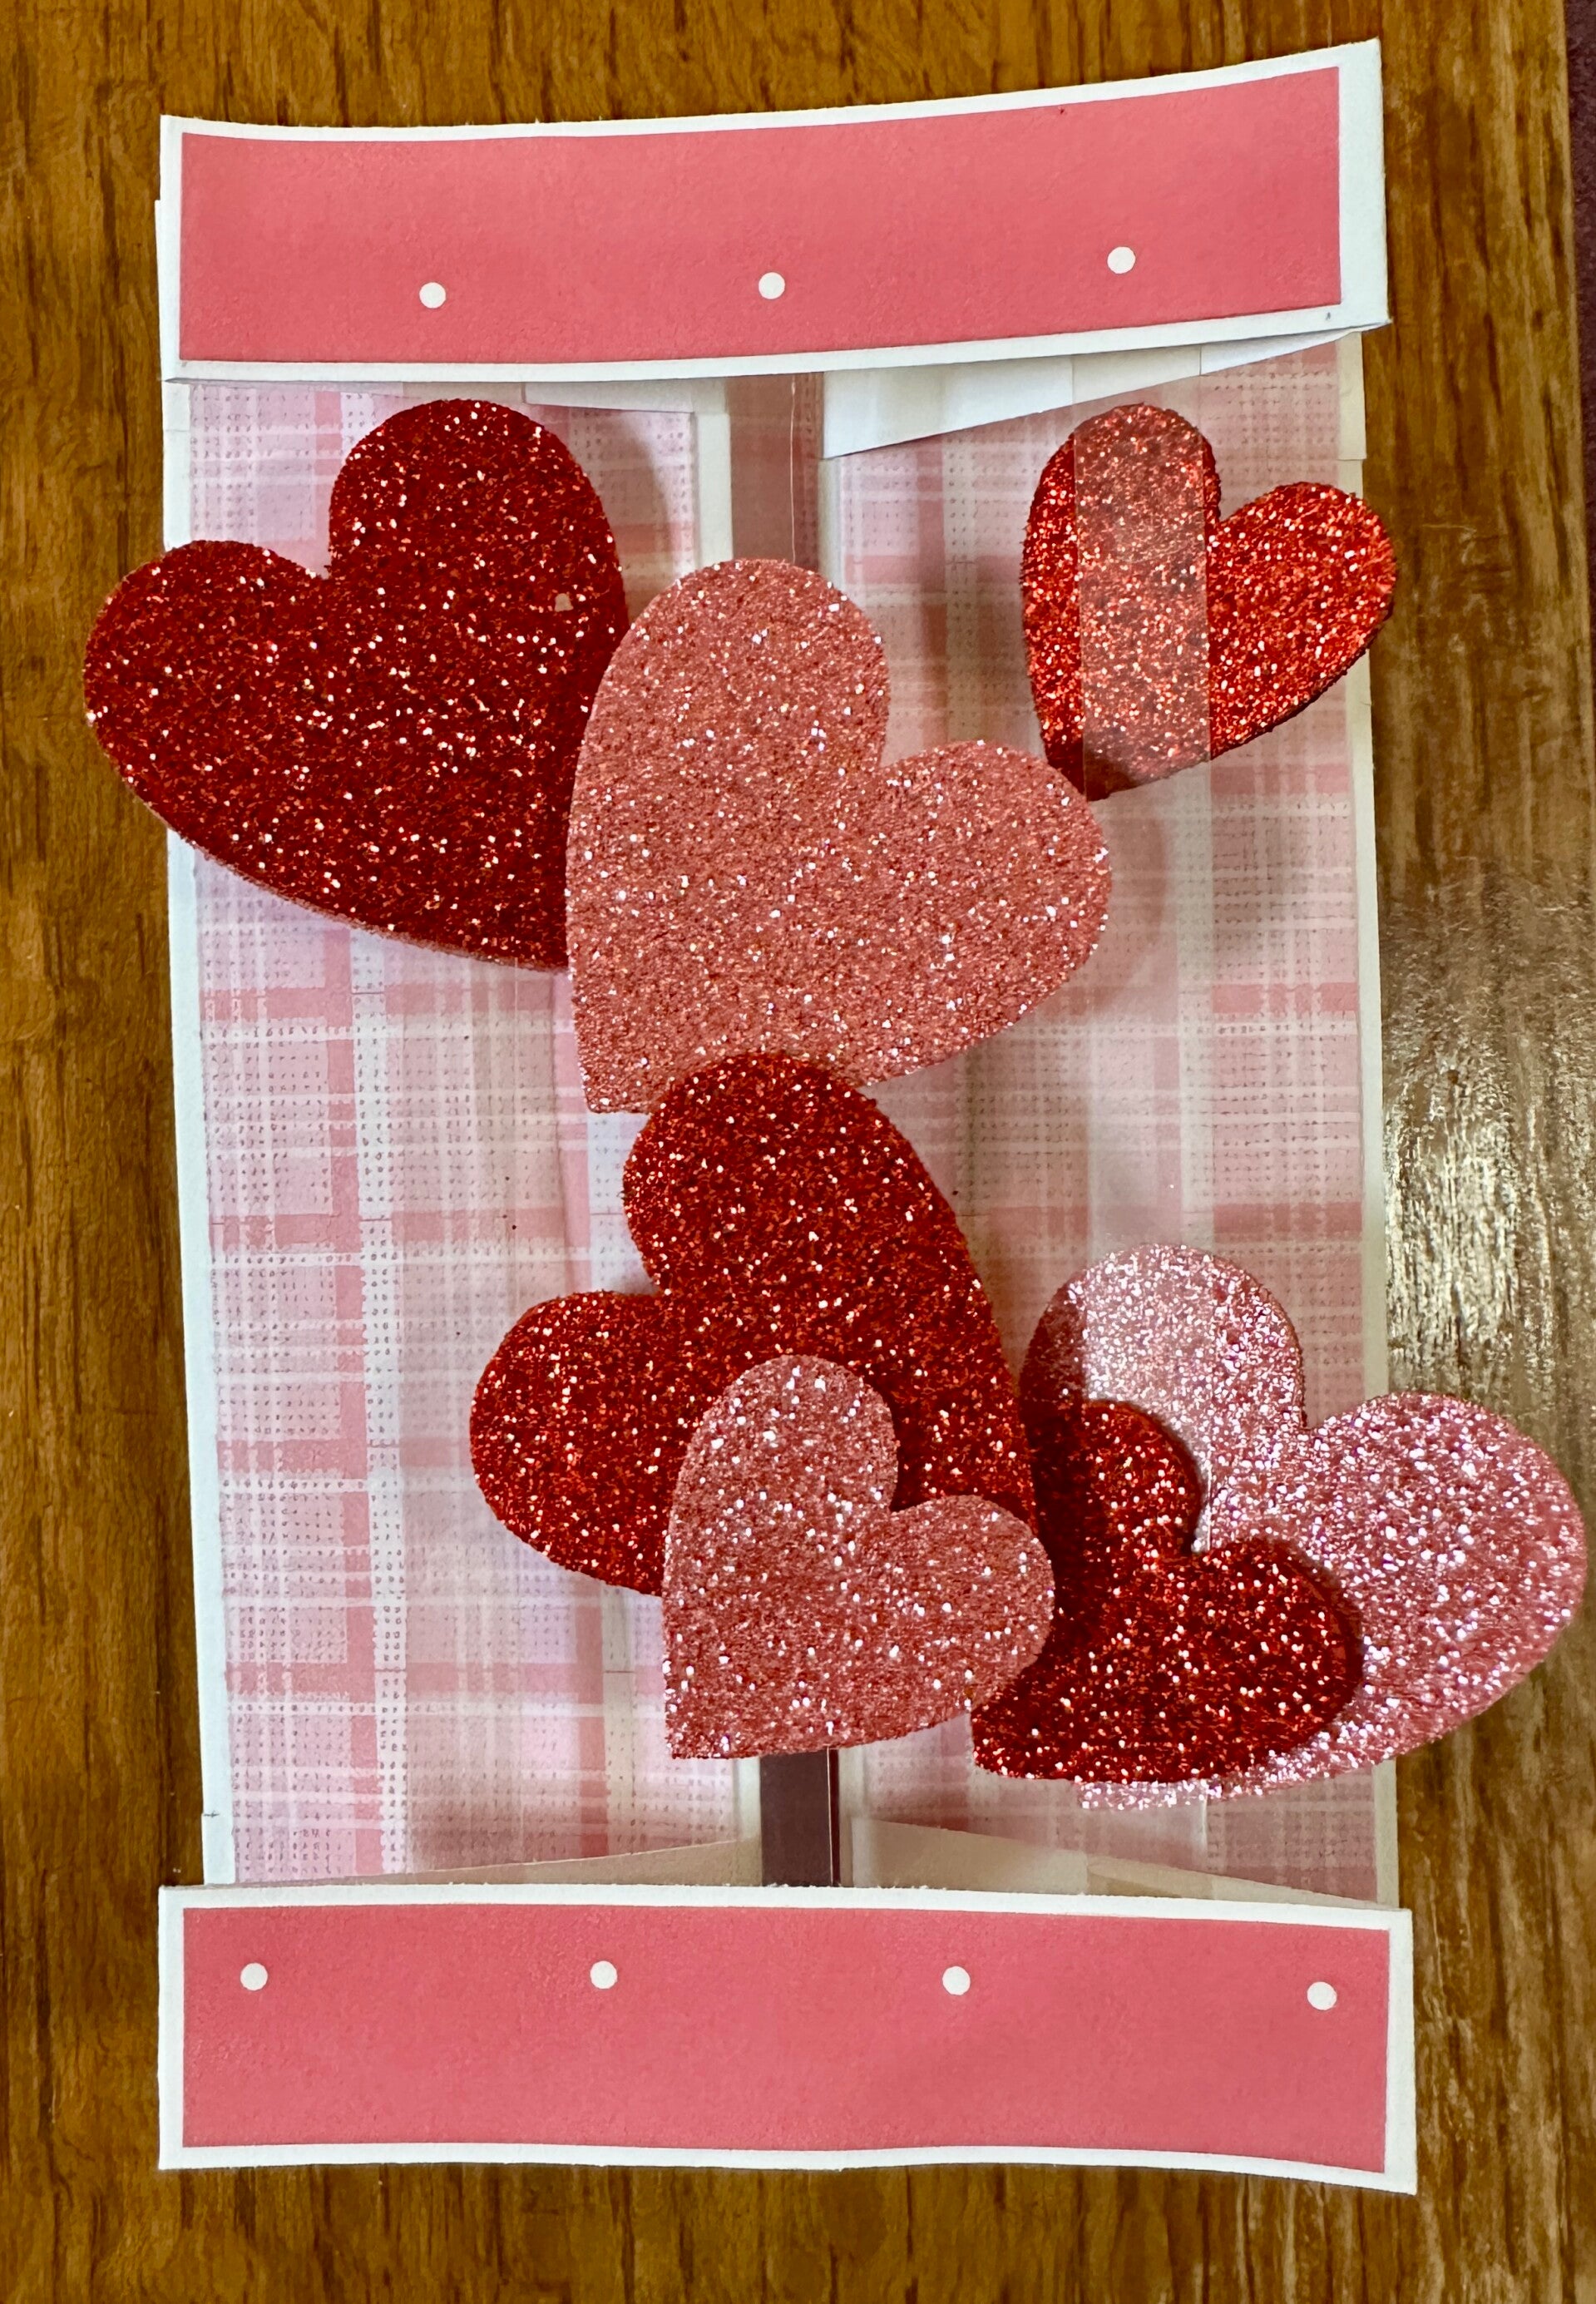
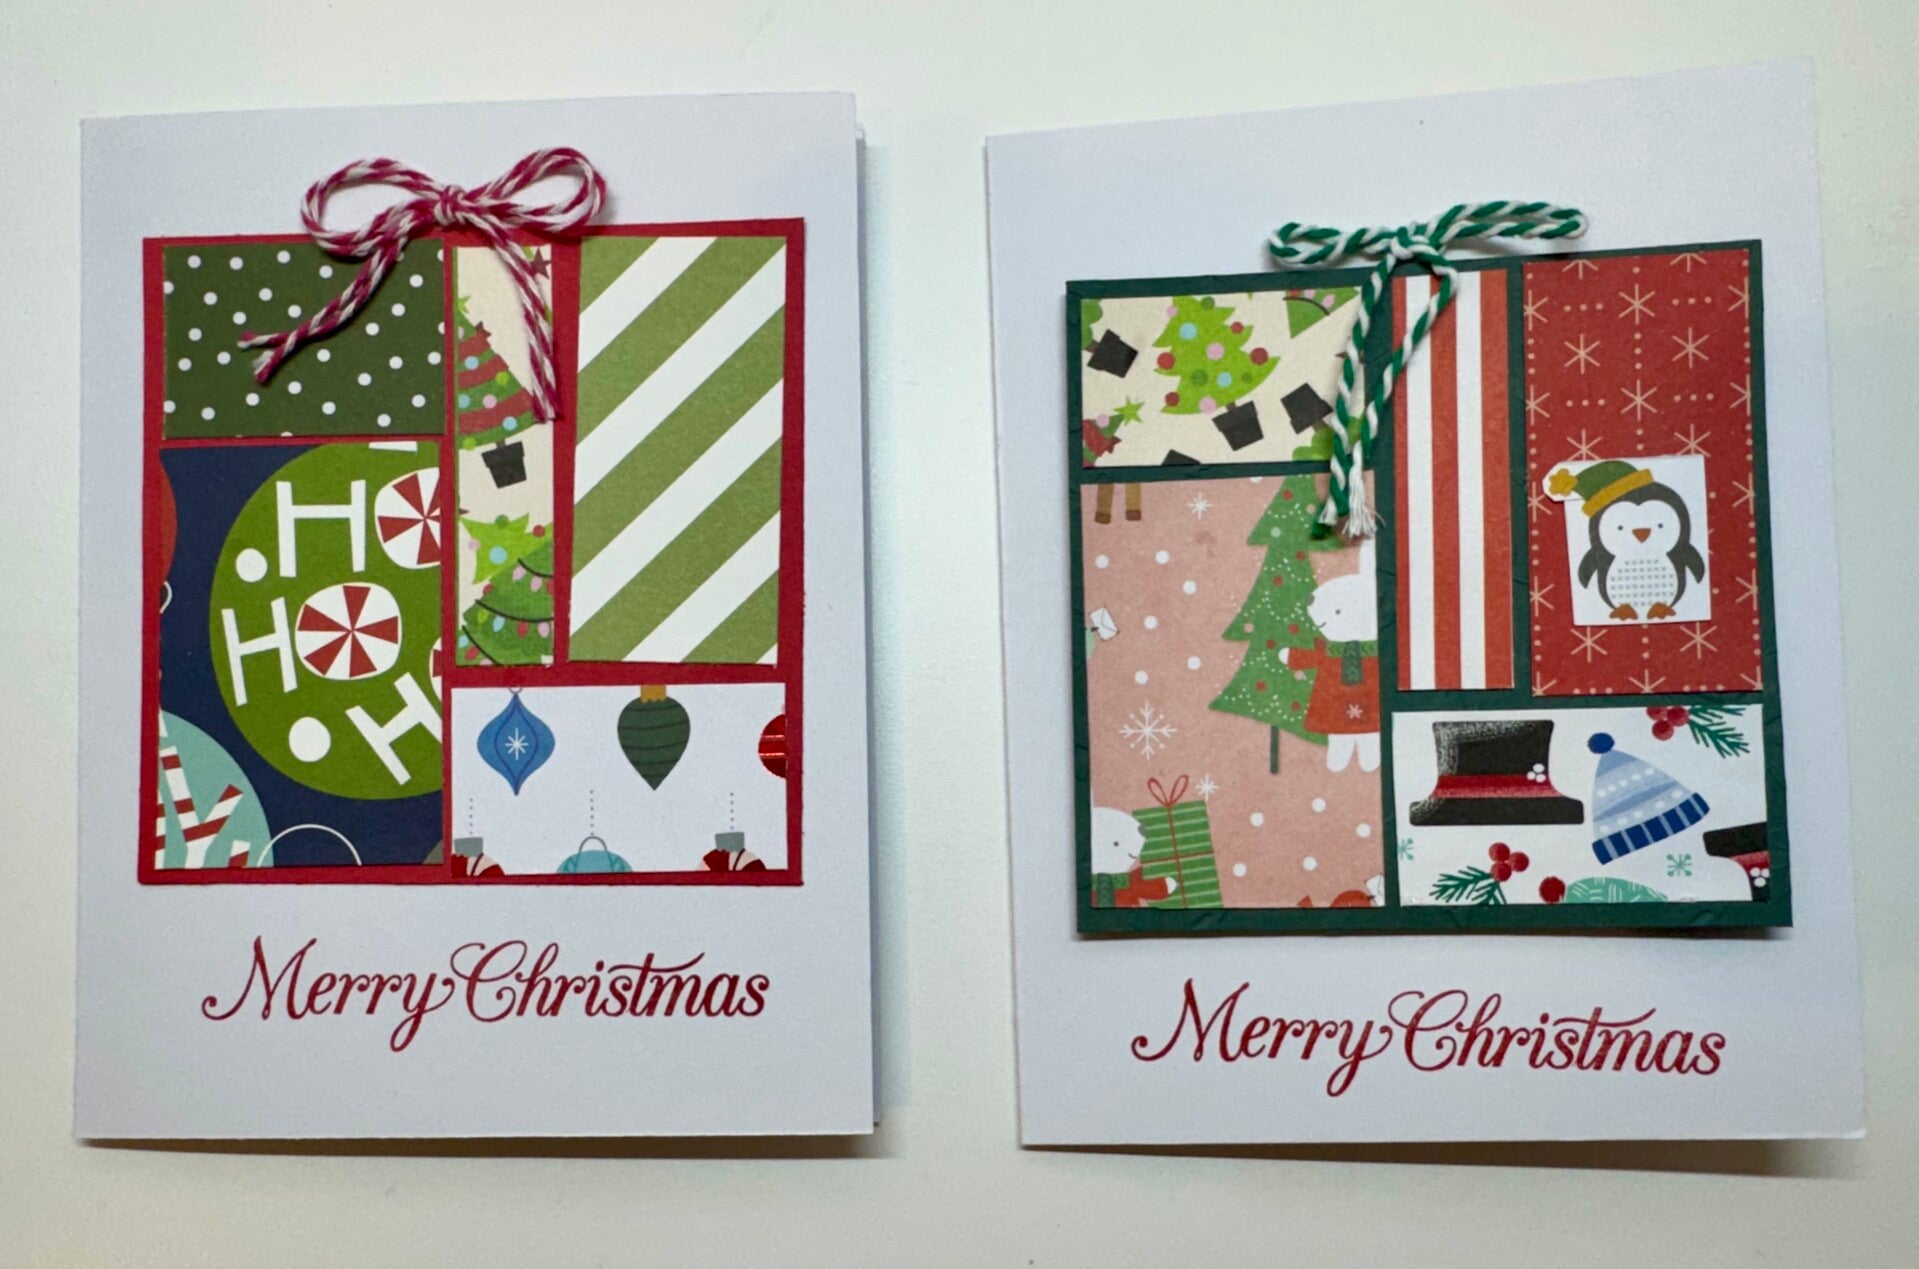
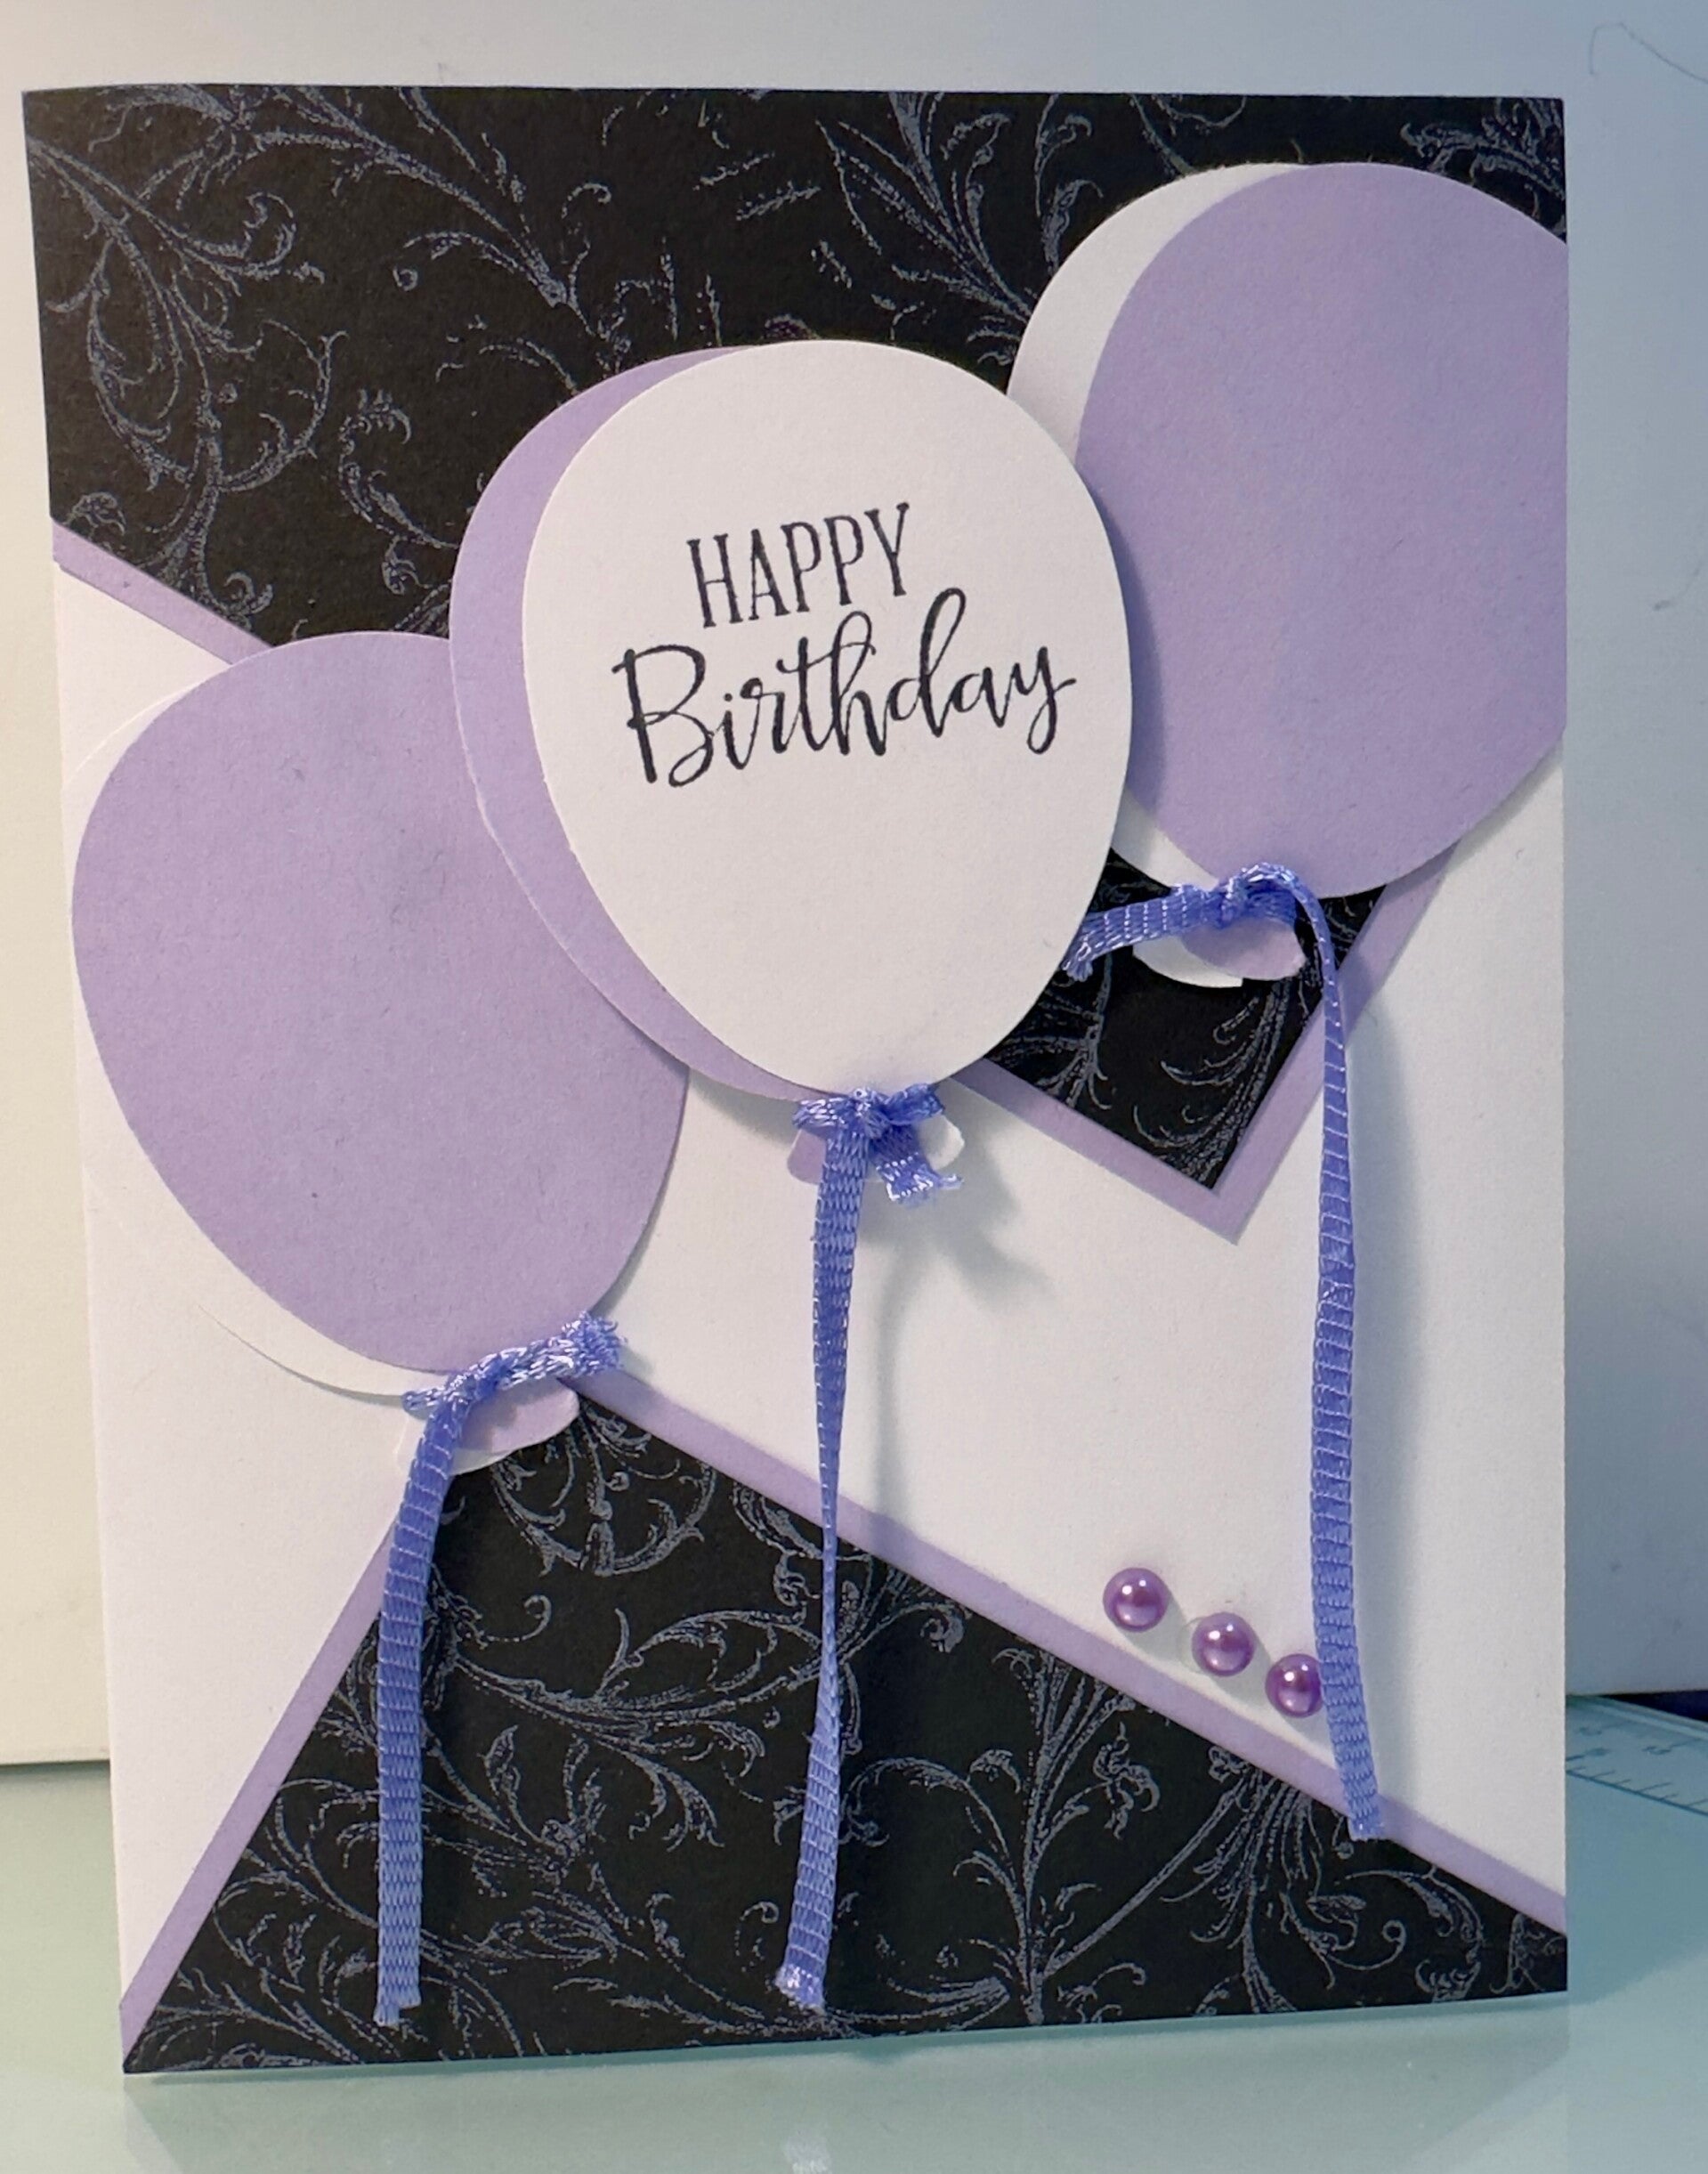
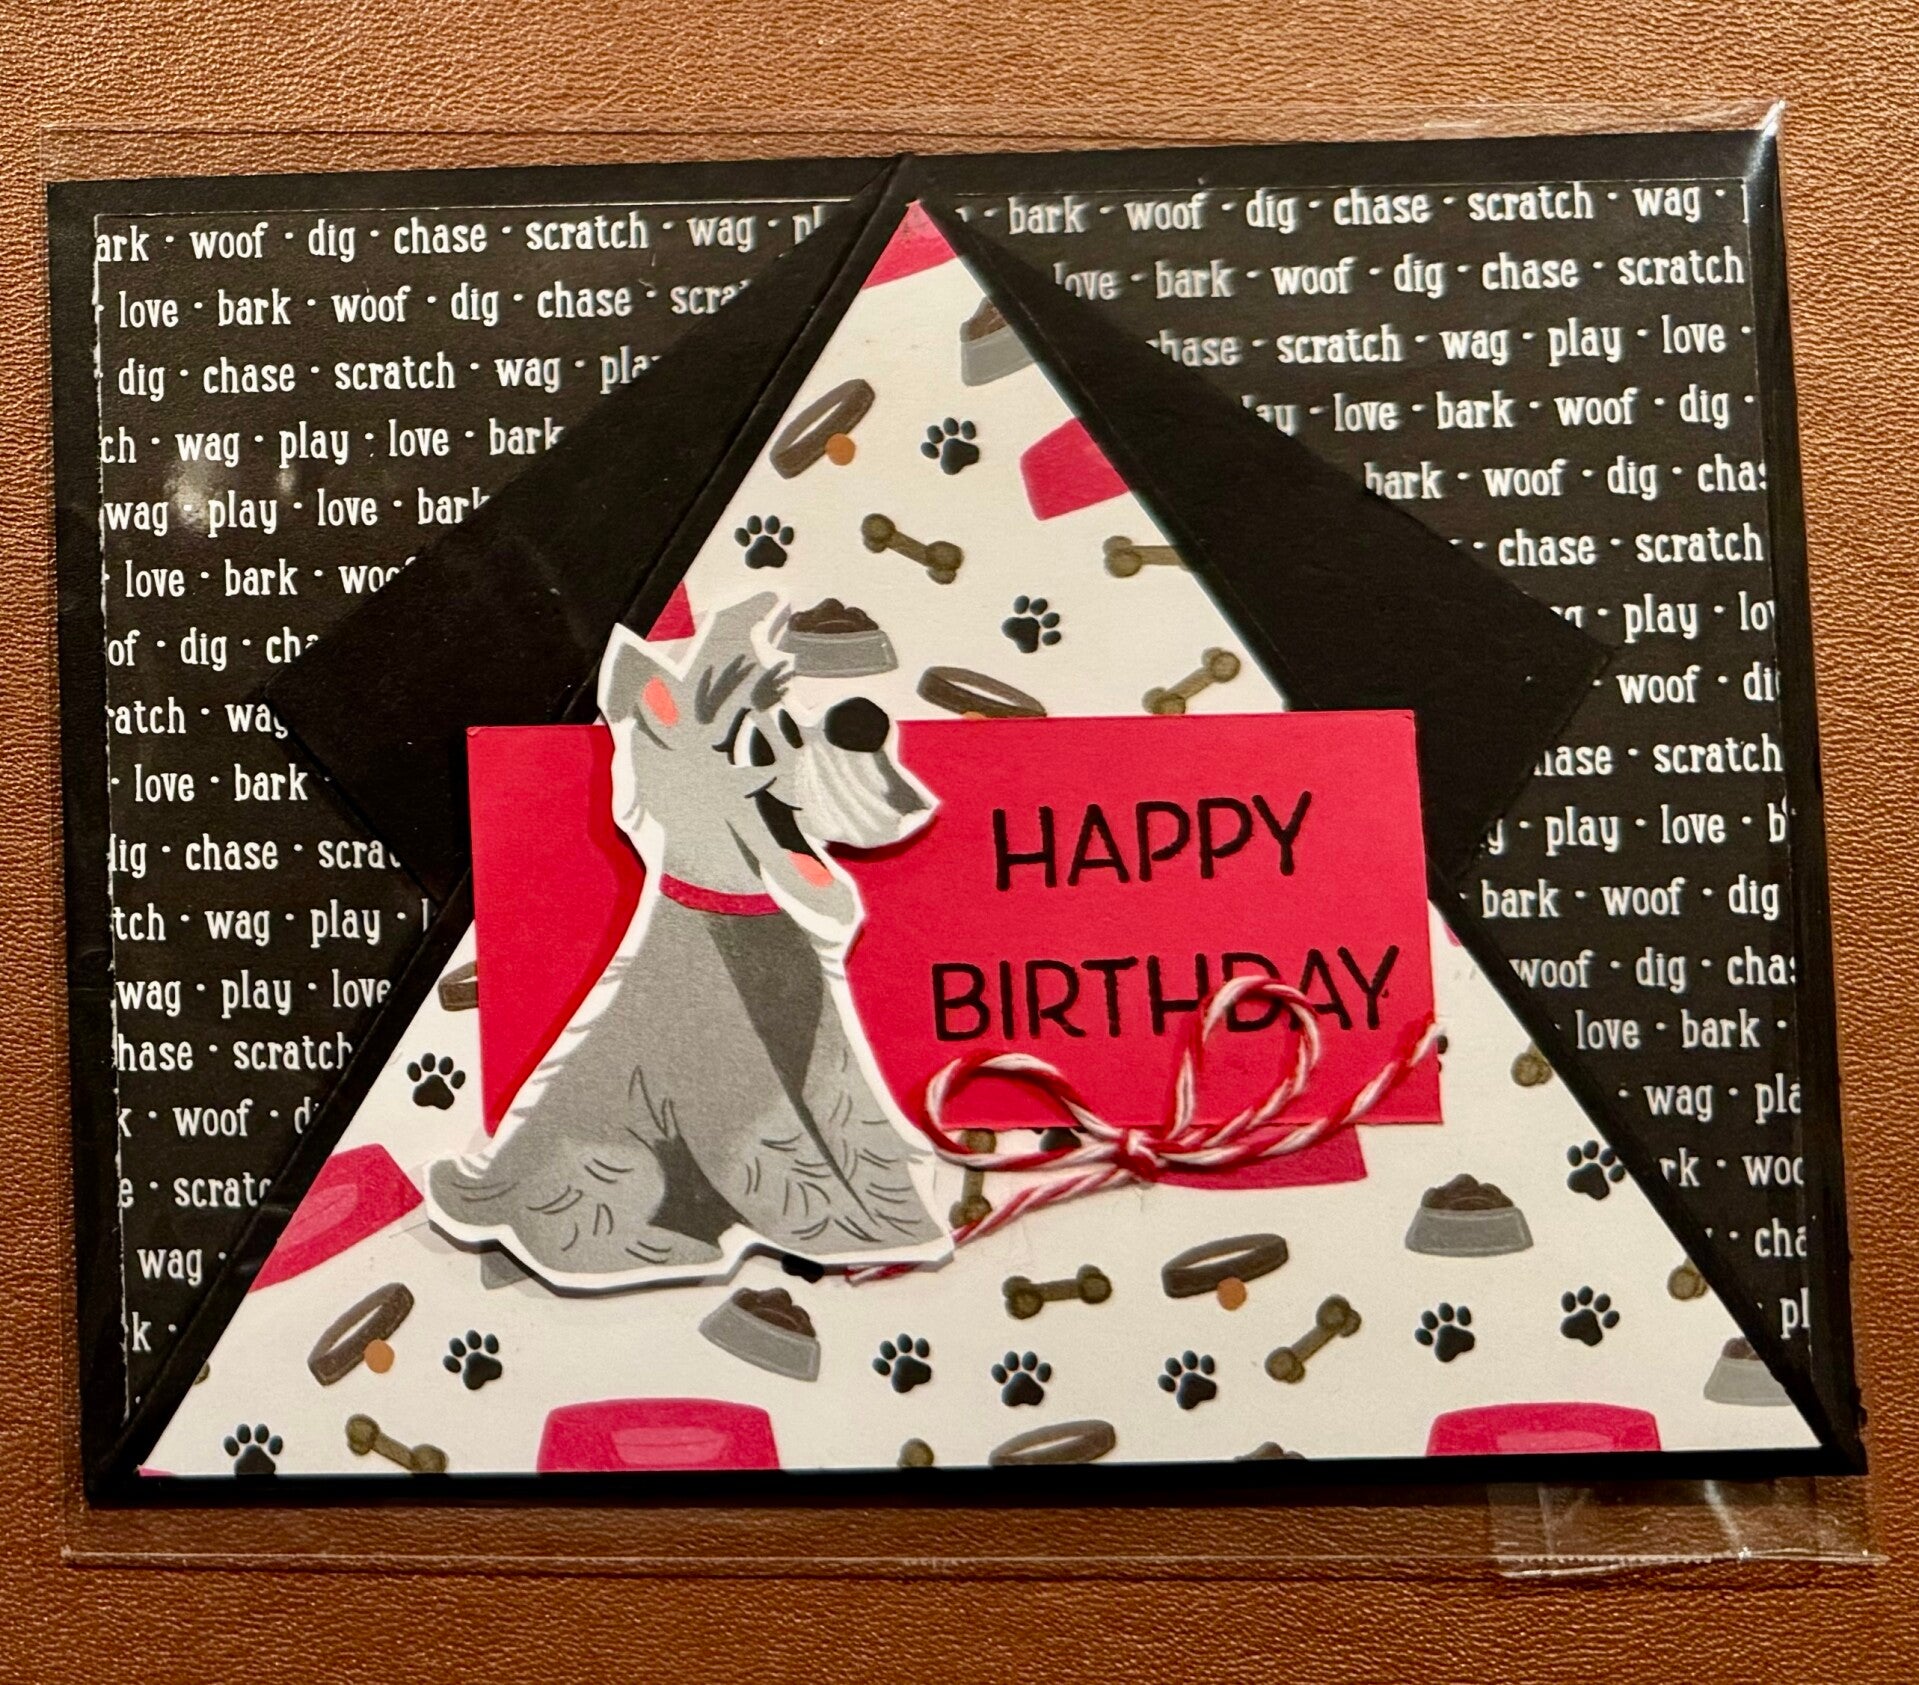
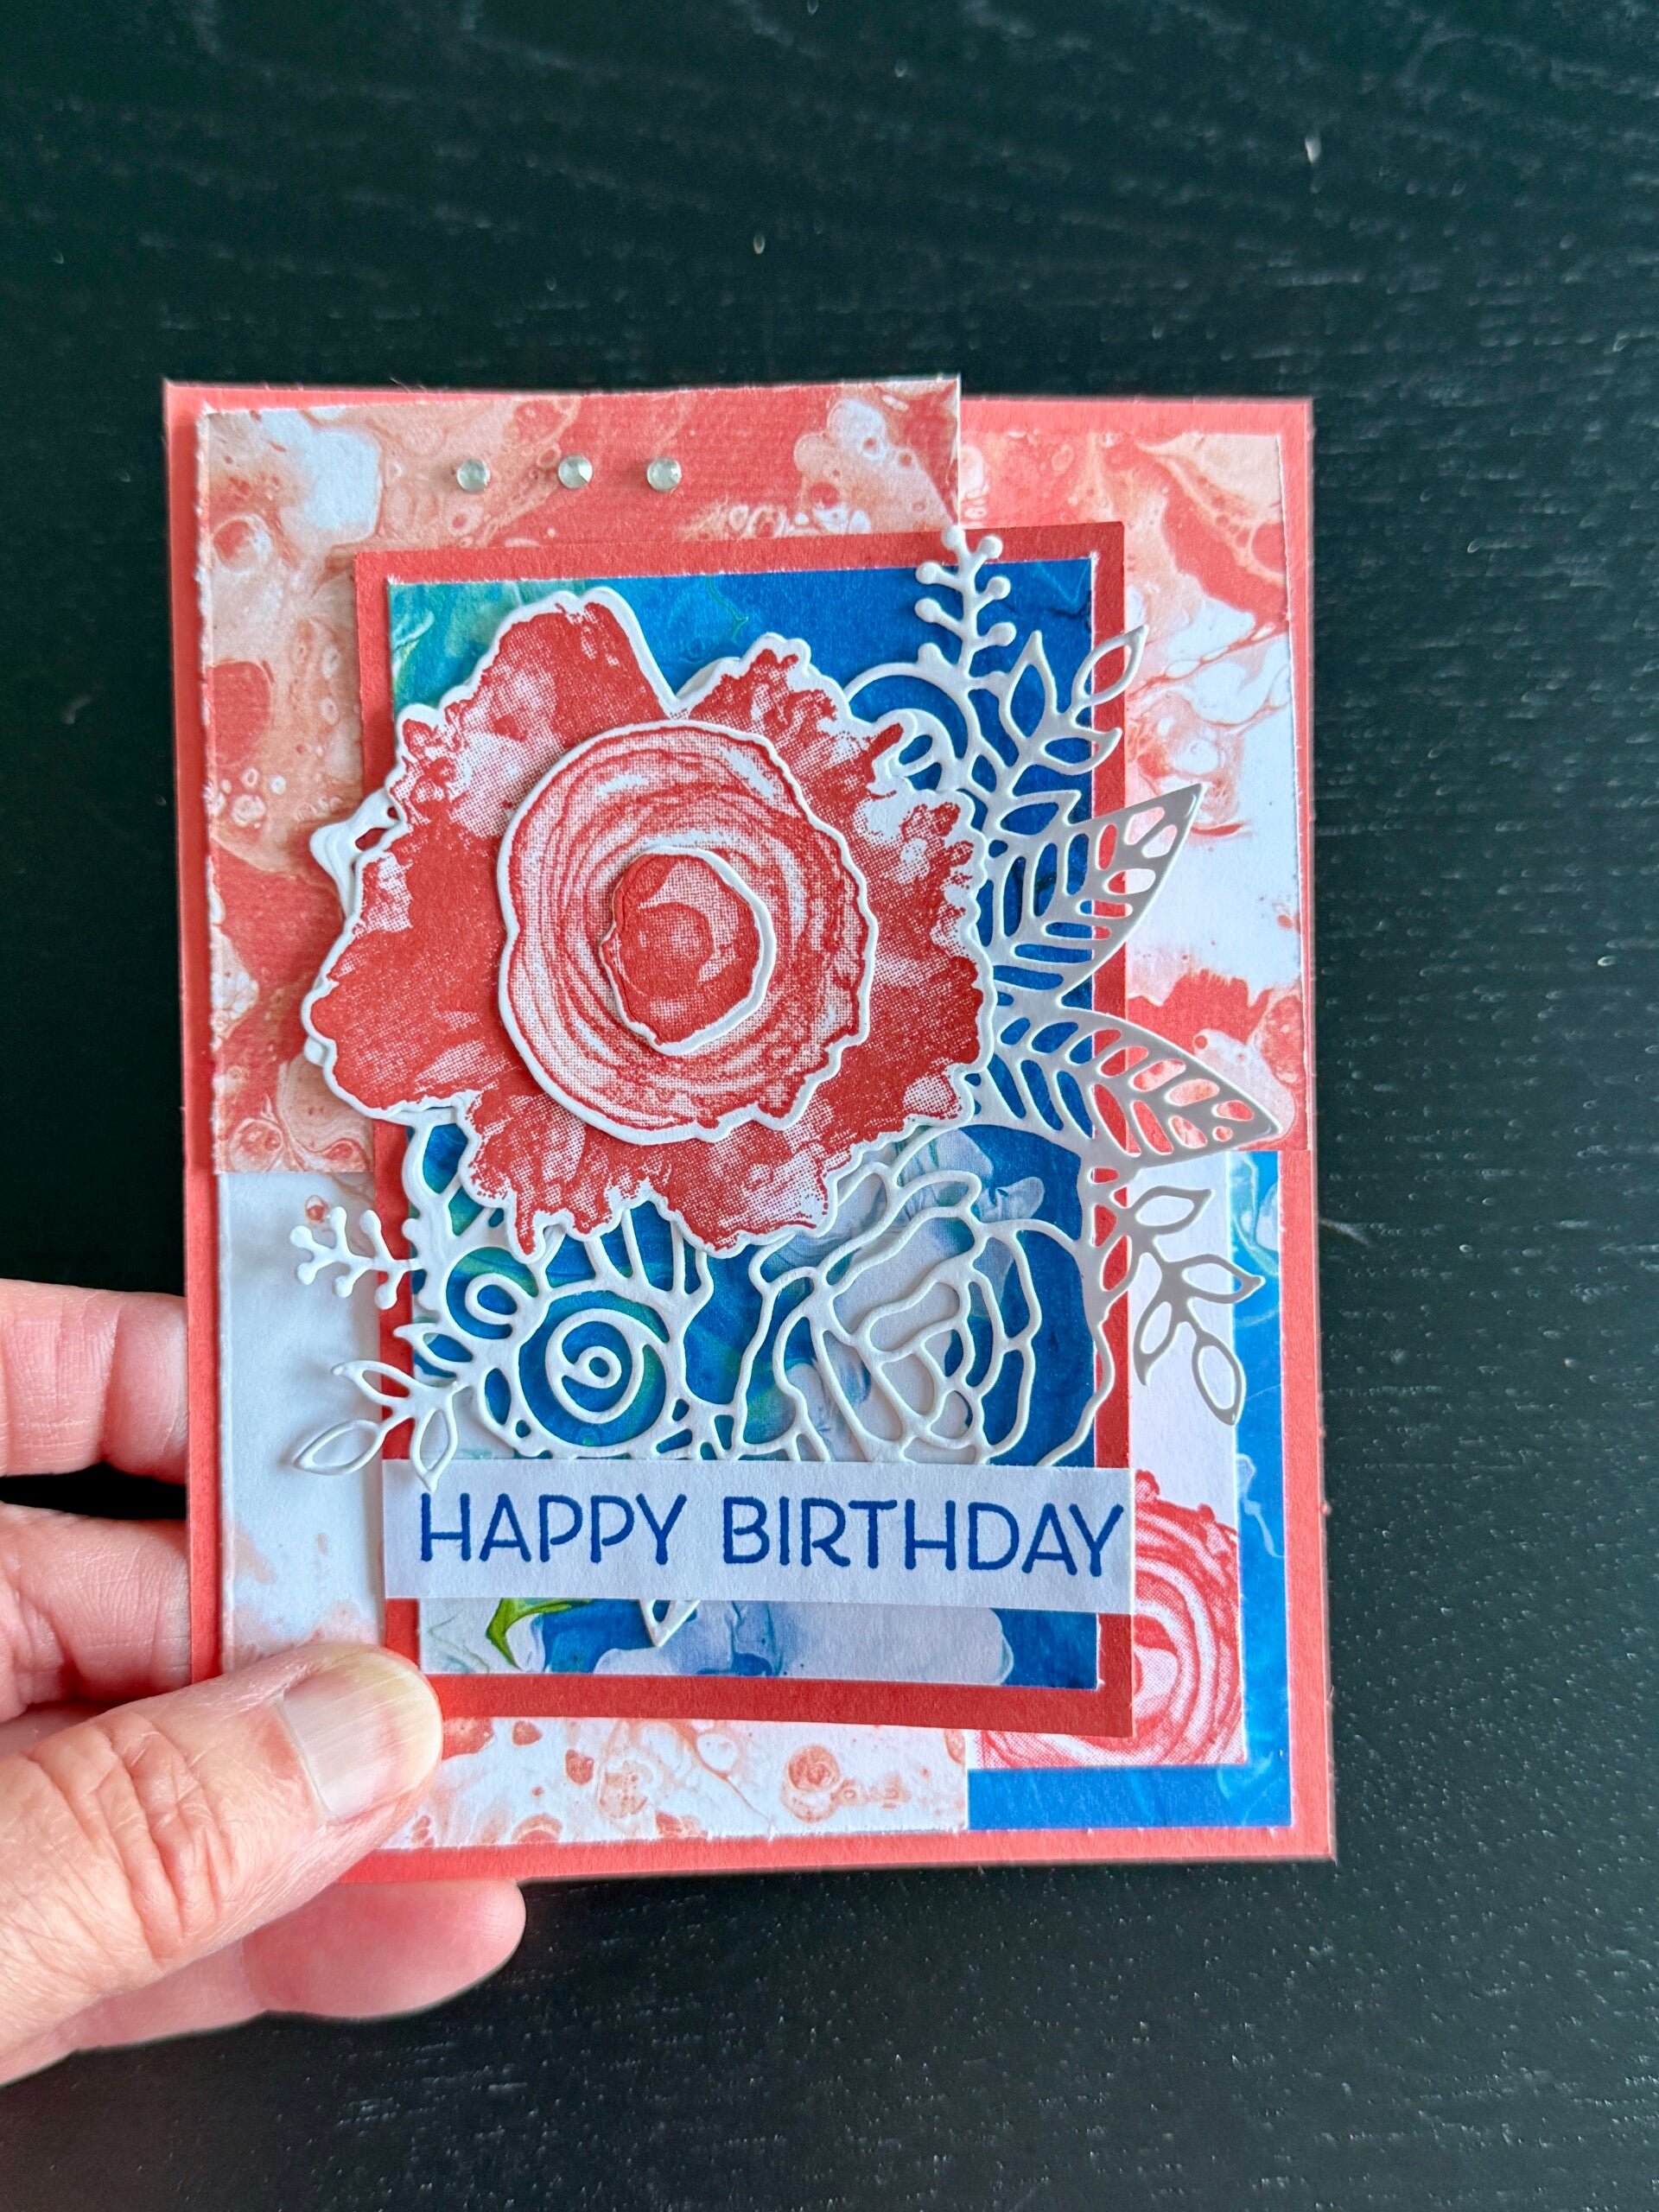
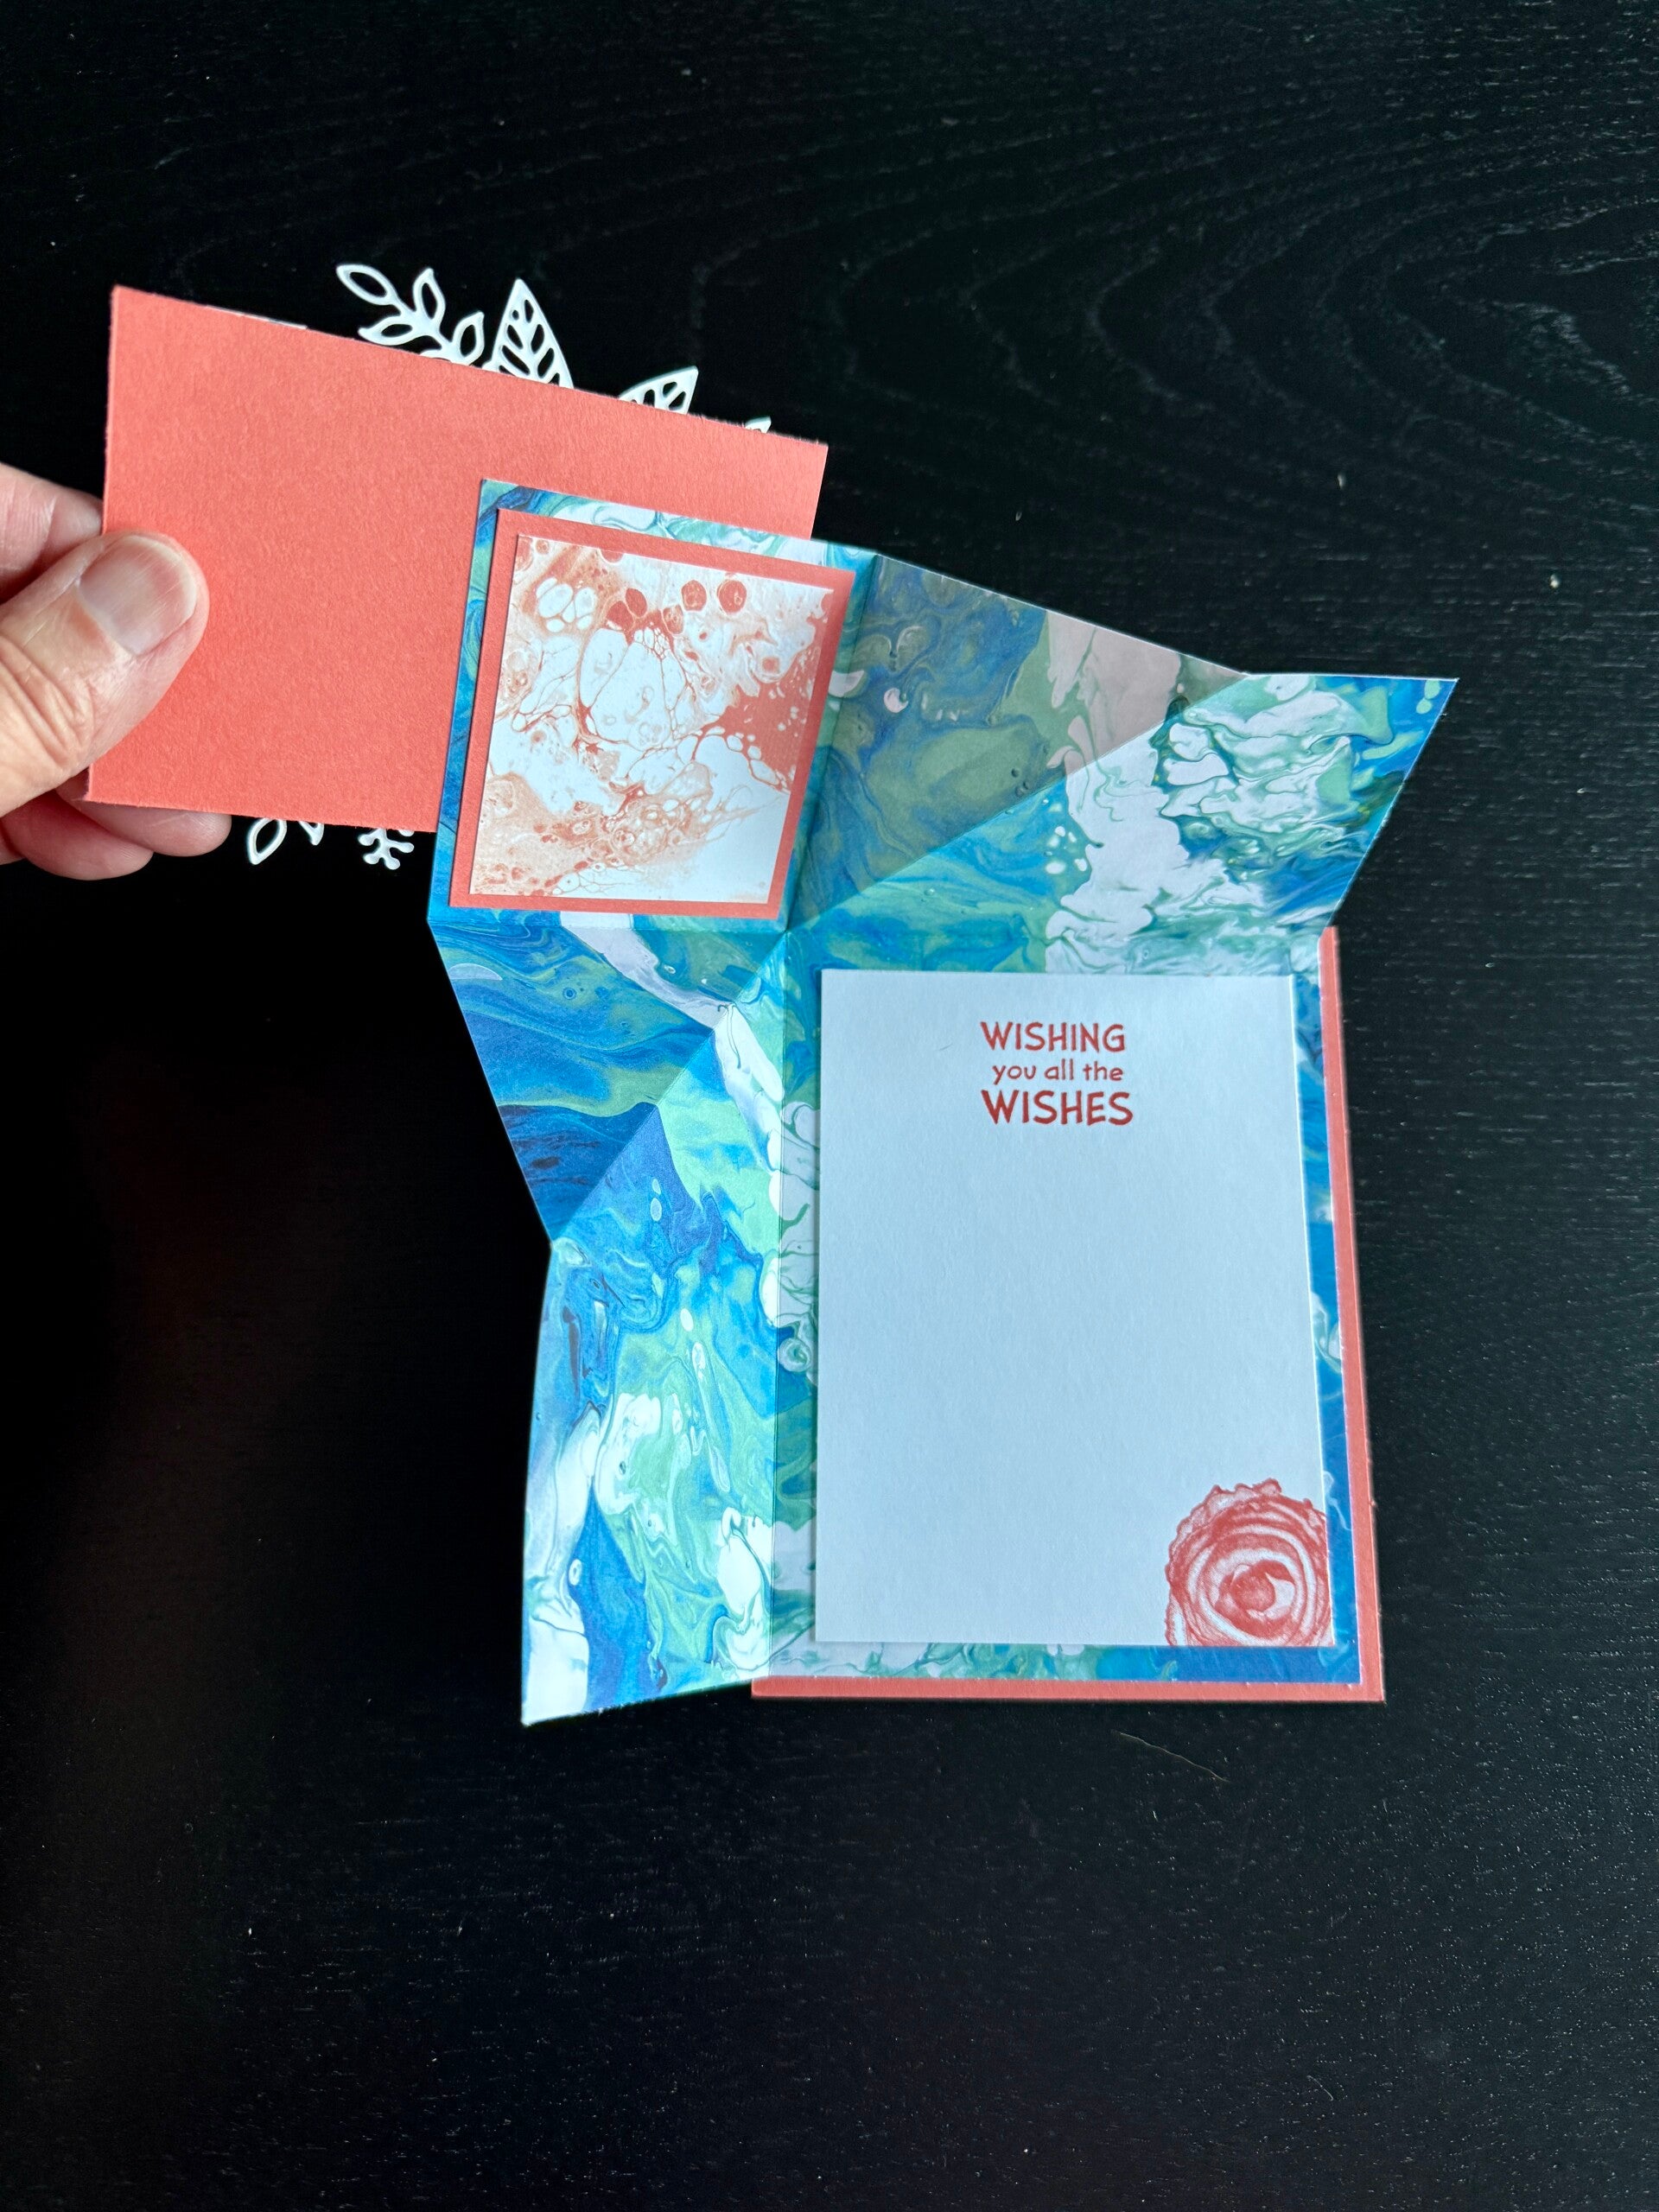
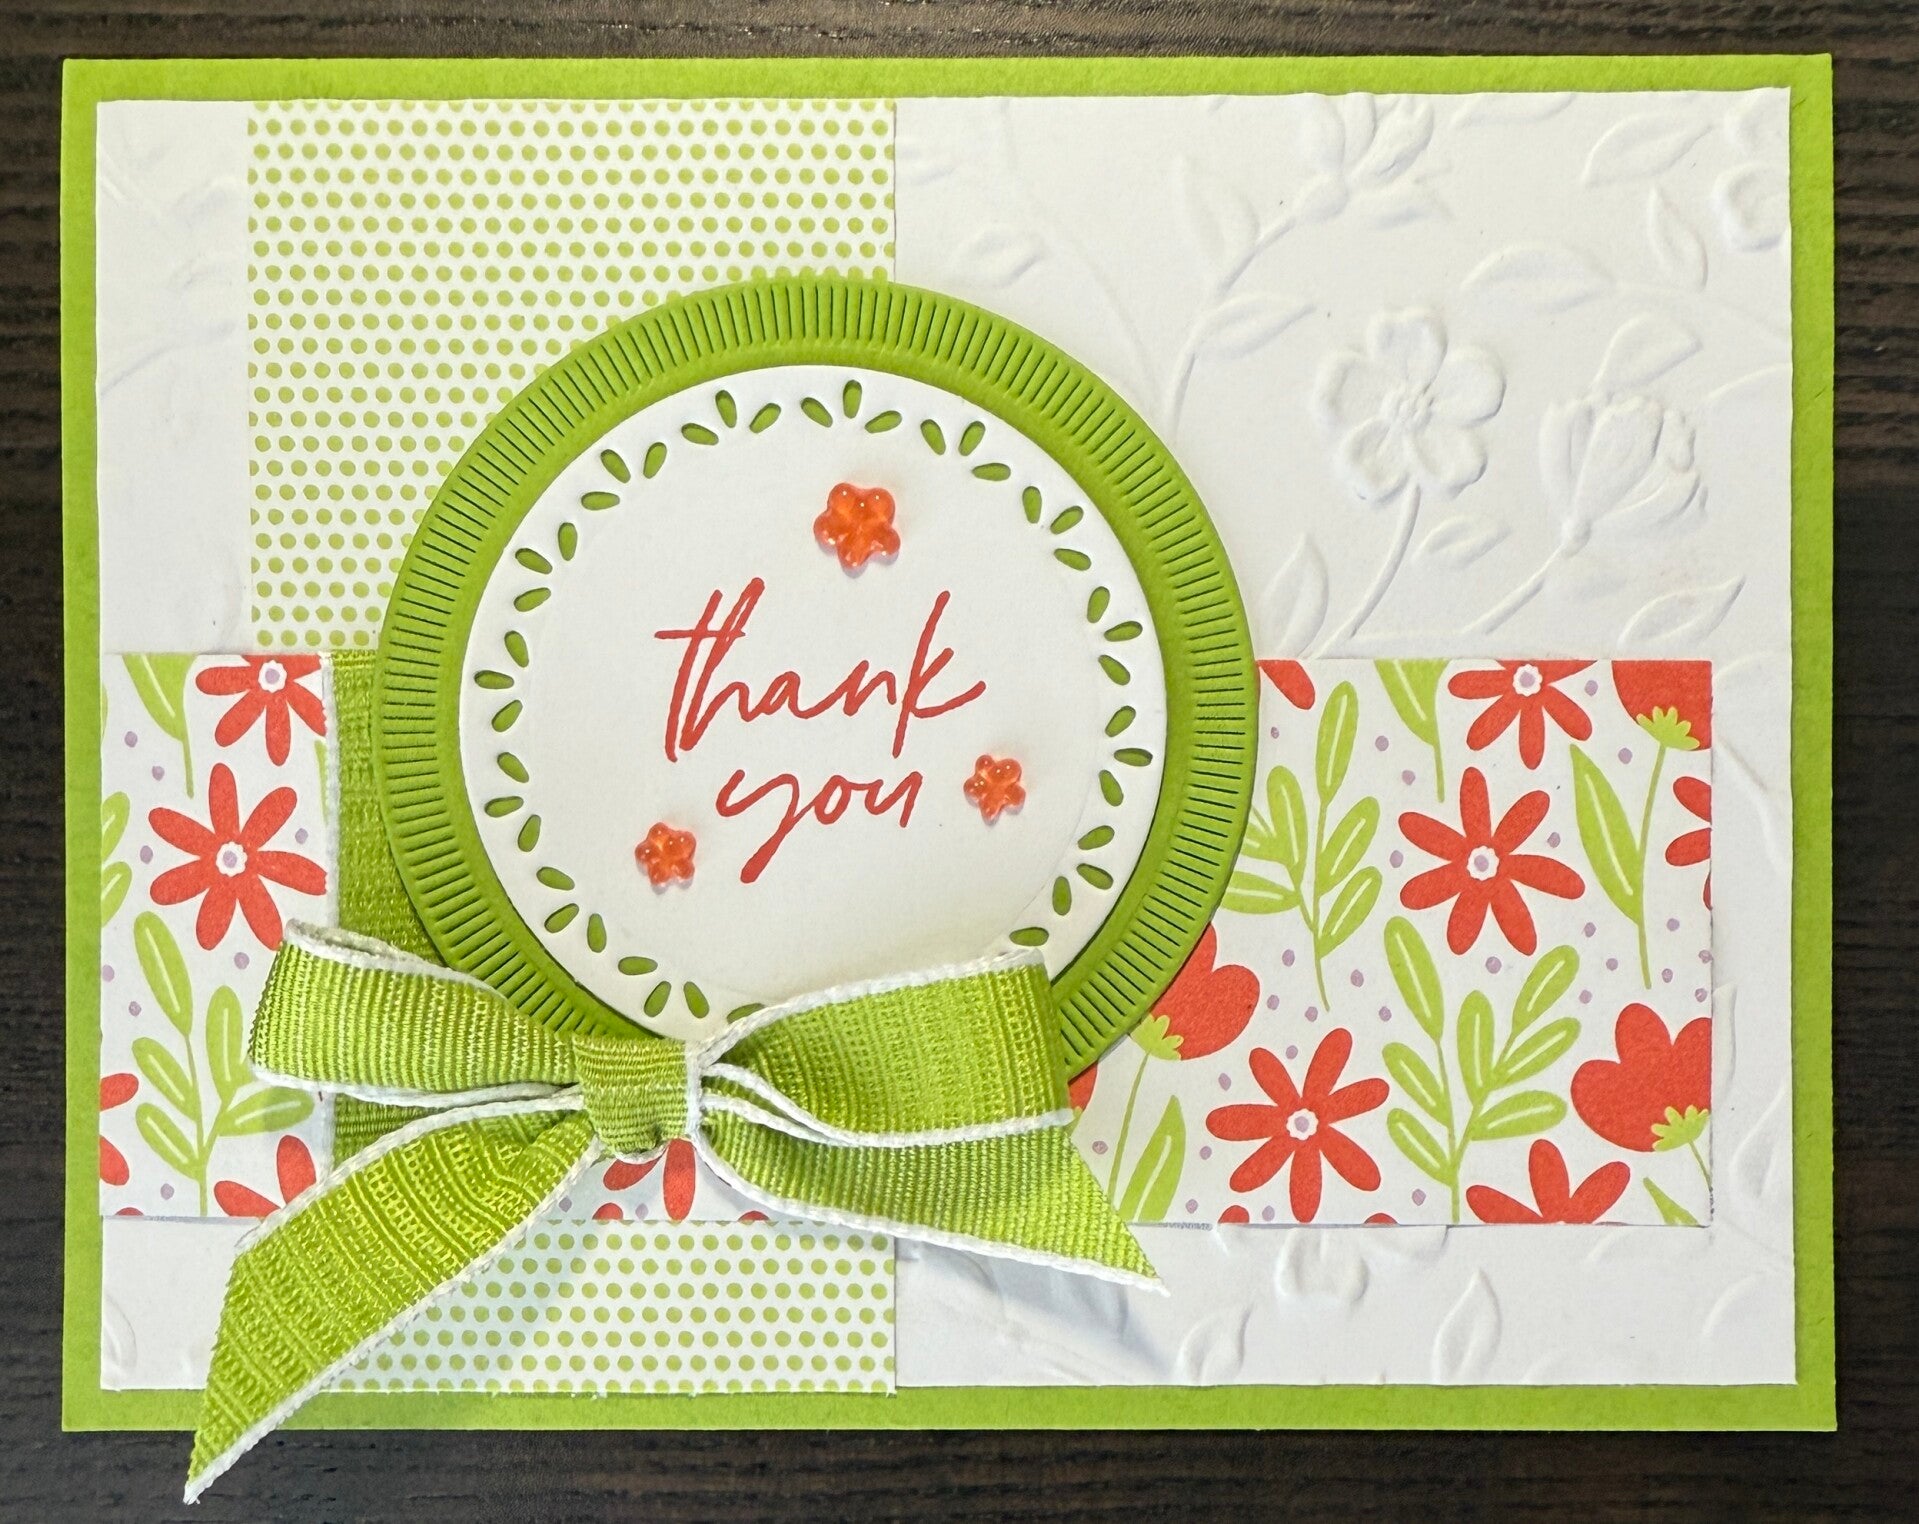
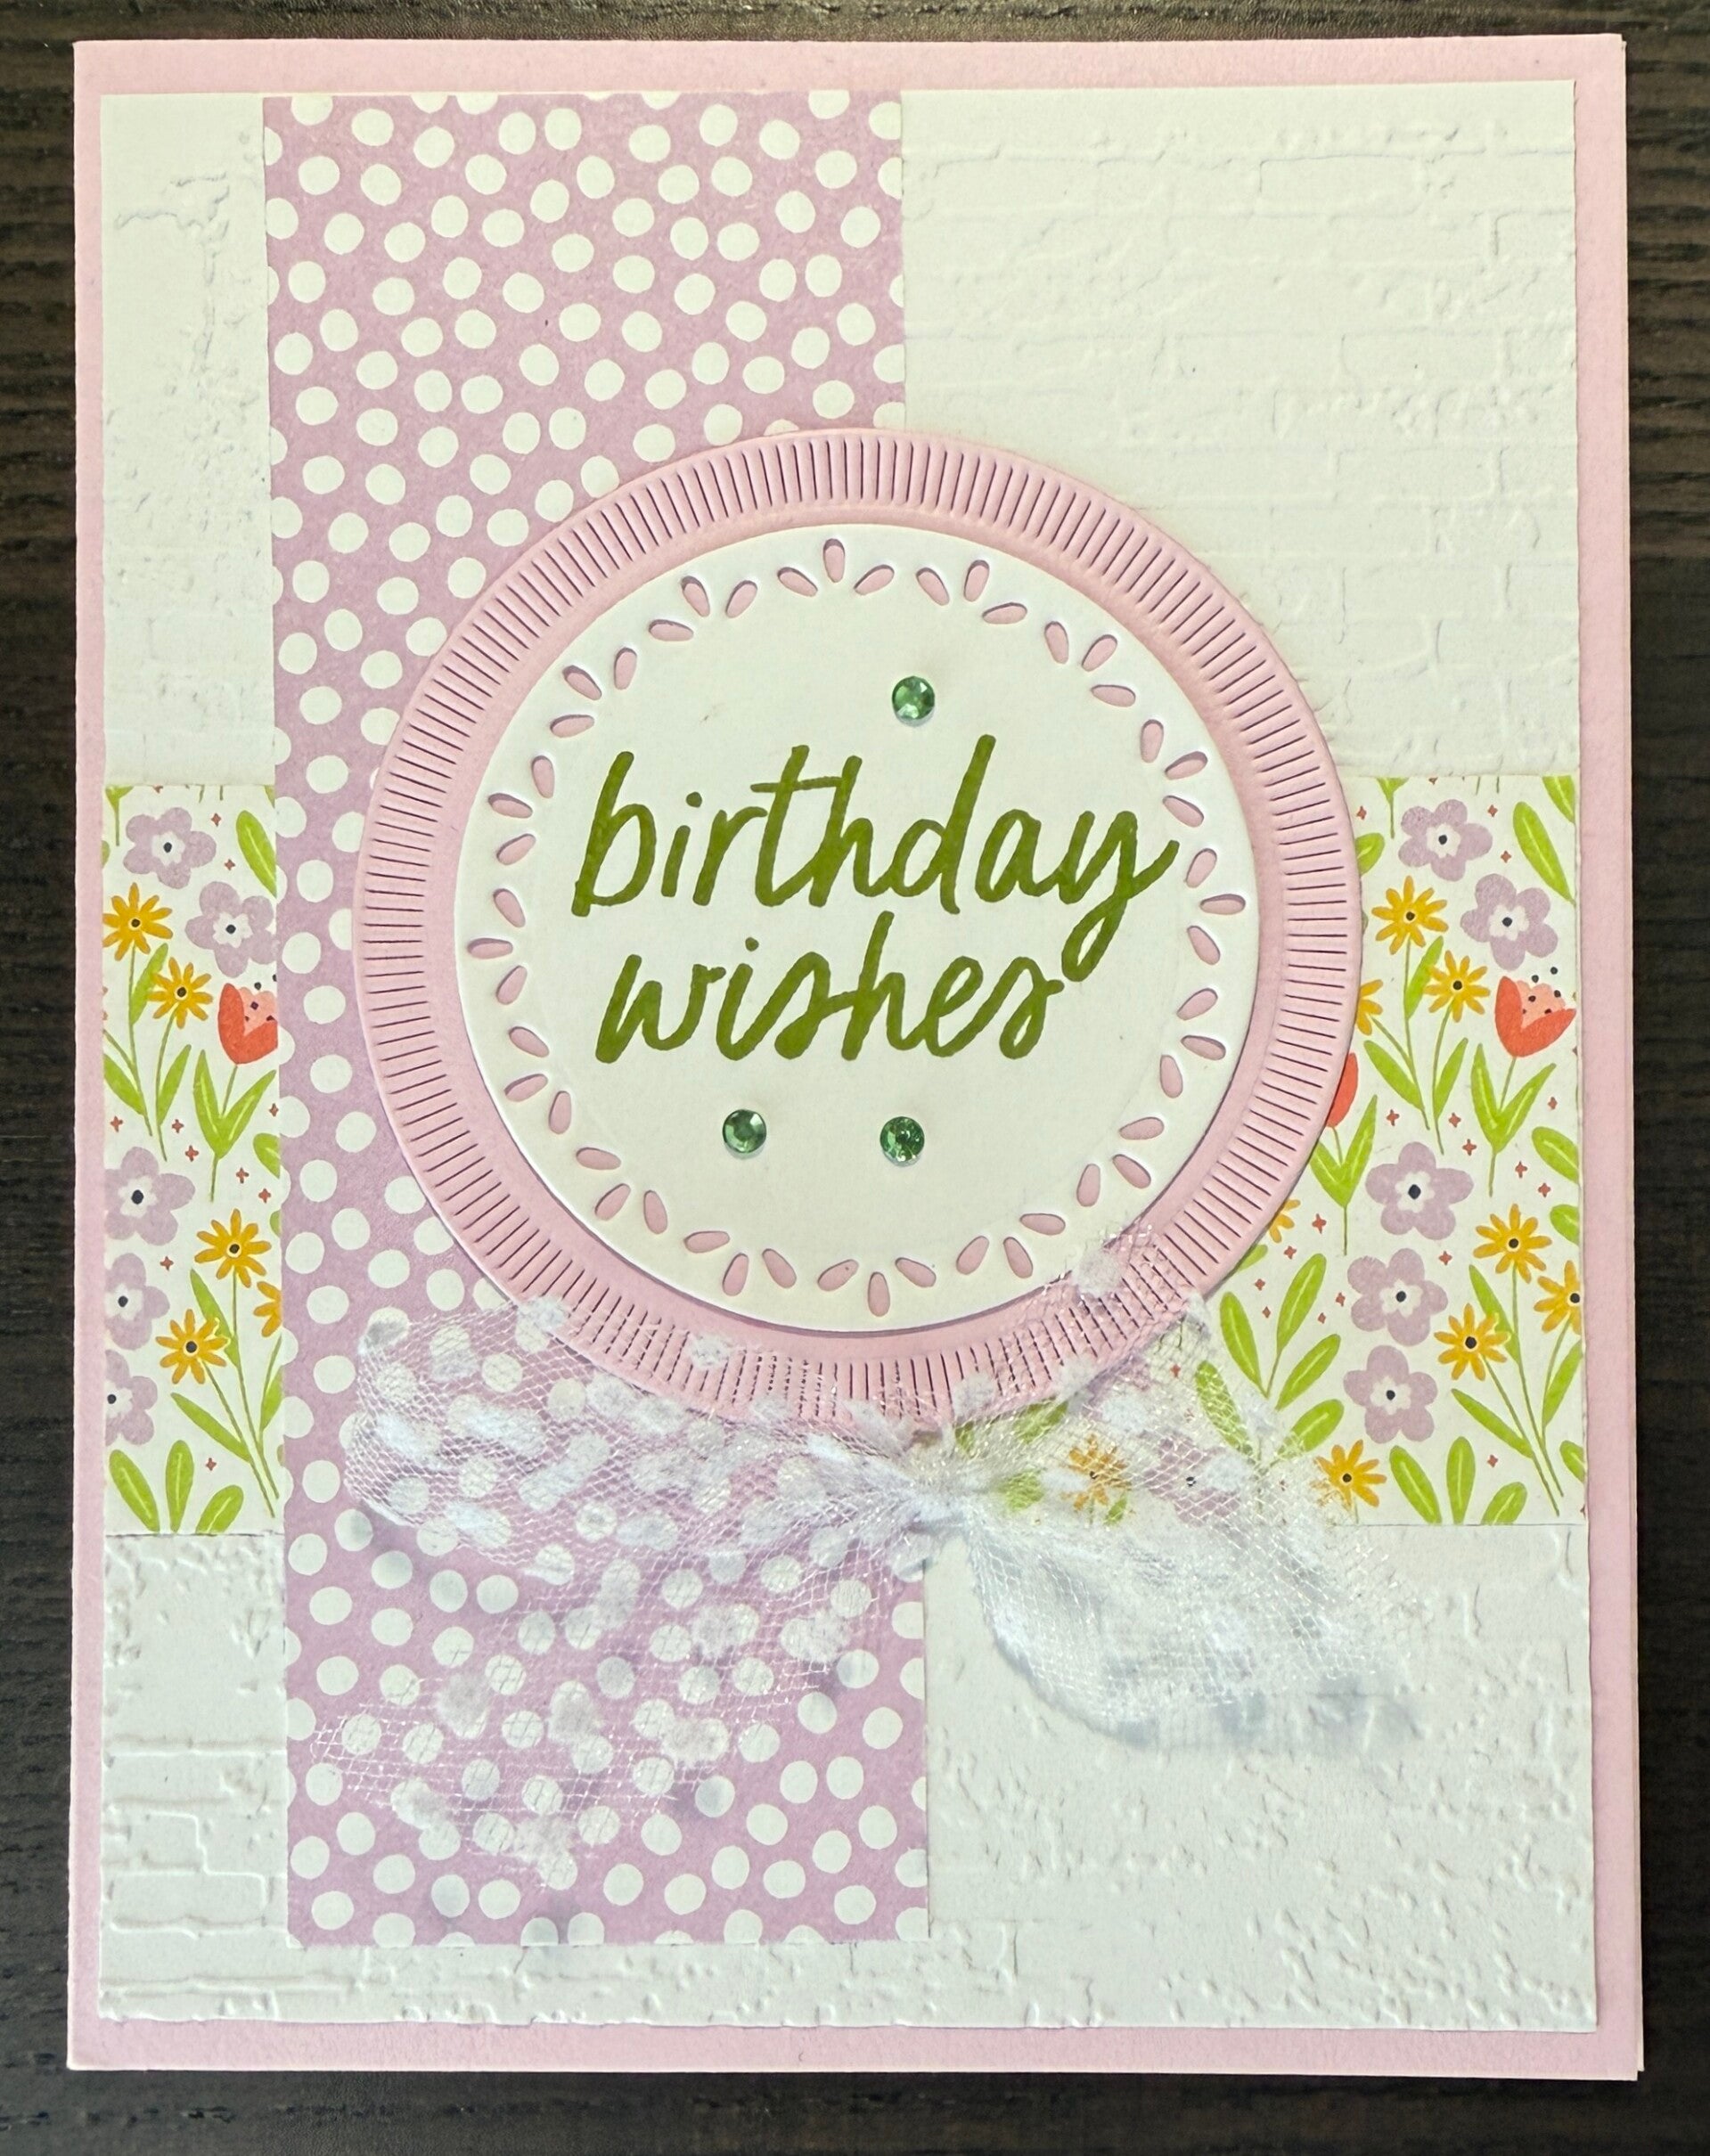
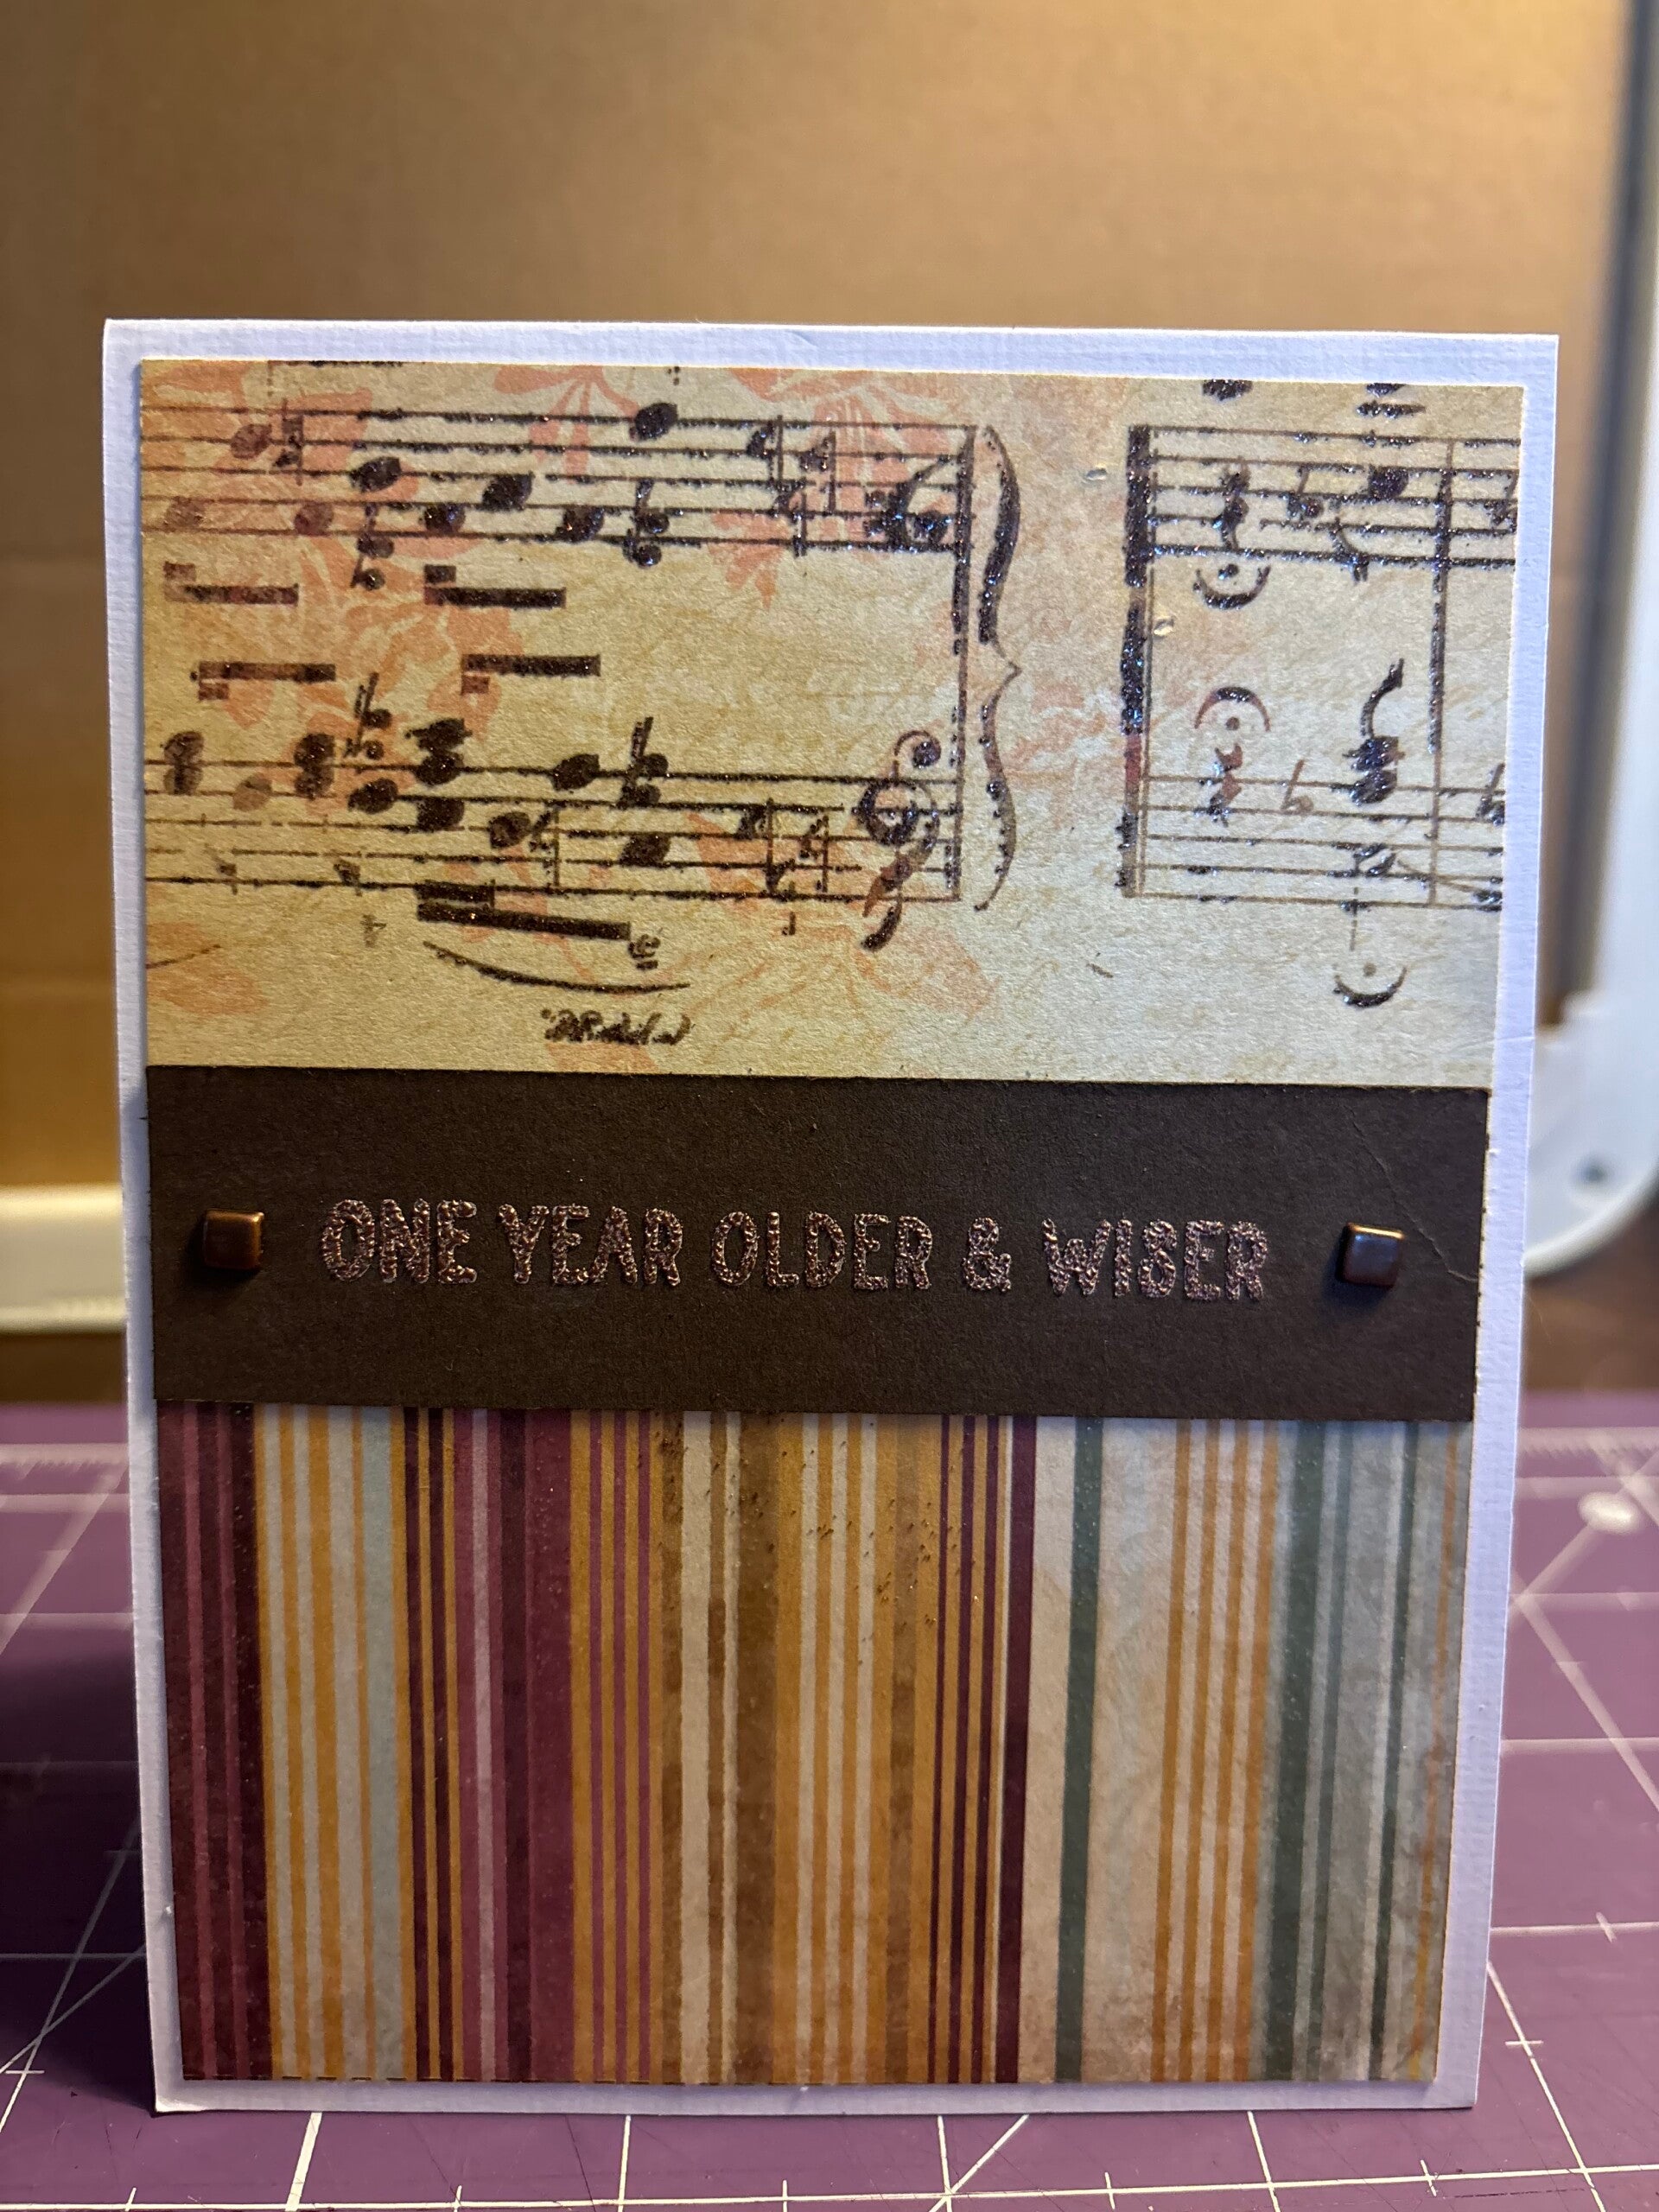
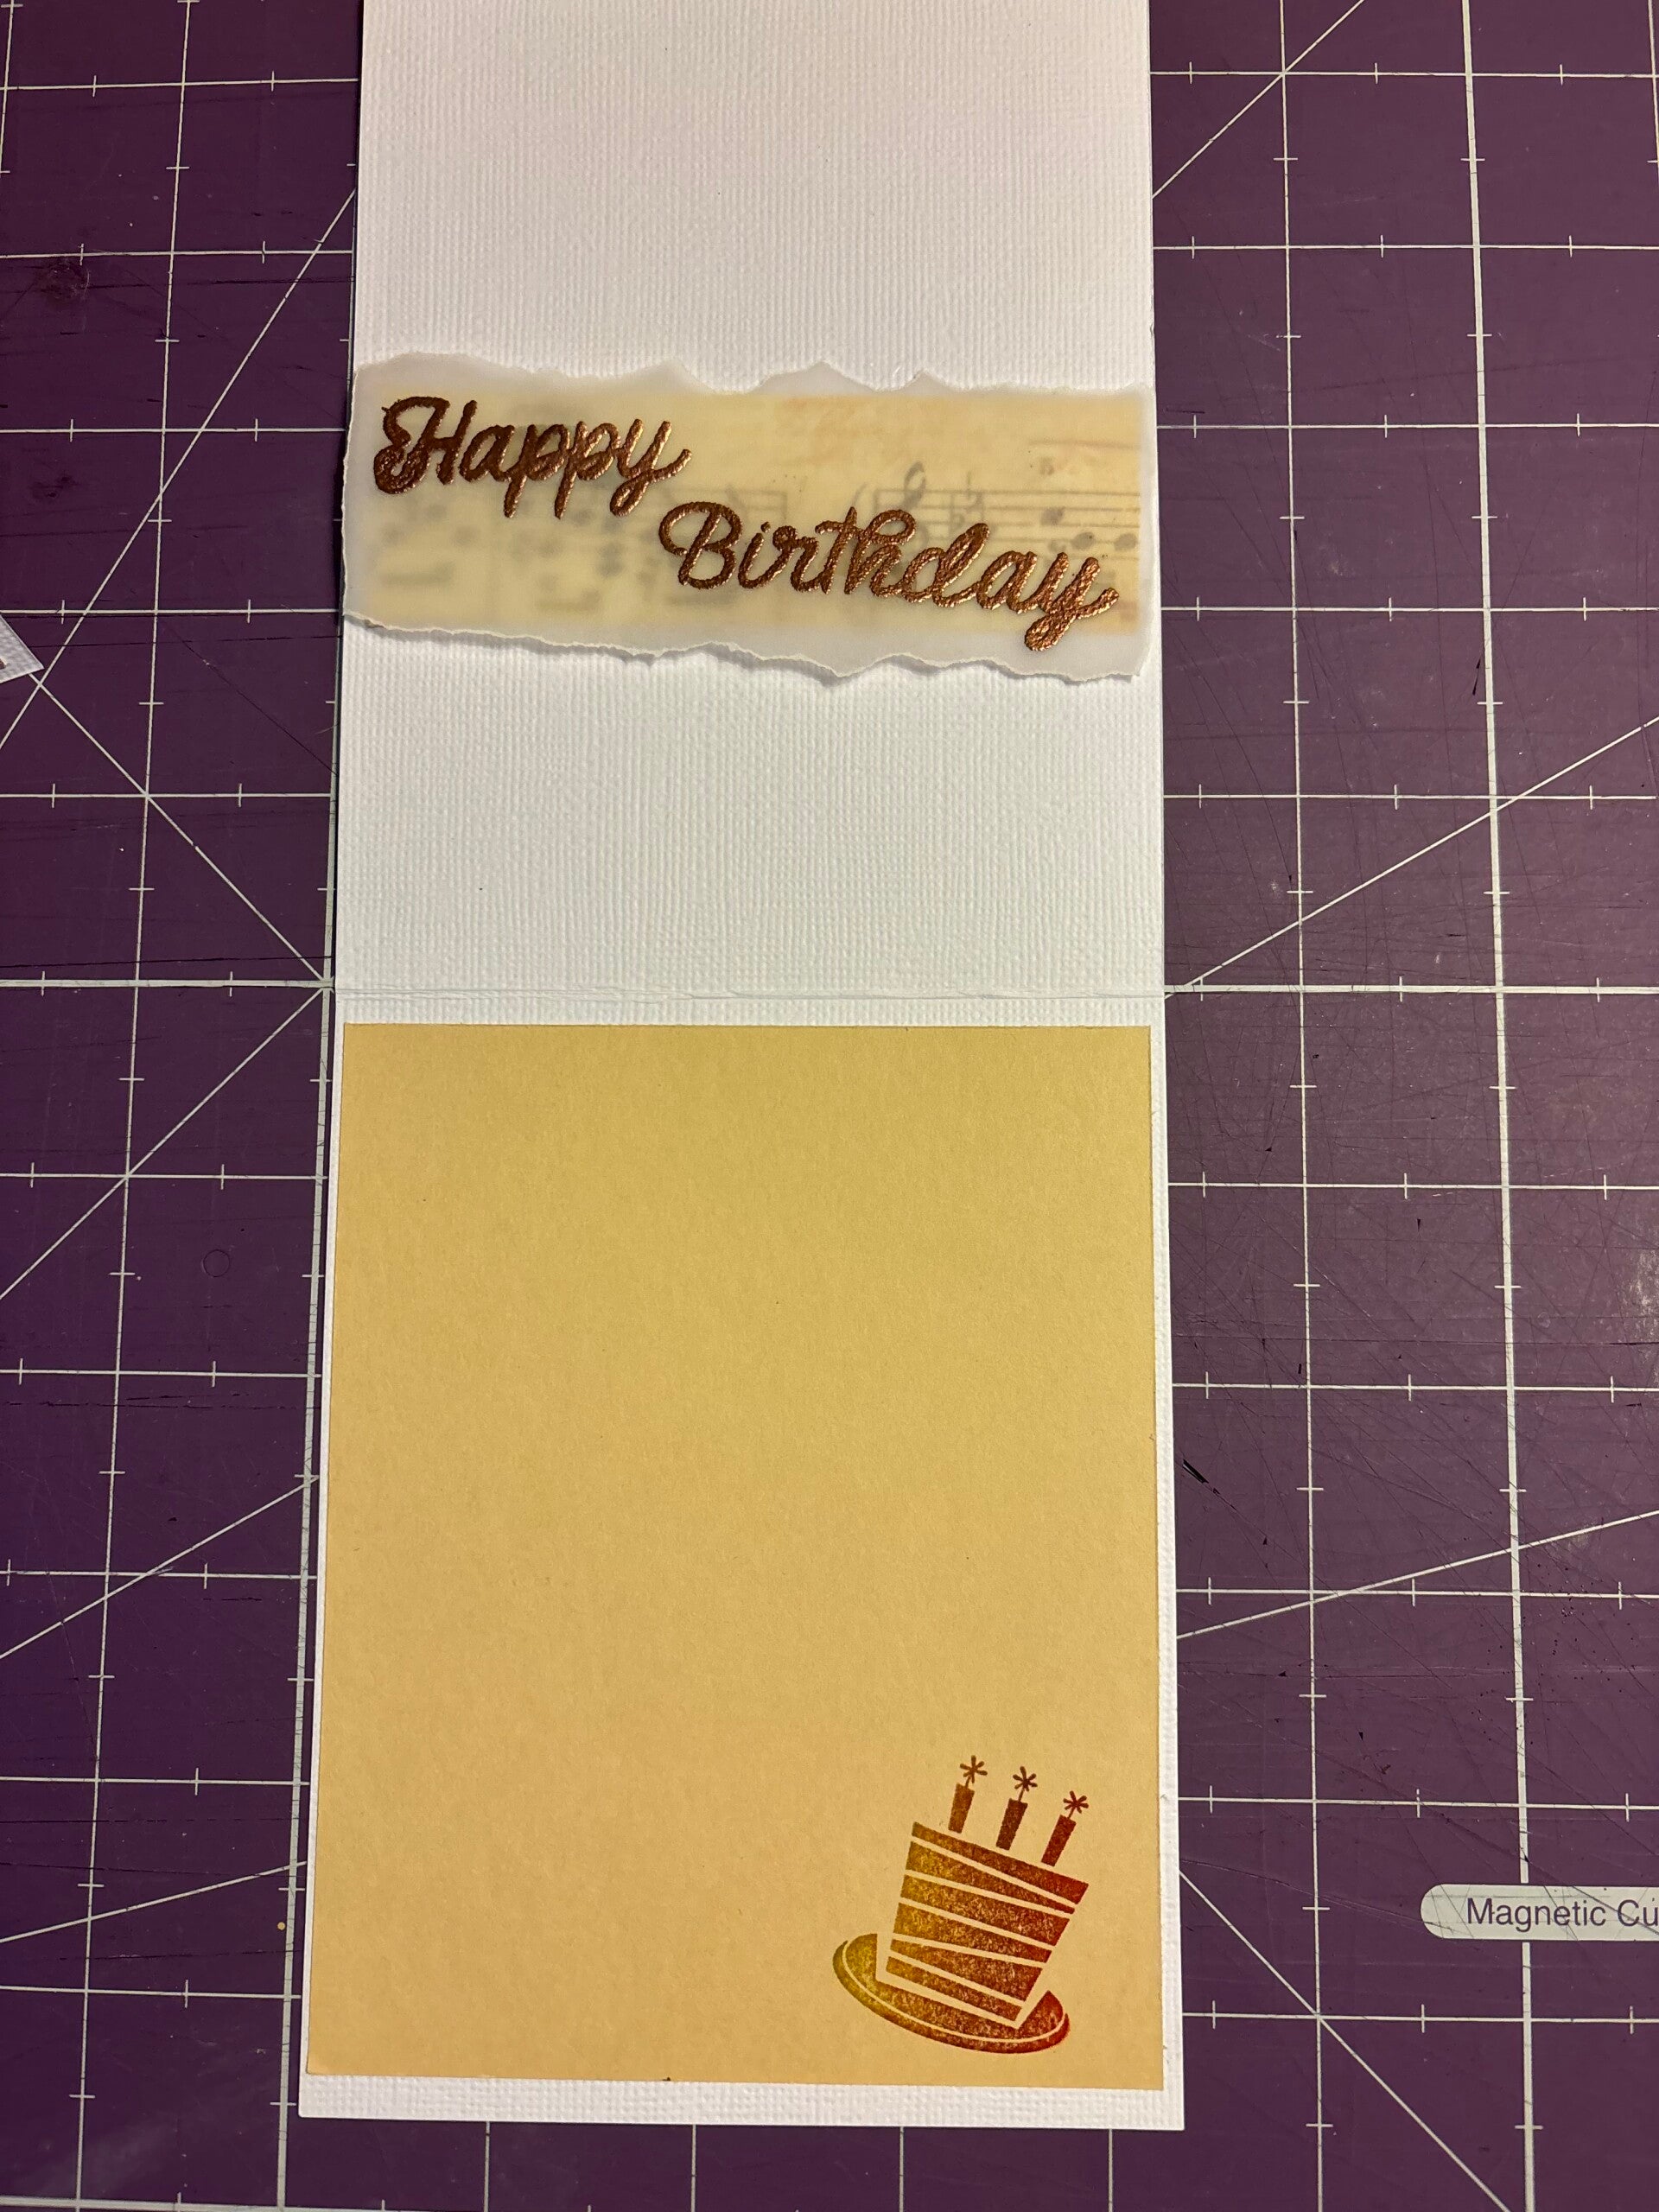
Sunday March 1, 2026 - Tonight we made easy "Present" Birthday Cards. This would be a good project for scraps!
Cutting Directions
Card Stock:
* Card Base: 5 1/2" x 8 1/2"
* Present Base: 3 1/2" x 3 1/2"
* Optional: If colored cardstock is used for the base, then a white piece can be cut for the inside, 4" x 5 1/4"
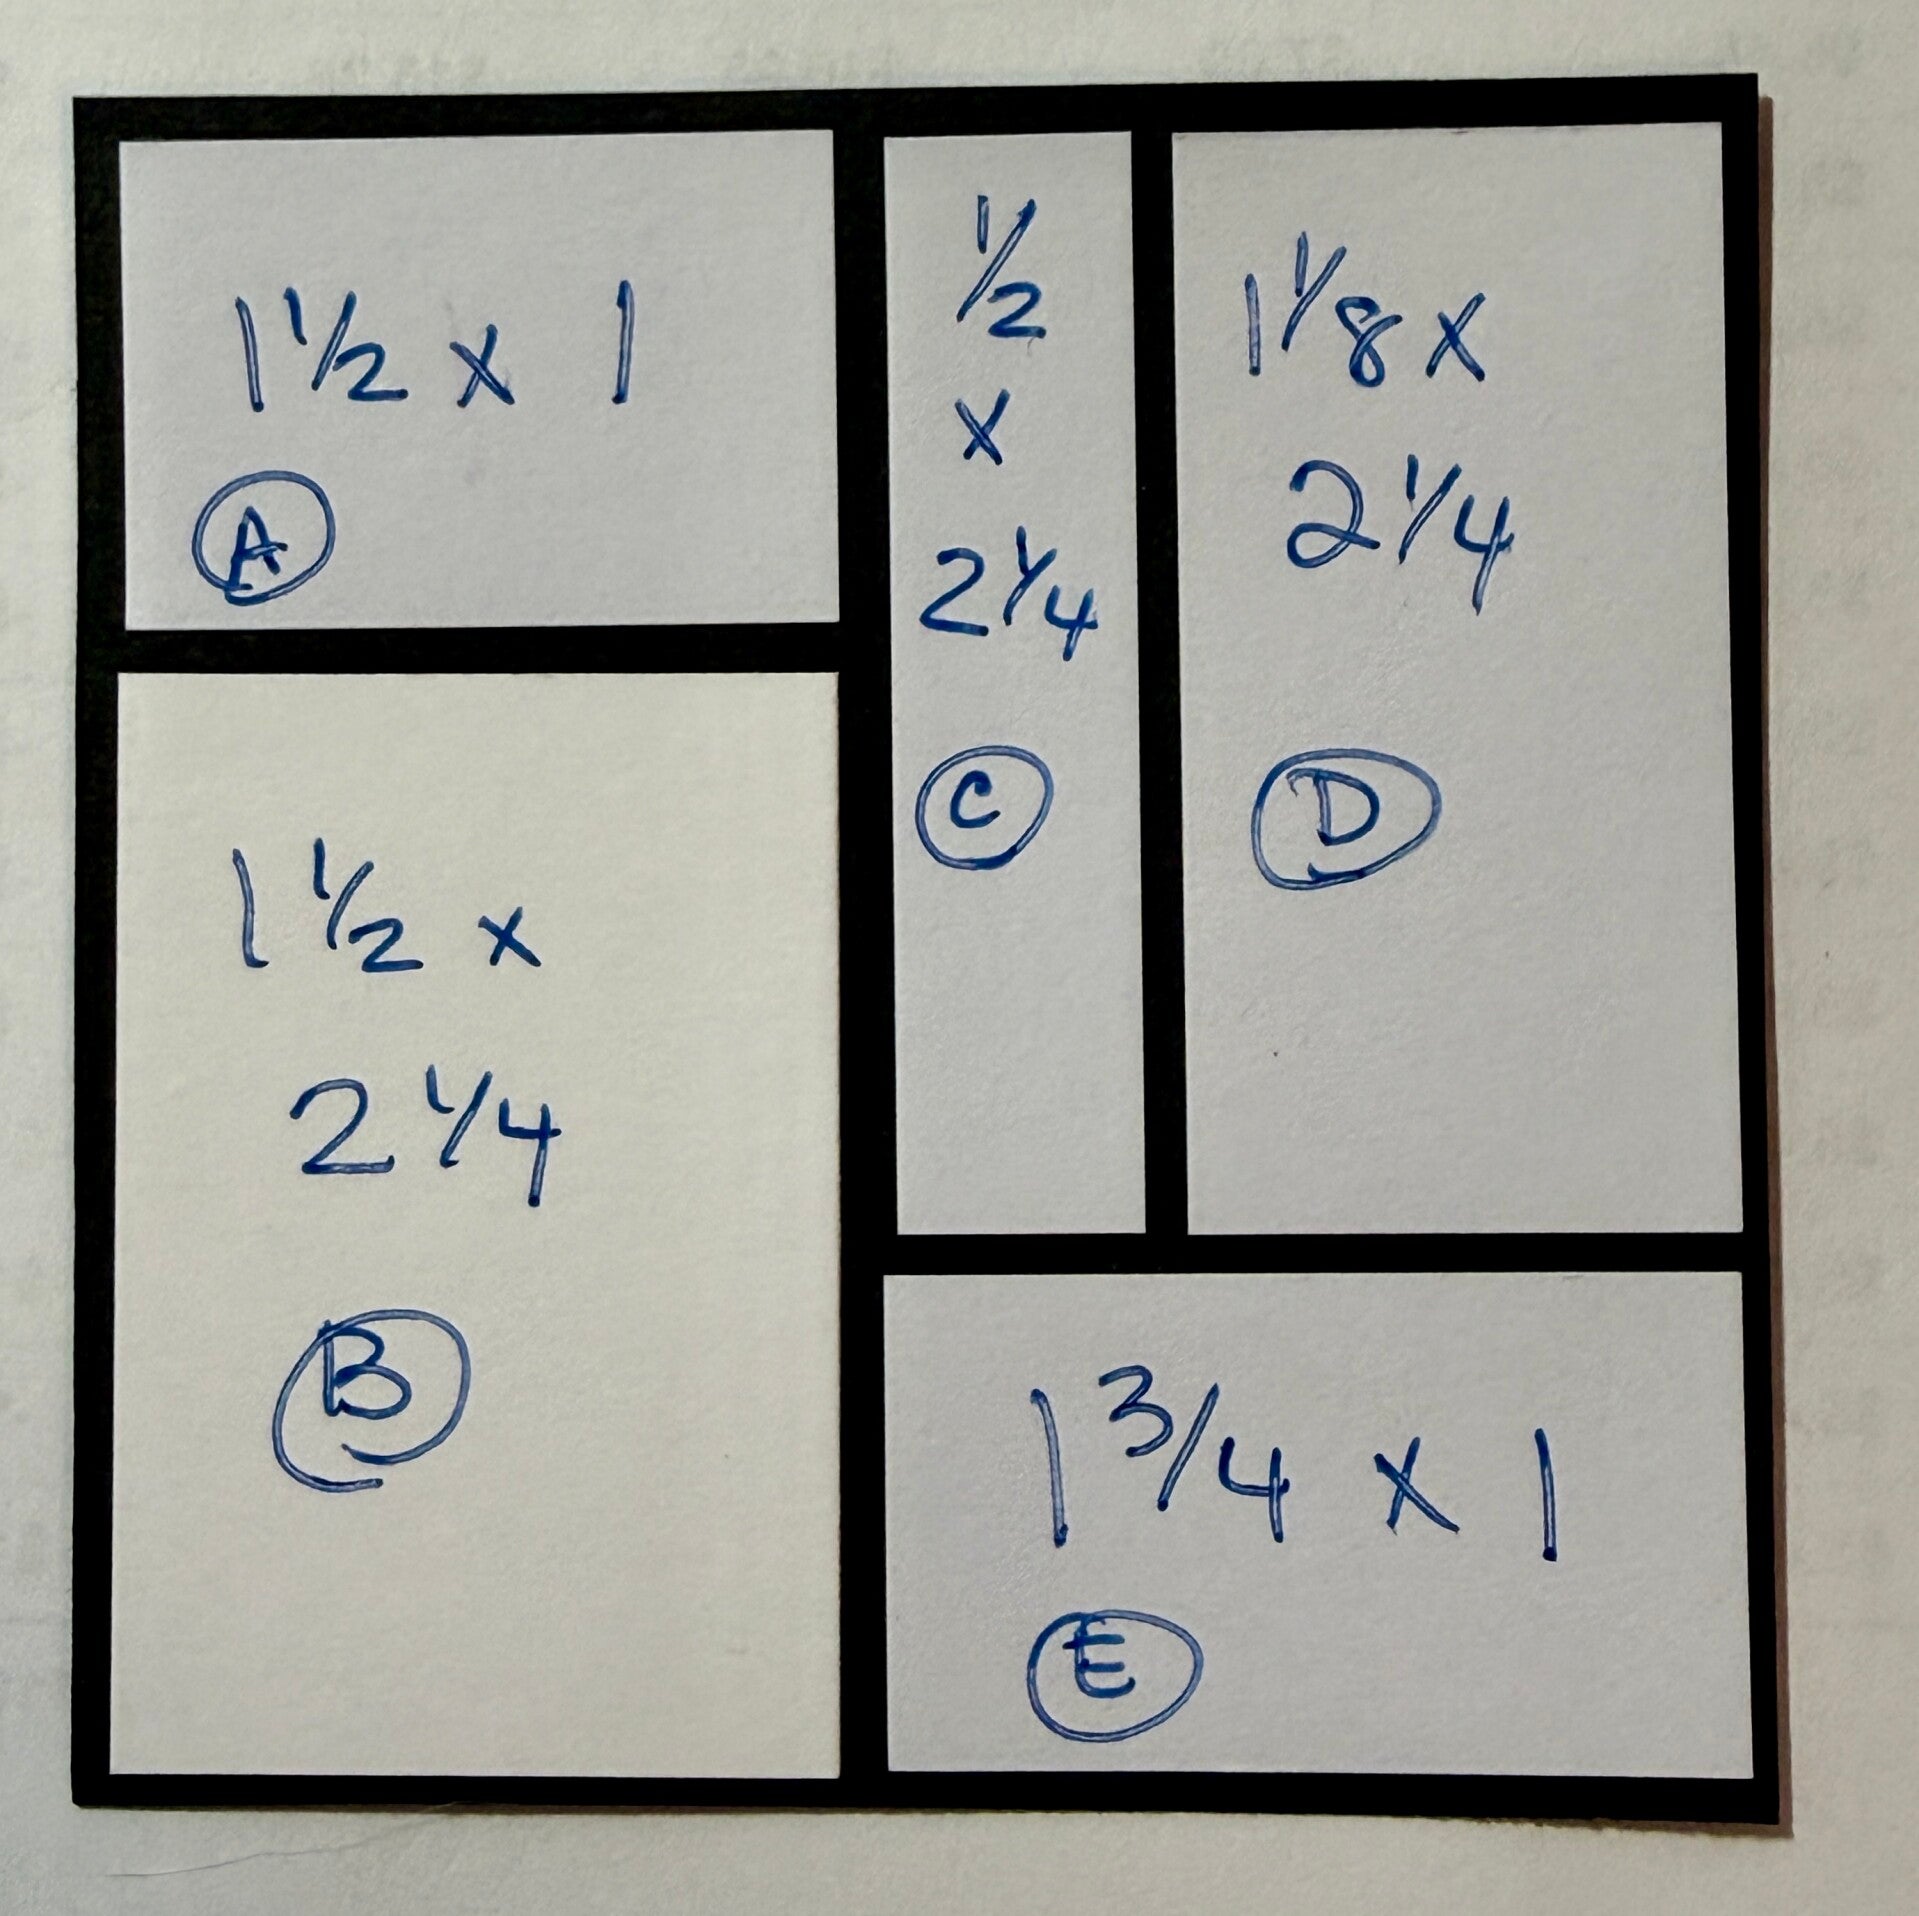
Designer Paper:
* See image to right for dimensions.
Directions:
* Adhere the small designer pieces to the present base as shown to the right. Figure out placement on the card front, leaving room for stamping below and ribbon above. After stamping the card base, attach the present base with dimensionals. Embellish with jewels and add the bow above the present. Alternately, instead of stamping on the base, you can stamp your sentiment on a tag and attach it to the present.


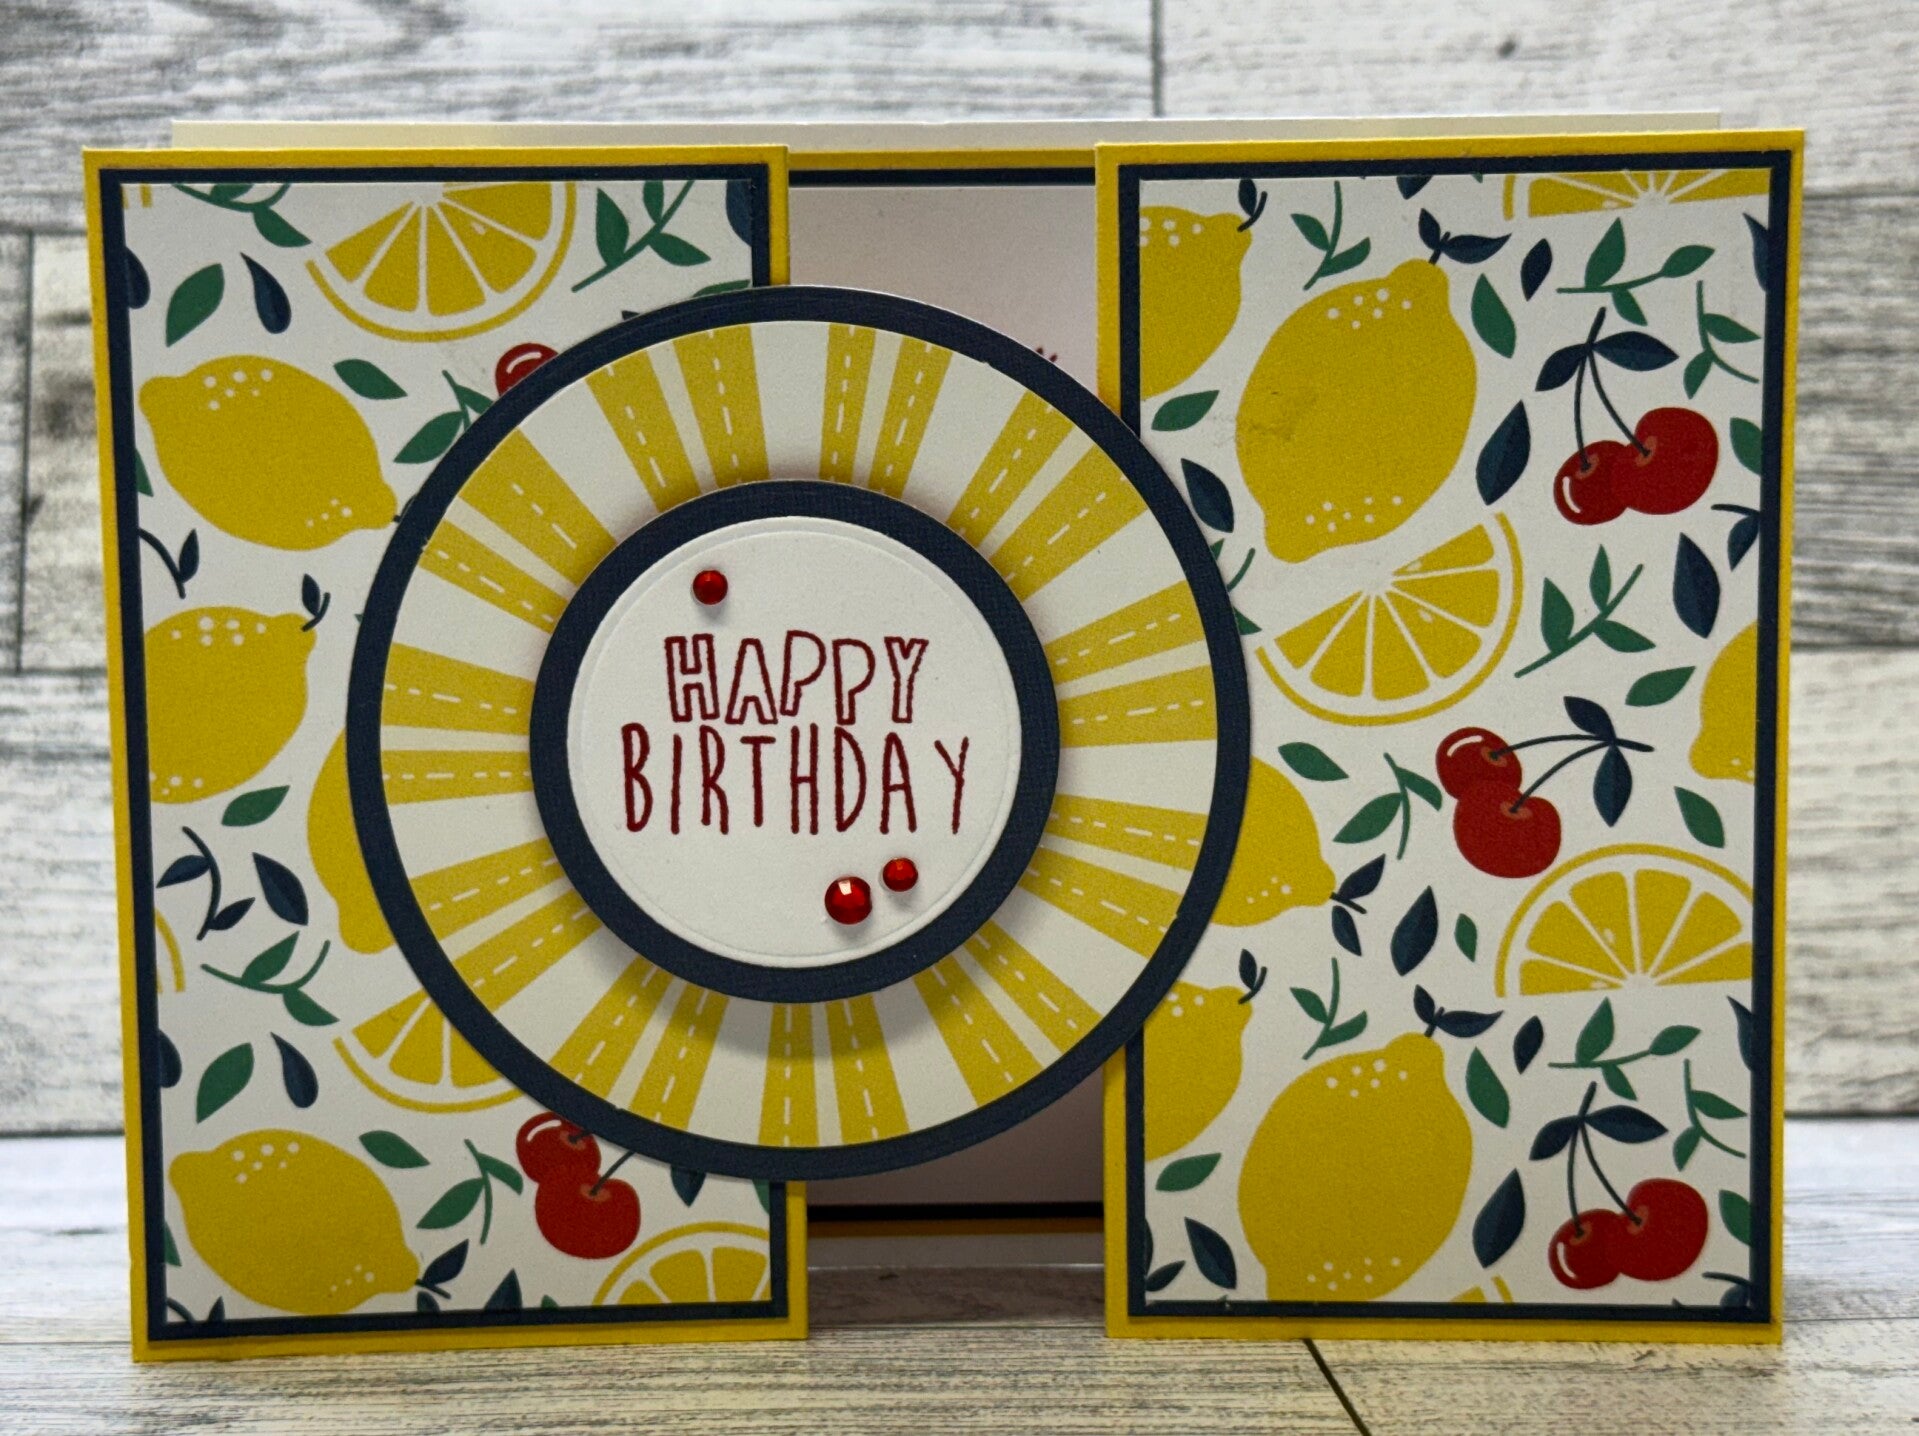
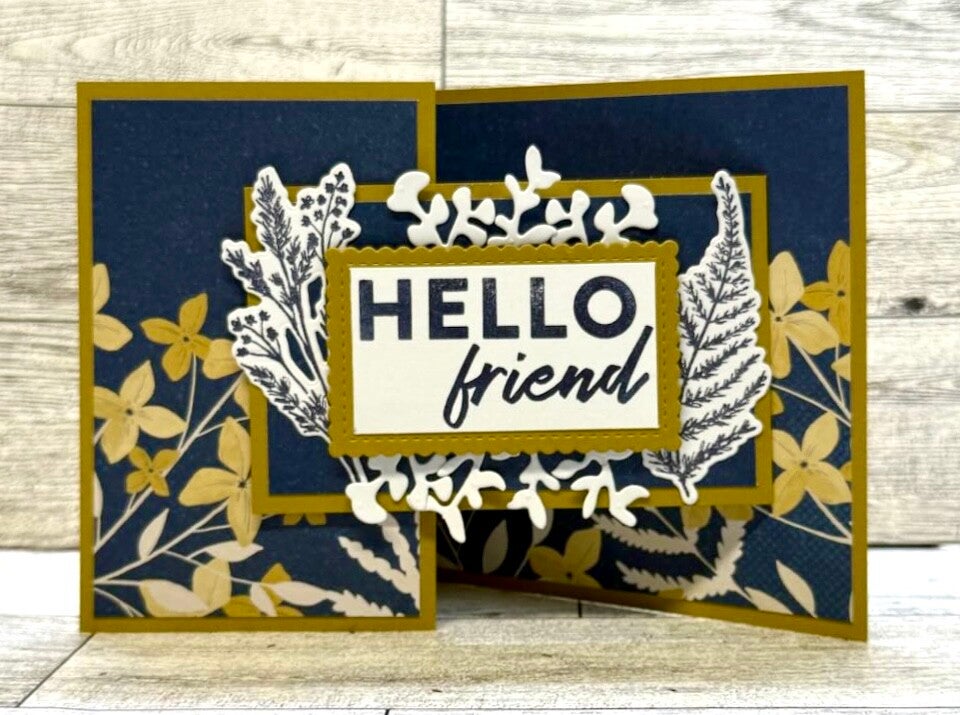
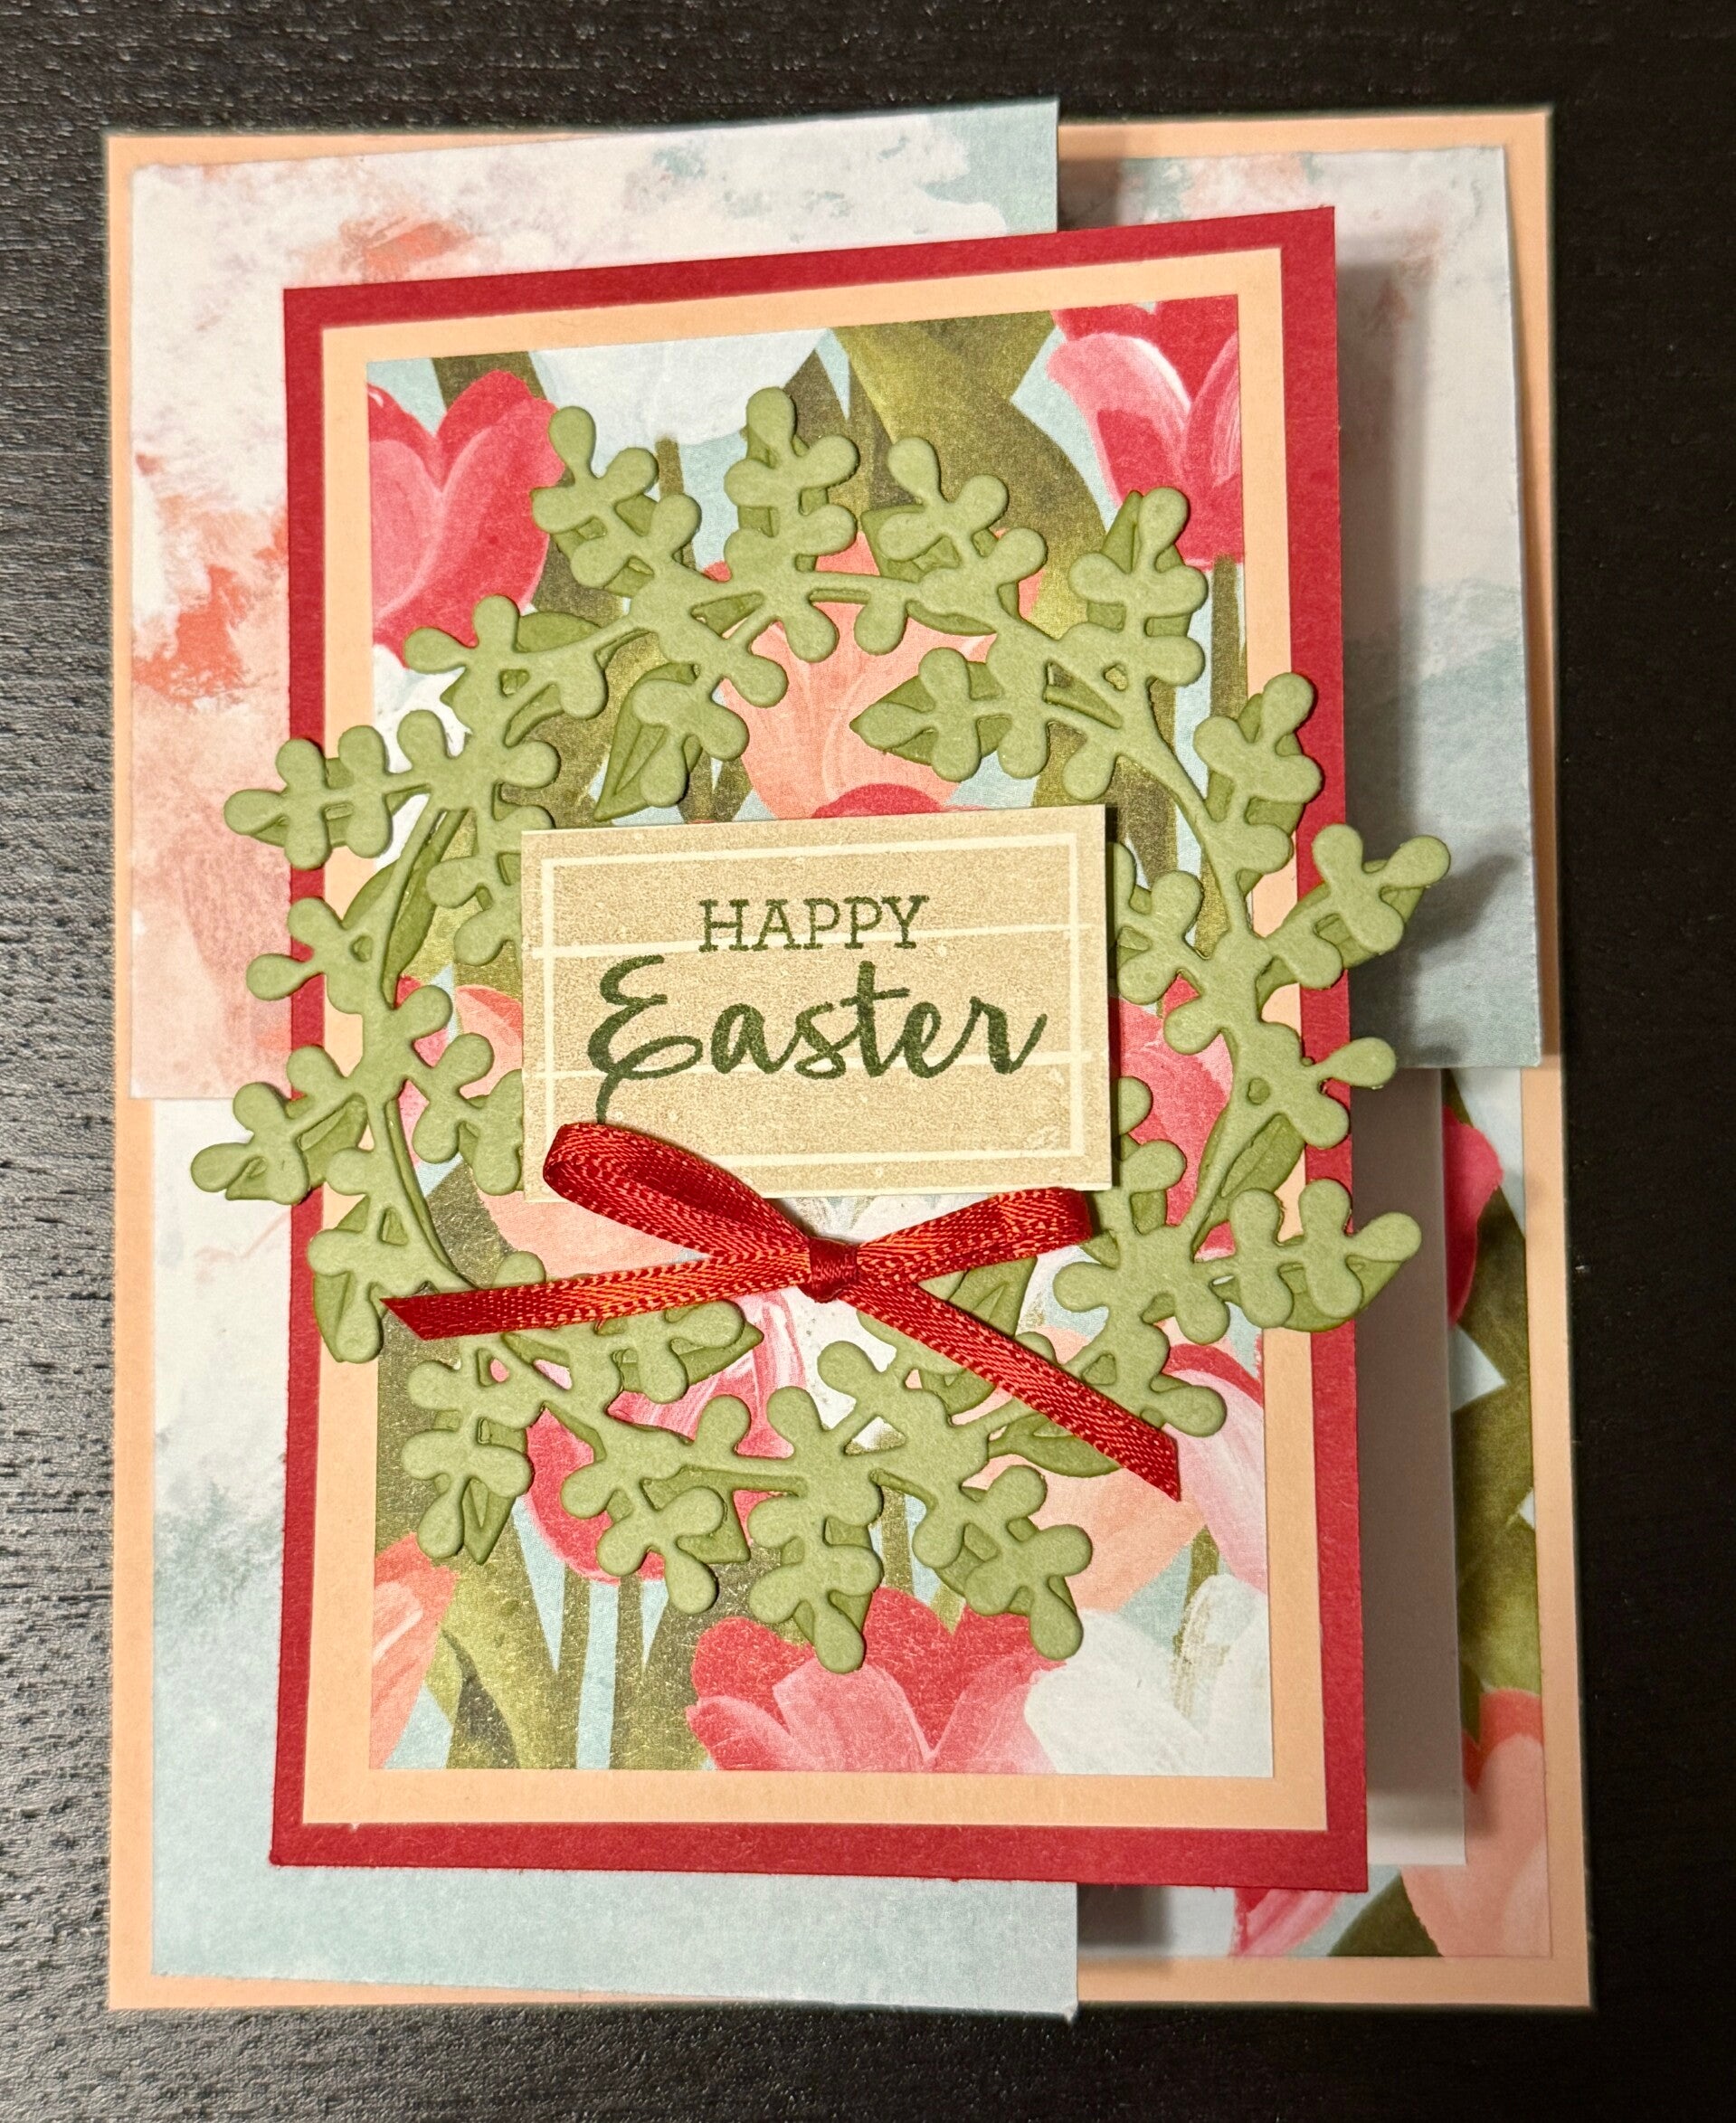
Sunday February 22, 2026 - Tonight's project was a Fancy Front Gatefold Card. This card is adapted from a card that we created in a card class at Made on Main in Ashville, Ohio last fall.
Cutting Directions
Card Stock:
* Back: 4 1/4" x 5 1/2"
* Front: 4" x 11", Score on long edge at 2 1/4" and 3 7/8". Flip over 180 degrees and score the other side the same. This creates the gate fold.
* Optional: If colored cardstock is used for the front piece, then a white piece can be cut for the inside, 3" x 3 3/4"
Designer Paper:
* To cover back piece: 4" x 5 1/4"
* To cover front panels, outside edges: 2" x 3 3/4"
* To cover front panels, inside edges: 1 3/8" x 3 3/4"
Additional:
* Die cut or decoration for front of card (this is only adhered to left edge of front of card)


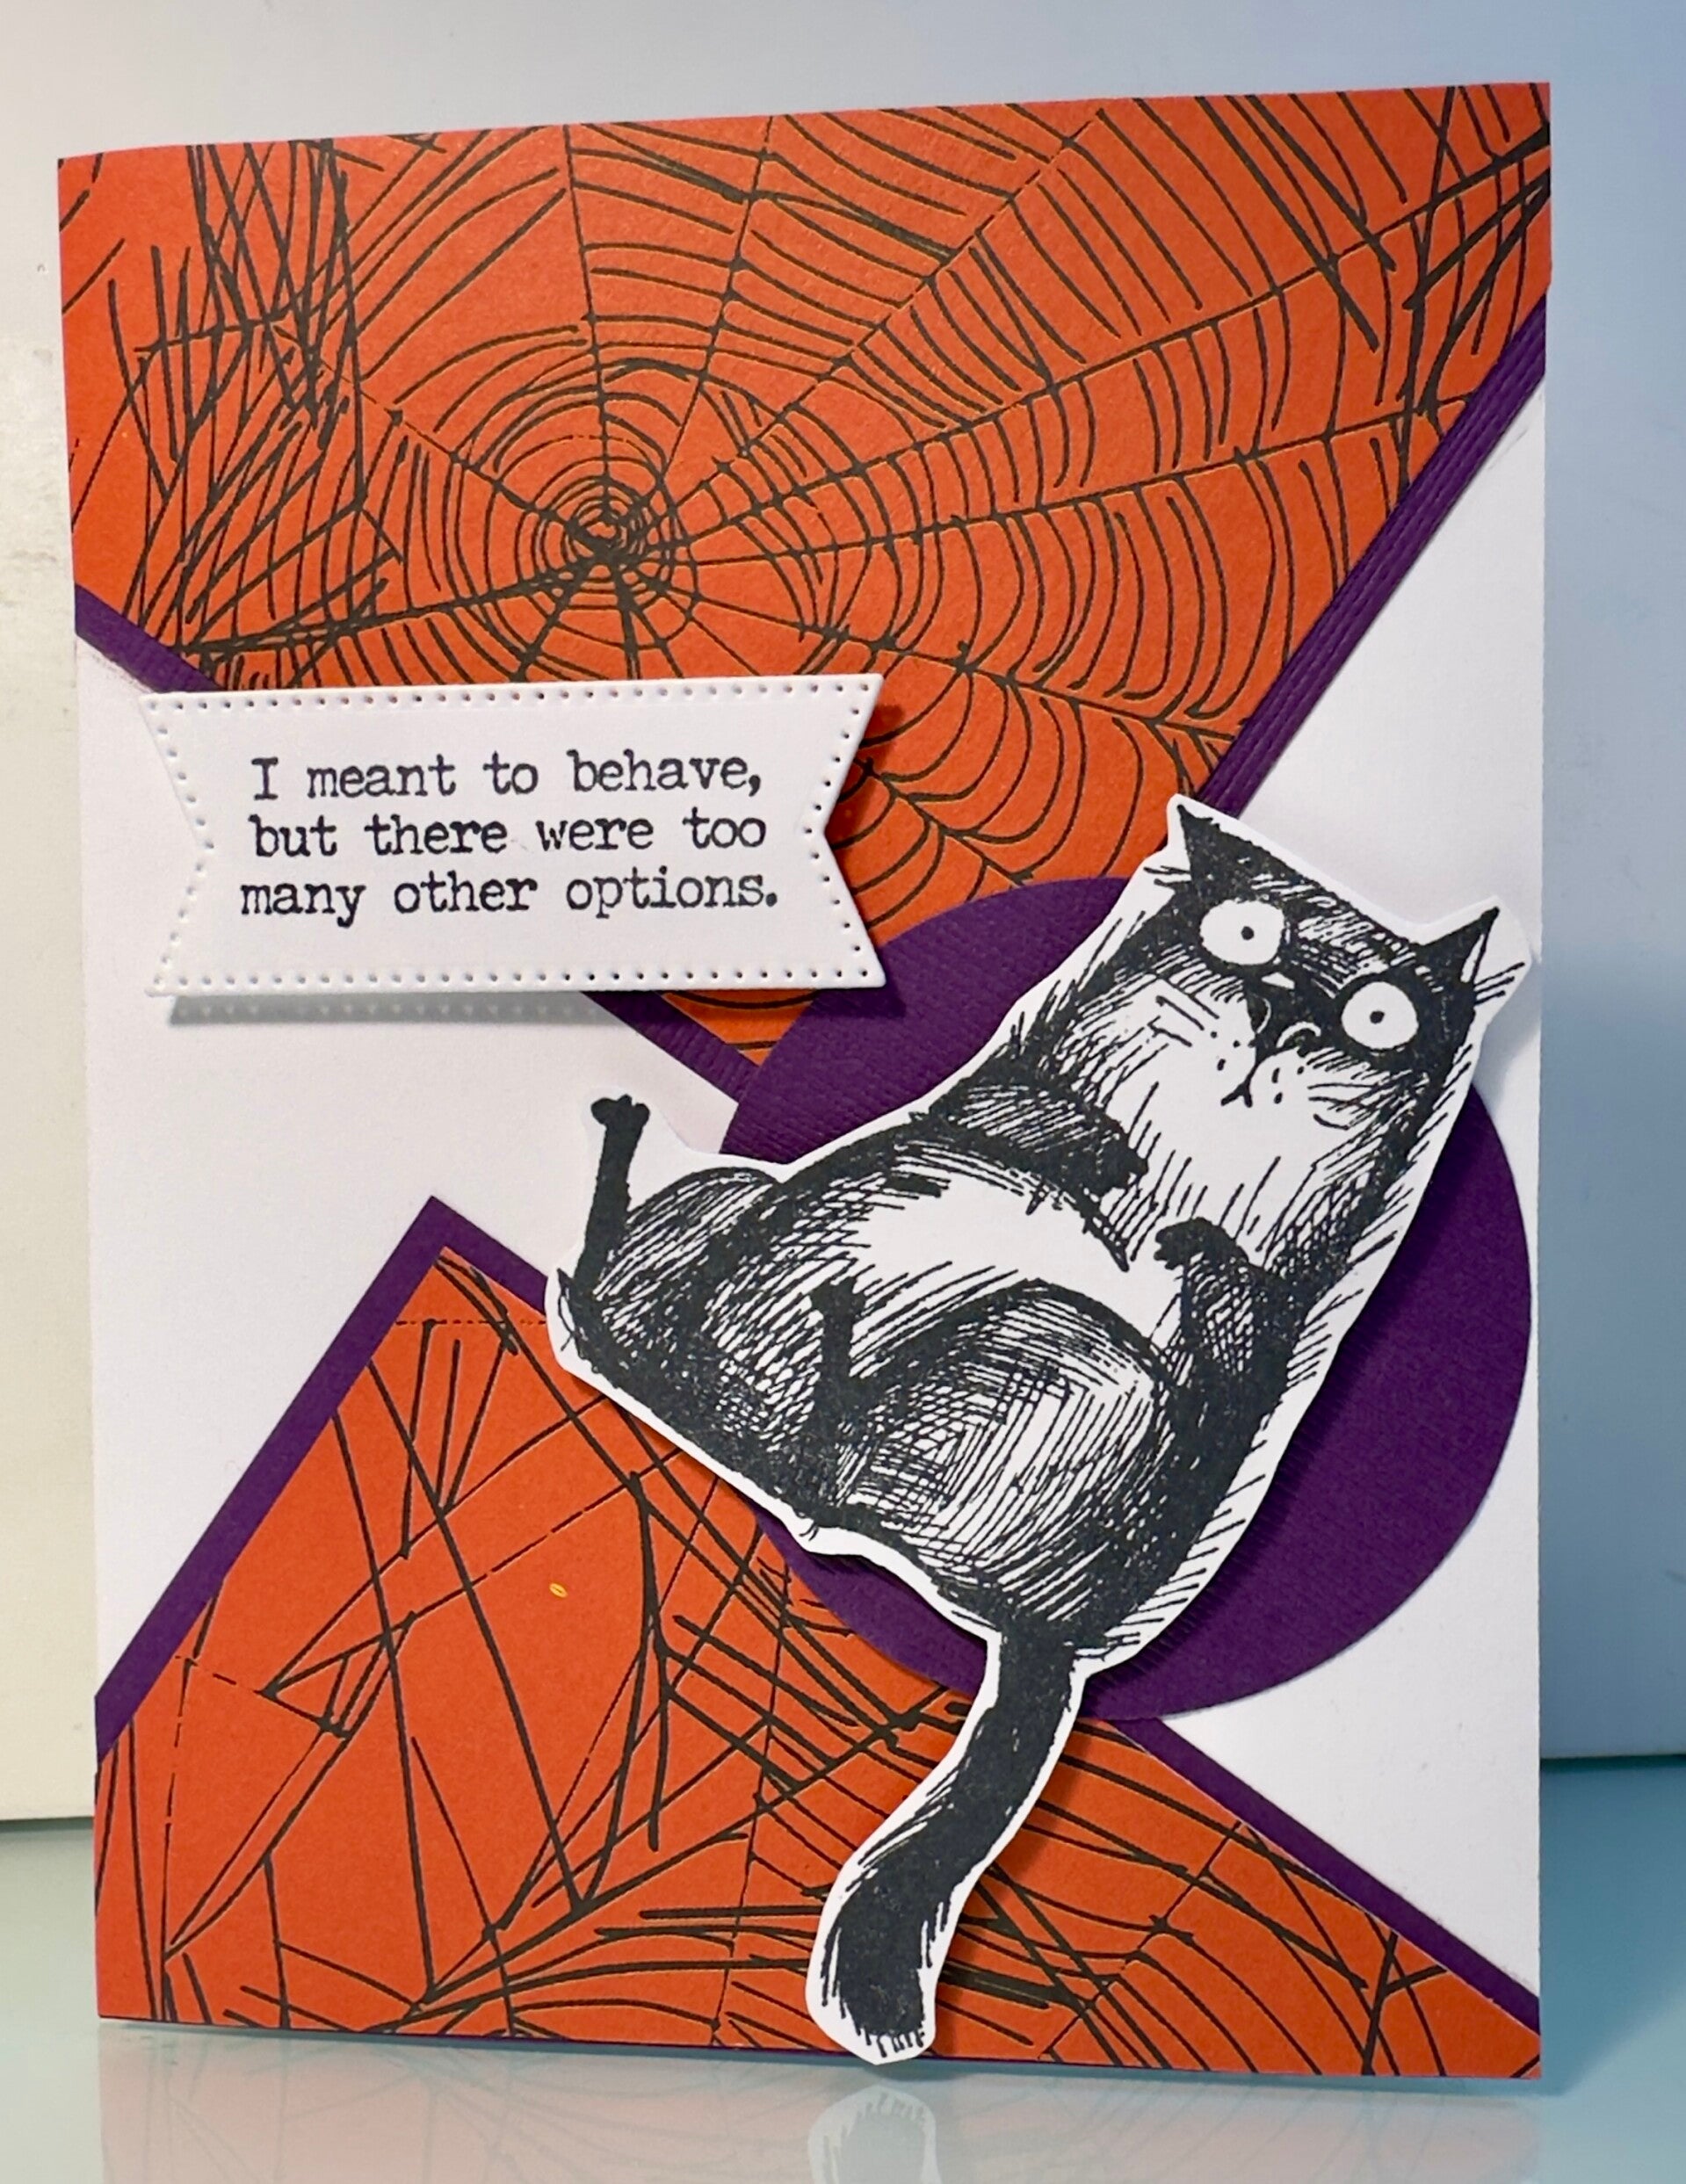
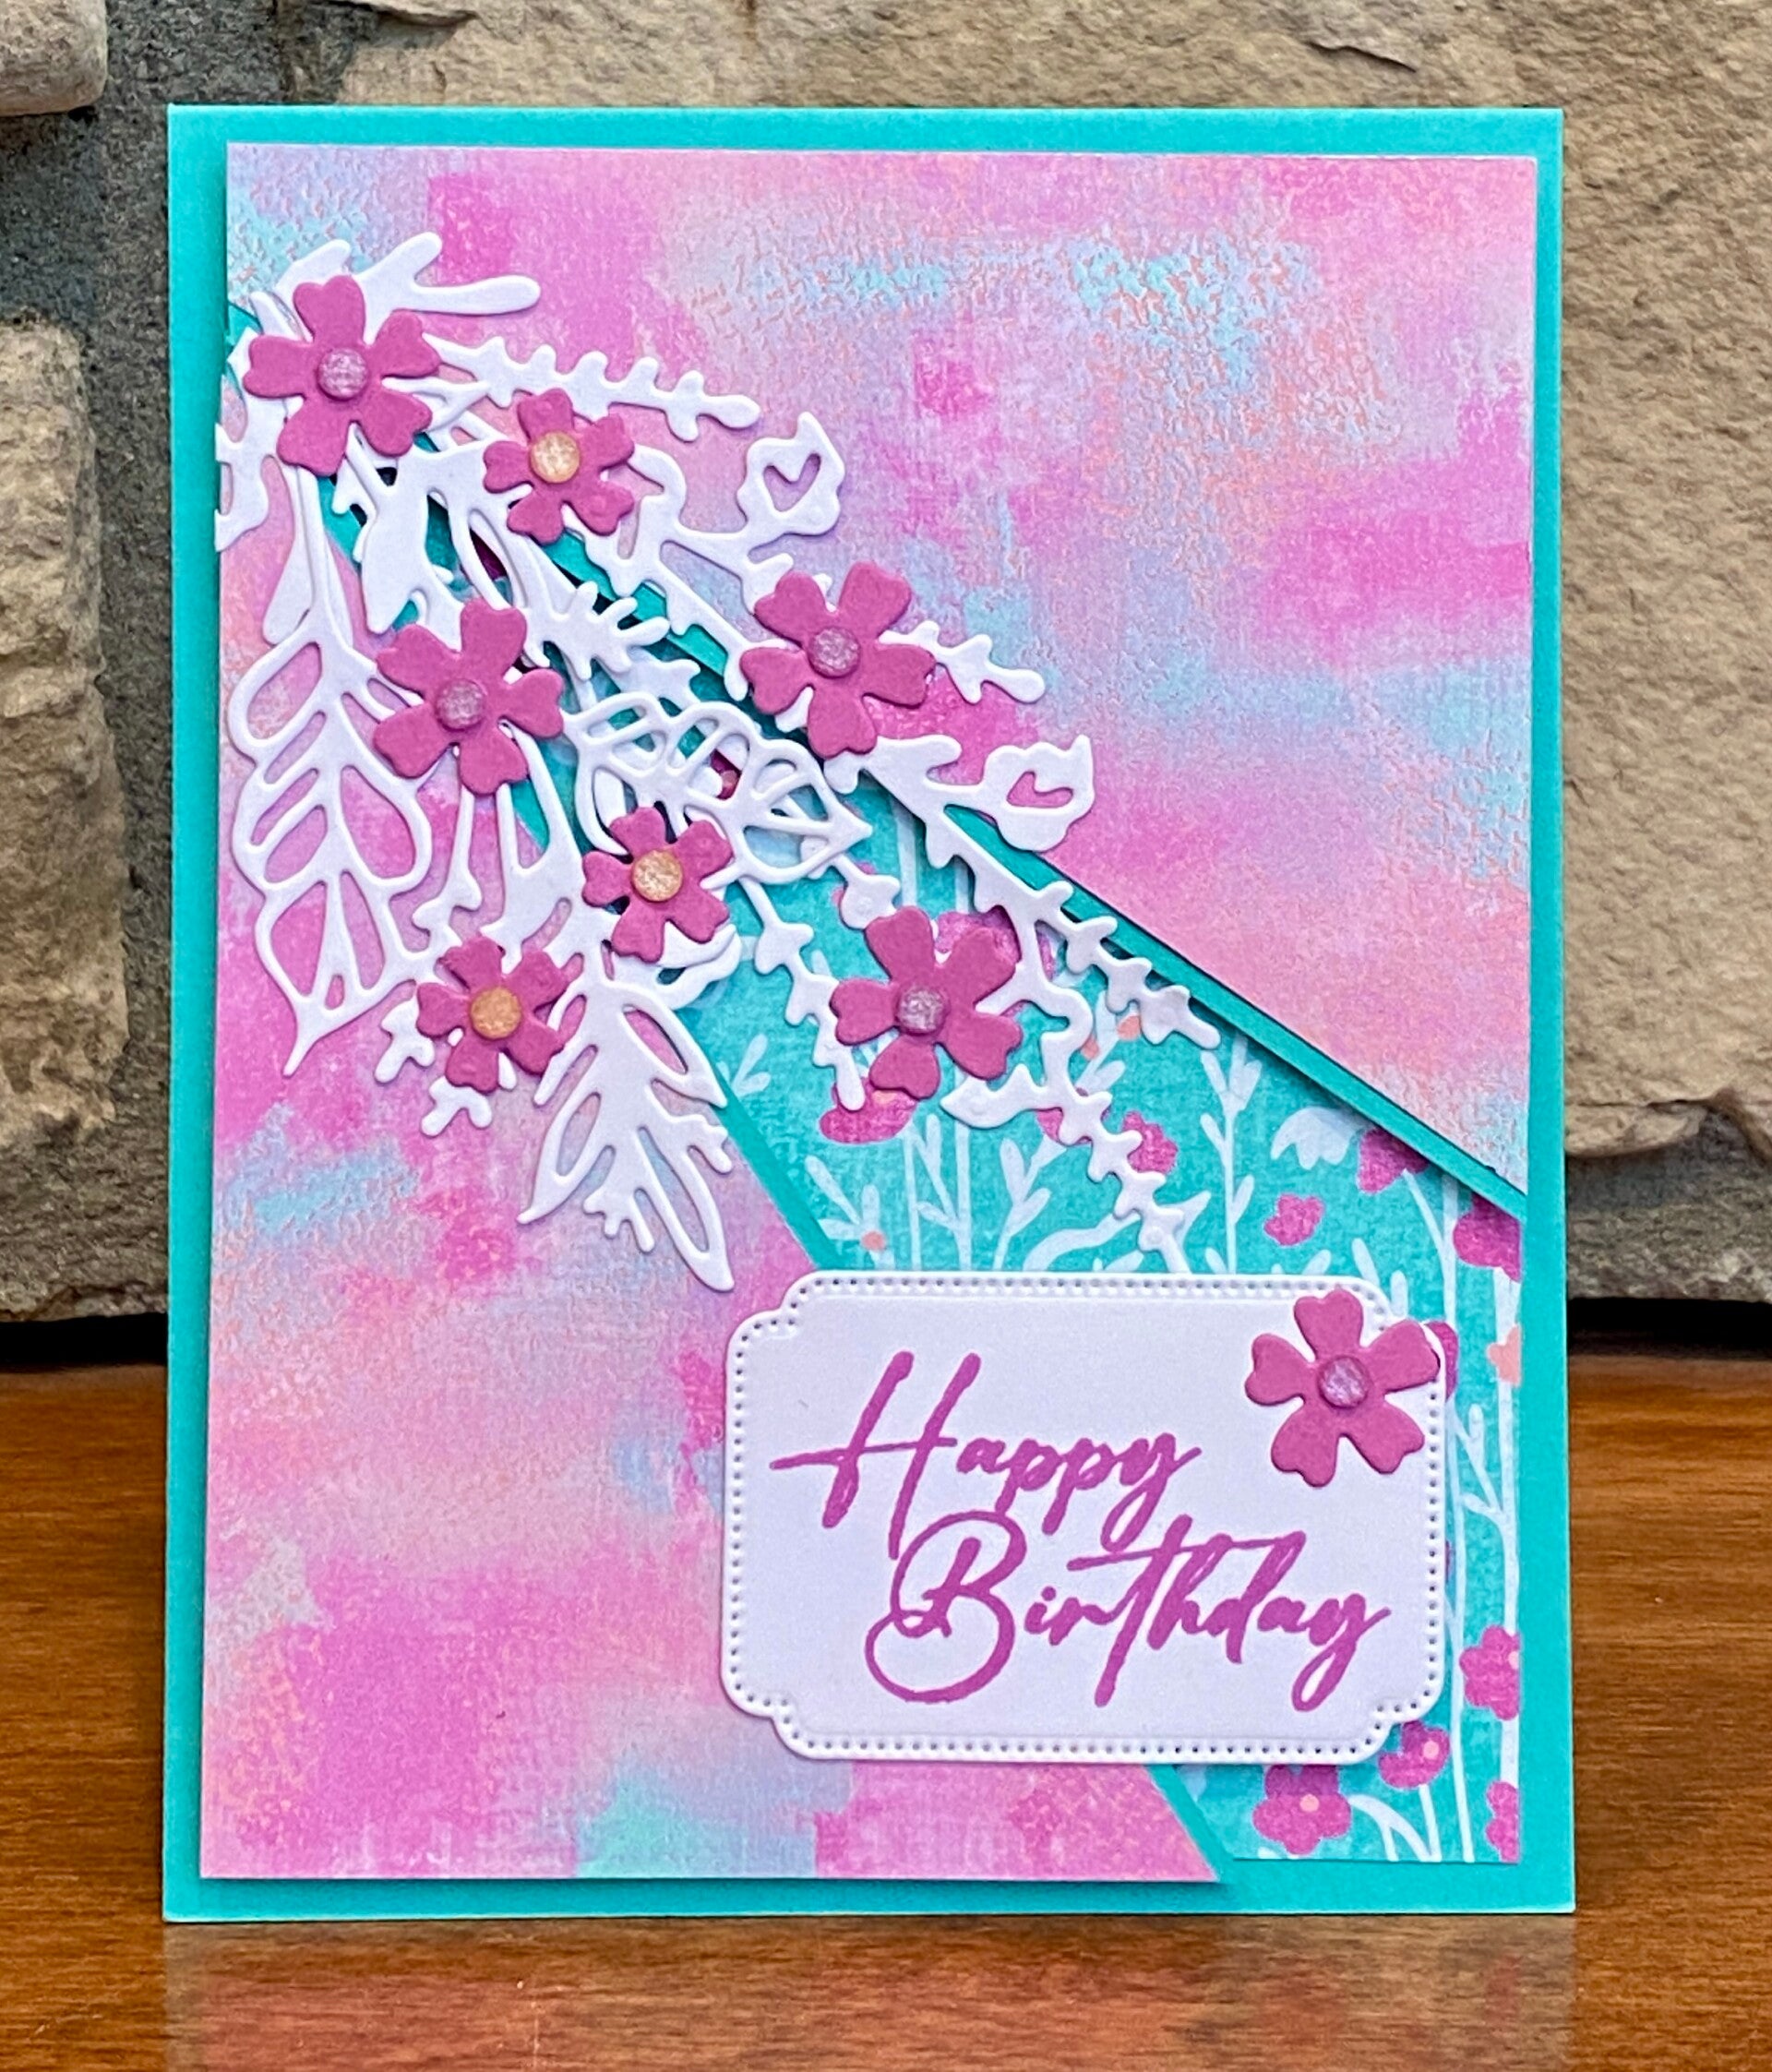
Sunday January 18, 2026 - Tonight we made a cute Corner Flip Card, inspired by the card design I saw on YouTube by Bukeye Inklings. Here is her video tutorial.
Cutting Directions
Card Stock:
* Colored: 5 1/2" x 8 1/2" scored at 4 1/4" (additional score to be made using triangle template)
* White: 5 1/4" x 4" (additional cut to be made using triangle template)
* Triange Template: 2 3/4" x 3 1/2" square, cut diagonally to make two triangles - long edge goes along the top of the card
Designer Paper:
* 2 pieces 5 1/4" x 4" (additional cuts to be made using triangle template) - one for top of card, one for inside of card
Additional:
* Embellishments to put in upper left corner of card and inside card to "pop" when opened


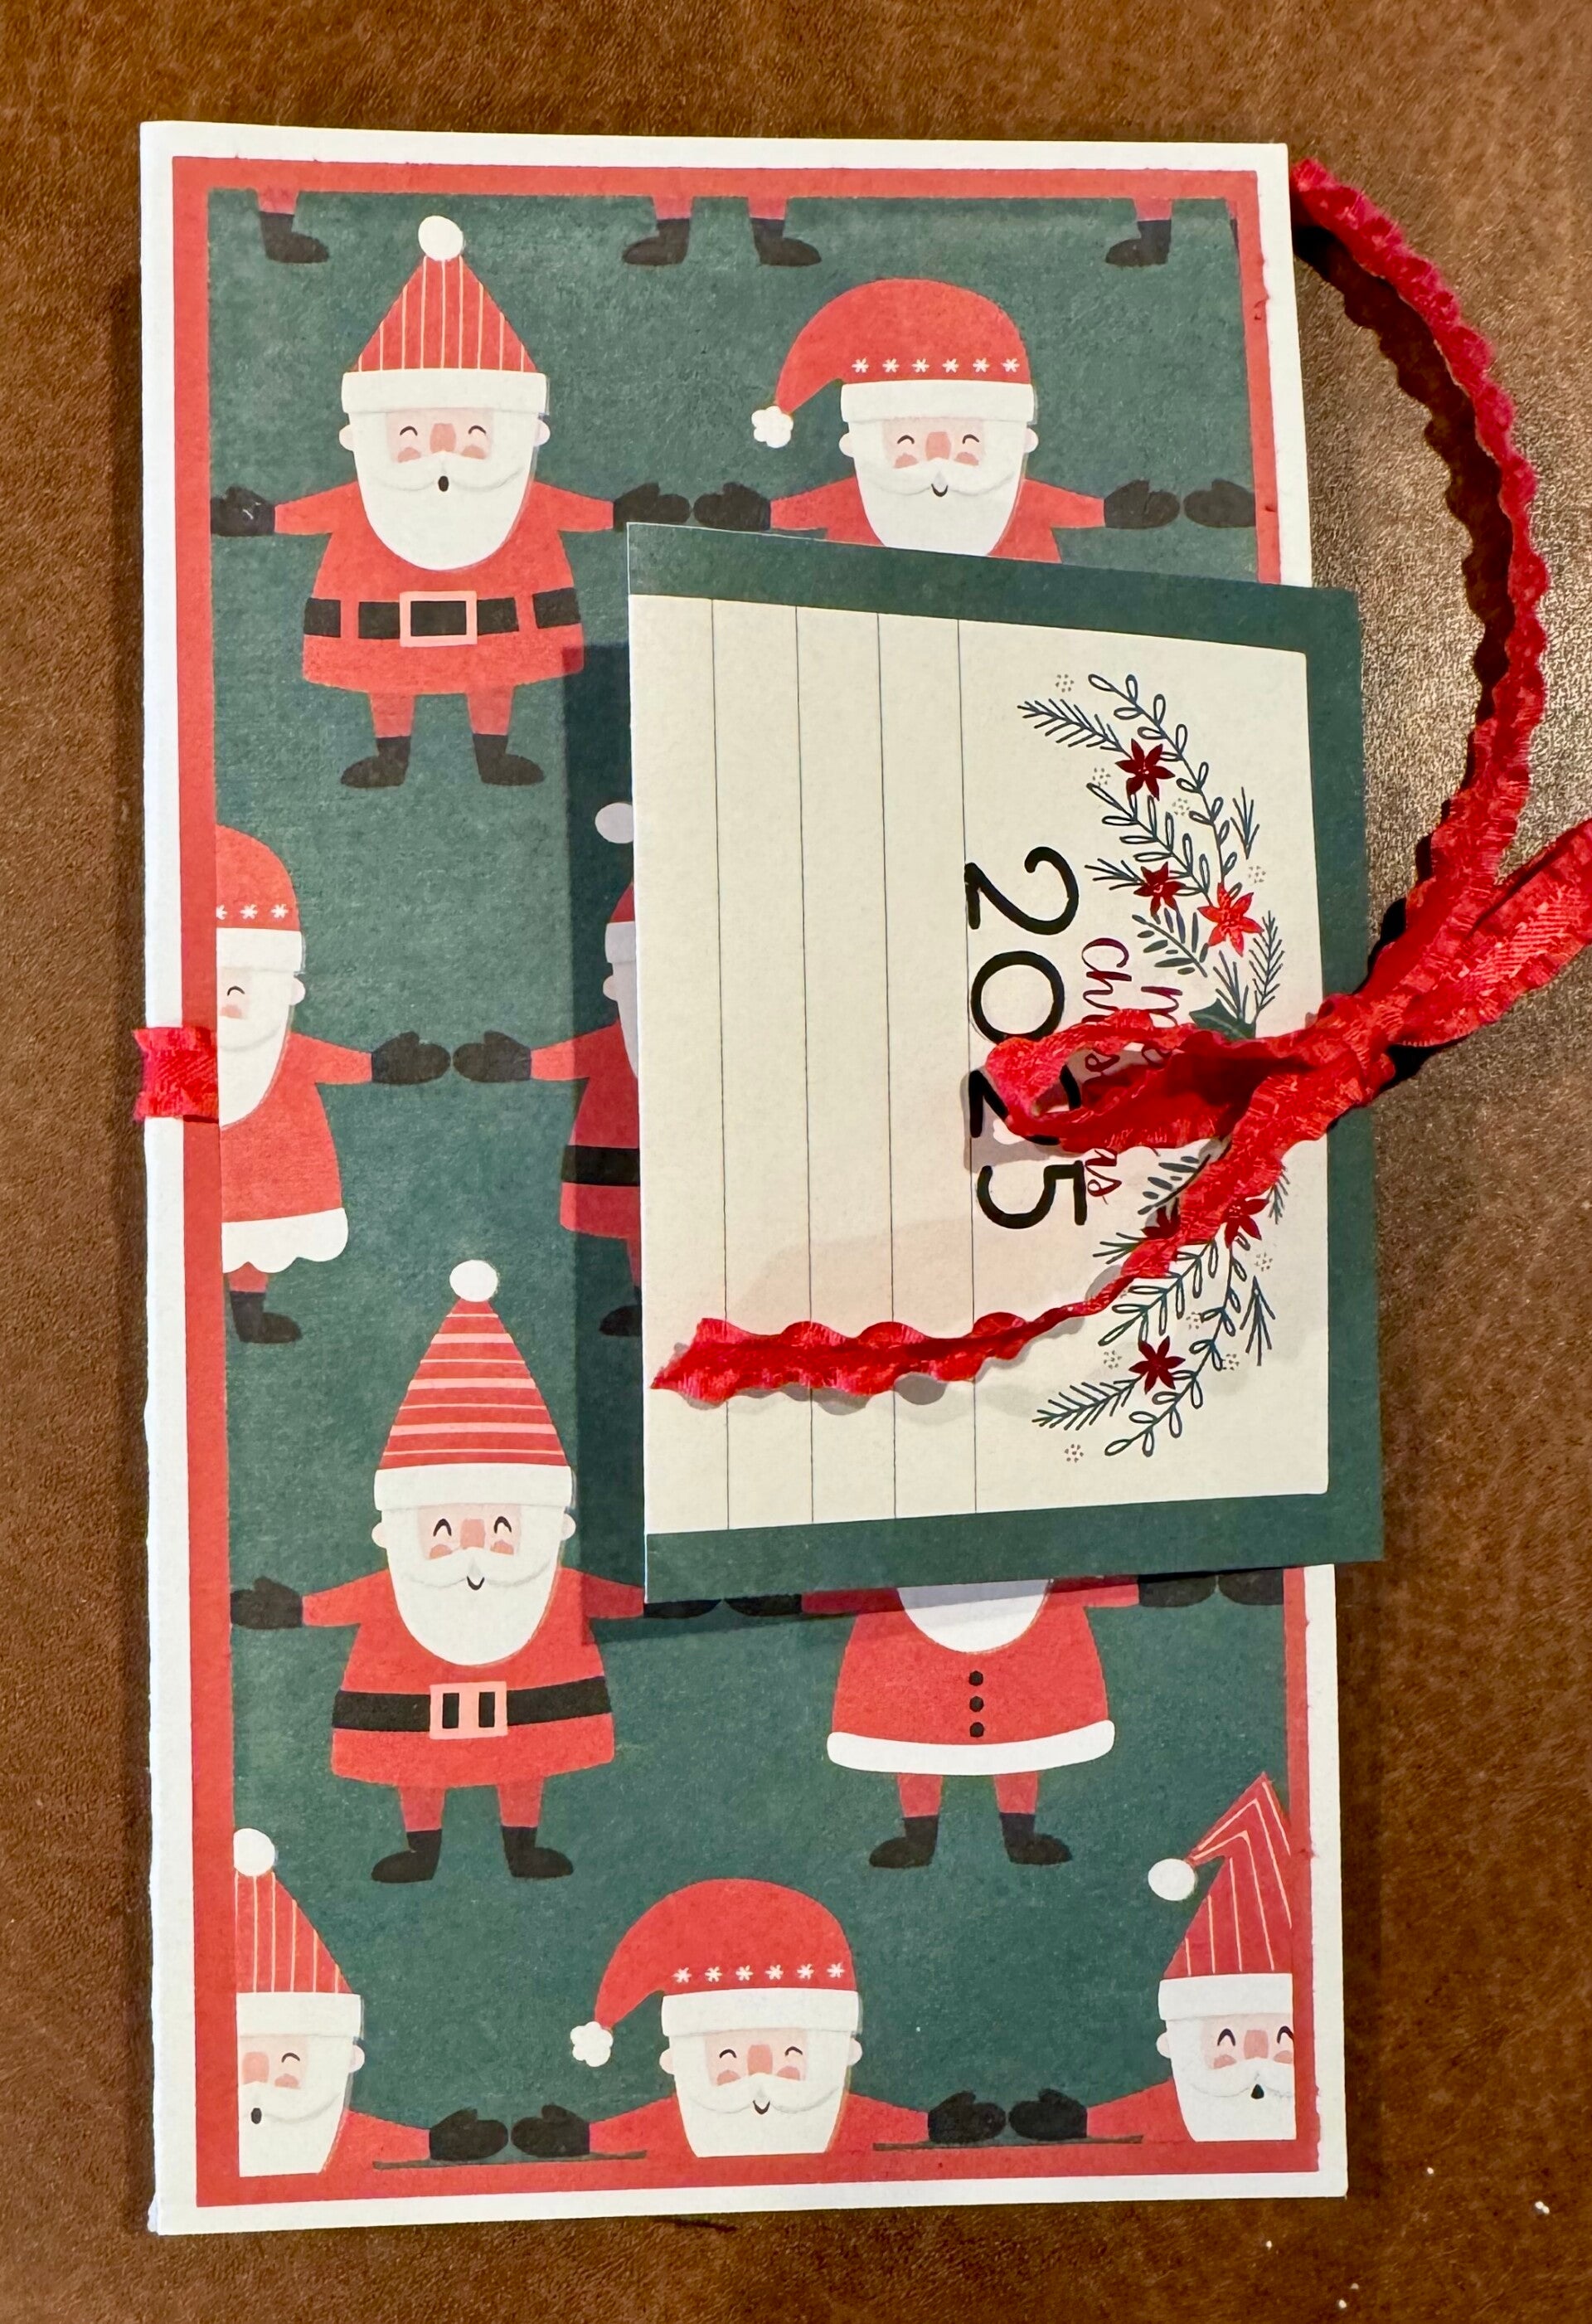
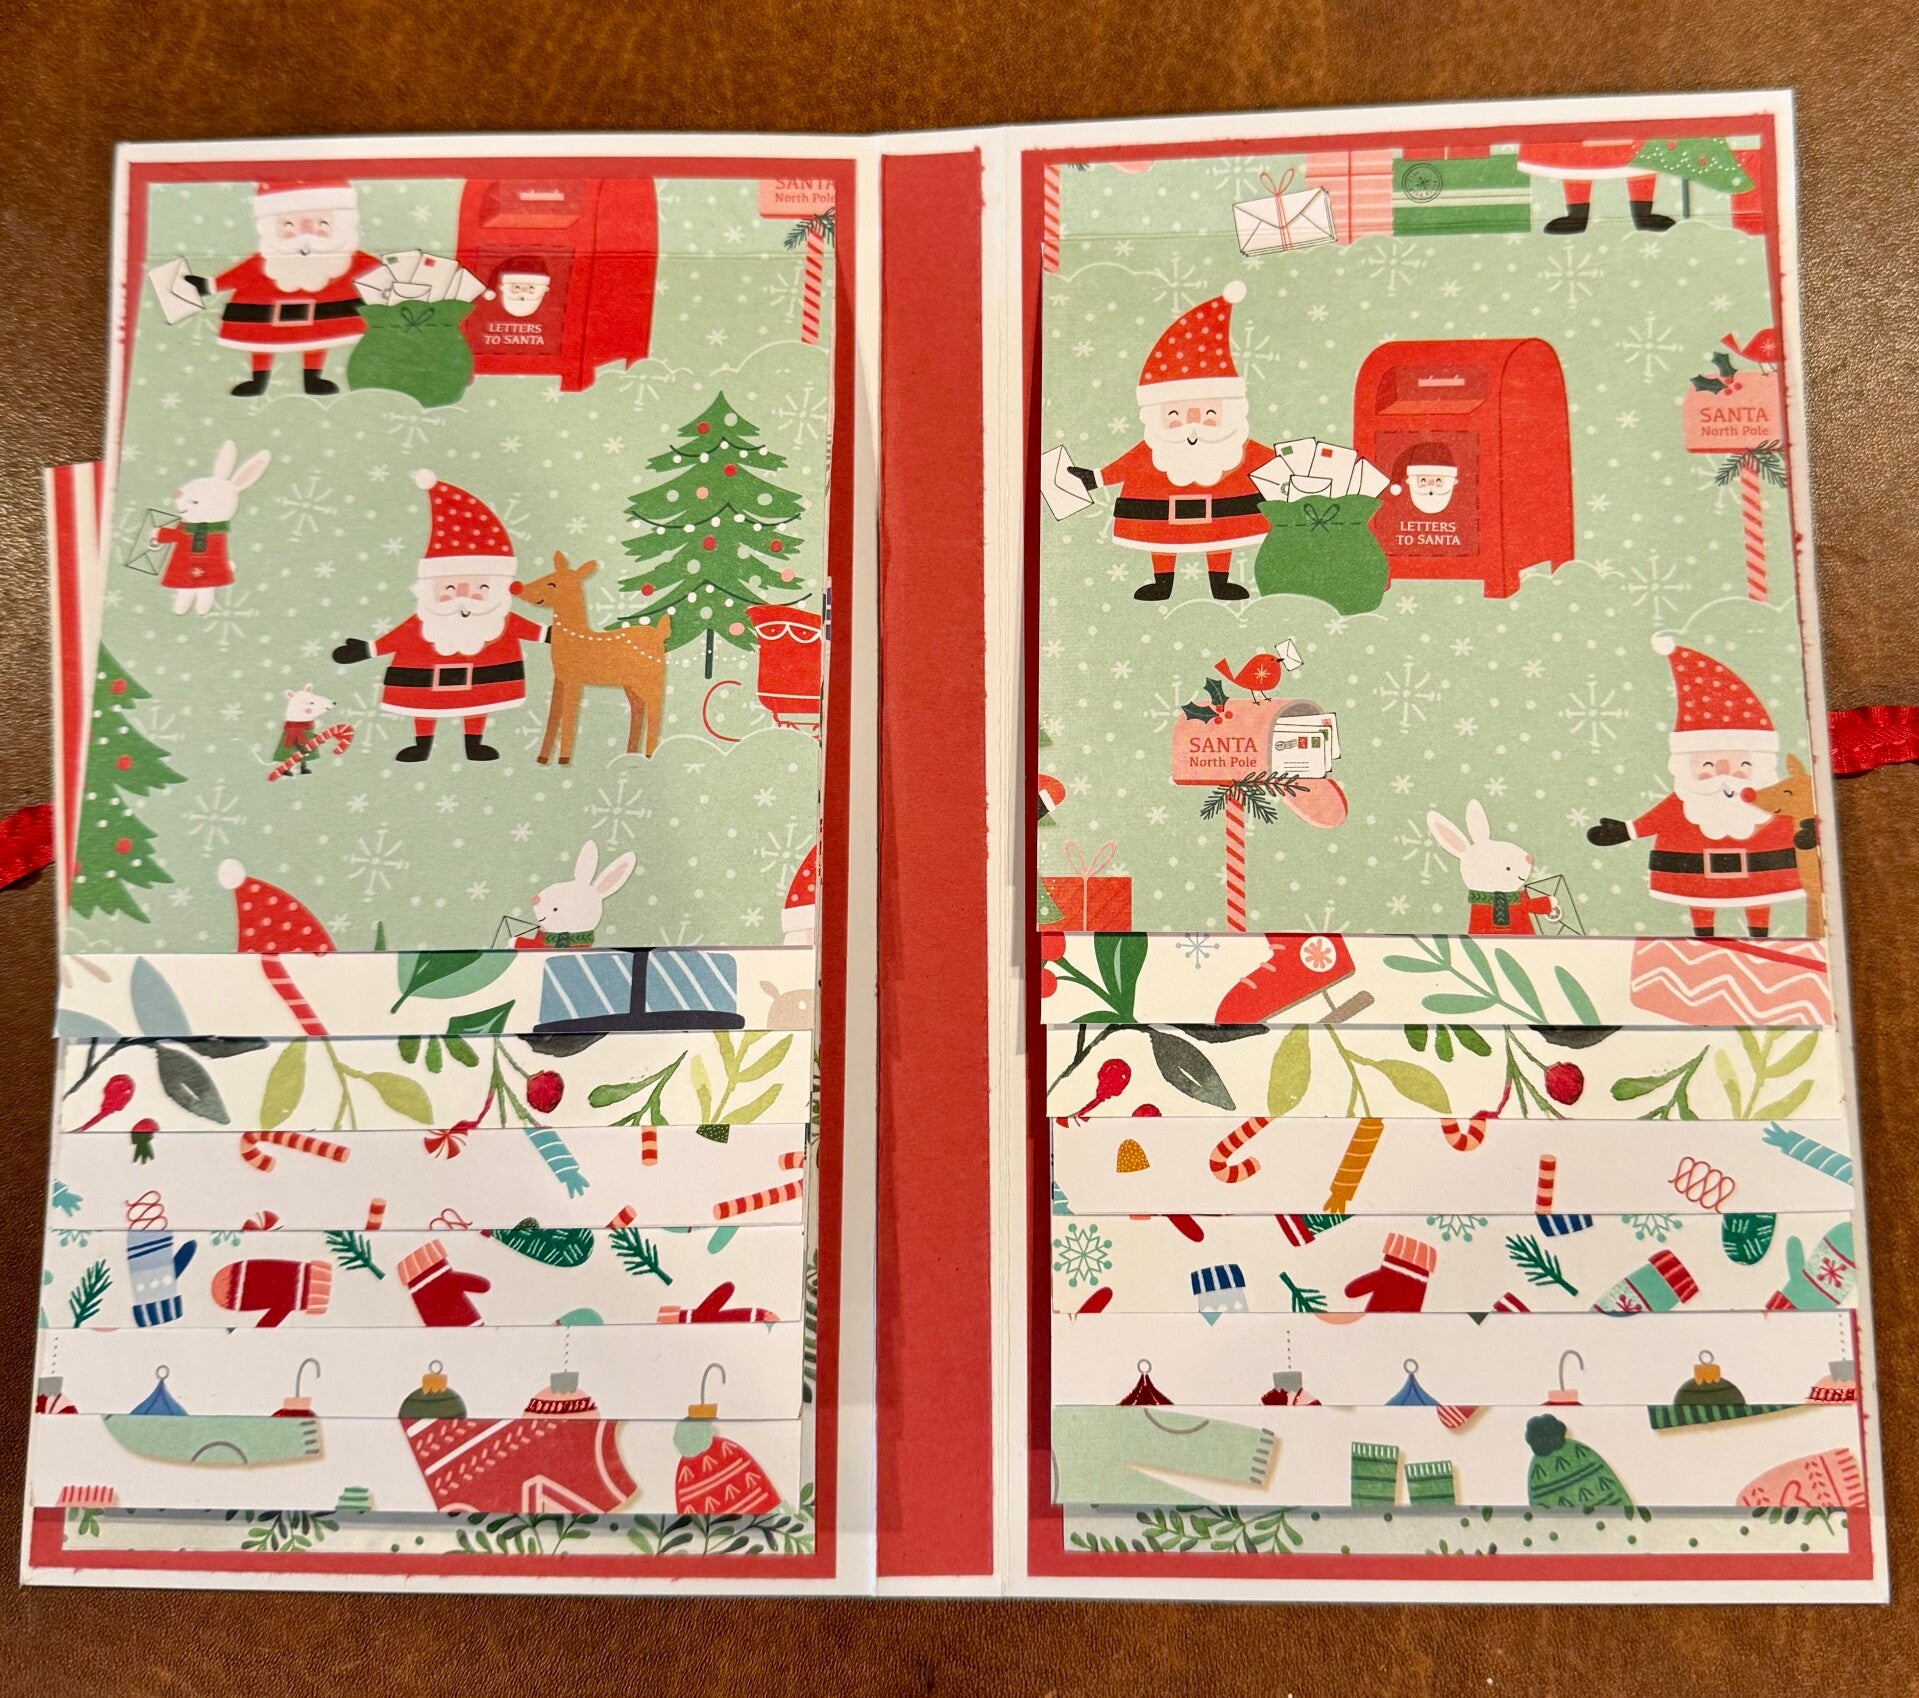
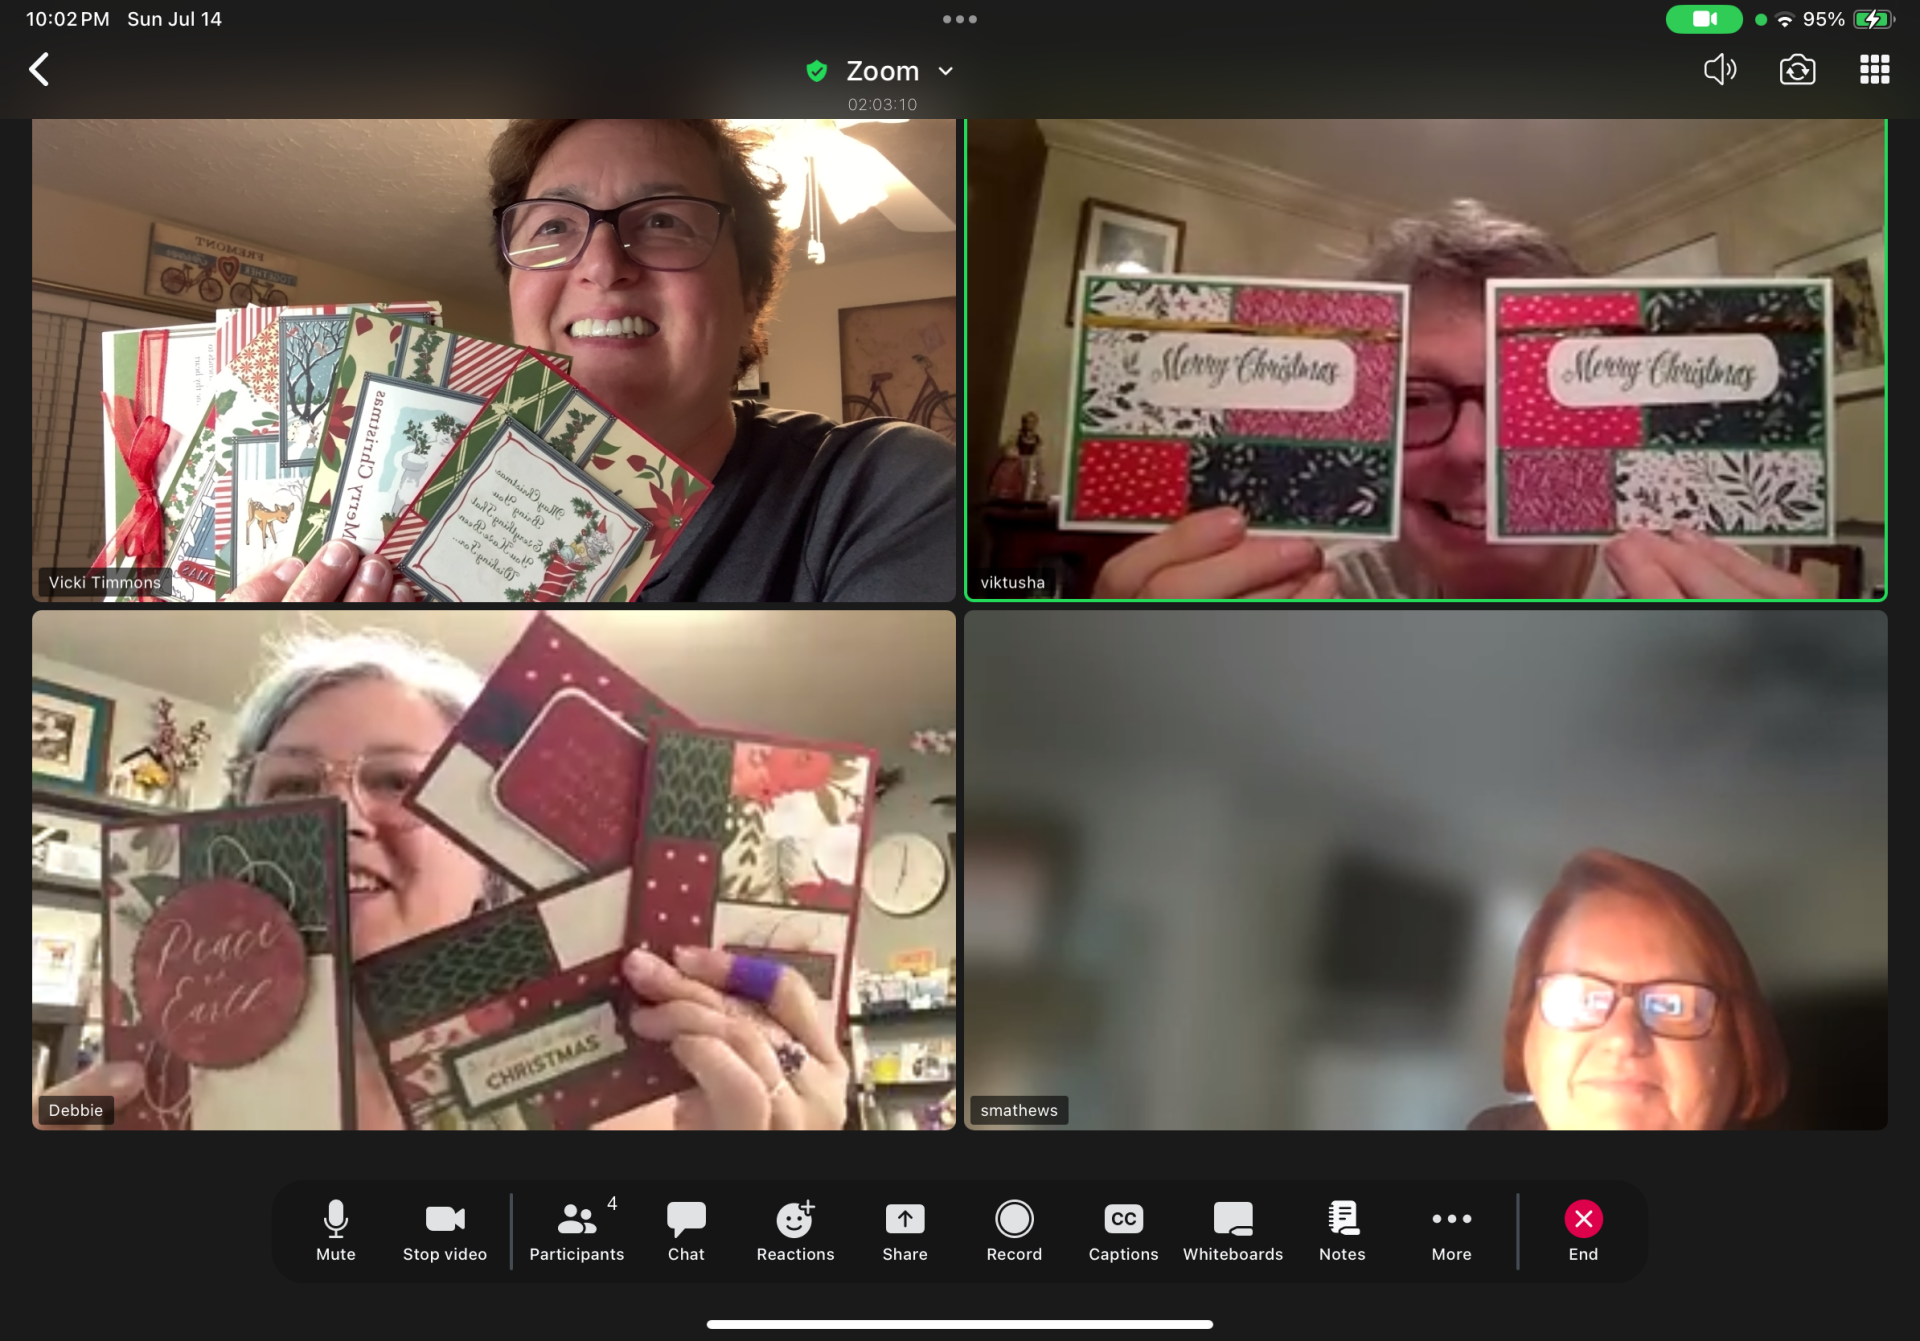
Sunday December 7, 2025 - Thank you to Debbie for teaching us this fun and easy waterfall mini album. Her inspiration for this came from an album by May May Made It Crafts, link here. Debbie took this and made adjustments to make it even better!
Cutting directions are located in tutorials!


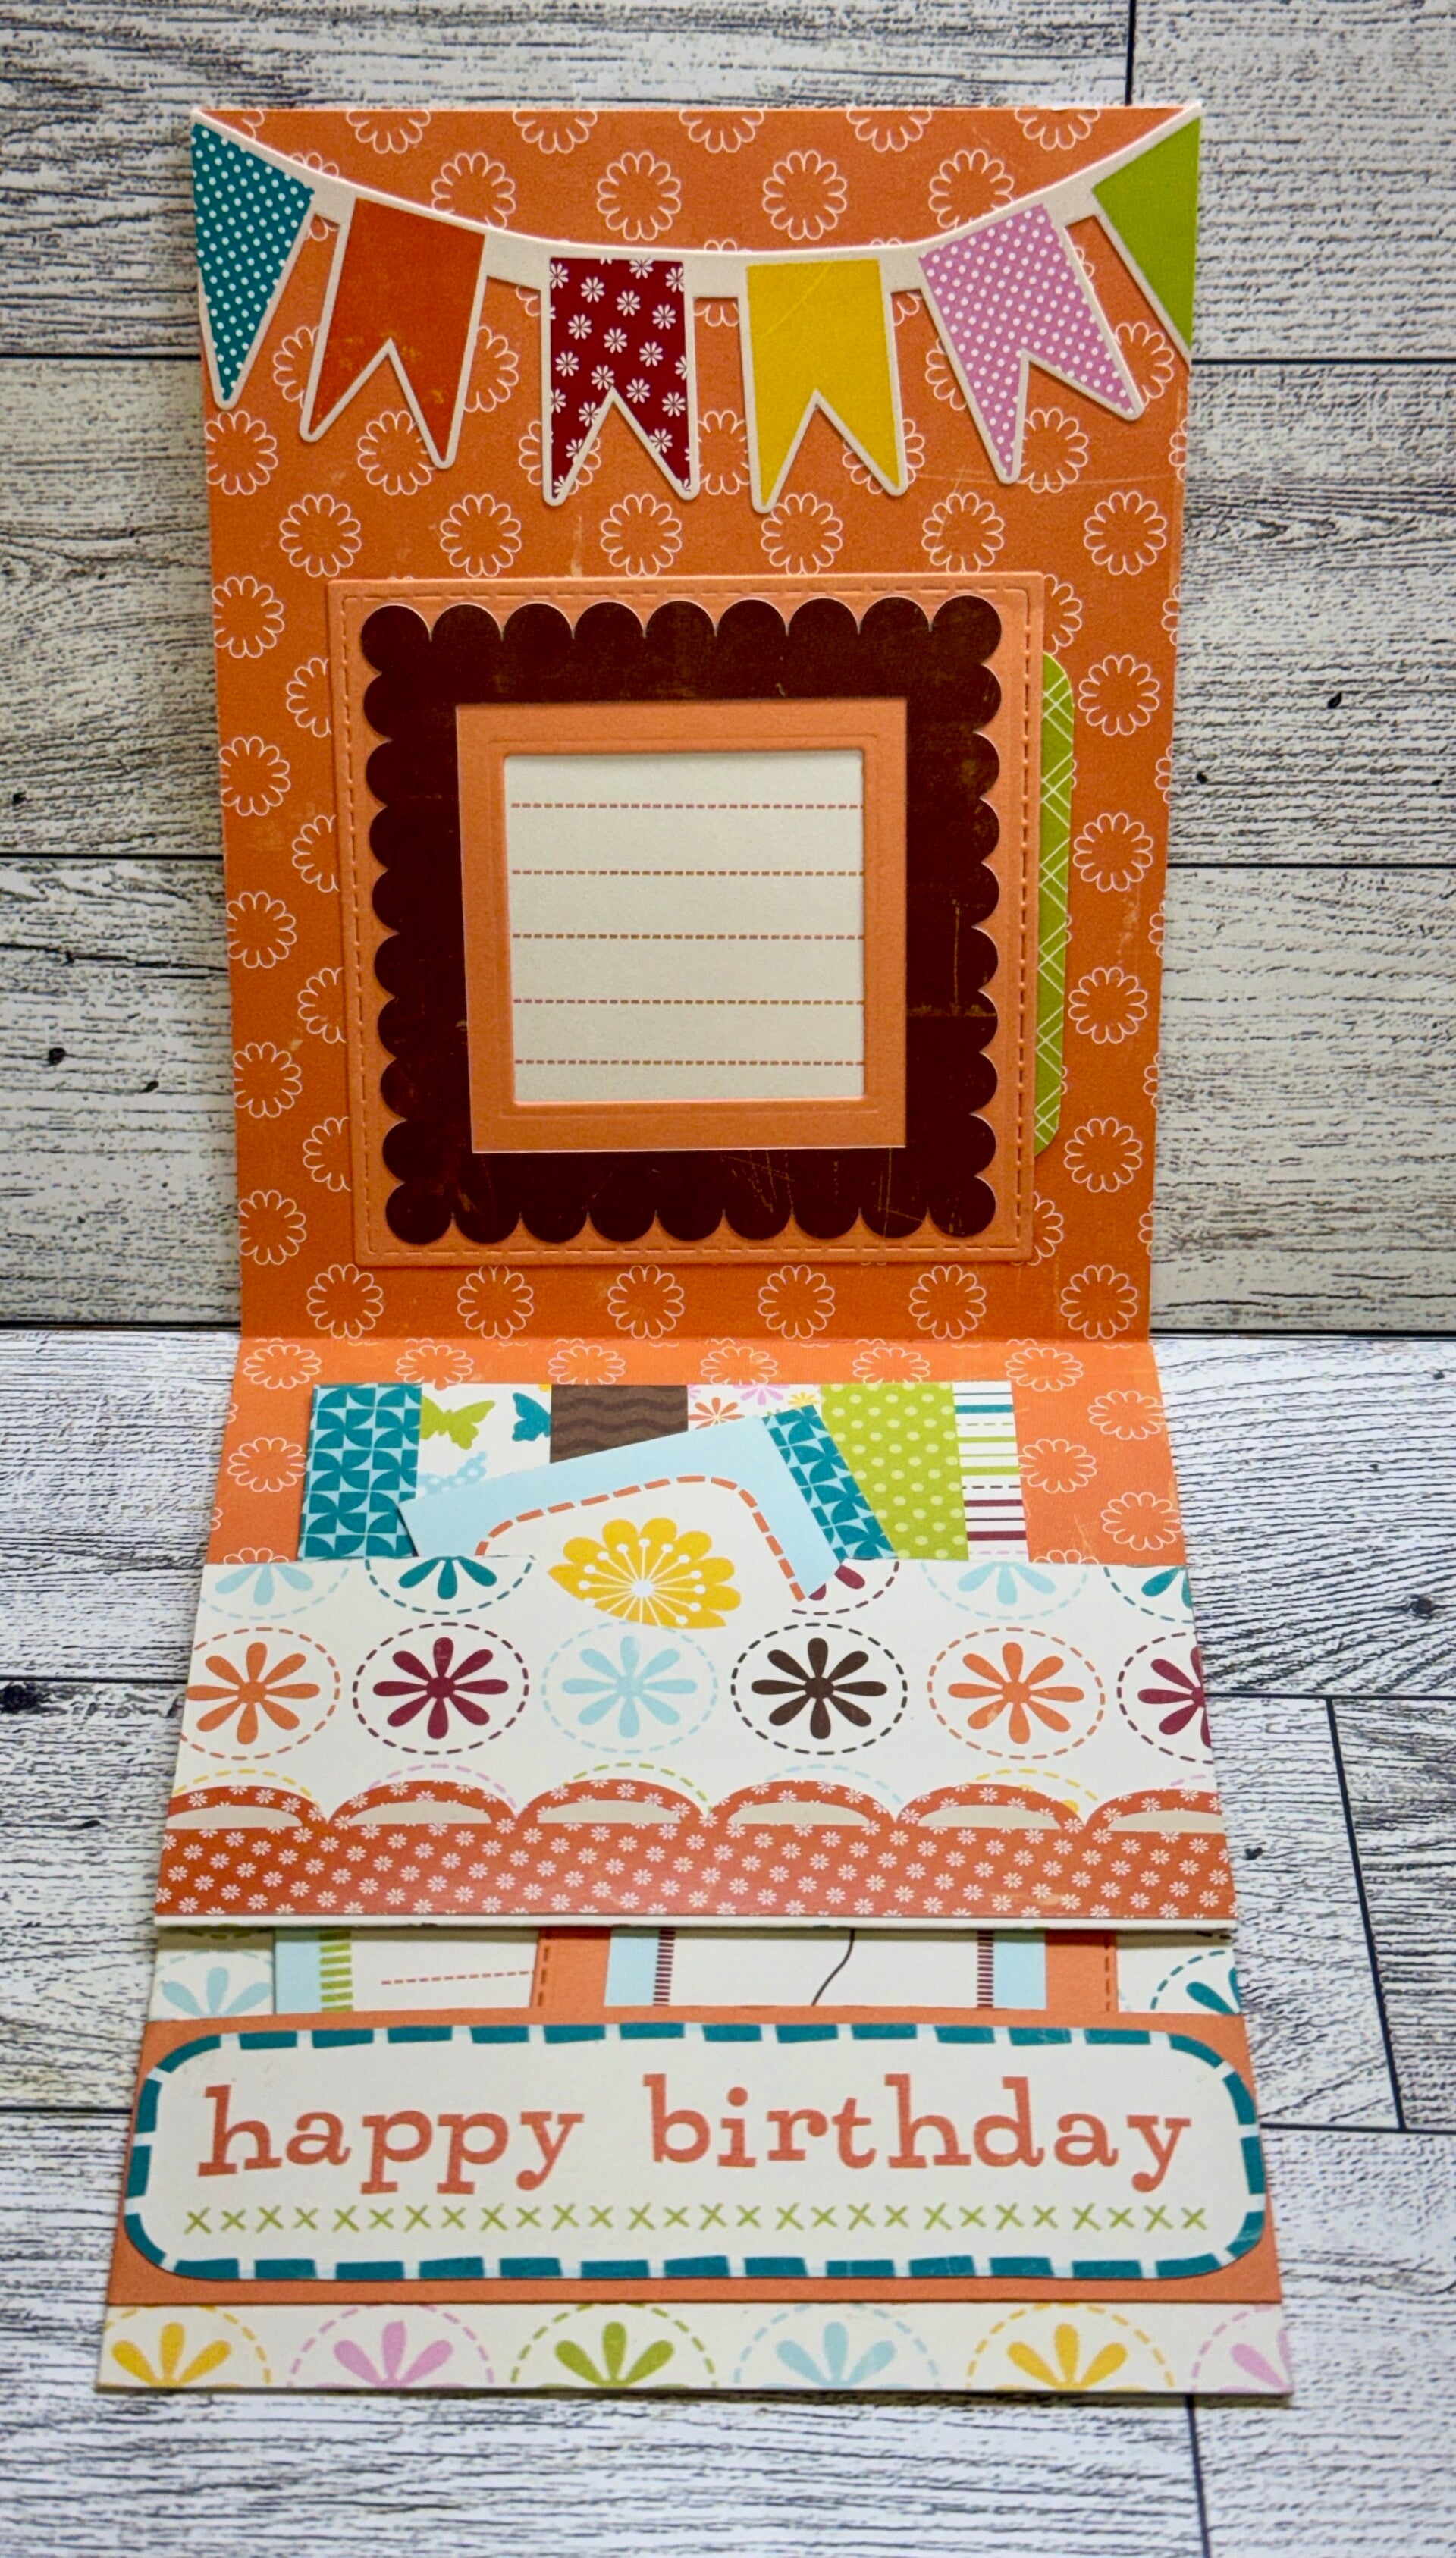
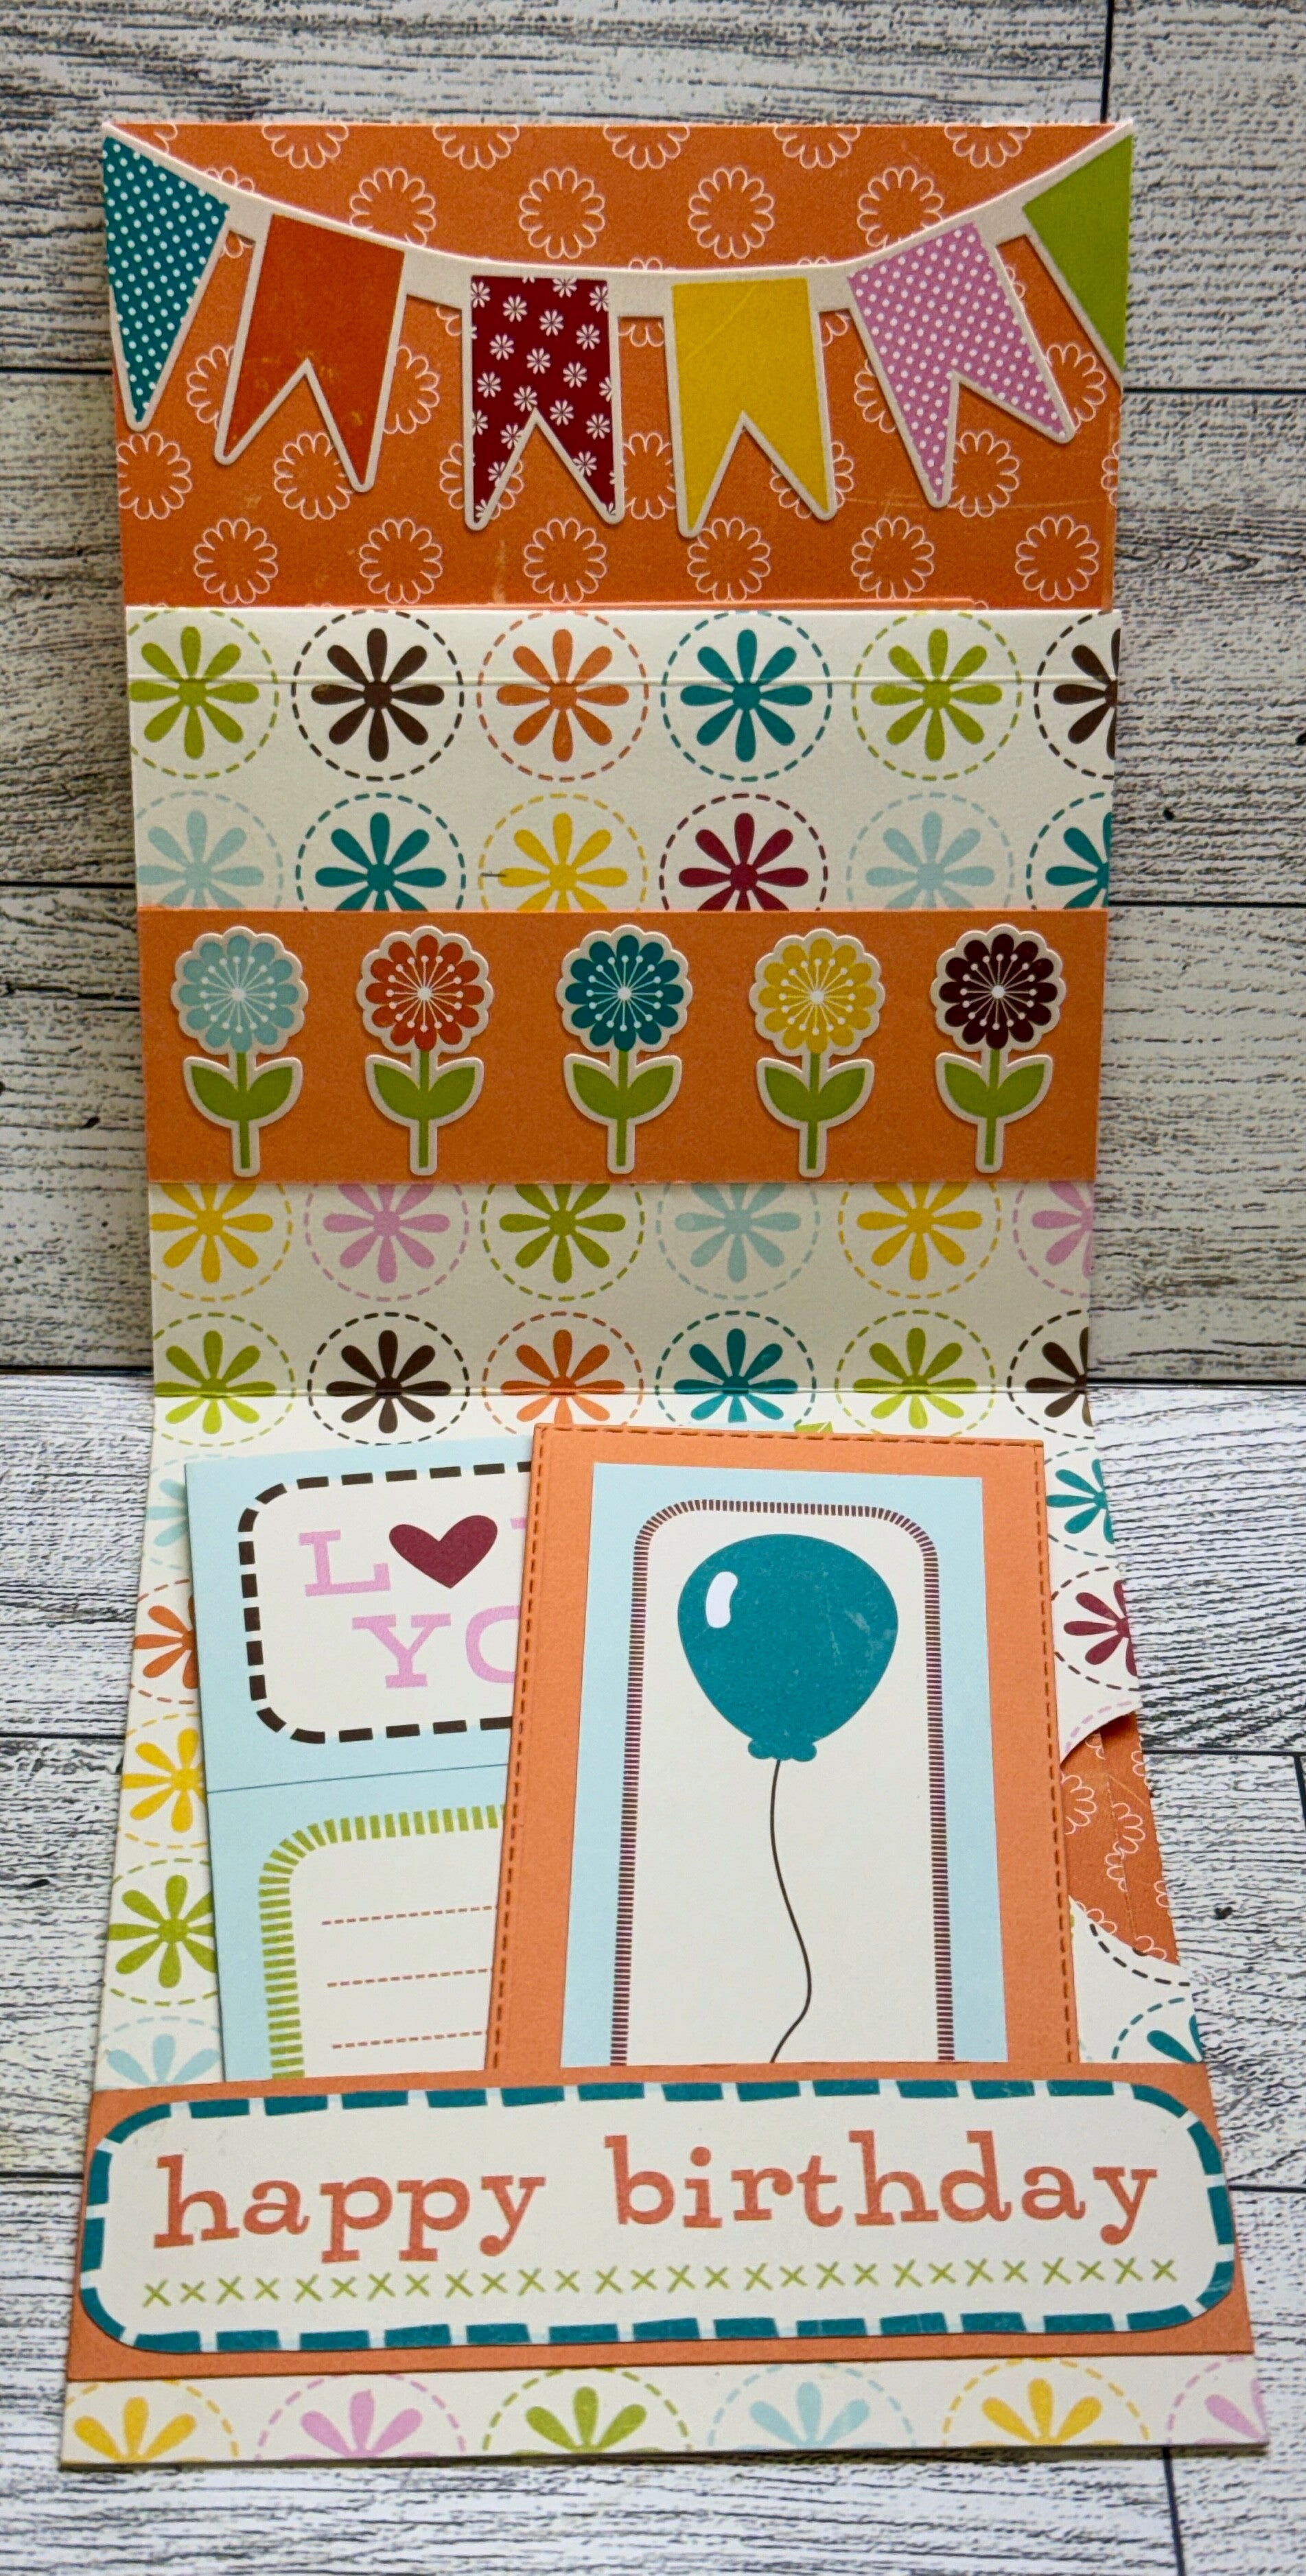
Sunday November 16, 2025 - Tonight we made a sliding gift card holder card by Lisa Curcio. Please see her YouTube and Website for further information and directions.
Cutting Dimensions:
BASE:
• Card Stock (base): 4 1⁄4” x 11”, Score at 3 1⁄2” and 9”
UPPER SECTION:
• Designer Paper: 3 1⁄4” x 4”
• Card Stock: 3 3/8” x 4 1/8”
• Card Stock (banner): 1 1⁄4” x 5 1⁄4”
LOWER SECTION:
• Designer Paper: 1 3⁄4” x 4”
• Card Stock: 1 7/8” x 4 1/8”
POP UP INSERT:
• Card Stock: 3 1⁄2” x 7 1⁄4”, Score at 1⁄2” and 5 3/8”
• Designer Paper (insert): 3 1⁄4” x 4 5/8”
• Card Stock(insert): 3 3/8” x 4 3⁄4”
• Card Stock (holder): 1 5/8” x 3 1⁄4”
• Card Stock (holder): 1 7/8” x 3 3/8”
• Basic White: 2 3⁄4” x 4”


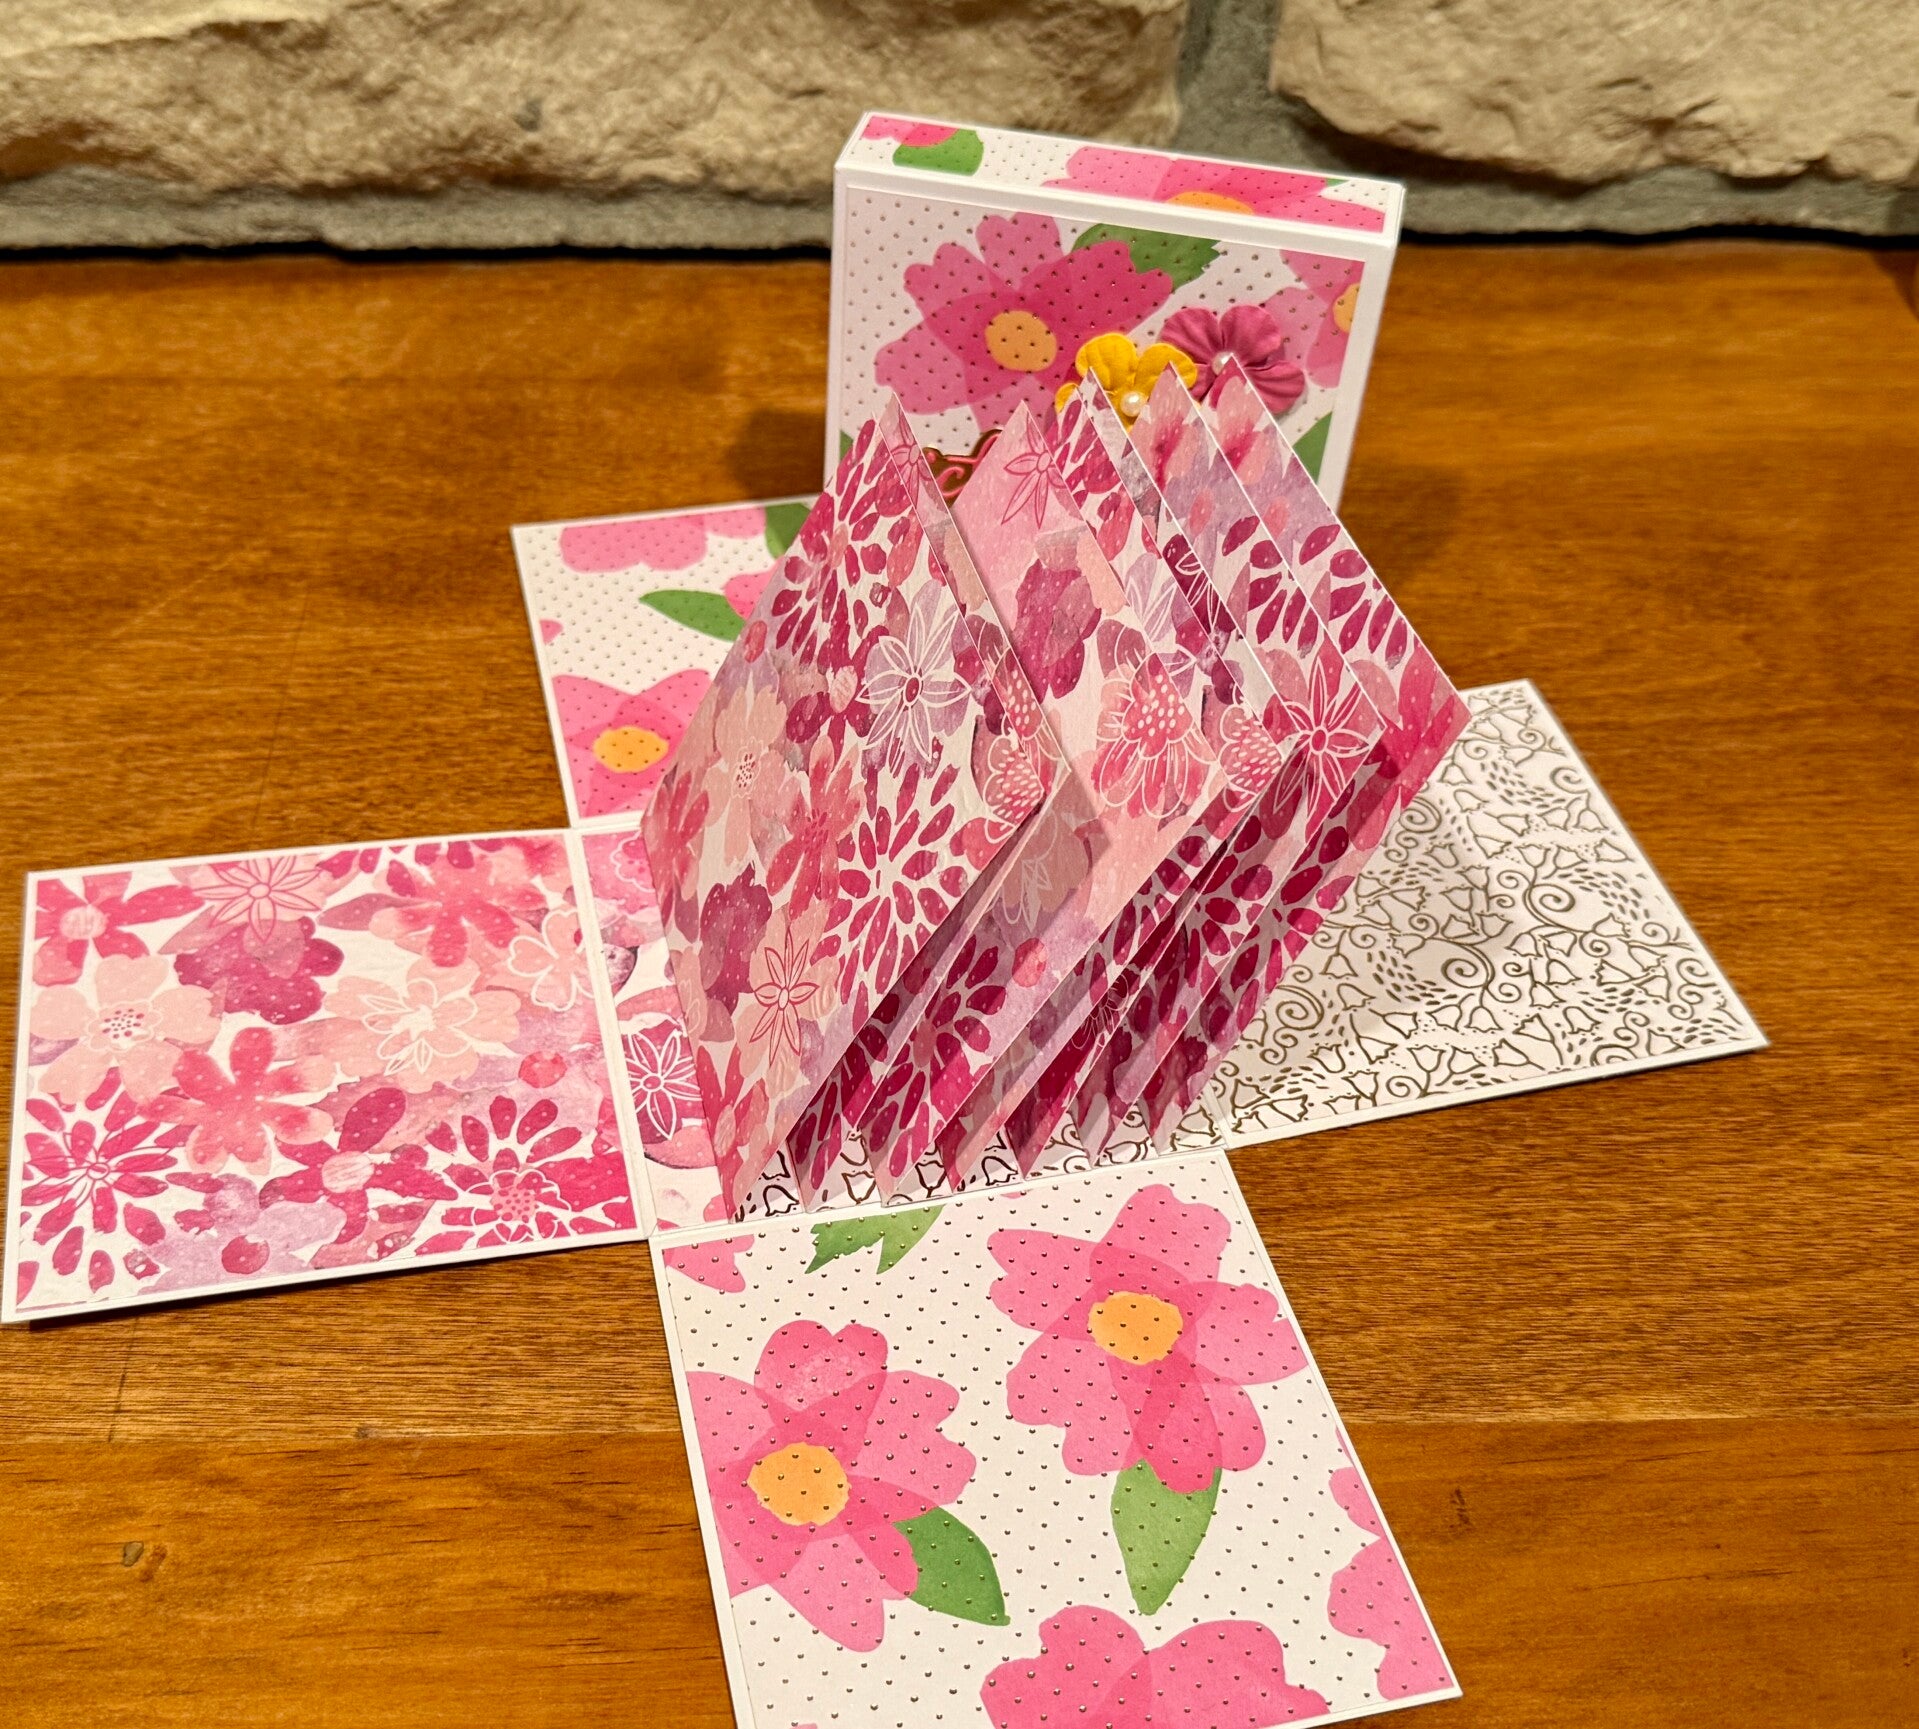
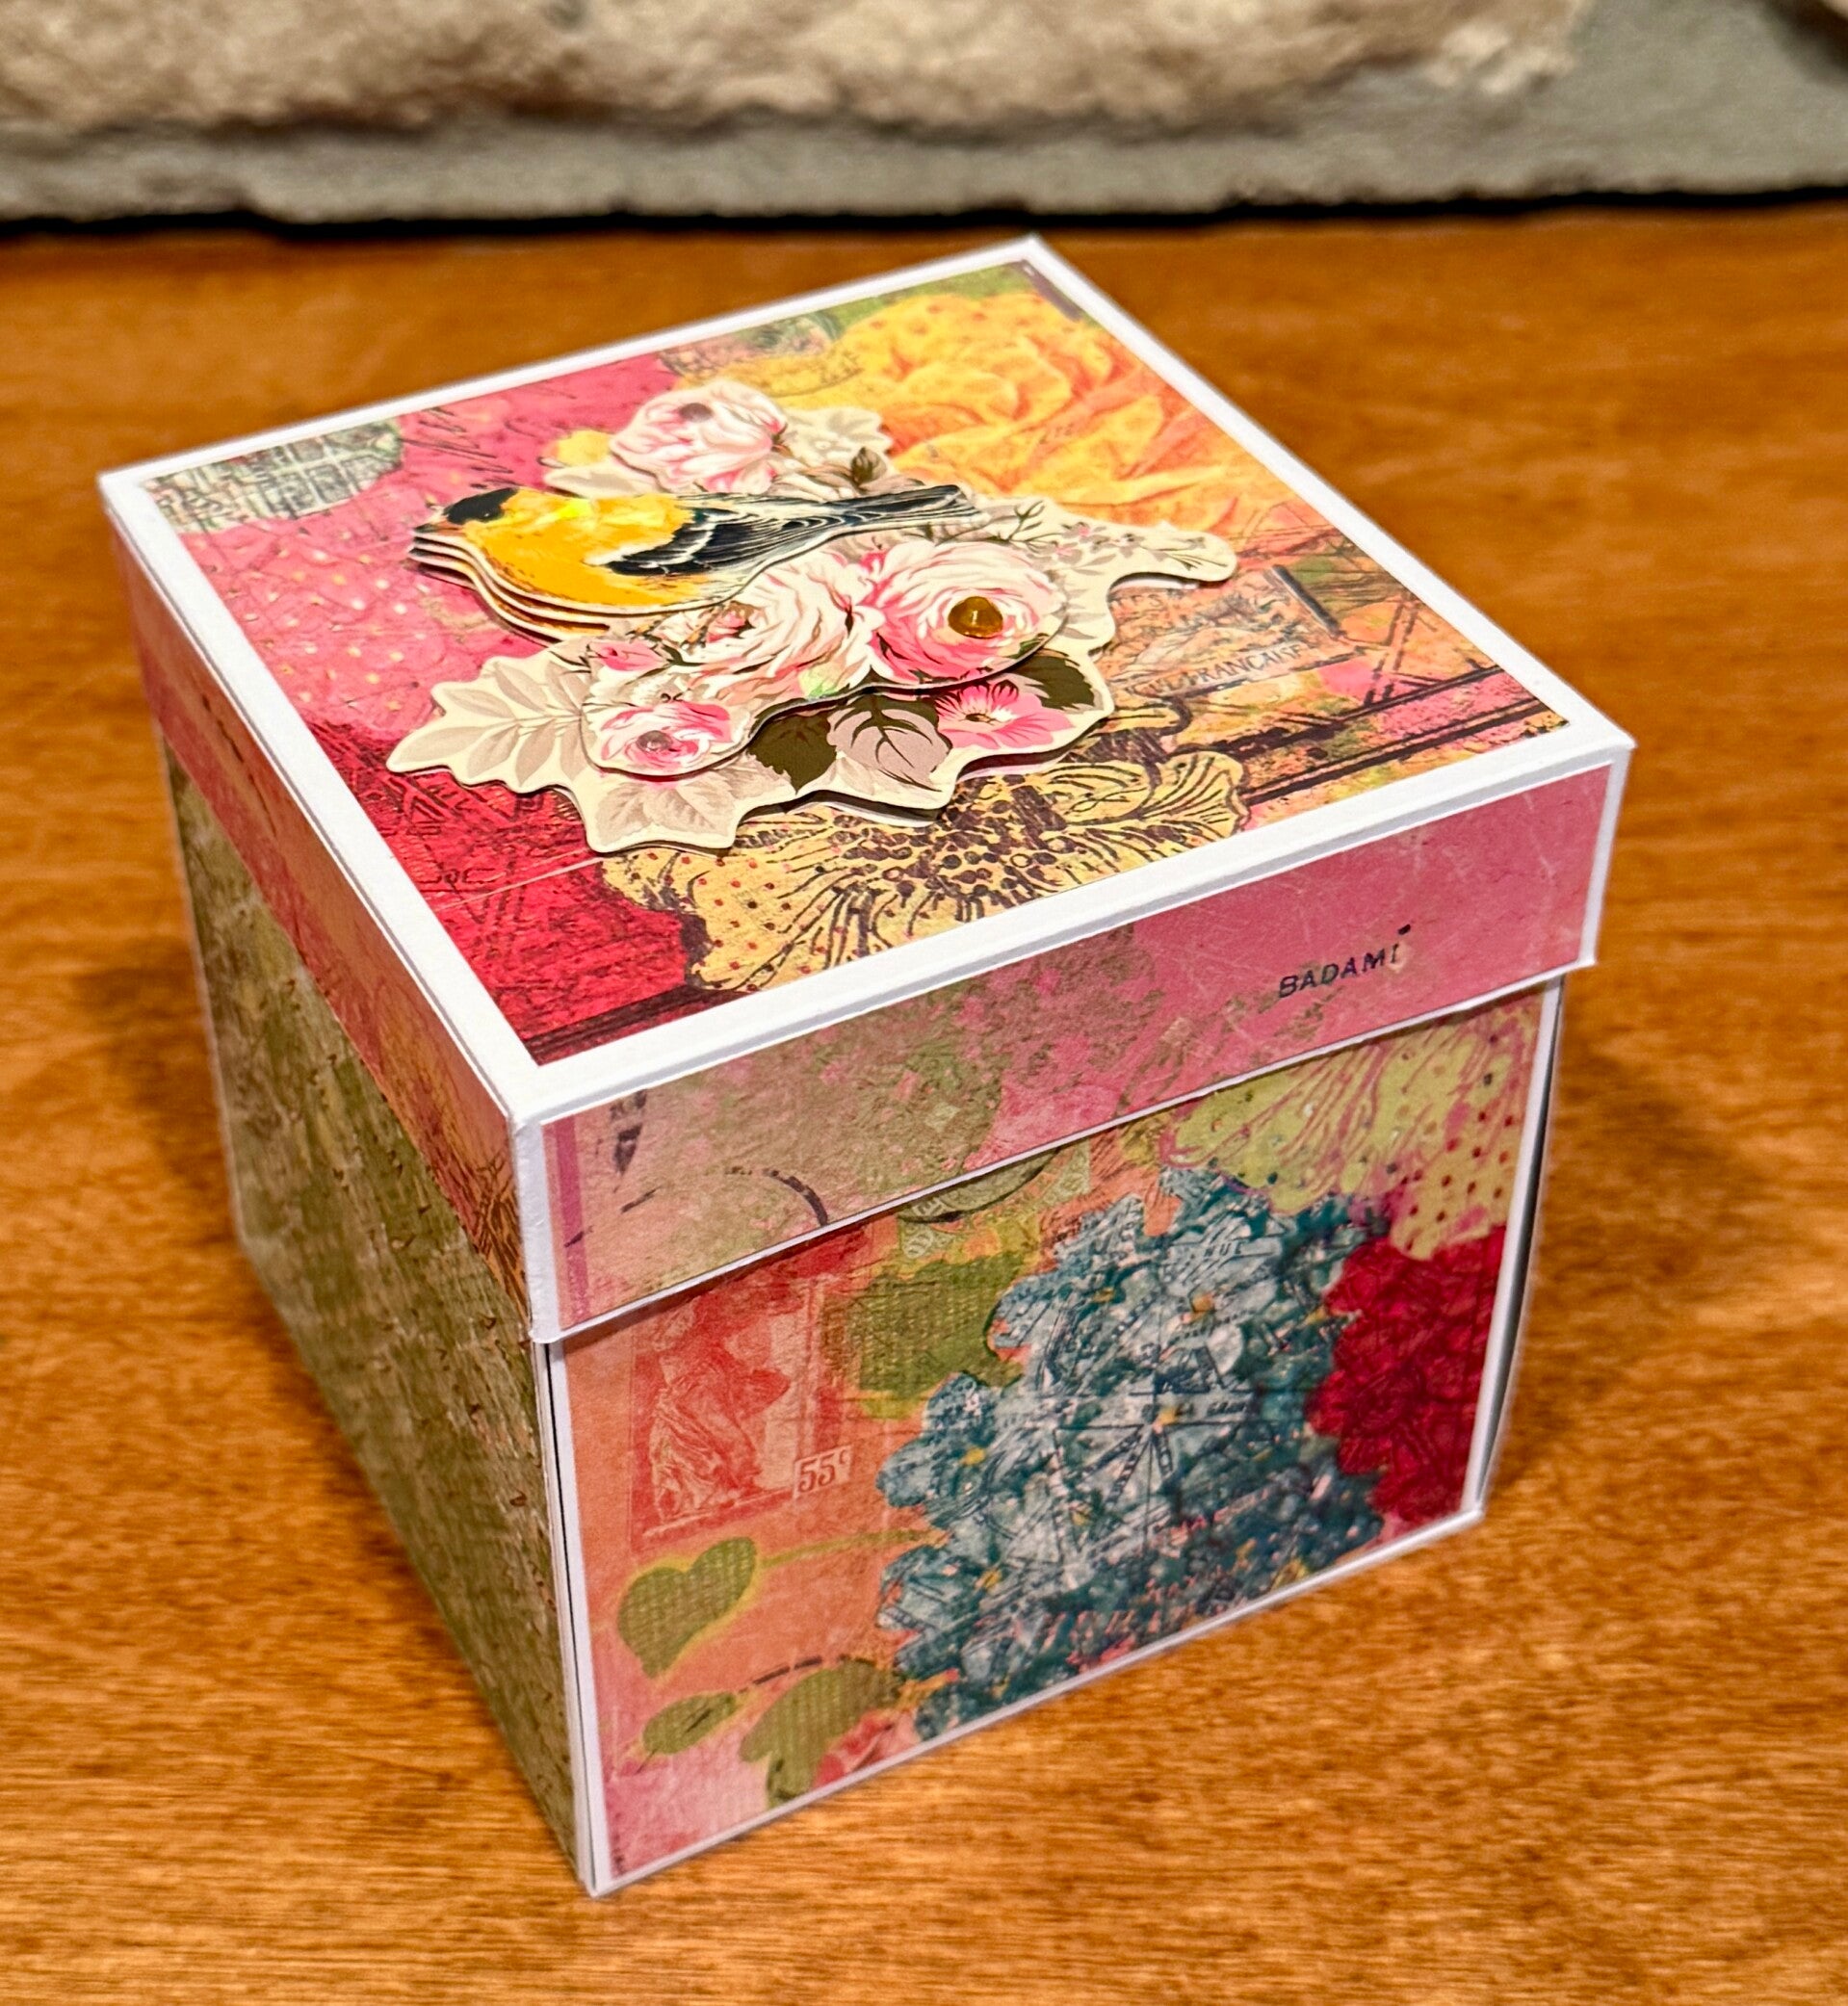
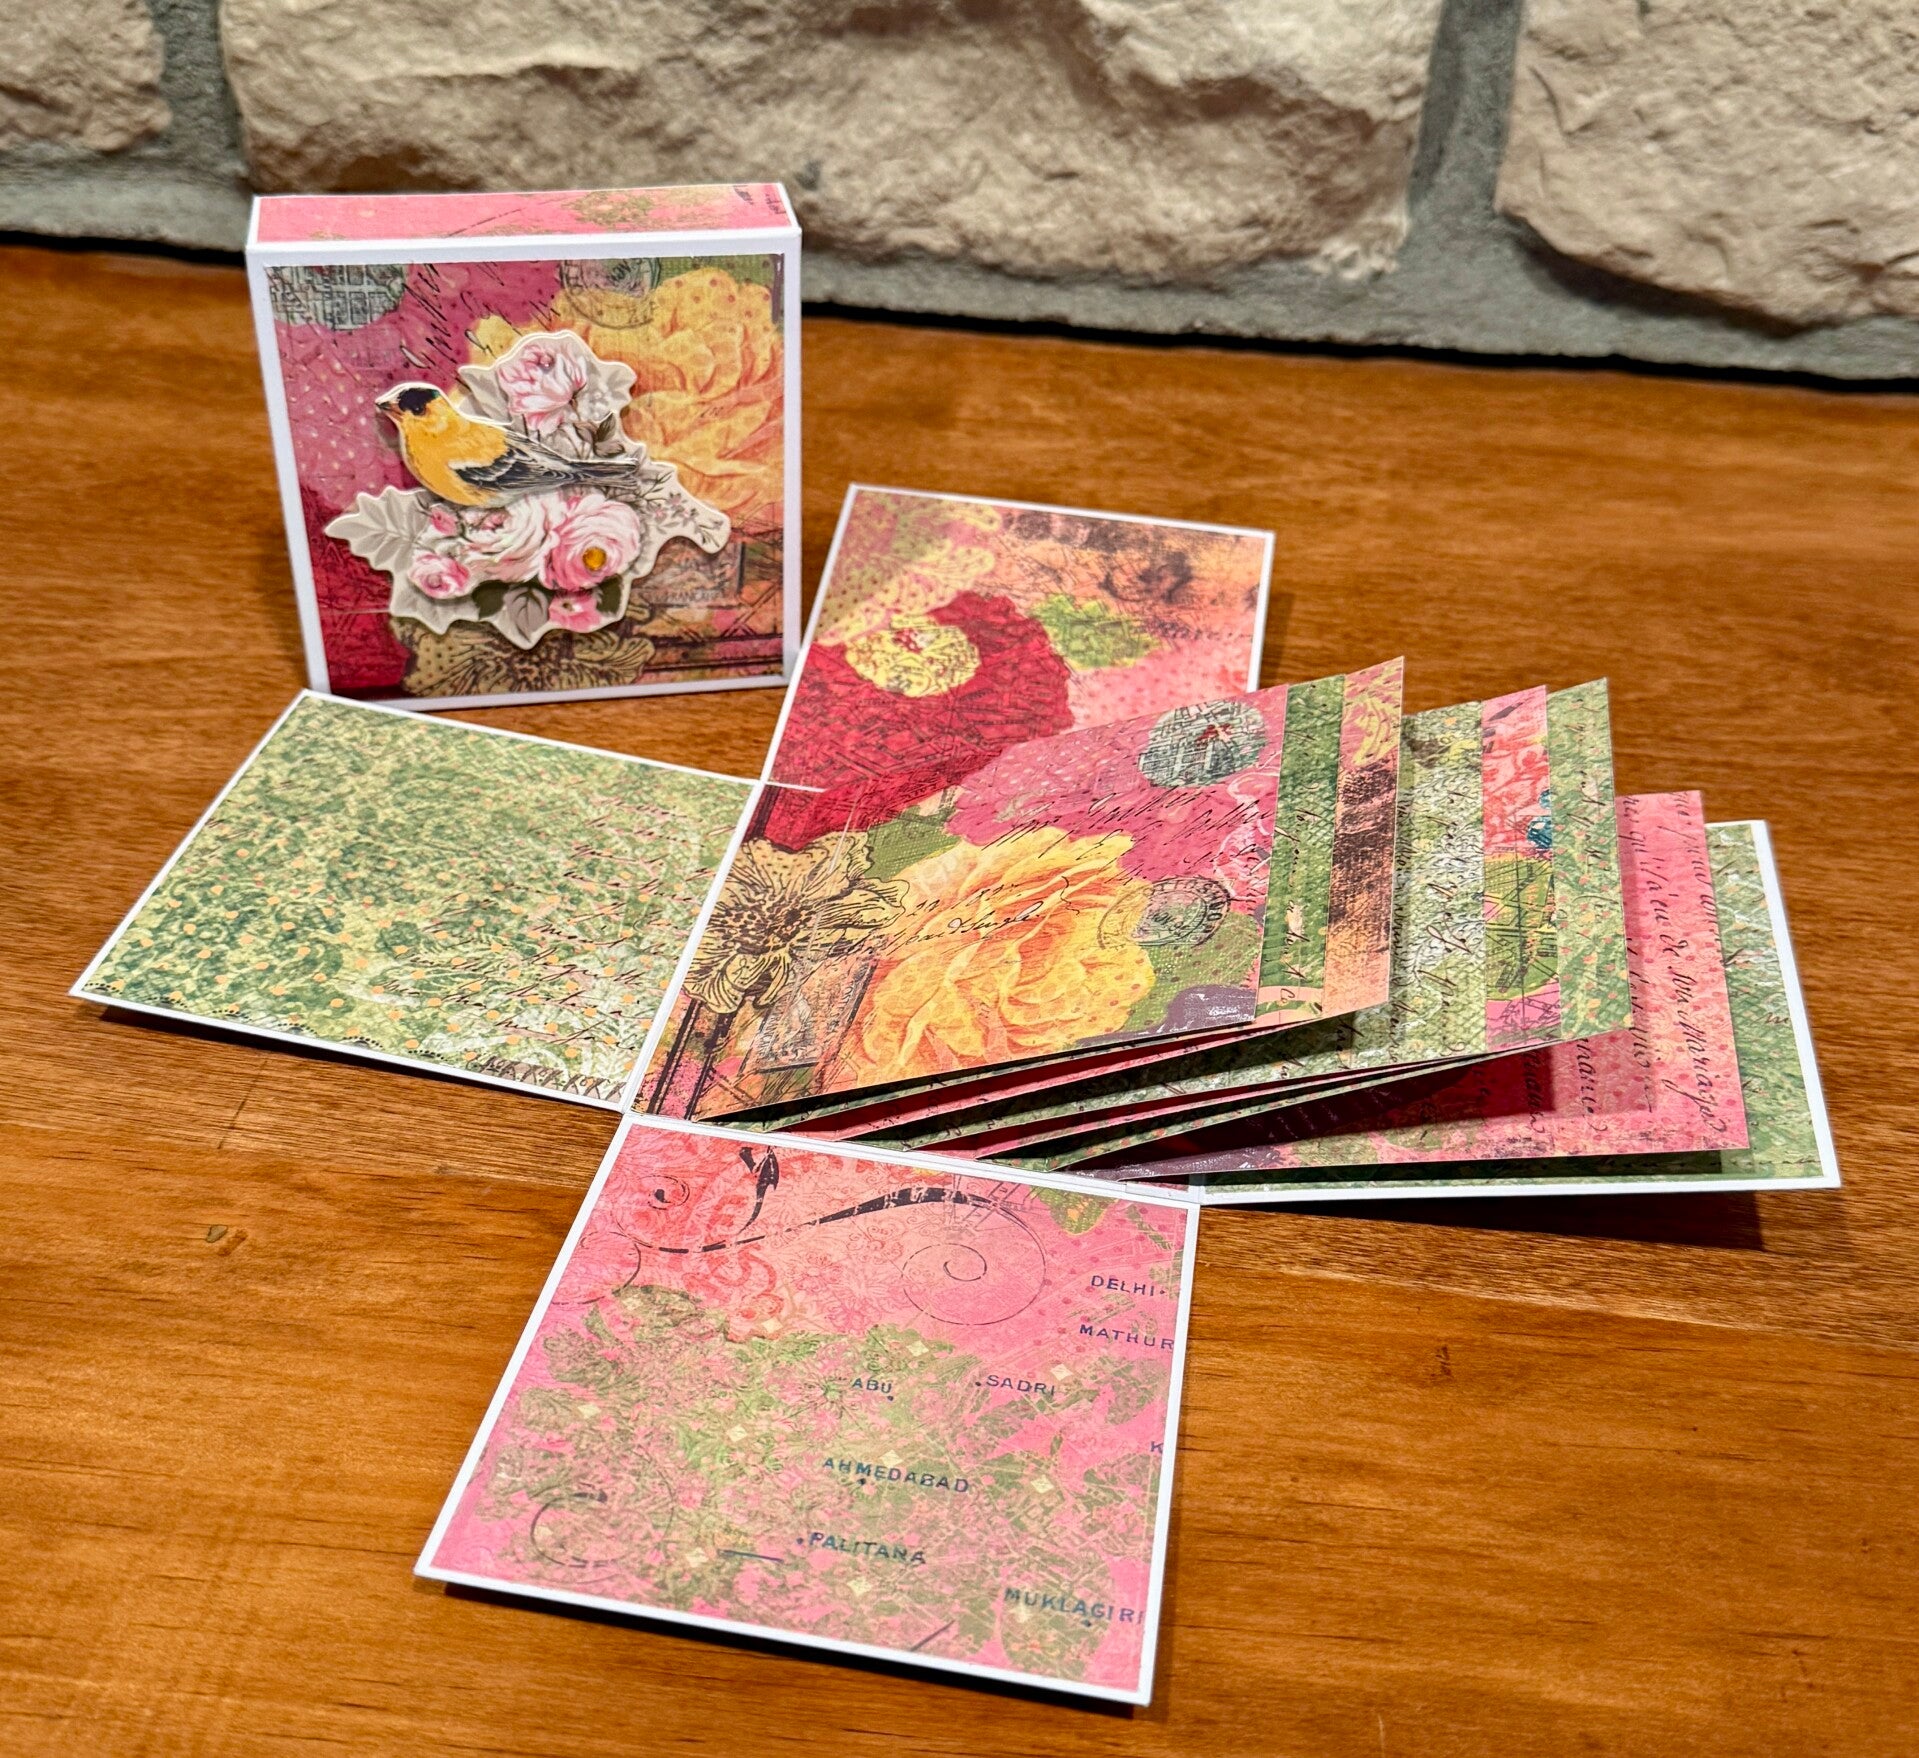
Sunday October 19, 2025 - We mixed it up a bit tonight making an explosion box mini album. The inspiration for this came from Einat Kessler, you can find here original instructions here. I had some super thick 8.5" x 11" cardstock so I adjusted the directions to use the smaller cardstock. I also had some fairly thick double sided designer paper, so I could skip the step of adding the pages with cardstock and covering them with designer paper, I just made them out of designer paper. My instructions also have 2 less pages than the original directions, I prefer having the even space between all pages. Cutting directions are below:
I found that this takes ~ 2 pieces of 12 x 12 cardstock, or 2 pieces 8 1/2" x 11 cardstock, and 2 1/2 to 3 pieces of designer paper.
Base & Lid:
You can use either 12" x 12" cardstock or 8 1/2" x 11" cardstock to make the box base and lid. Use either of the cutting directions below:
Cardstock (12 x 12):
- 2 pieces 4" x 12", scored at 4" & 8"
- 1 piece 6 1/8" x 6 1/8", scored 1" on all sides - trim the edges of the flaps at a diagonal to reduce bulk
- or -
Cardstock (8.5 x 11):
- 1 piece 4" x 8", scored at 4"
- 3 pieces 4 1/2" x 4", scored at 1/2" to create a 4" x 4" section with a 1/2" flap - trim the two sides of the flap at a diagonal to reduce bulk when adhering them
- 1 piece 6 1/8" x 6 1/8", scored 1" on all sides - trim the edges of the flaps at a diagonal to reduce bulk
Designer Paper: you can use any size, but the most efficient size to use for cutting is 12 x 12 double sided paper.
- Interior Pages - 7 pieces 4 1/2" x 4", scored at 1/2" to create a 4" x 4" section (if you paper is directional, determine how you want your pages to orient before cutting)
- Box - 8 to 9 pieces of 3 7/8" x 3 7/8" - box outside (4 pieces), inside (4 pieces + 1 piece on base if you used 8 1/2" x 11" paper to make the base)
- Lid - 1 to 2 pieces of 3 7/8" x 3 7/8" - box top, and box inside if you choose to cover it
- Lid - 4 pieces of 3 7/8" x 7/8" to cover the outside edges
Note: If using lightweight cardstock, you will need to make the following adjustments:
Instead of the 7 pieces for the interior pages above, cut the following:
- Cardstock for interior pages: 7 pieces 4 1/2" x 4", scored at 1/2" to create a 4" x 4" section
- Designer paper for interior pages: 14 pieces 3 7/8" x 3 7/8"

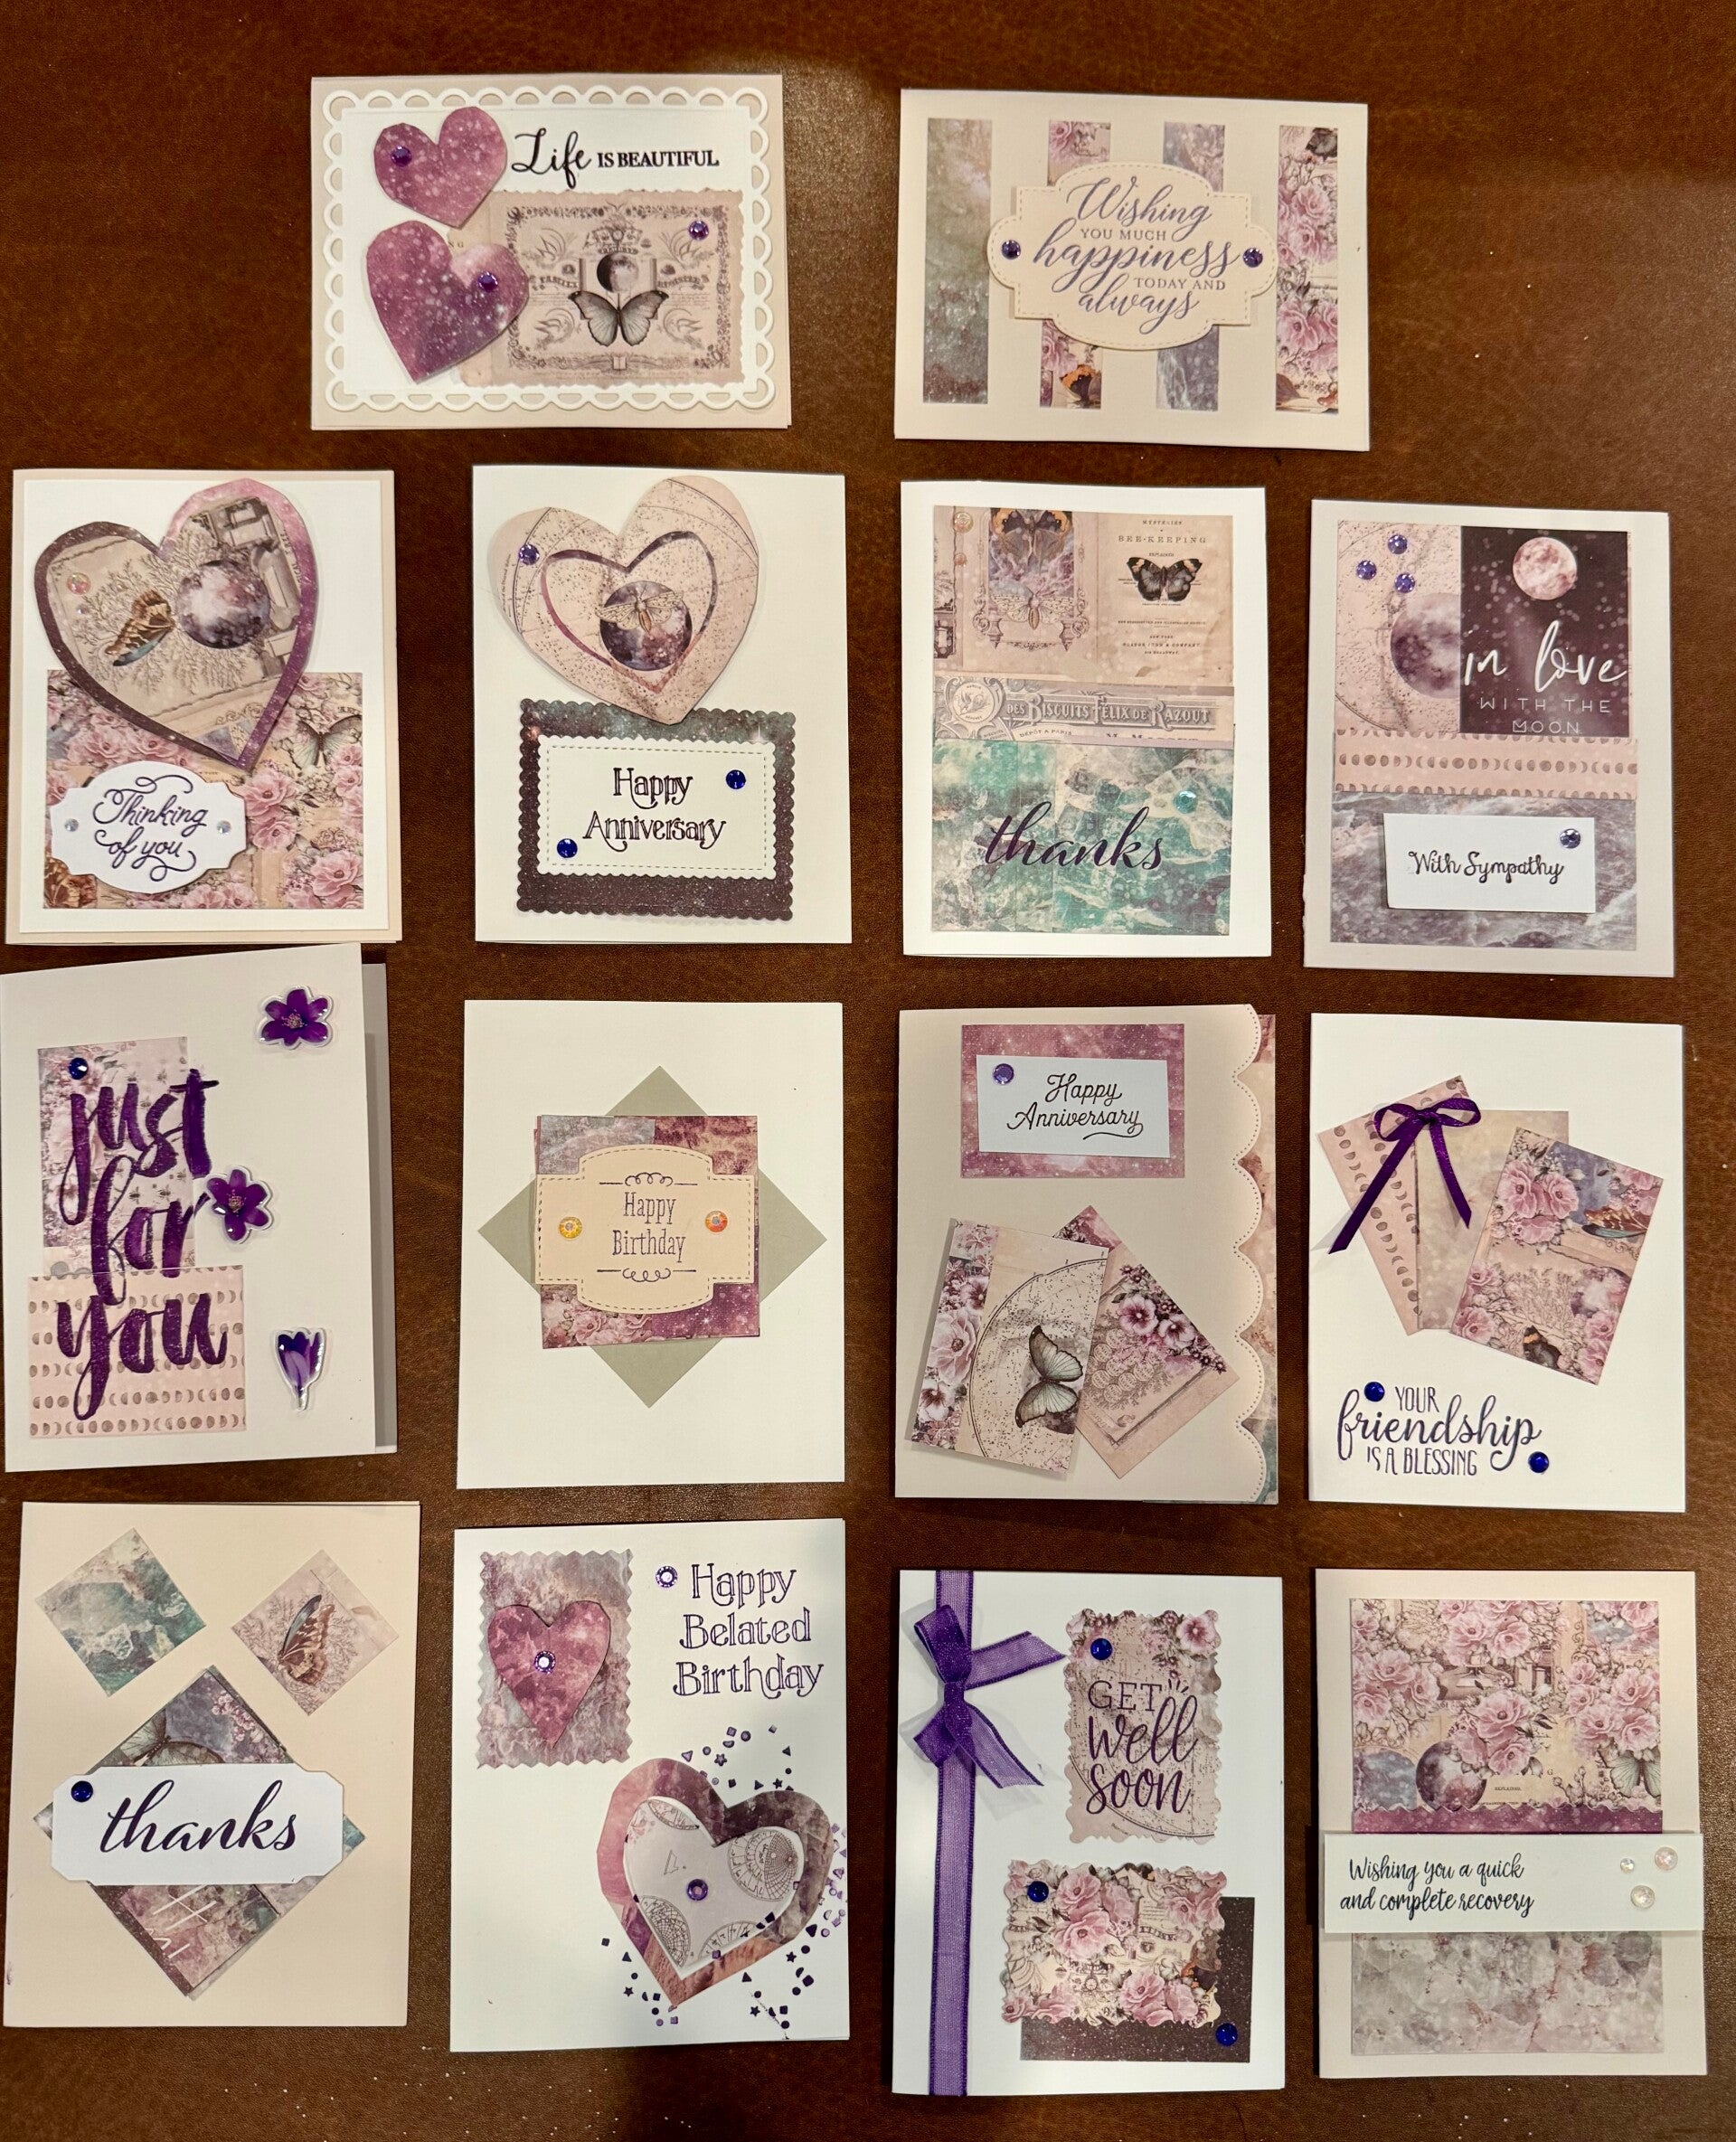
Sunday September 7, 2025 - We used real leaves as stamps! A combination of using various inks (yes, you can use dye ink too!) and embossing powders. Here are a few Gina K Videos that inspired us! Stamping With Real Leaves With Distress Oxide Inks and Stamping With Real Leaves Stamp & Chat. Below are the awesome cards we all made!

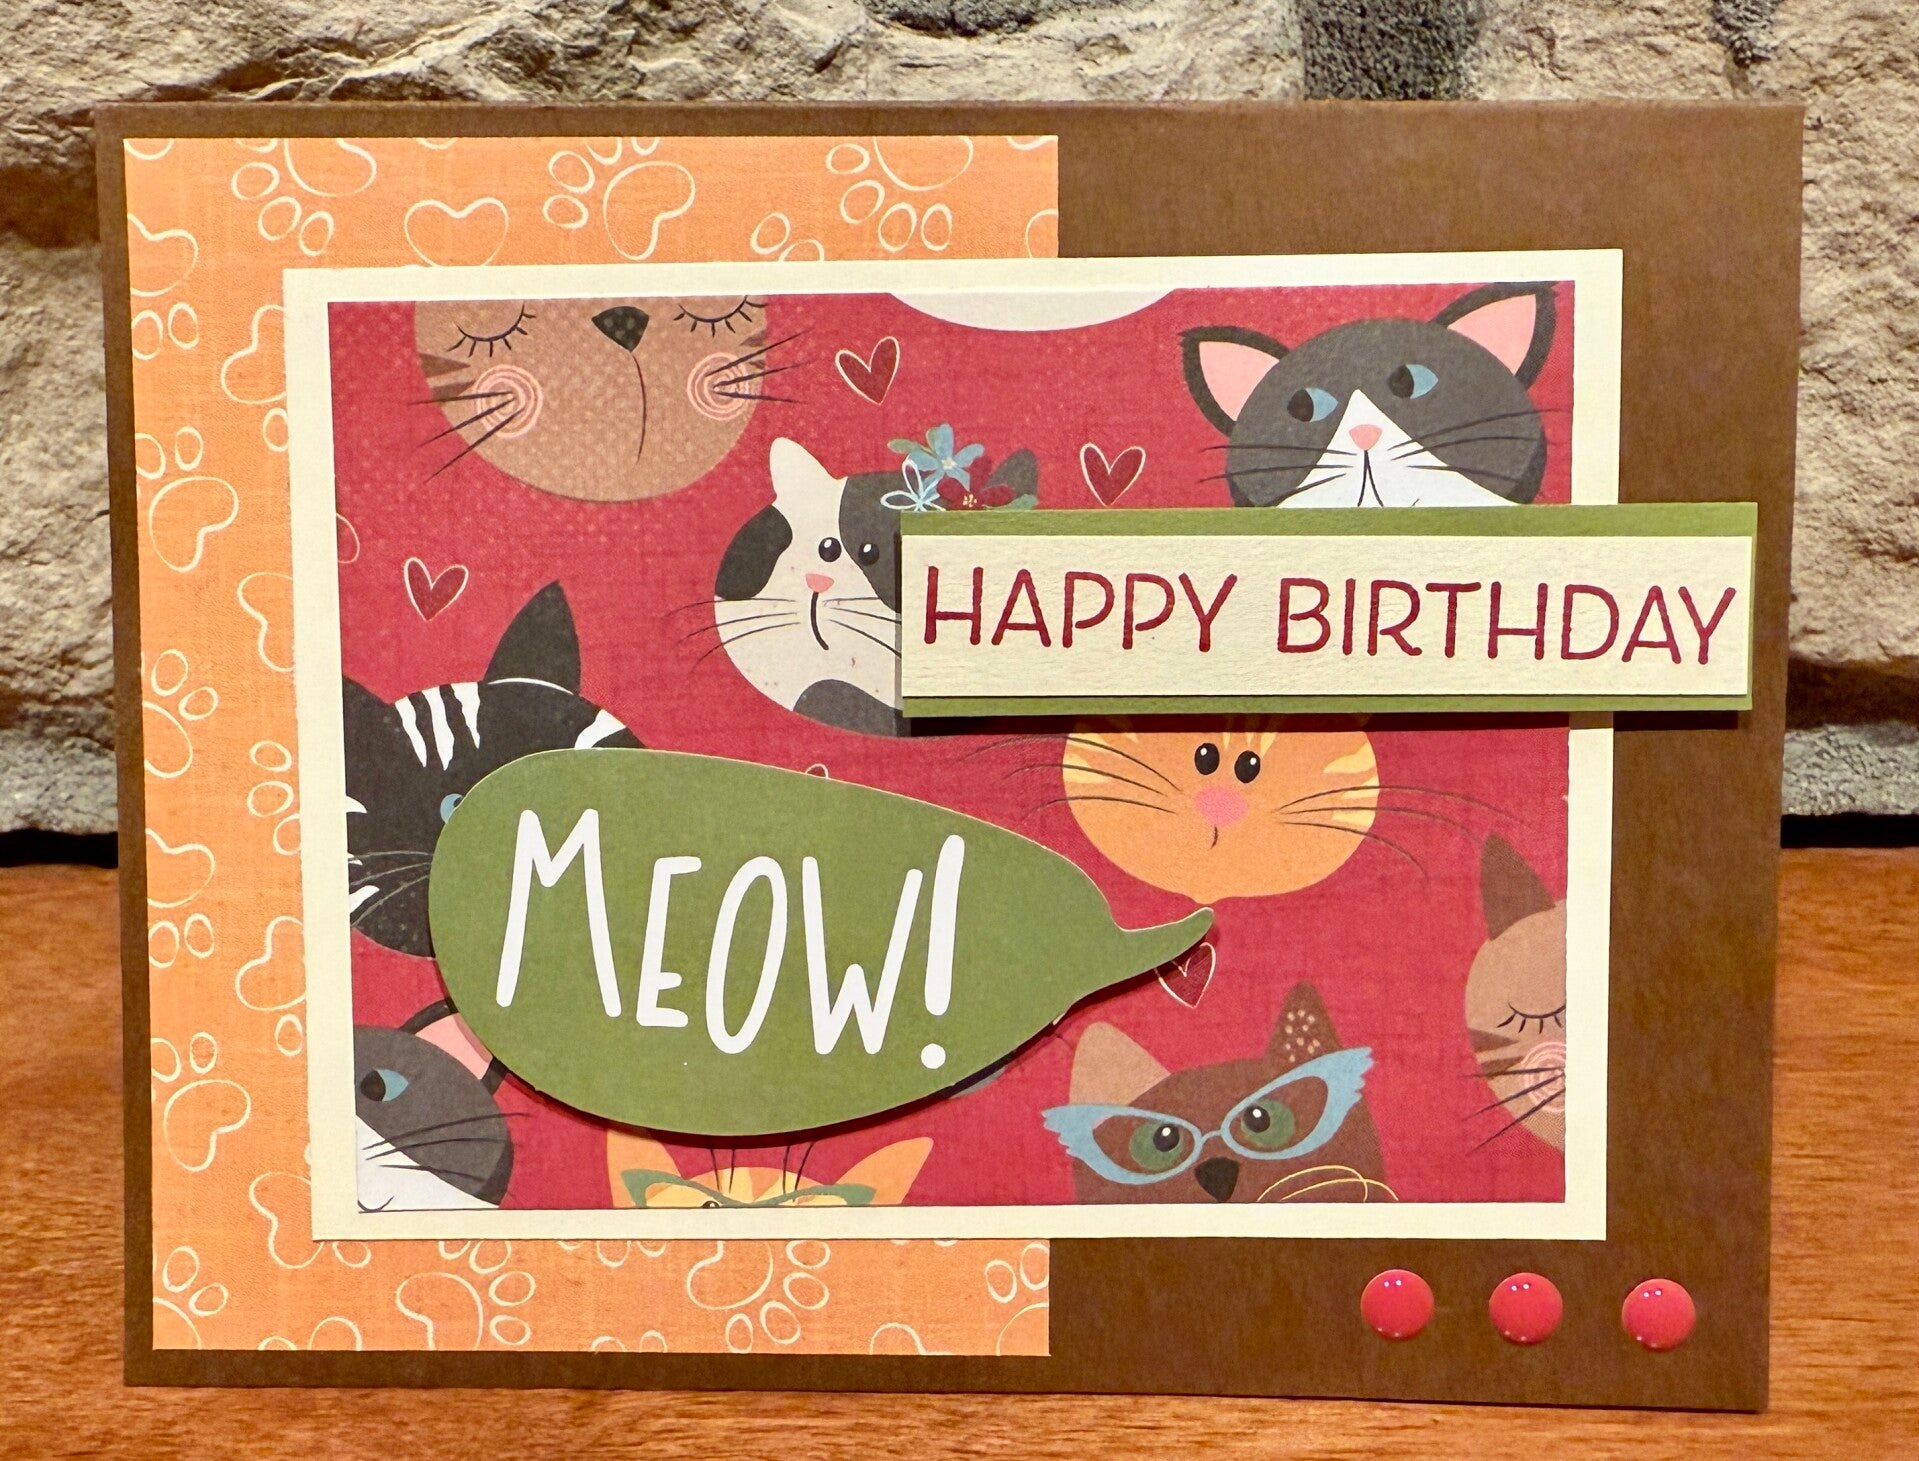
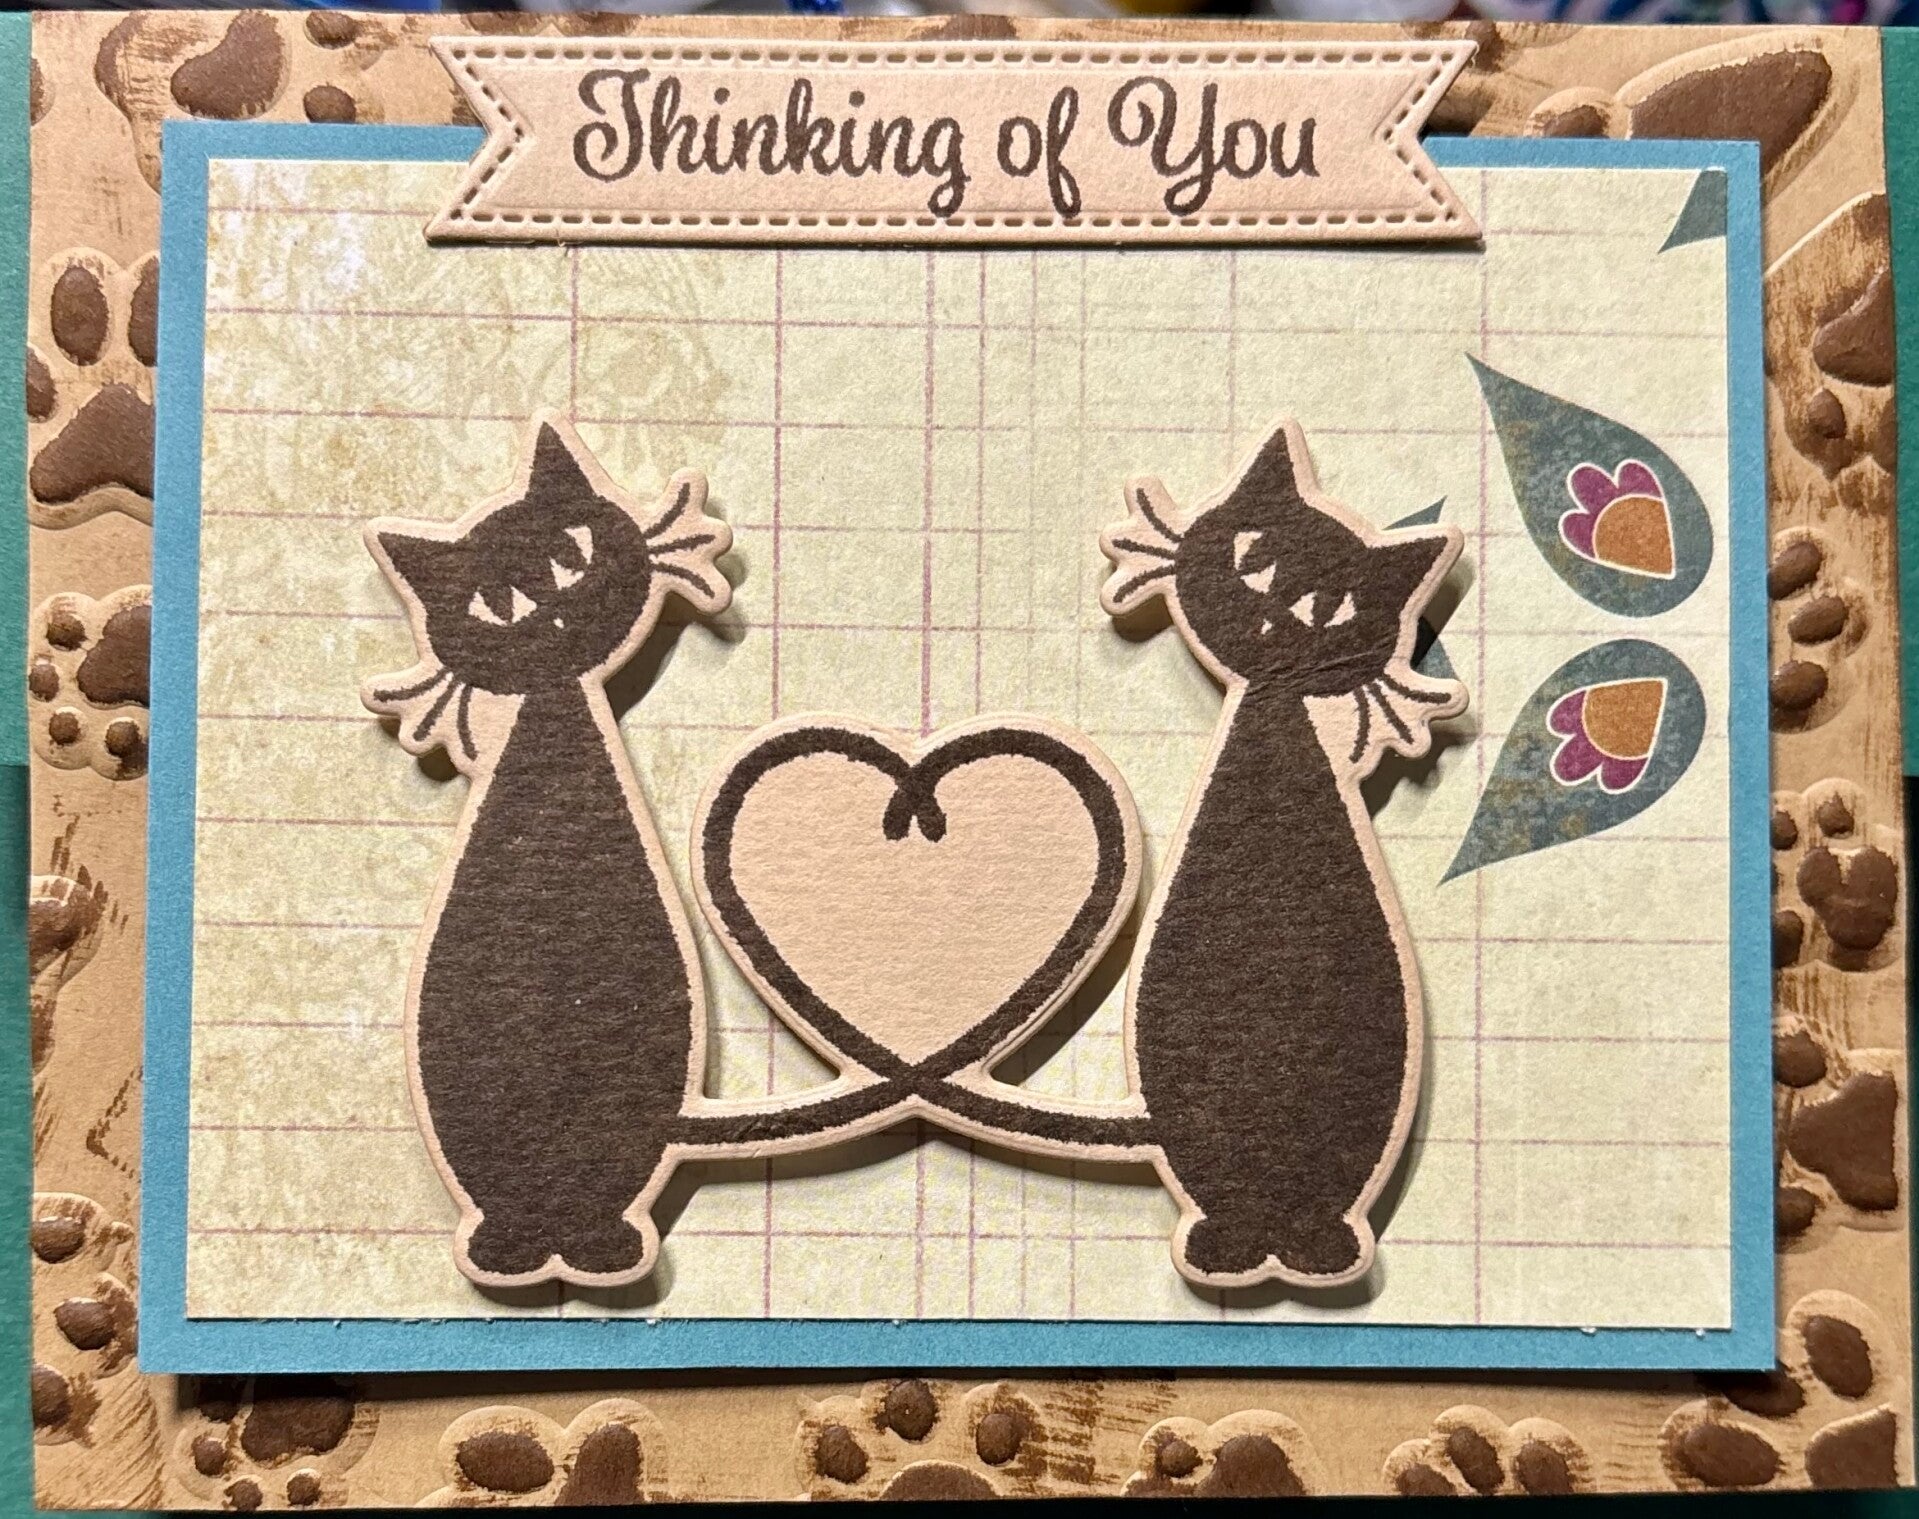
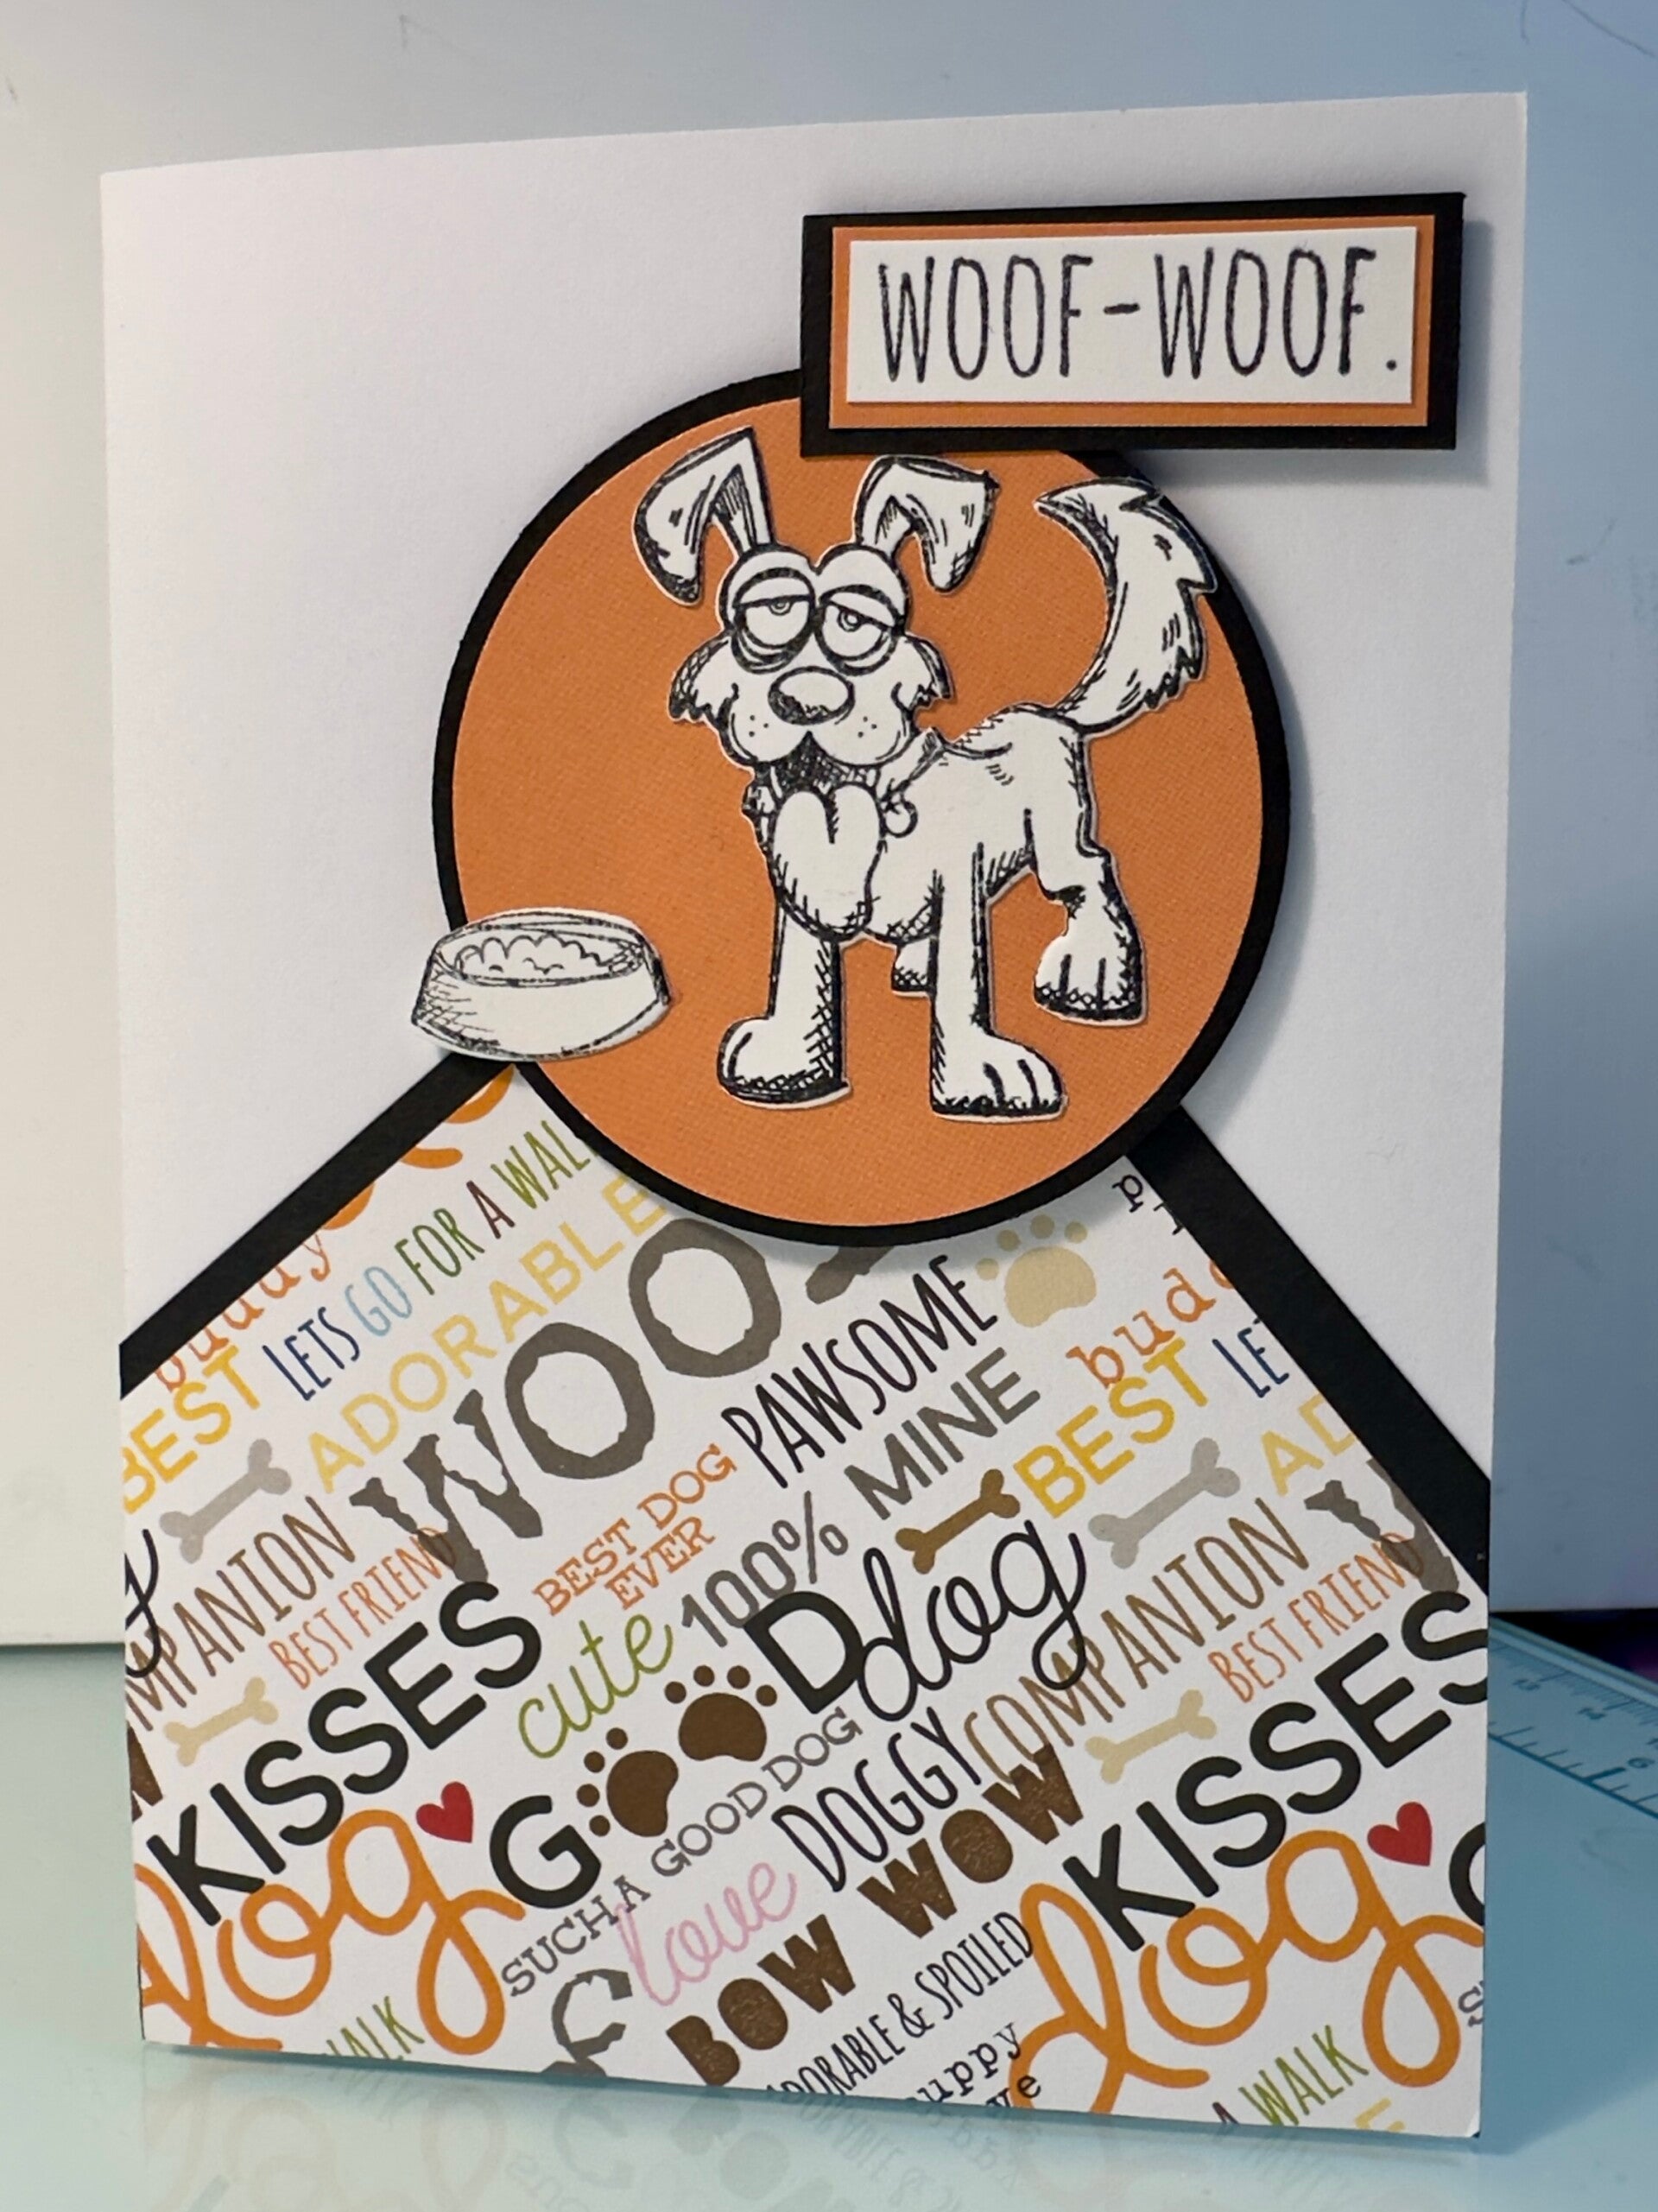
Sunday August 24 & 31, 2025 - We made cat and dog greeting cards using a one sheet wonder template from Karen Titus, Stamping on the Back Porch, using her instructions for the Easiest One Sheet Wonder for 12 x 12 Paper directions to donate to pet rescueRevelation Gardens Cat & Dog Sanctuary in Camden TN. Below are the awesome cards we all made to donate!


Sunday August 10, 2025 - We made cards using a one sheet wonder template from Lynn Dunn from Stampastic Designs that Margery suggested. Here is the link to the tutorial. Below are the awesome cards we all made!


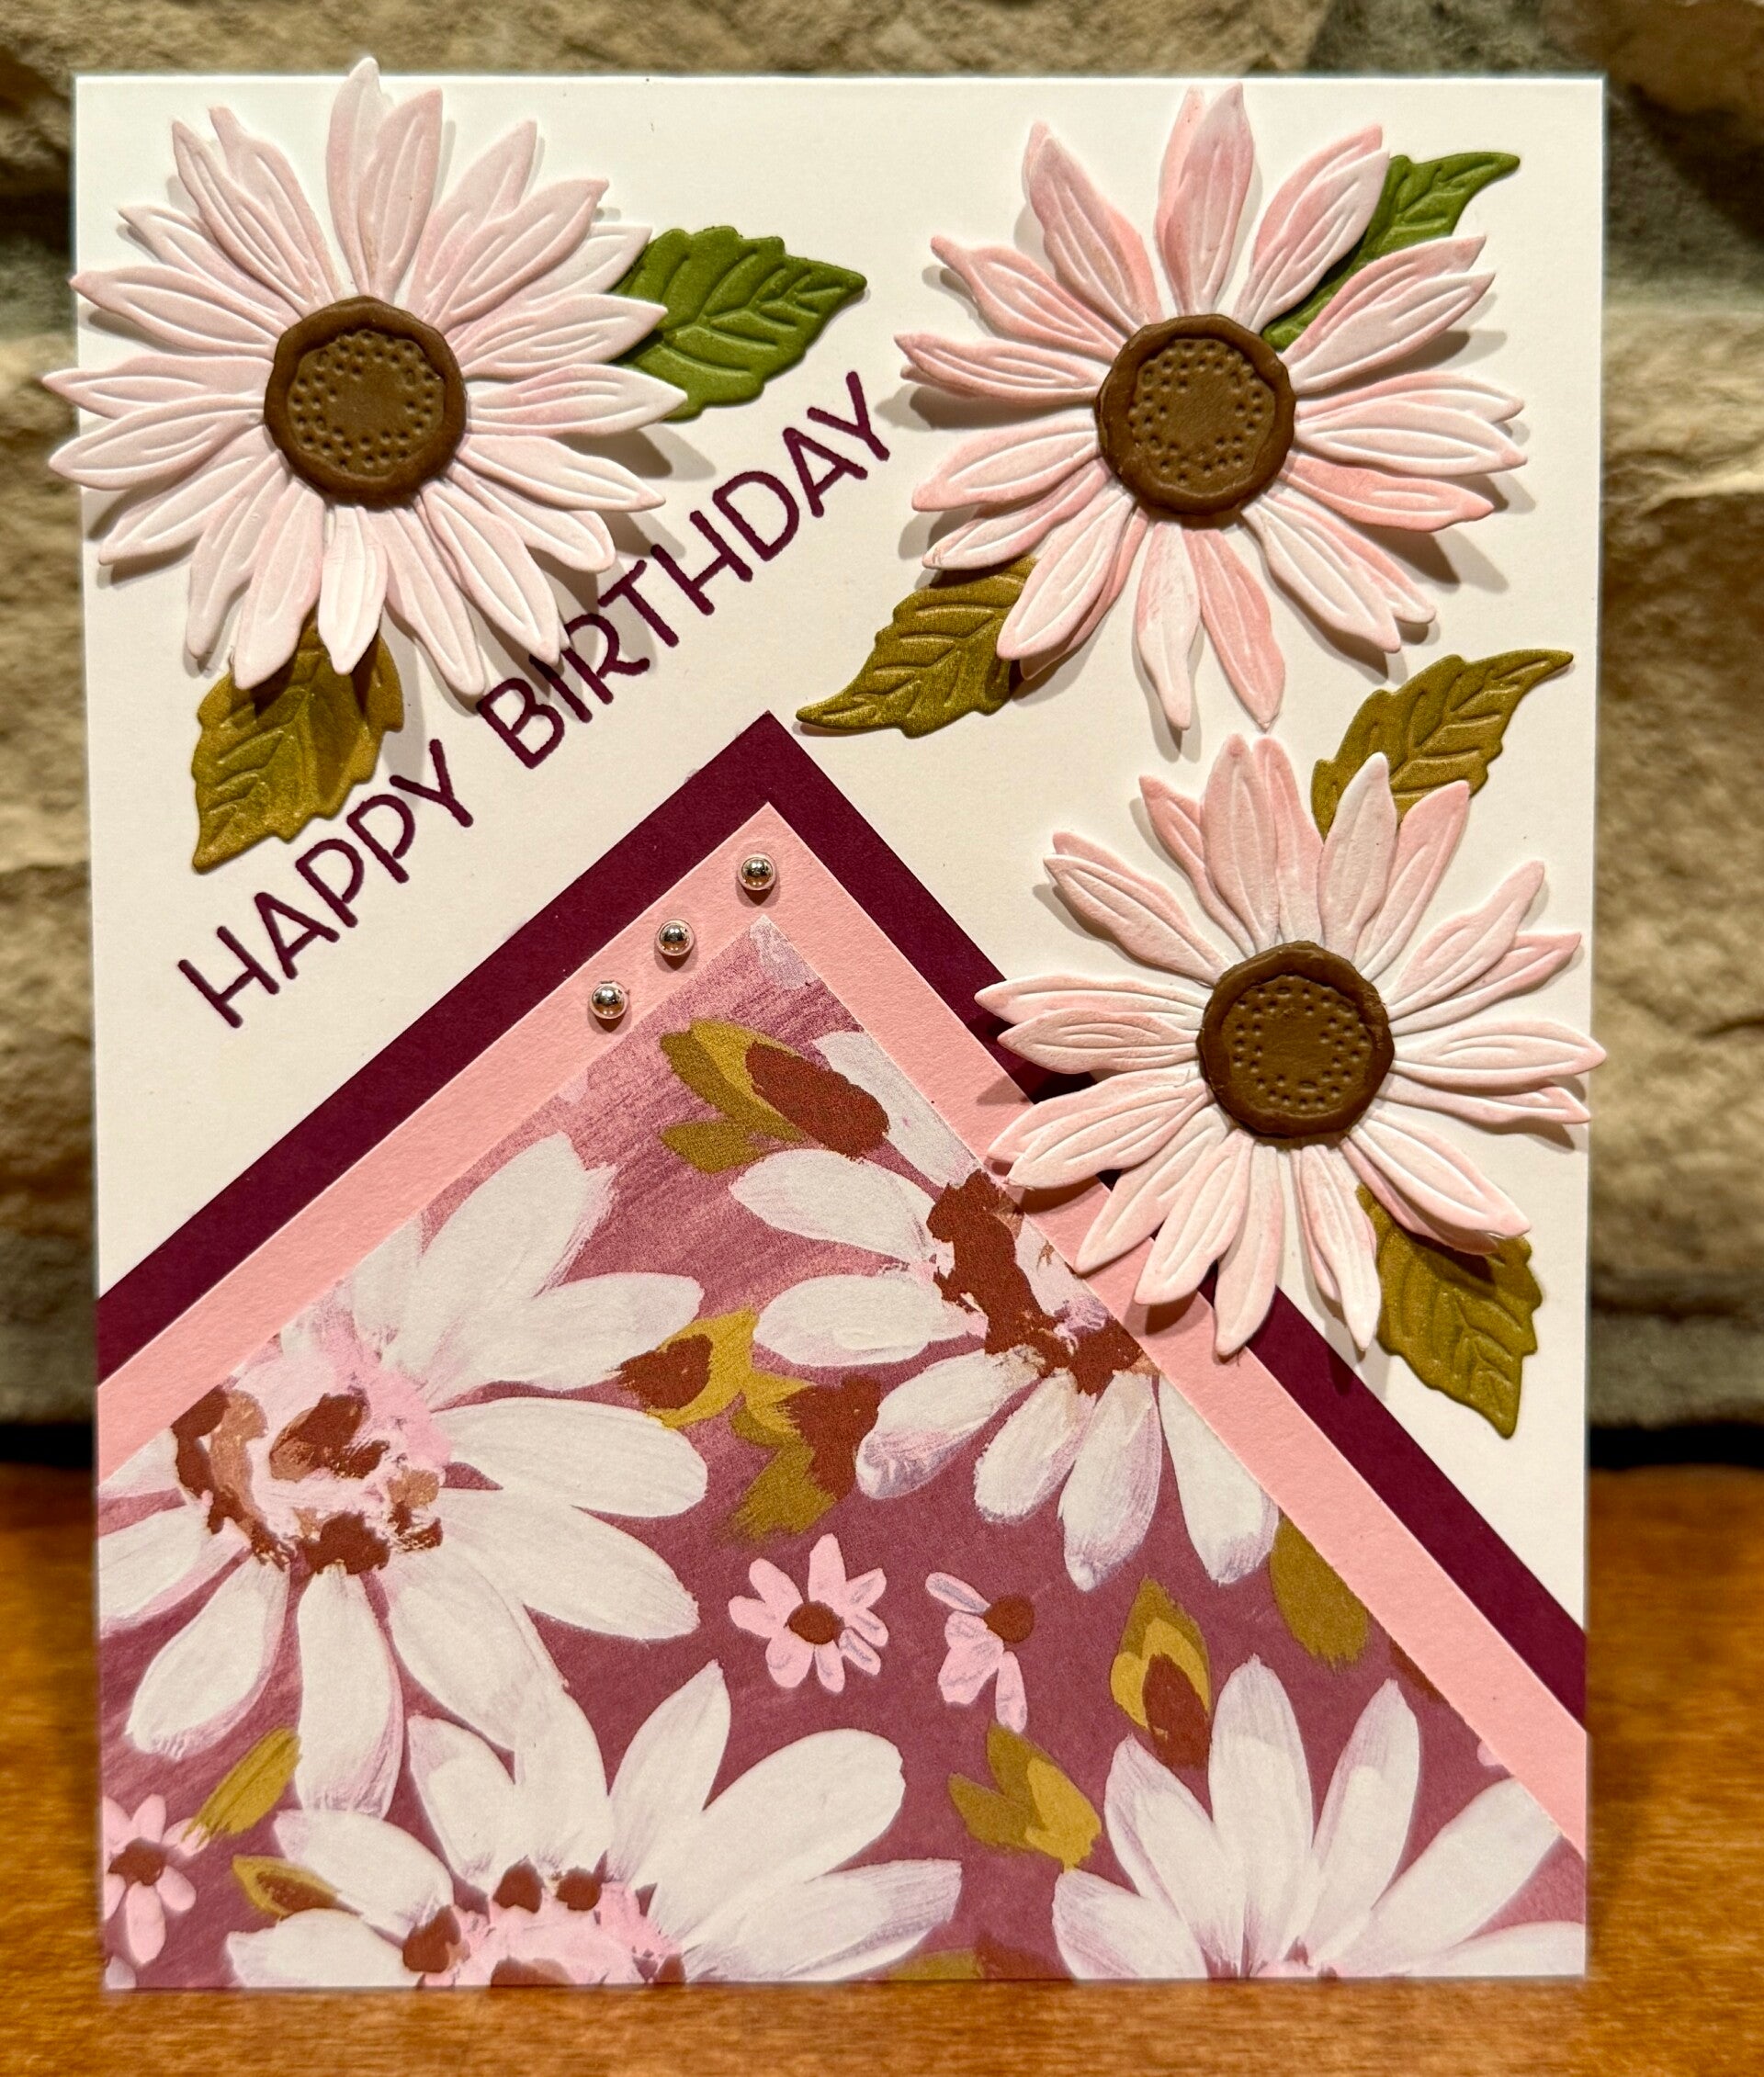
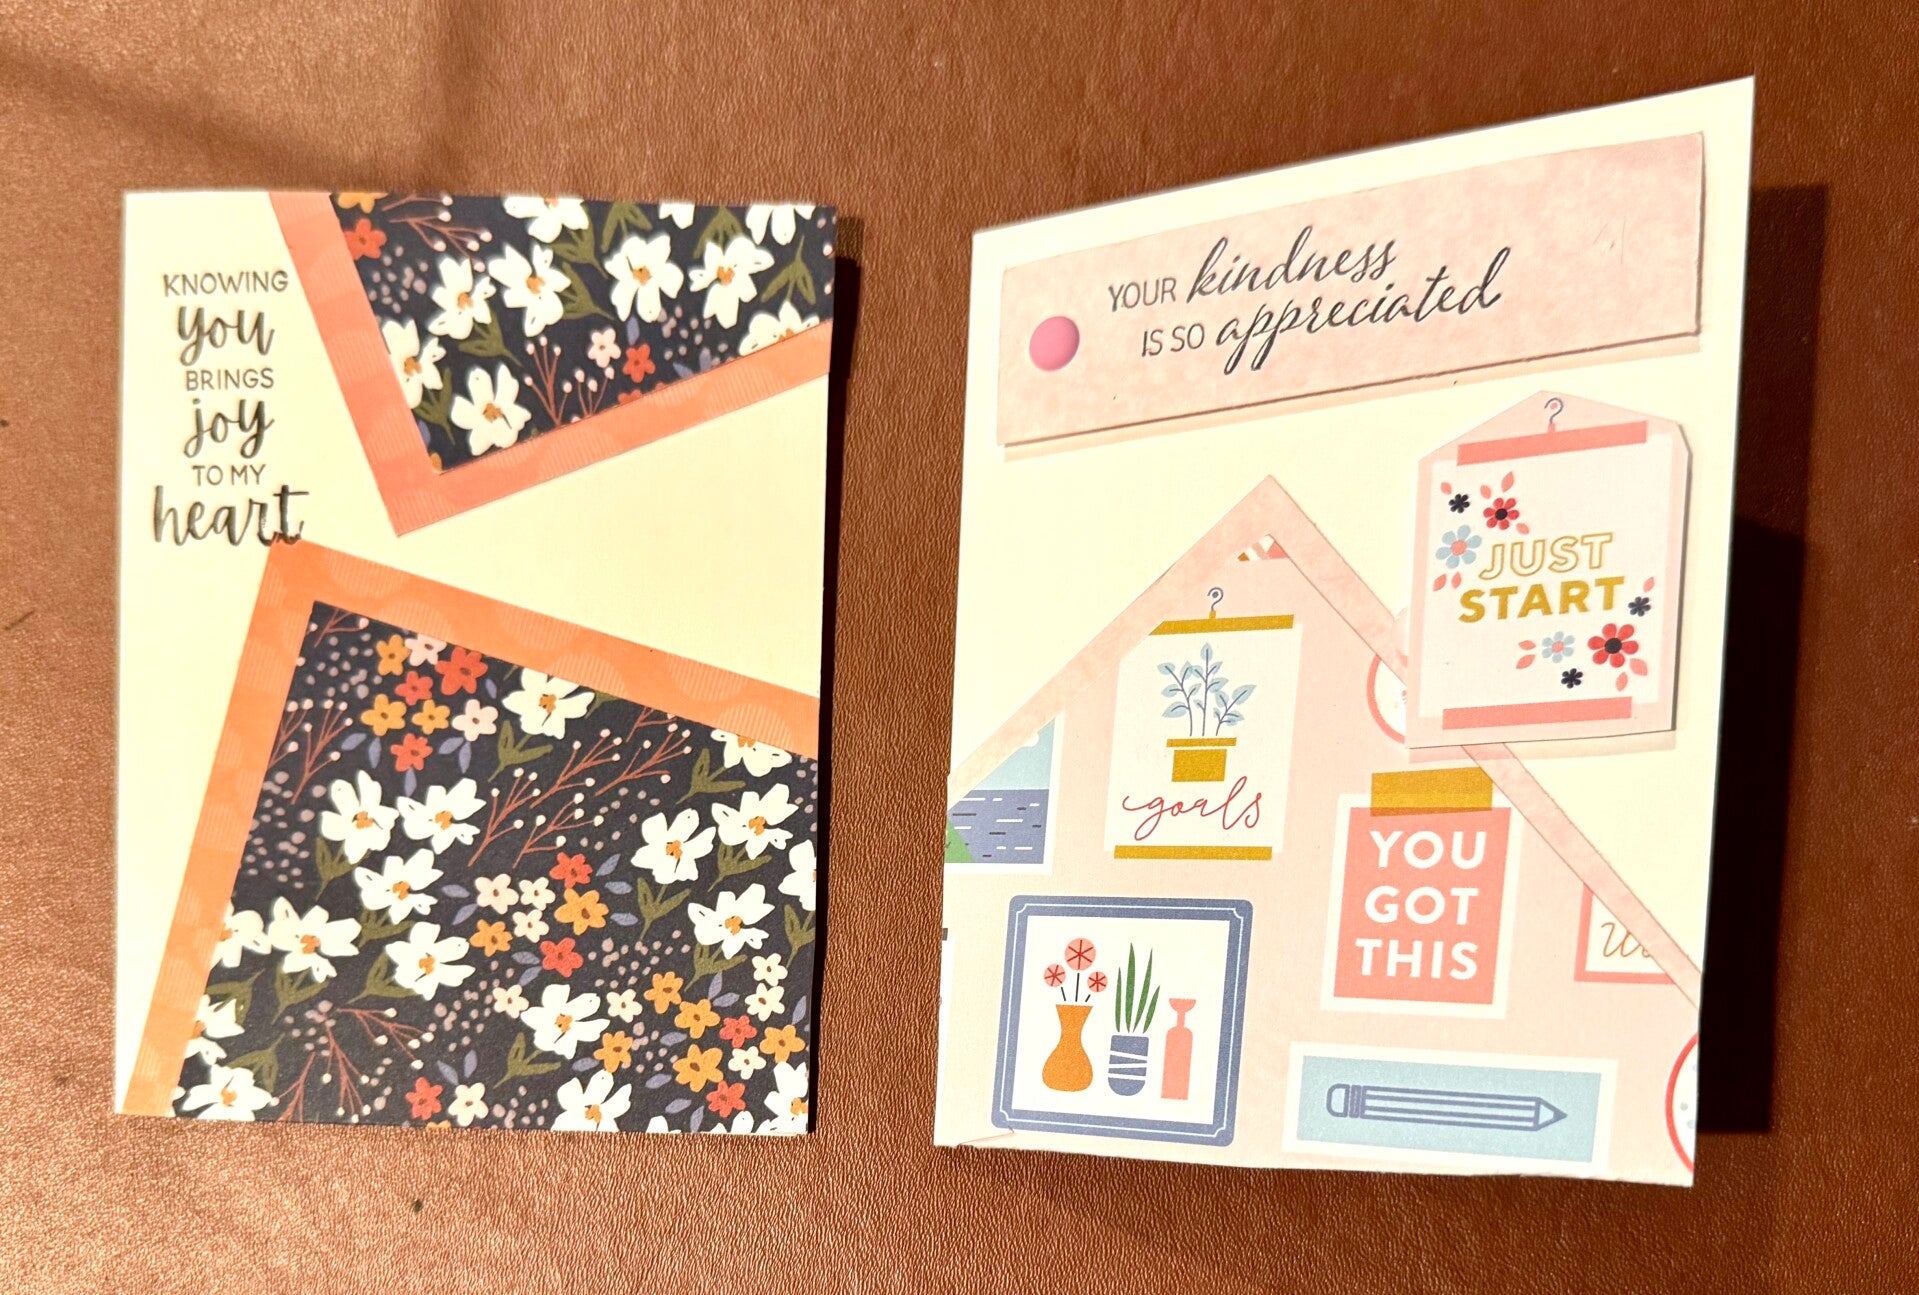
Sunday August 3, 2025 - Tonight Phyllis showed us how to make a super easy card using scraps. This idea was discovered in a May May Made It video while Debbie, Phyllis, and I were in Tucson Arizona recently. Here is the original video (this card is made starting around 27 minutes into the video), and below are the super cards we made.


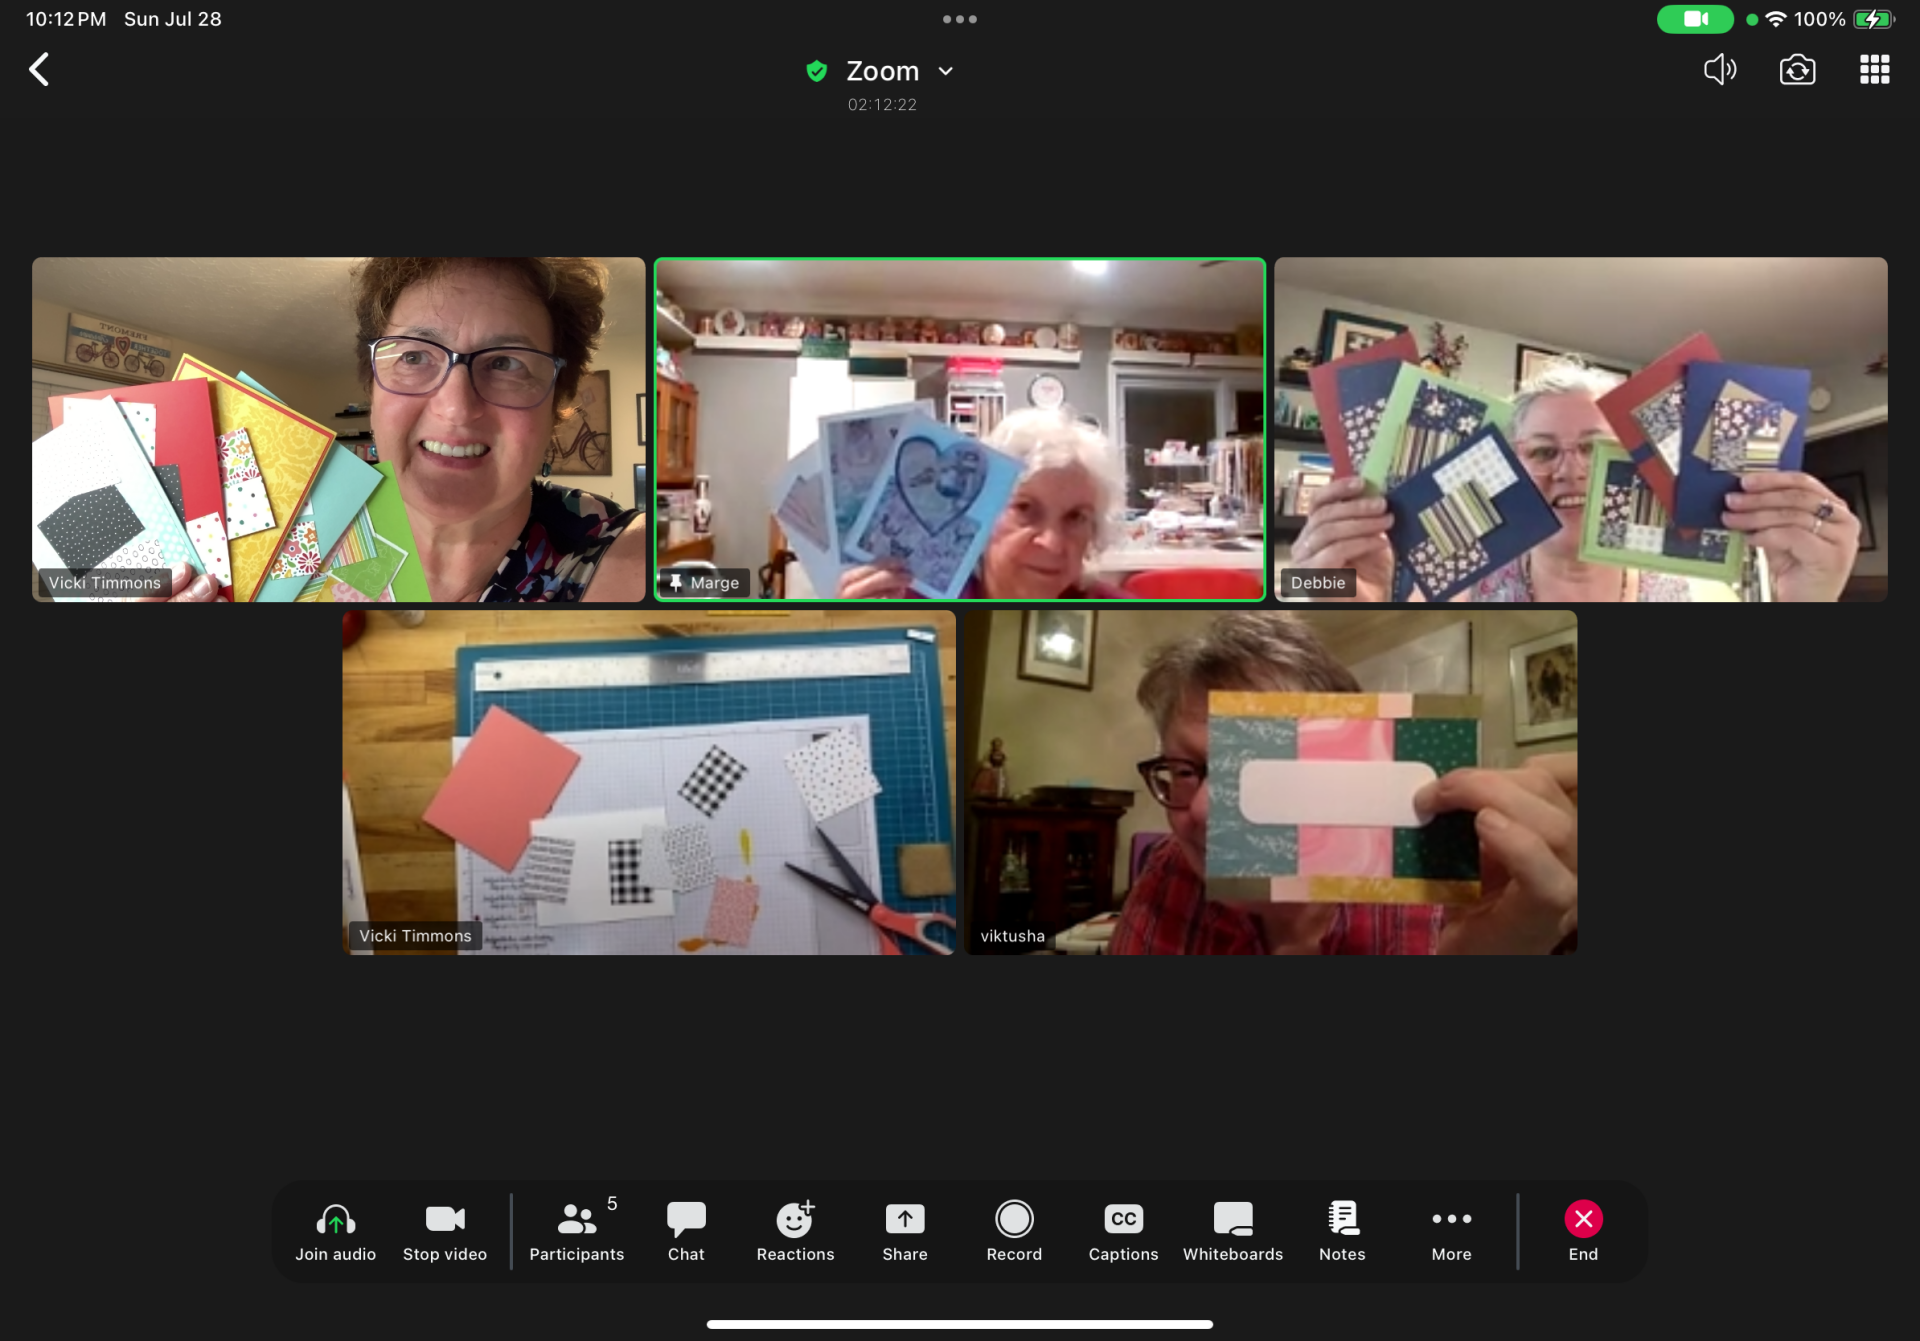
Sunday July 27, 2025 - Tonight we revisited a one sheet wonder from January 5, 2025. This project uses a 6 x 6 piece of designer paper, along with cardstock, to make two easy and fun cards. The directions can be found on Christina's Creative Corner.


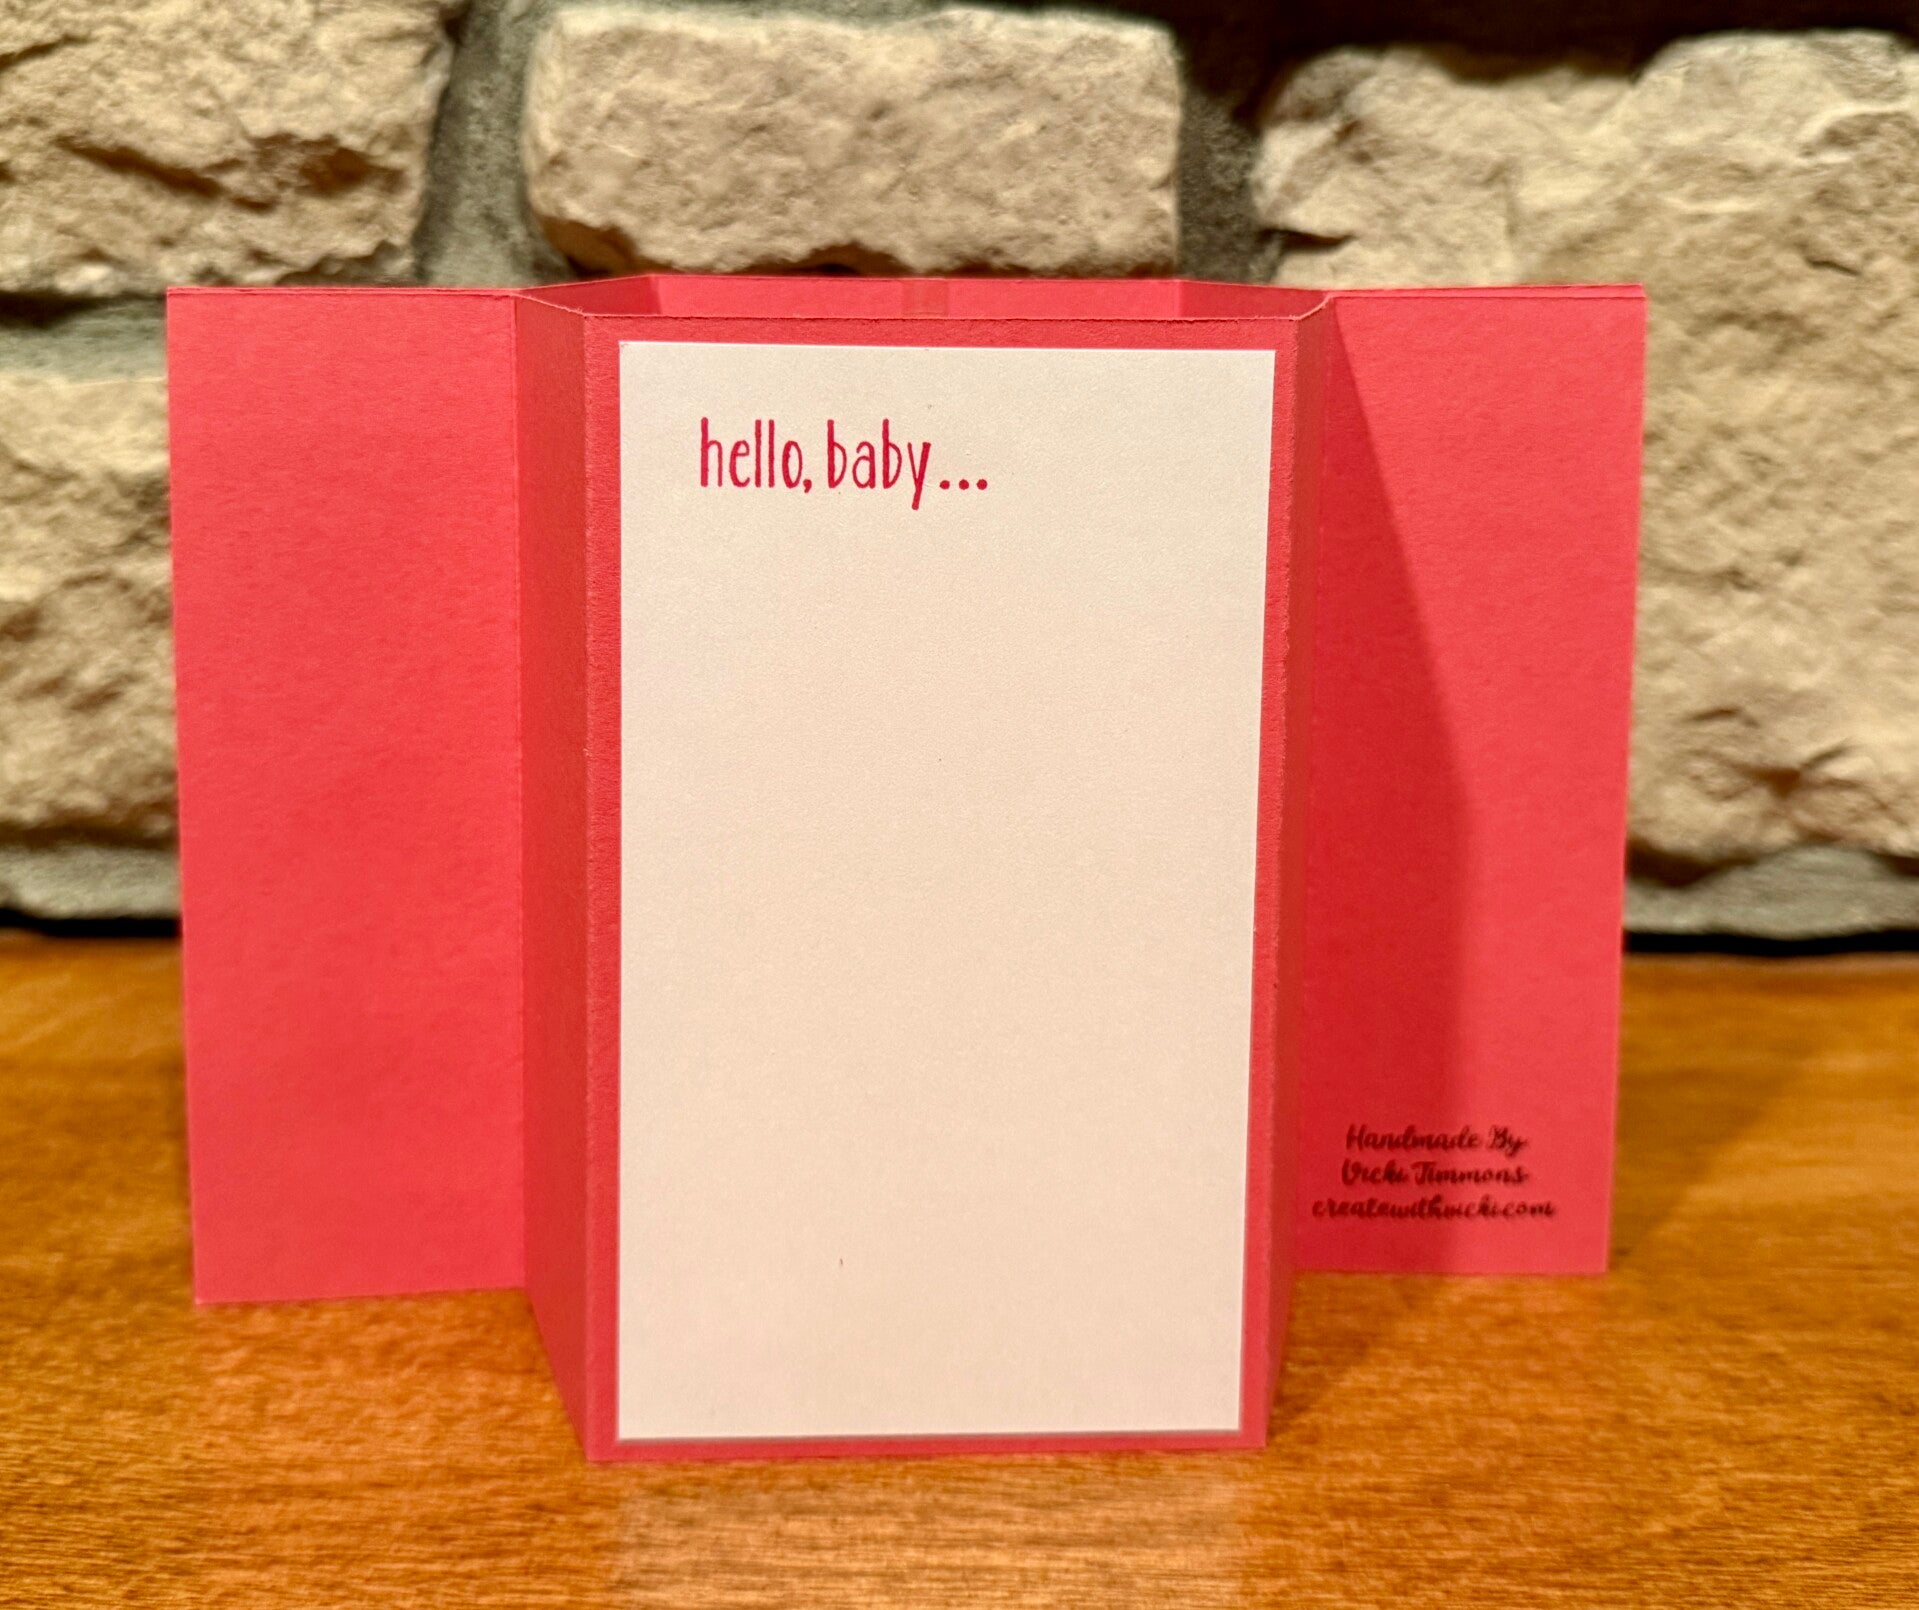
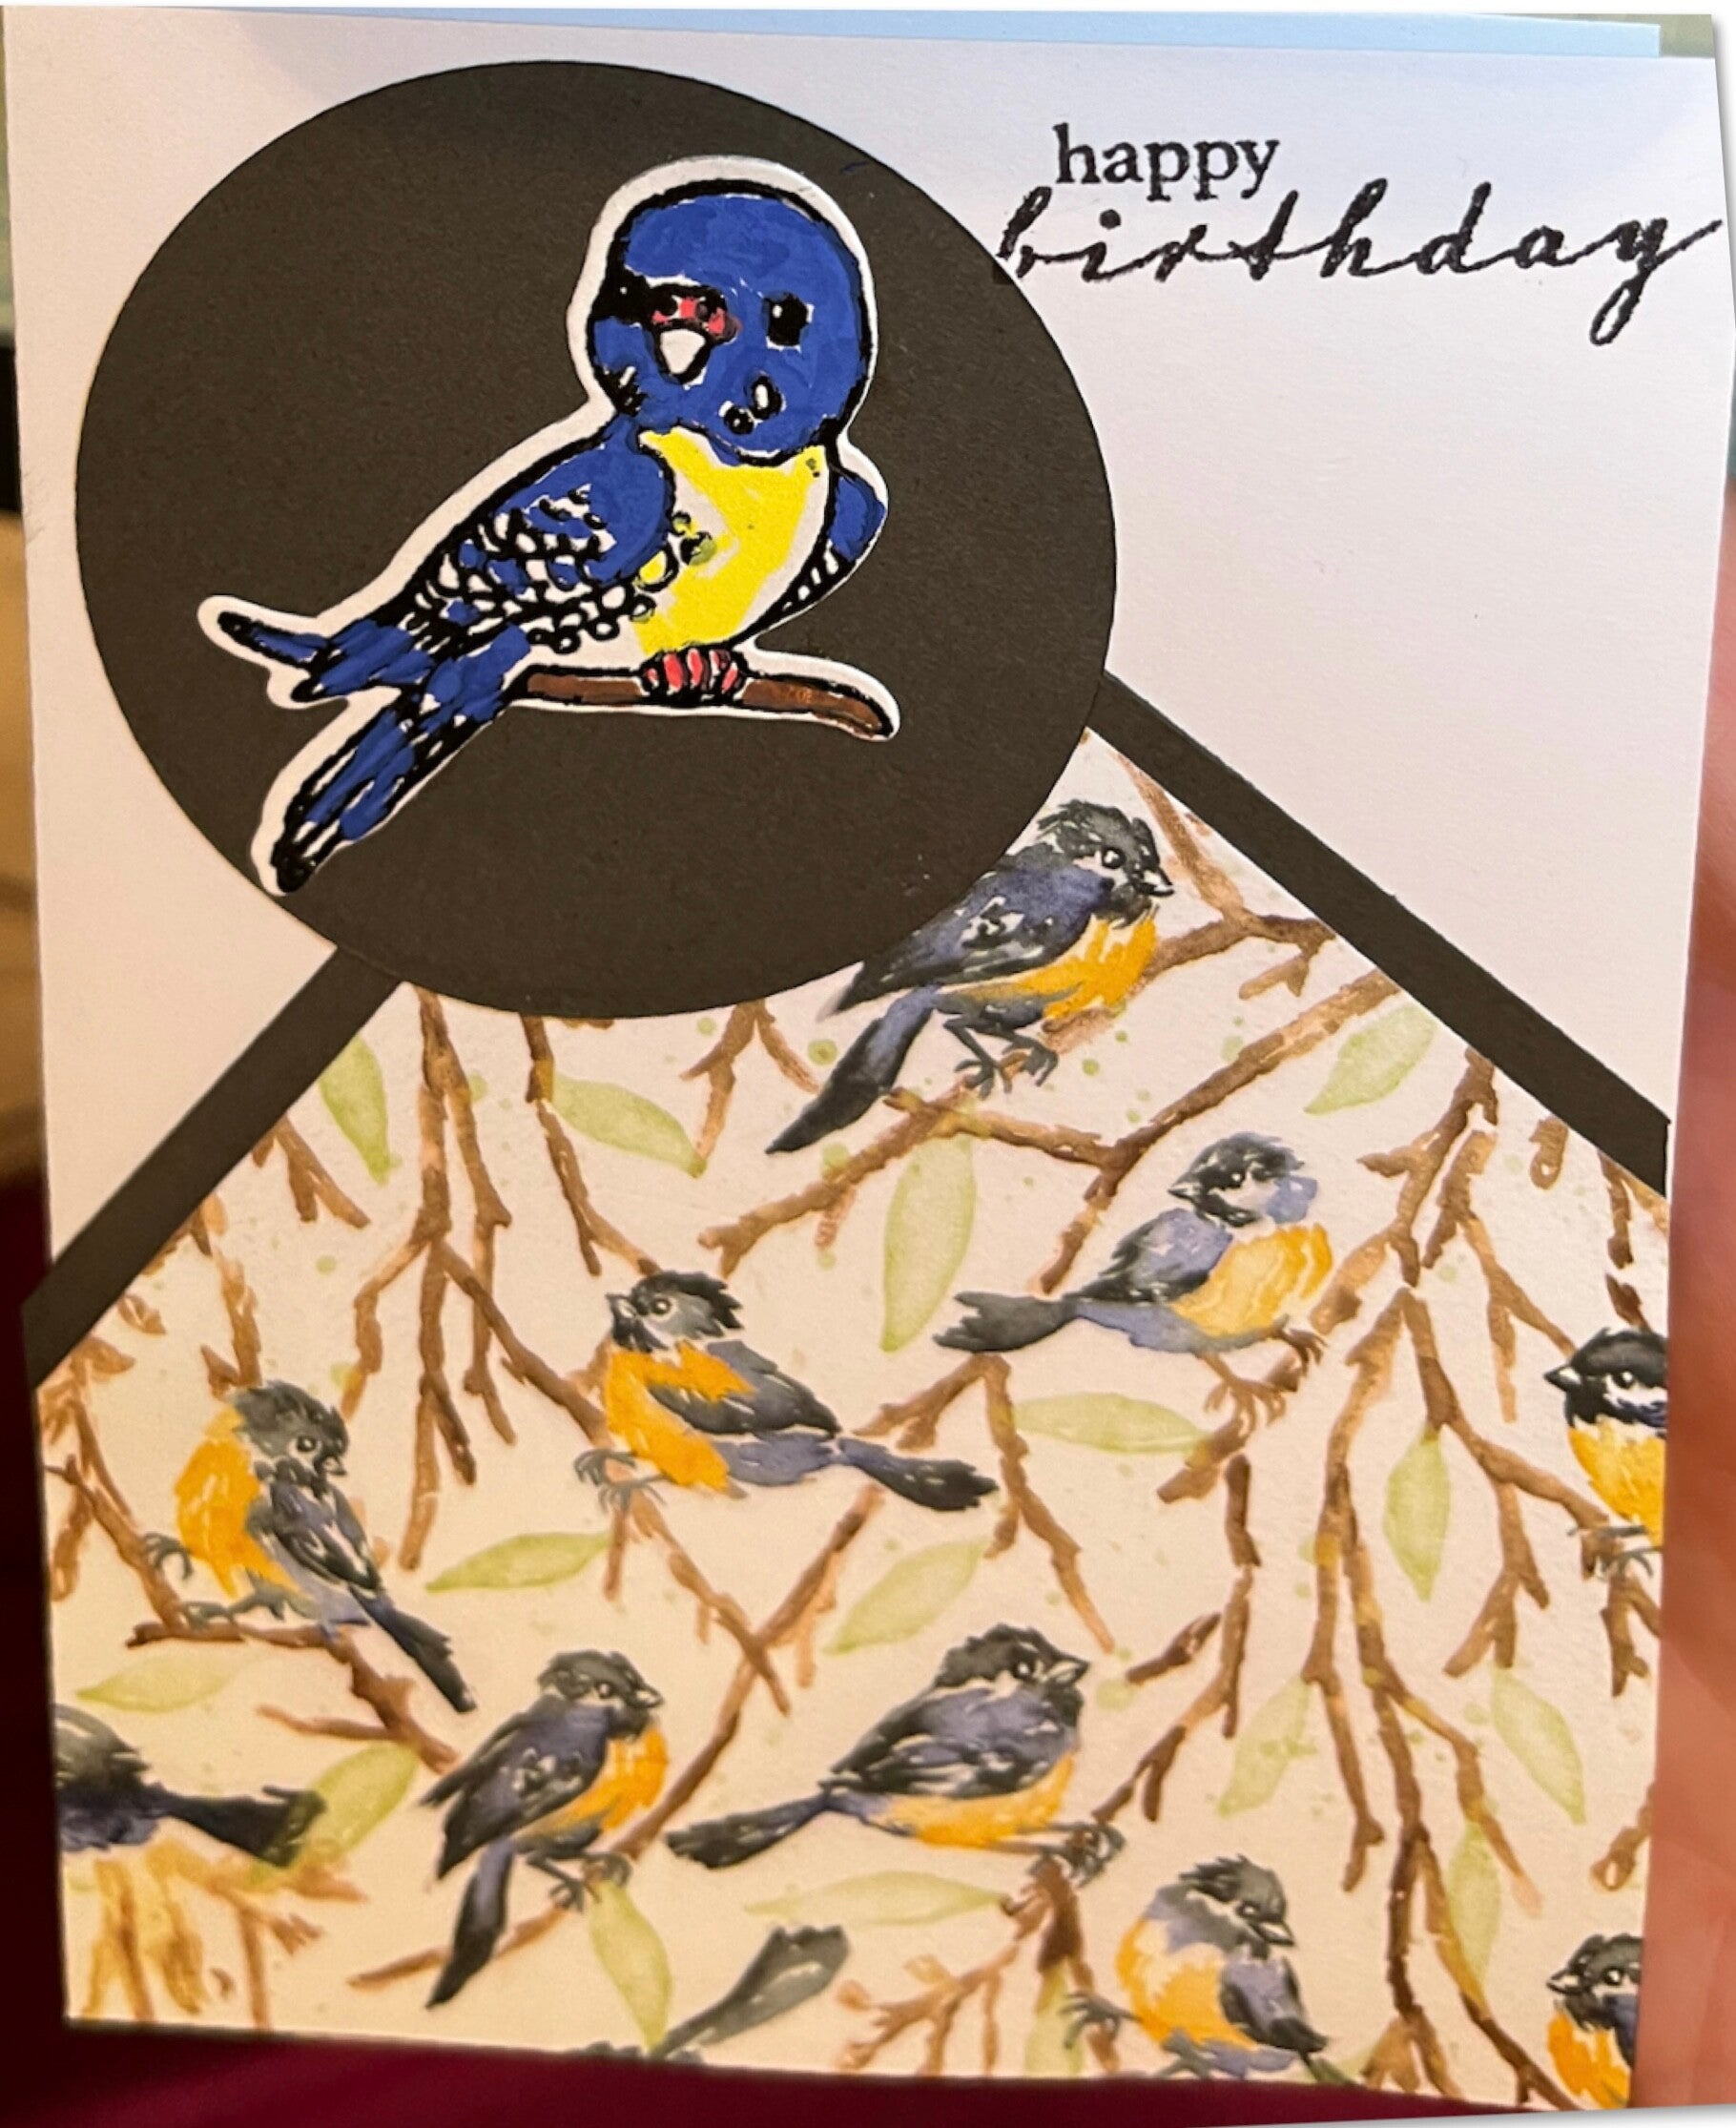
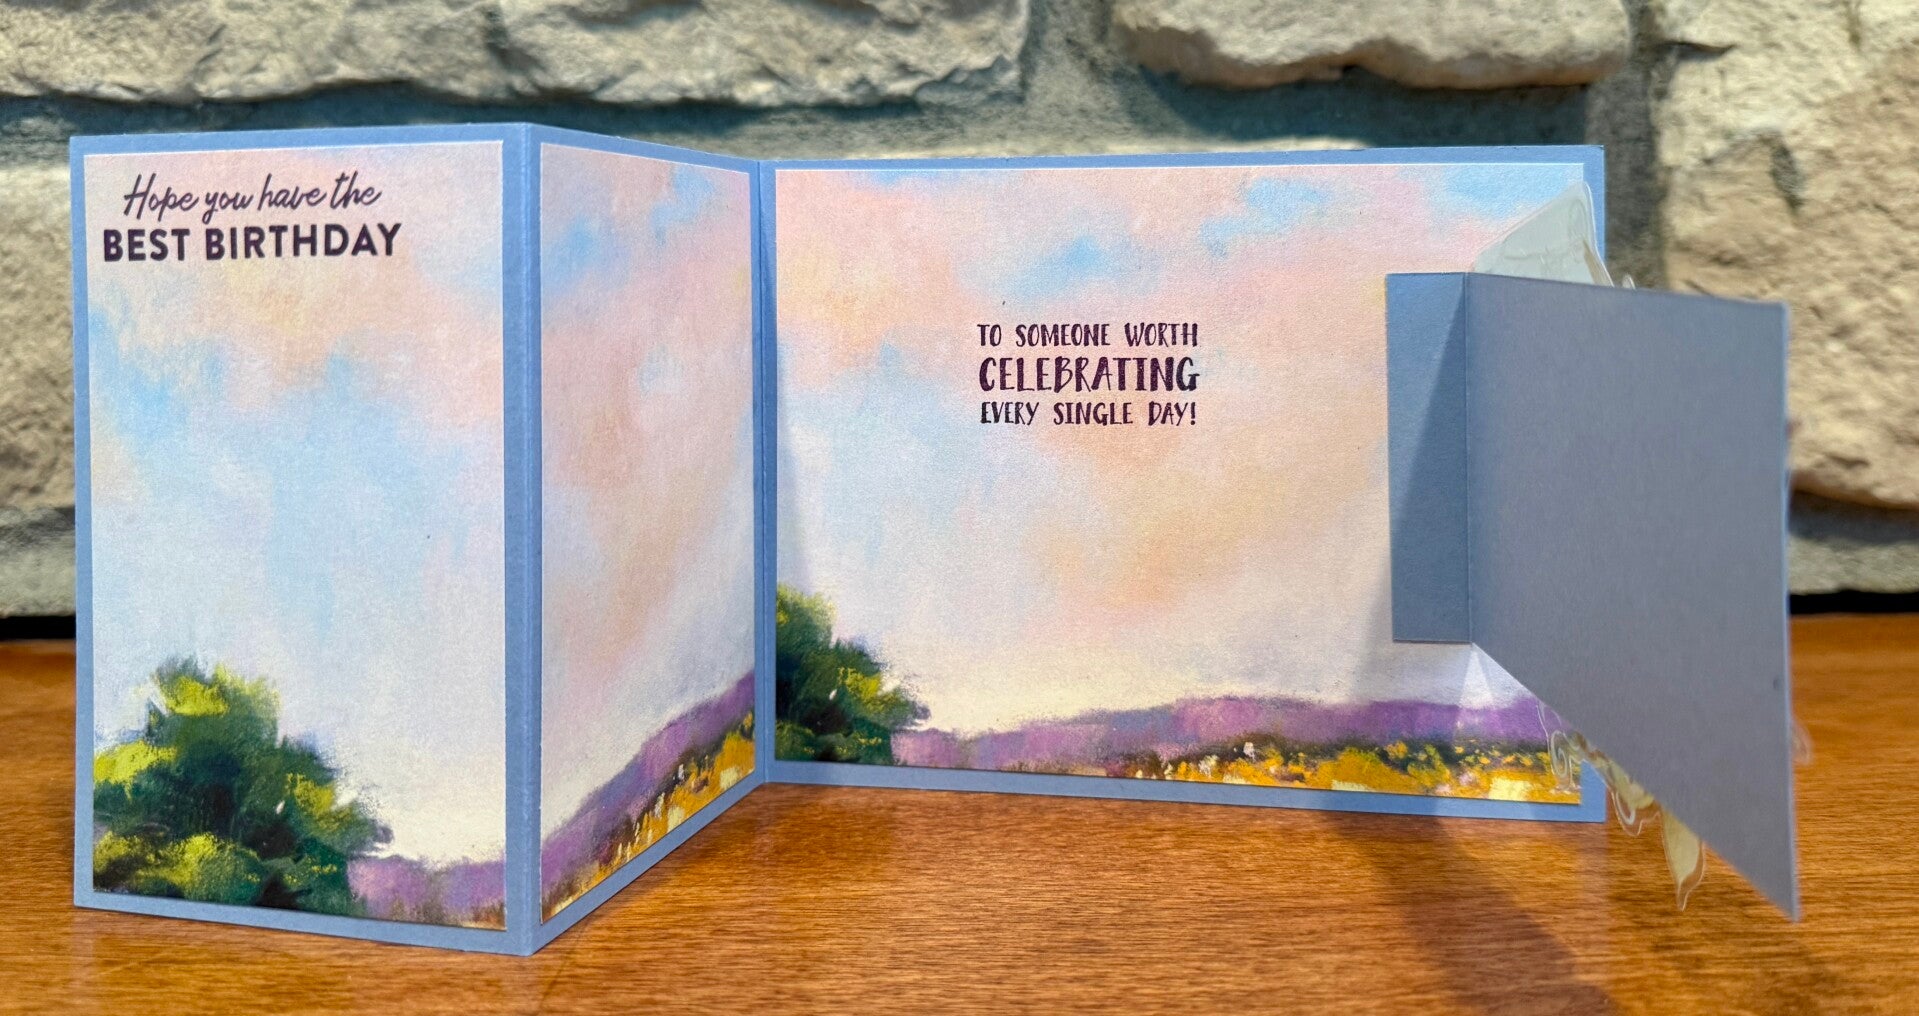
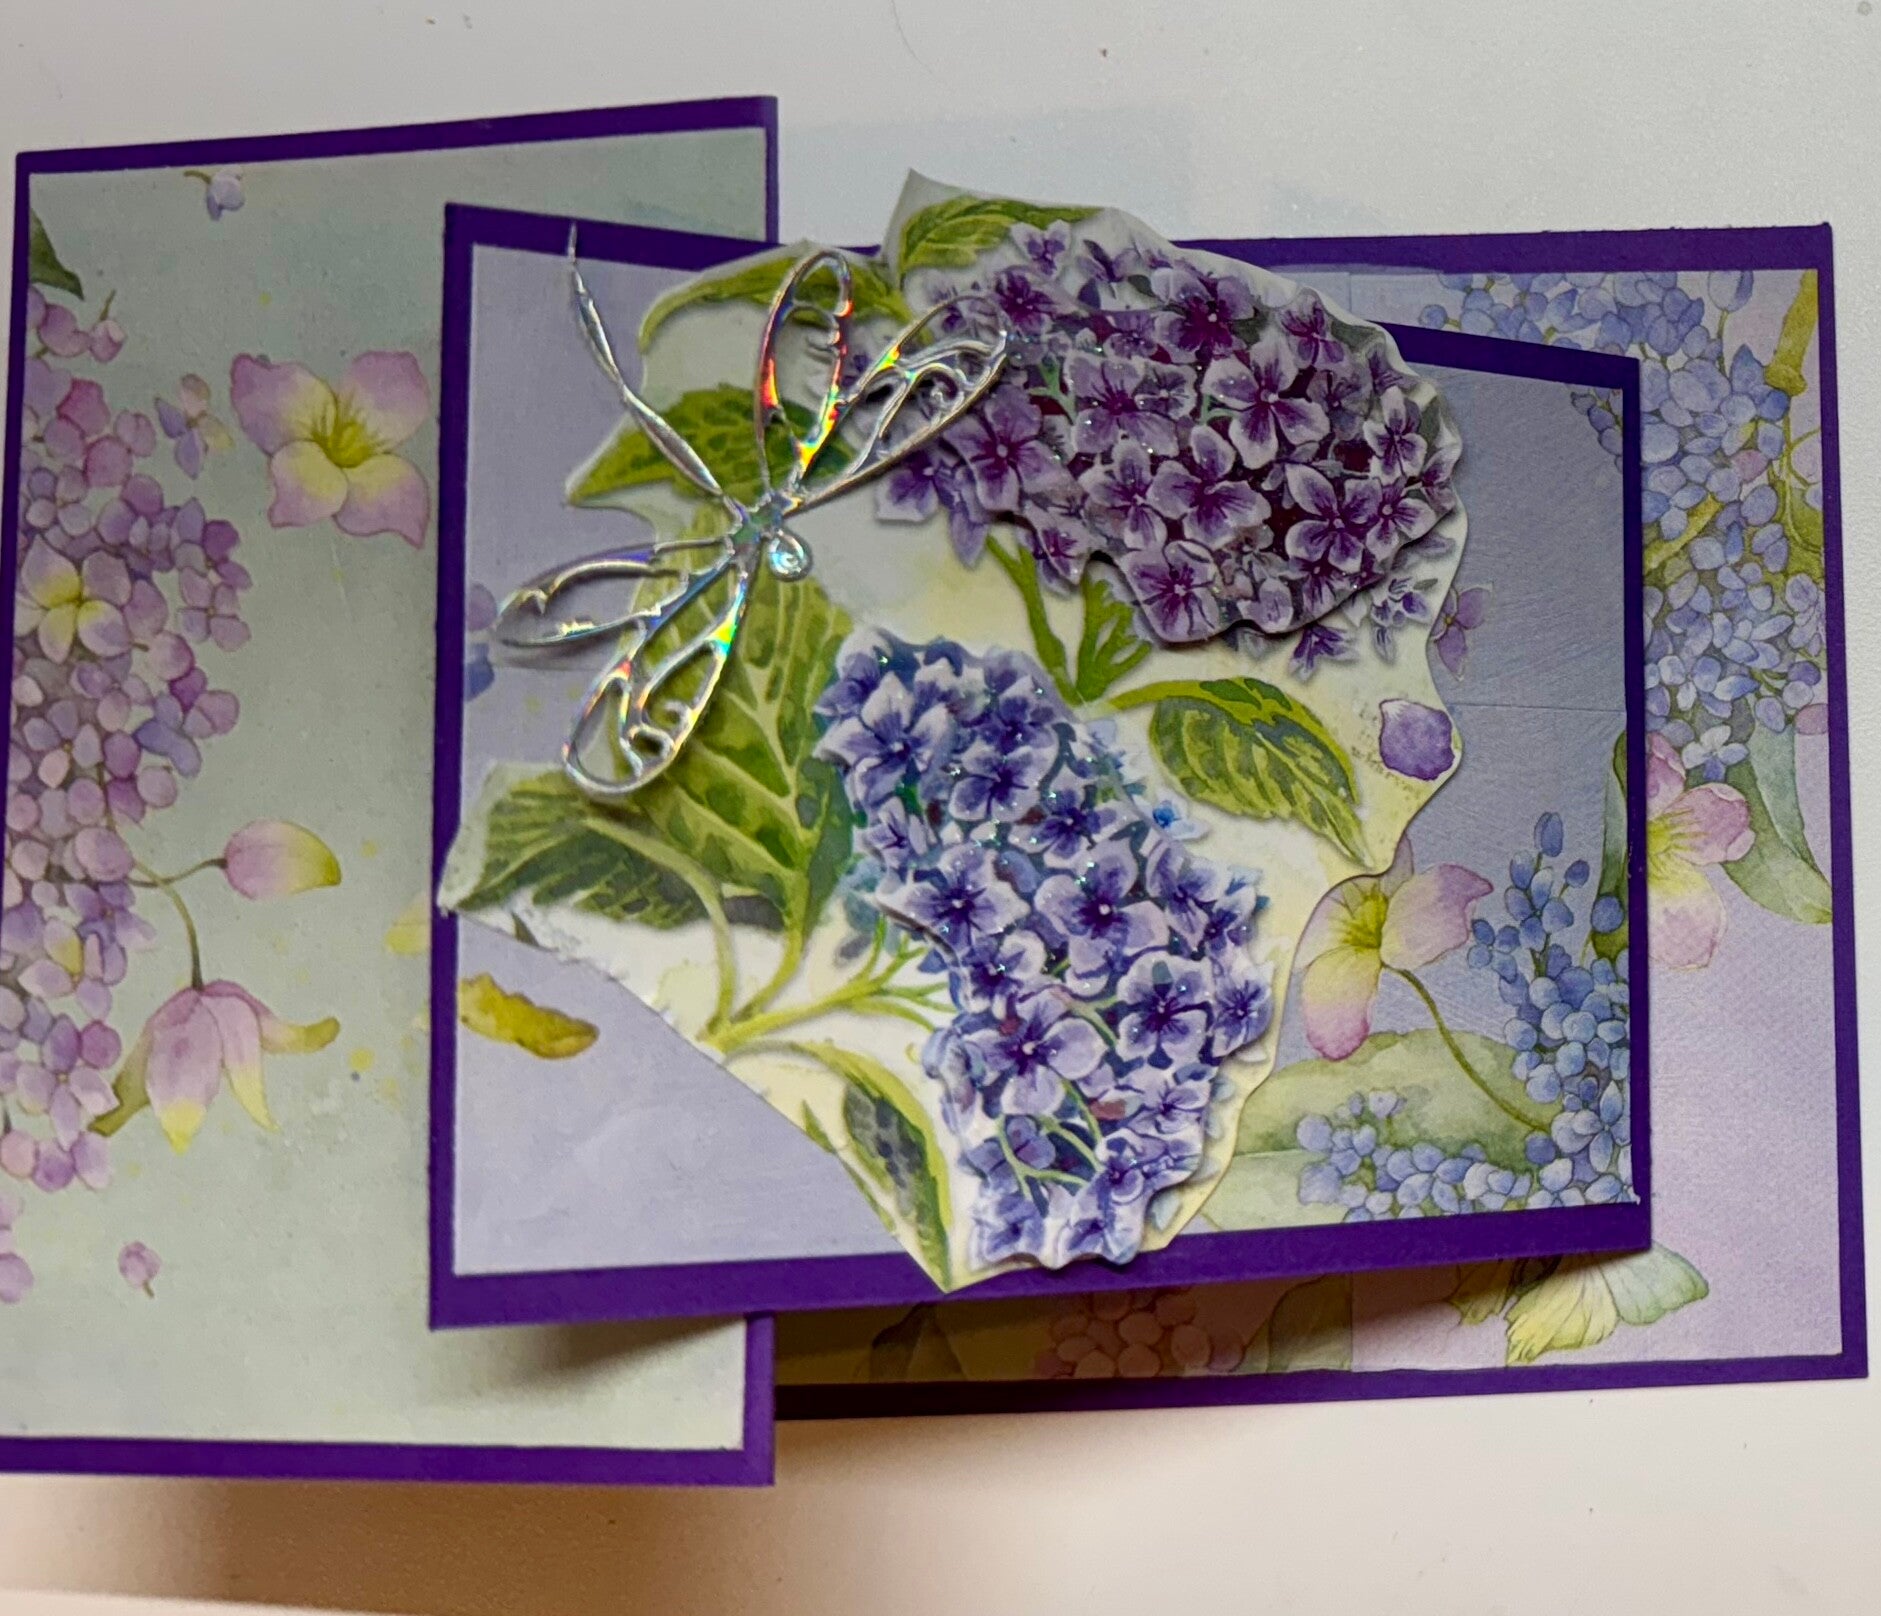
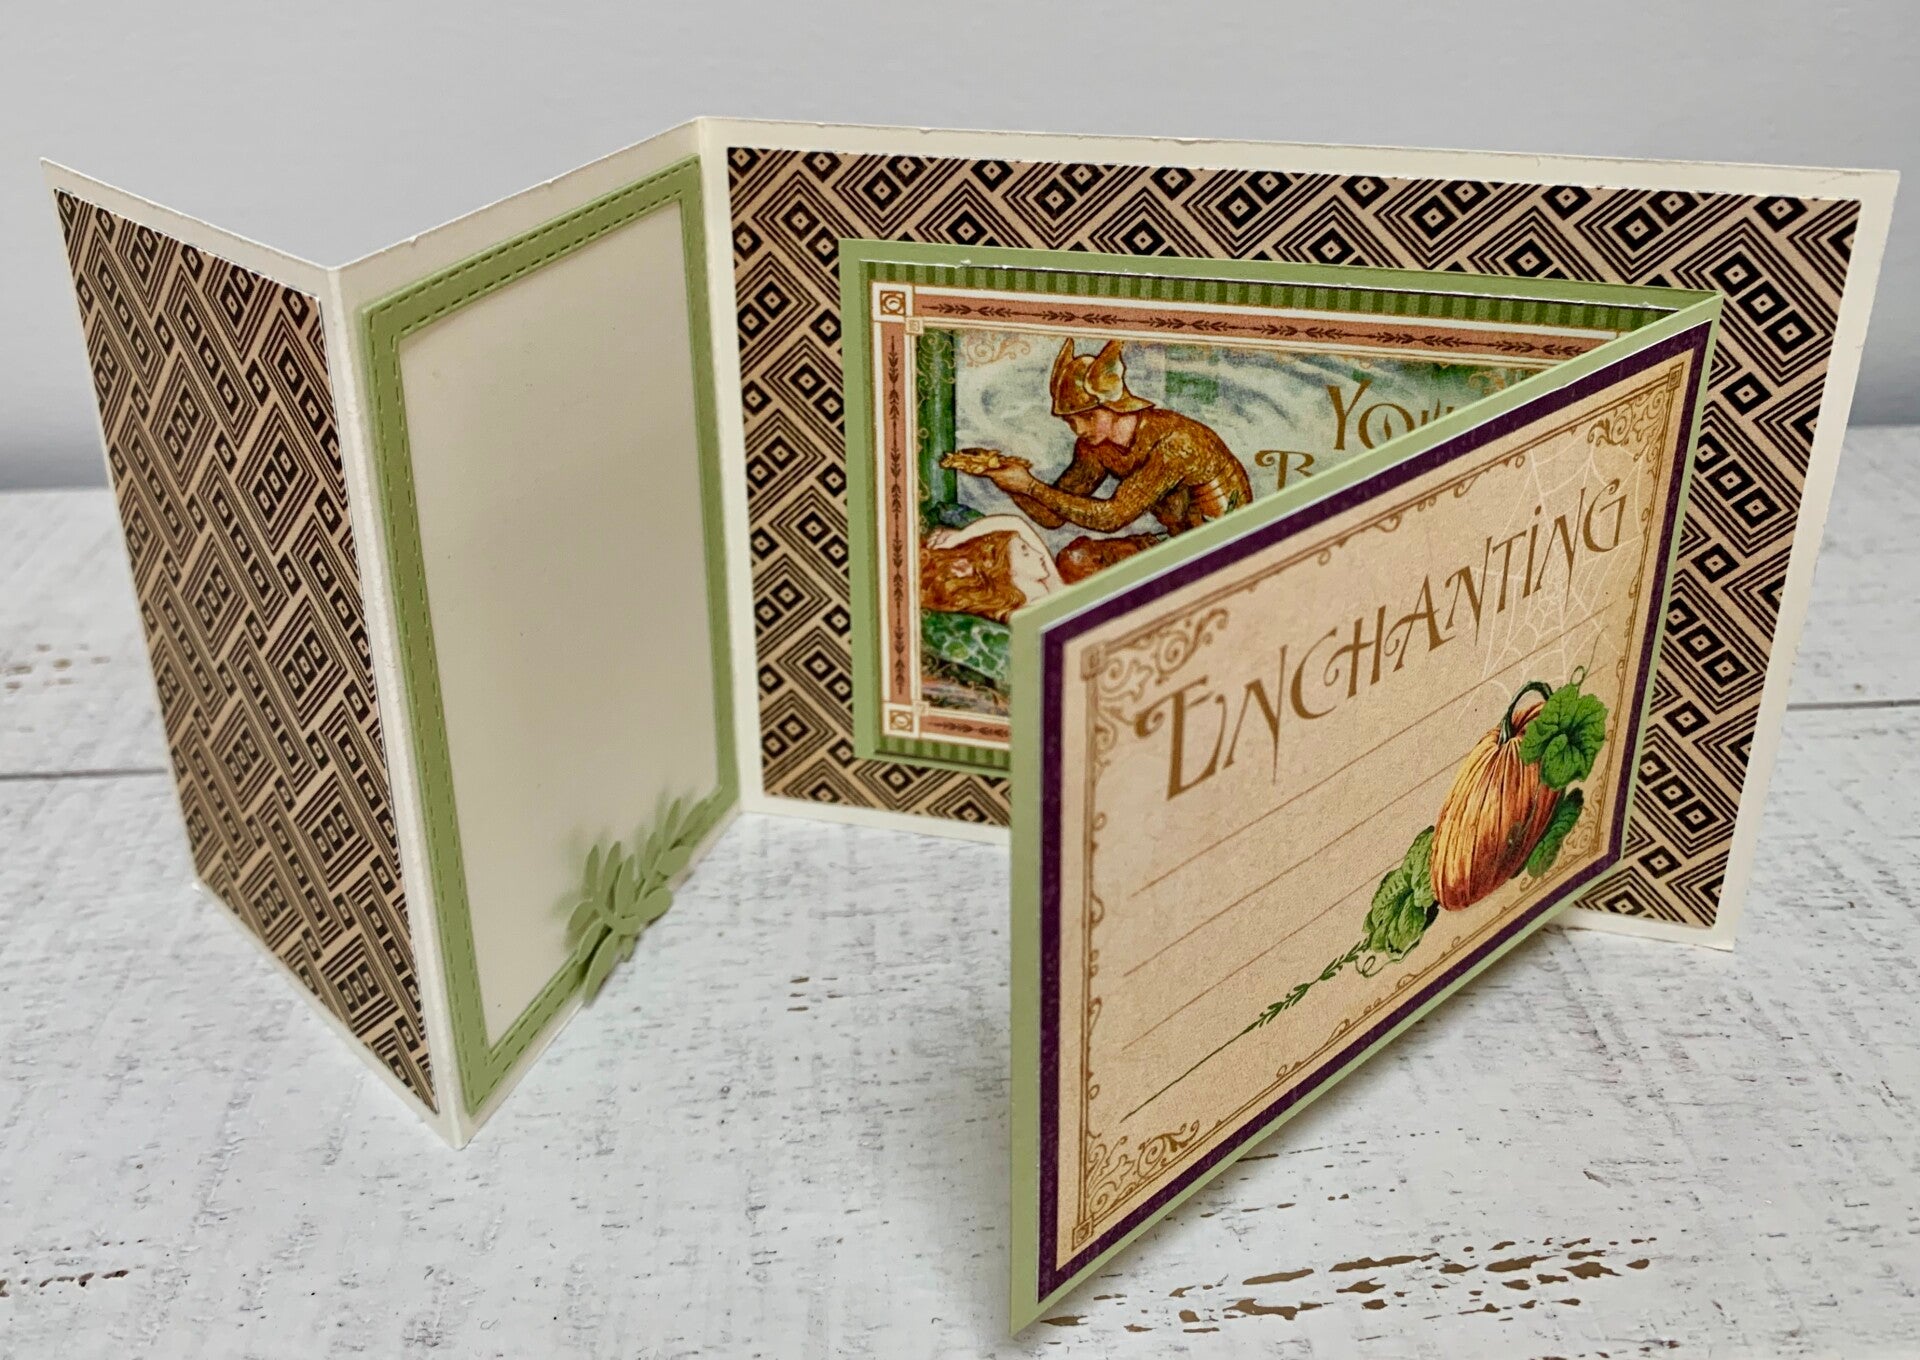
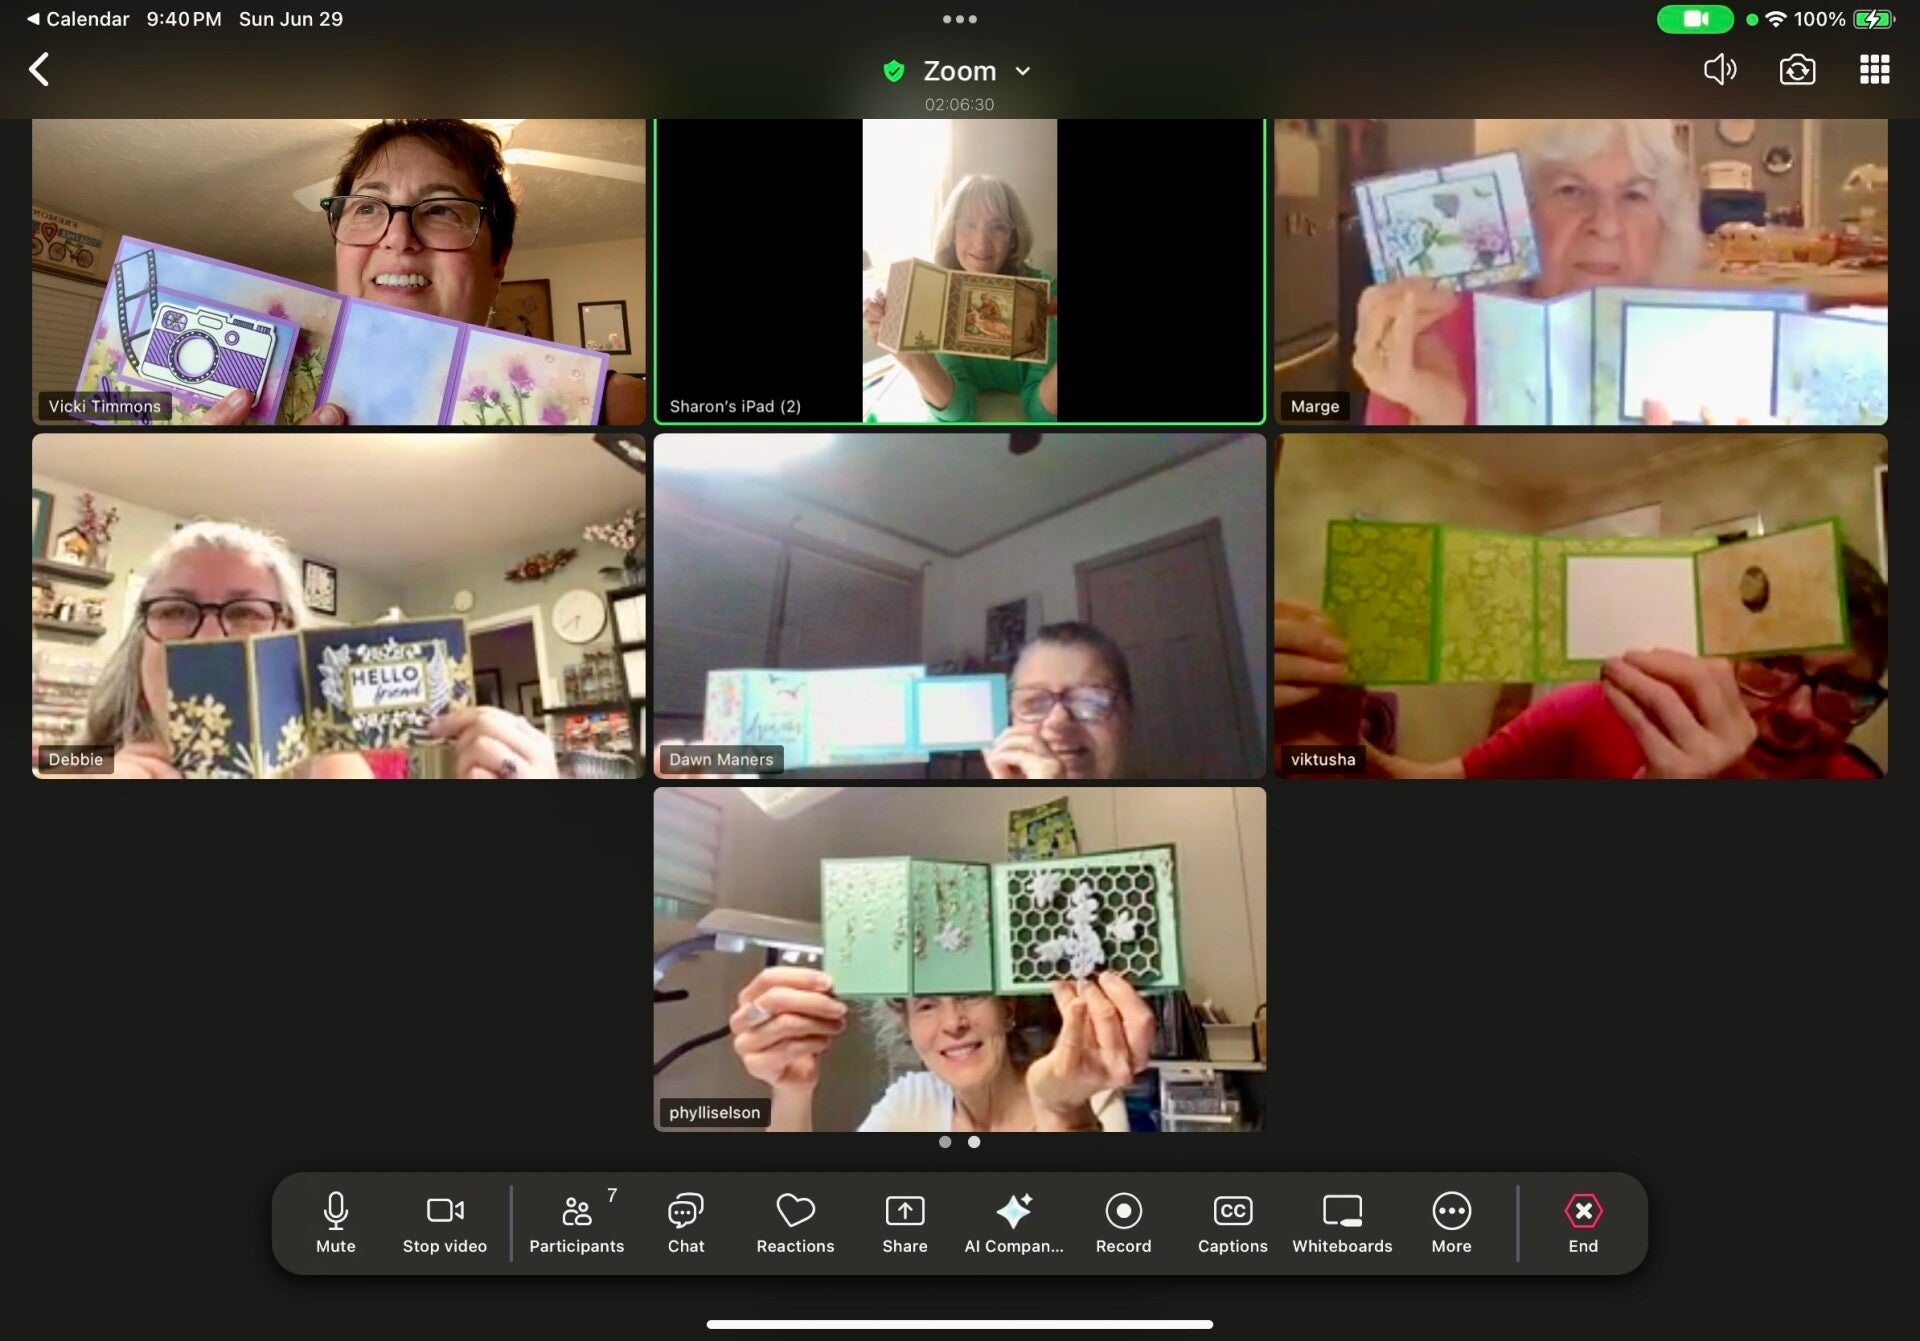
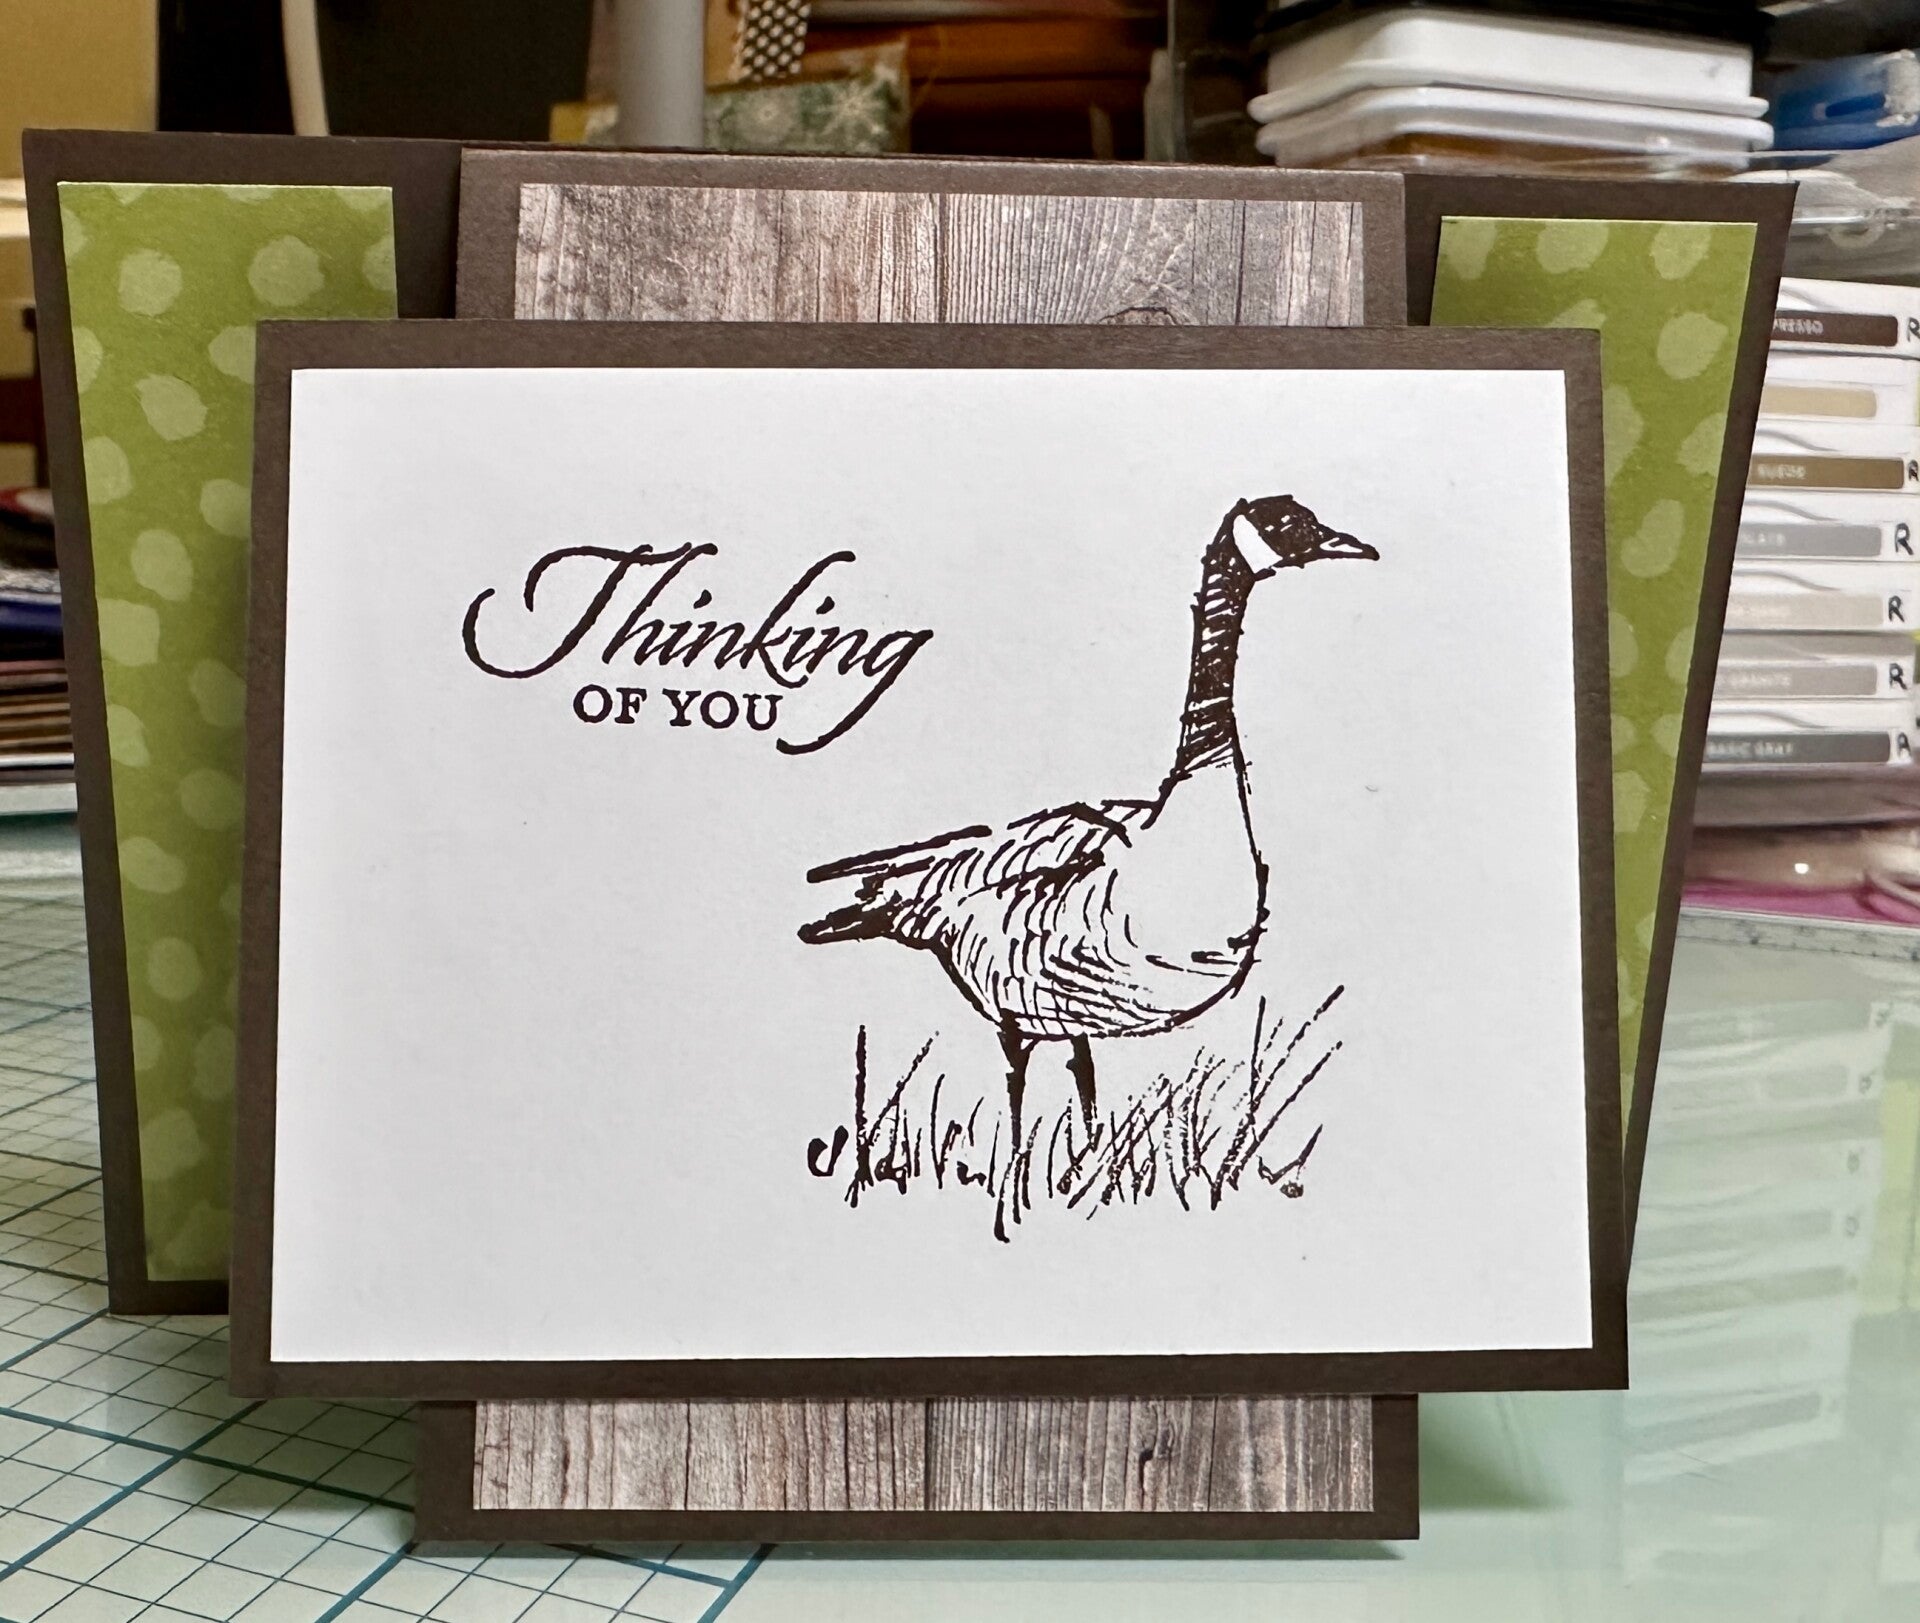
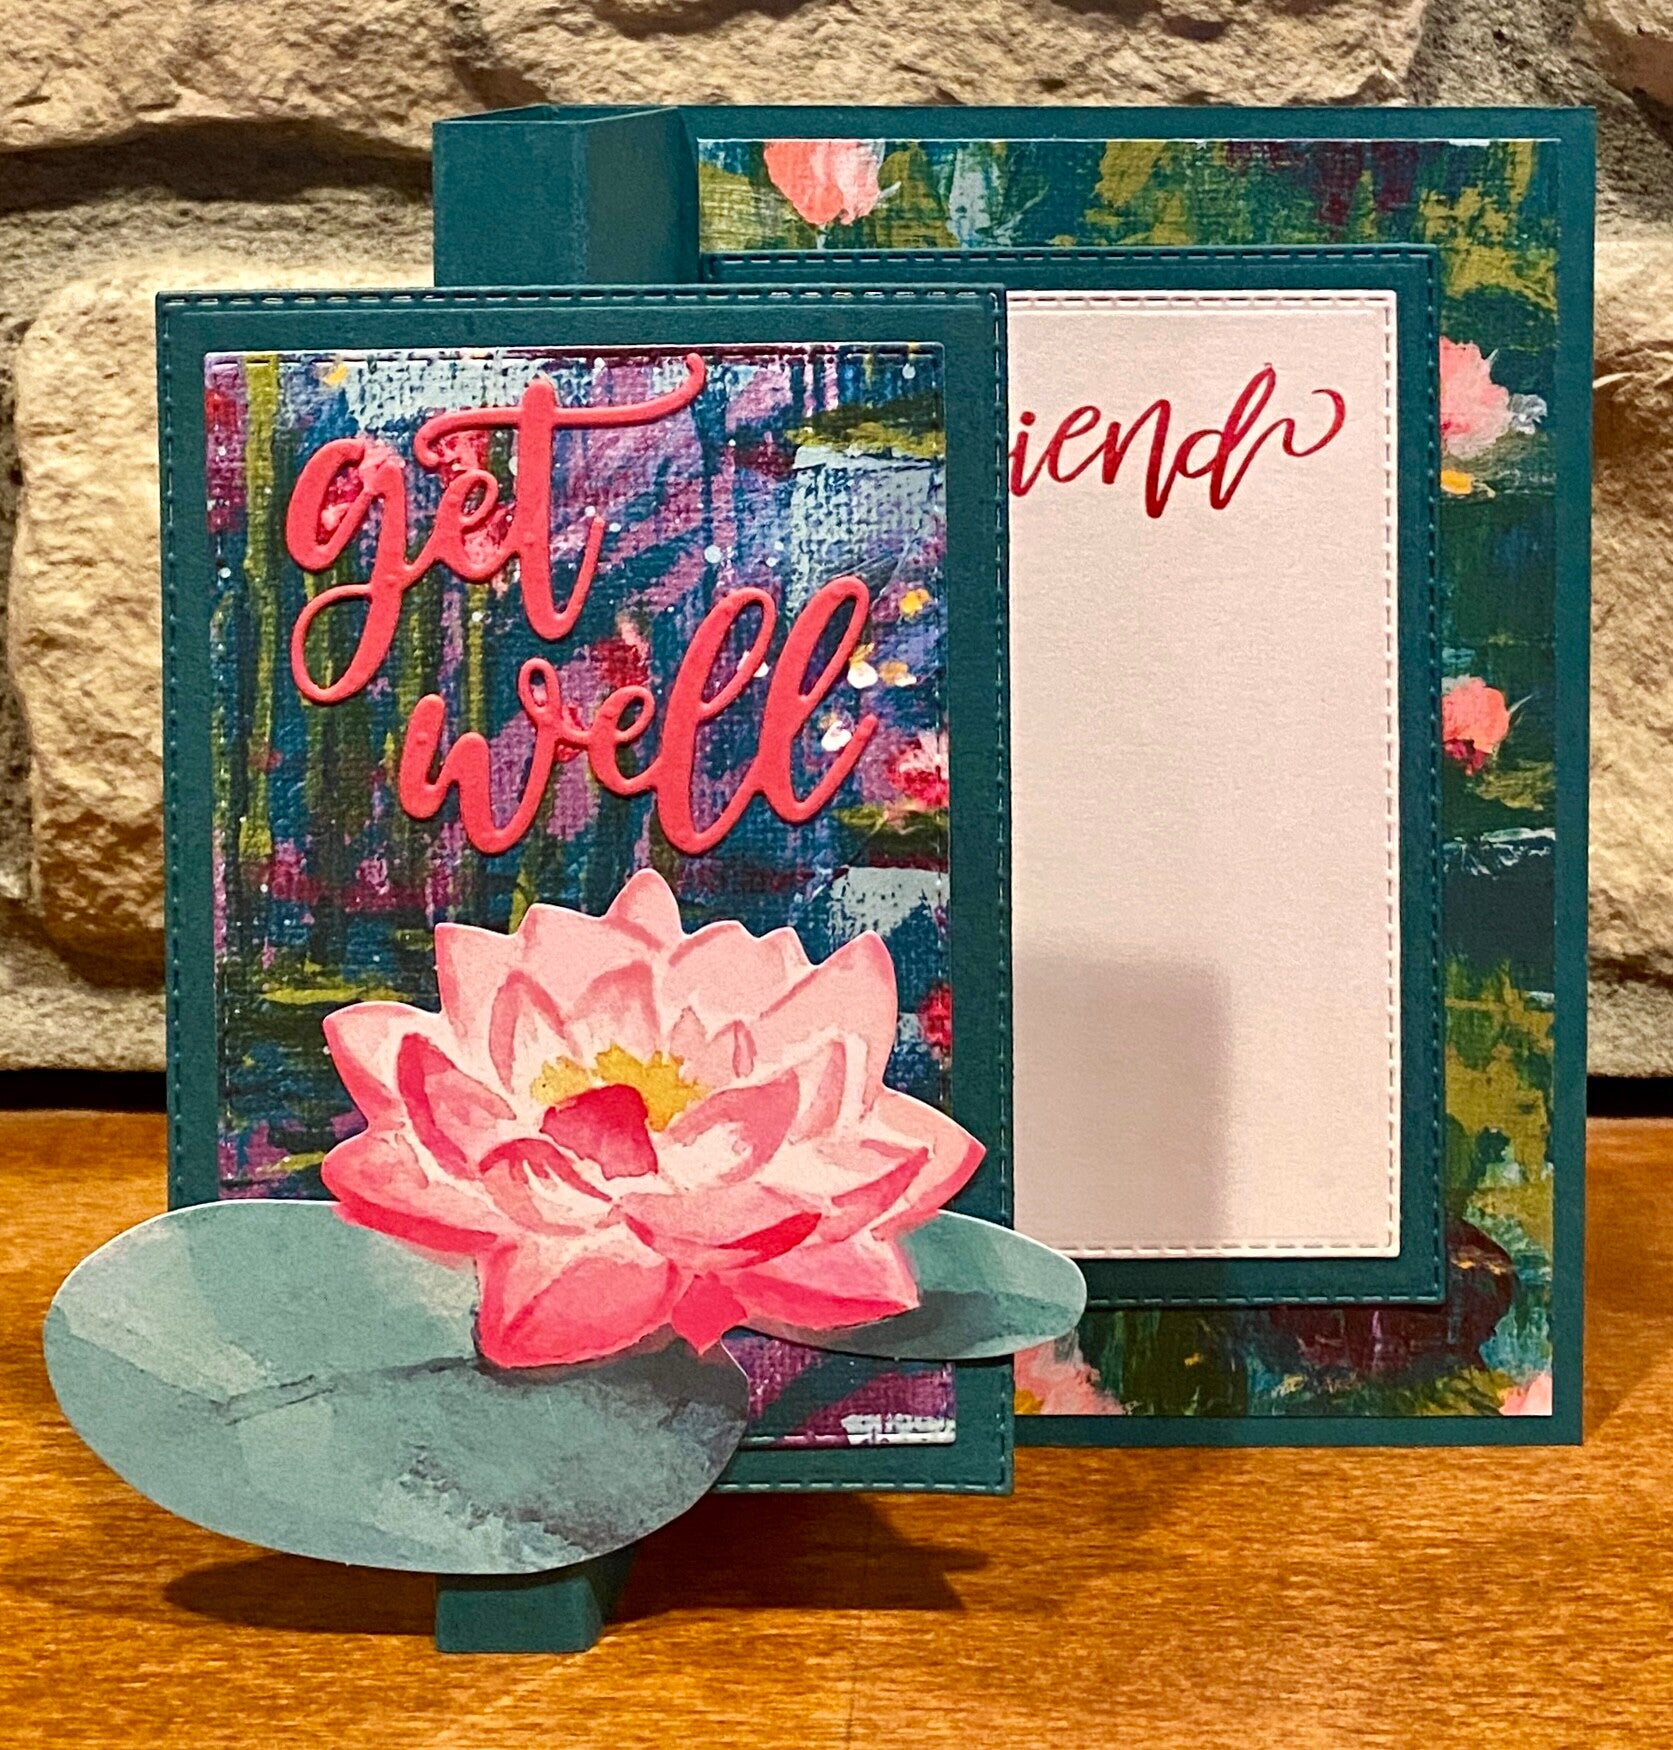
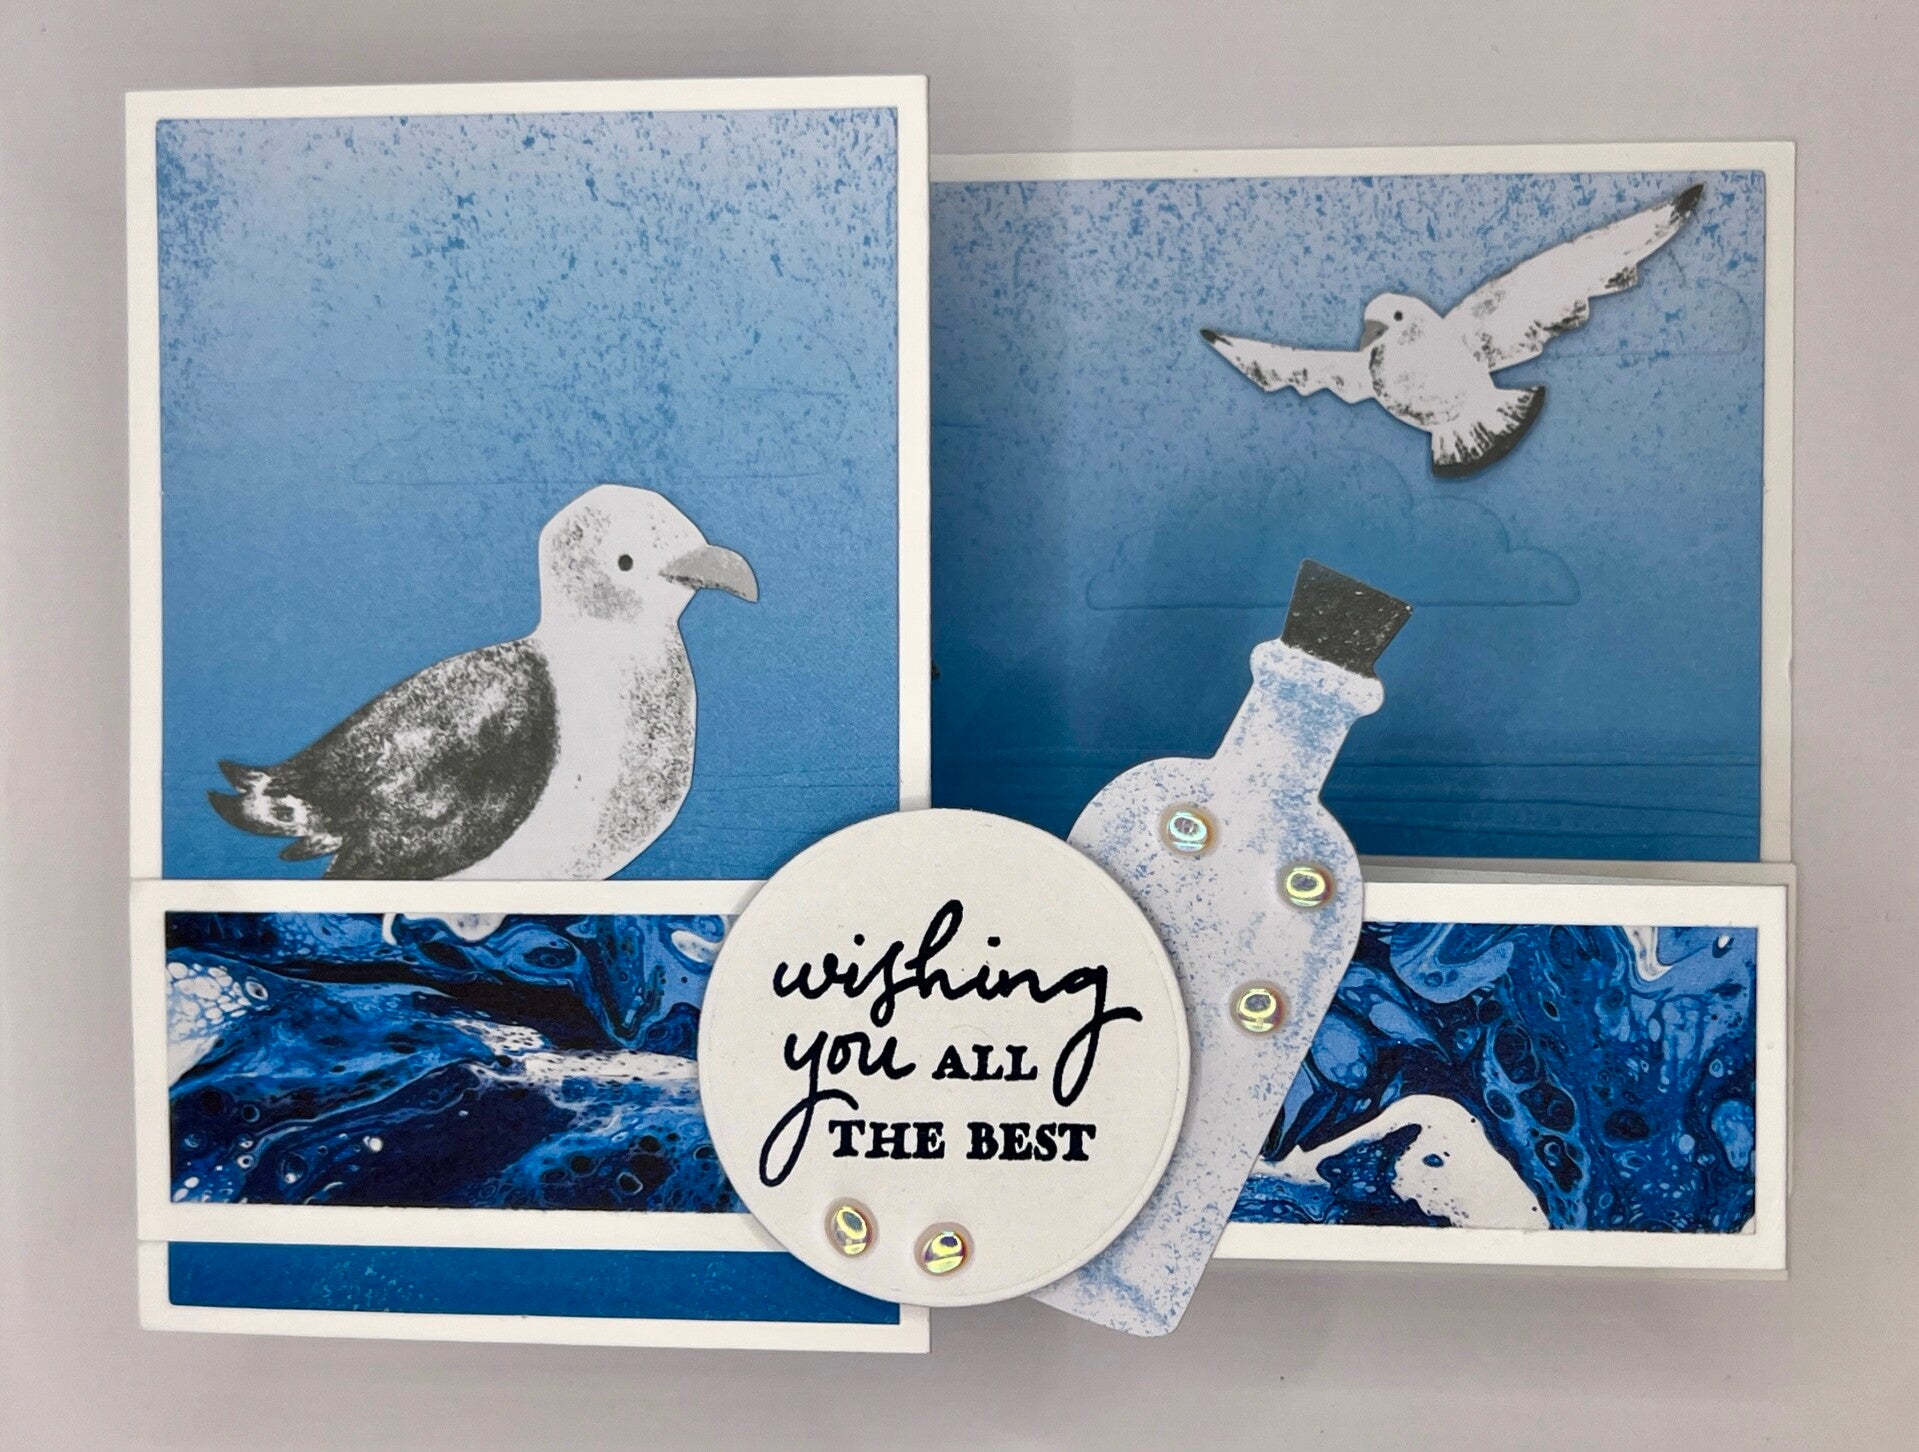
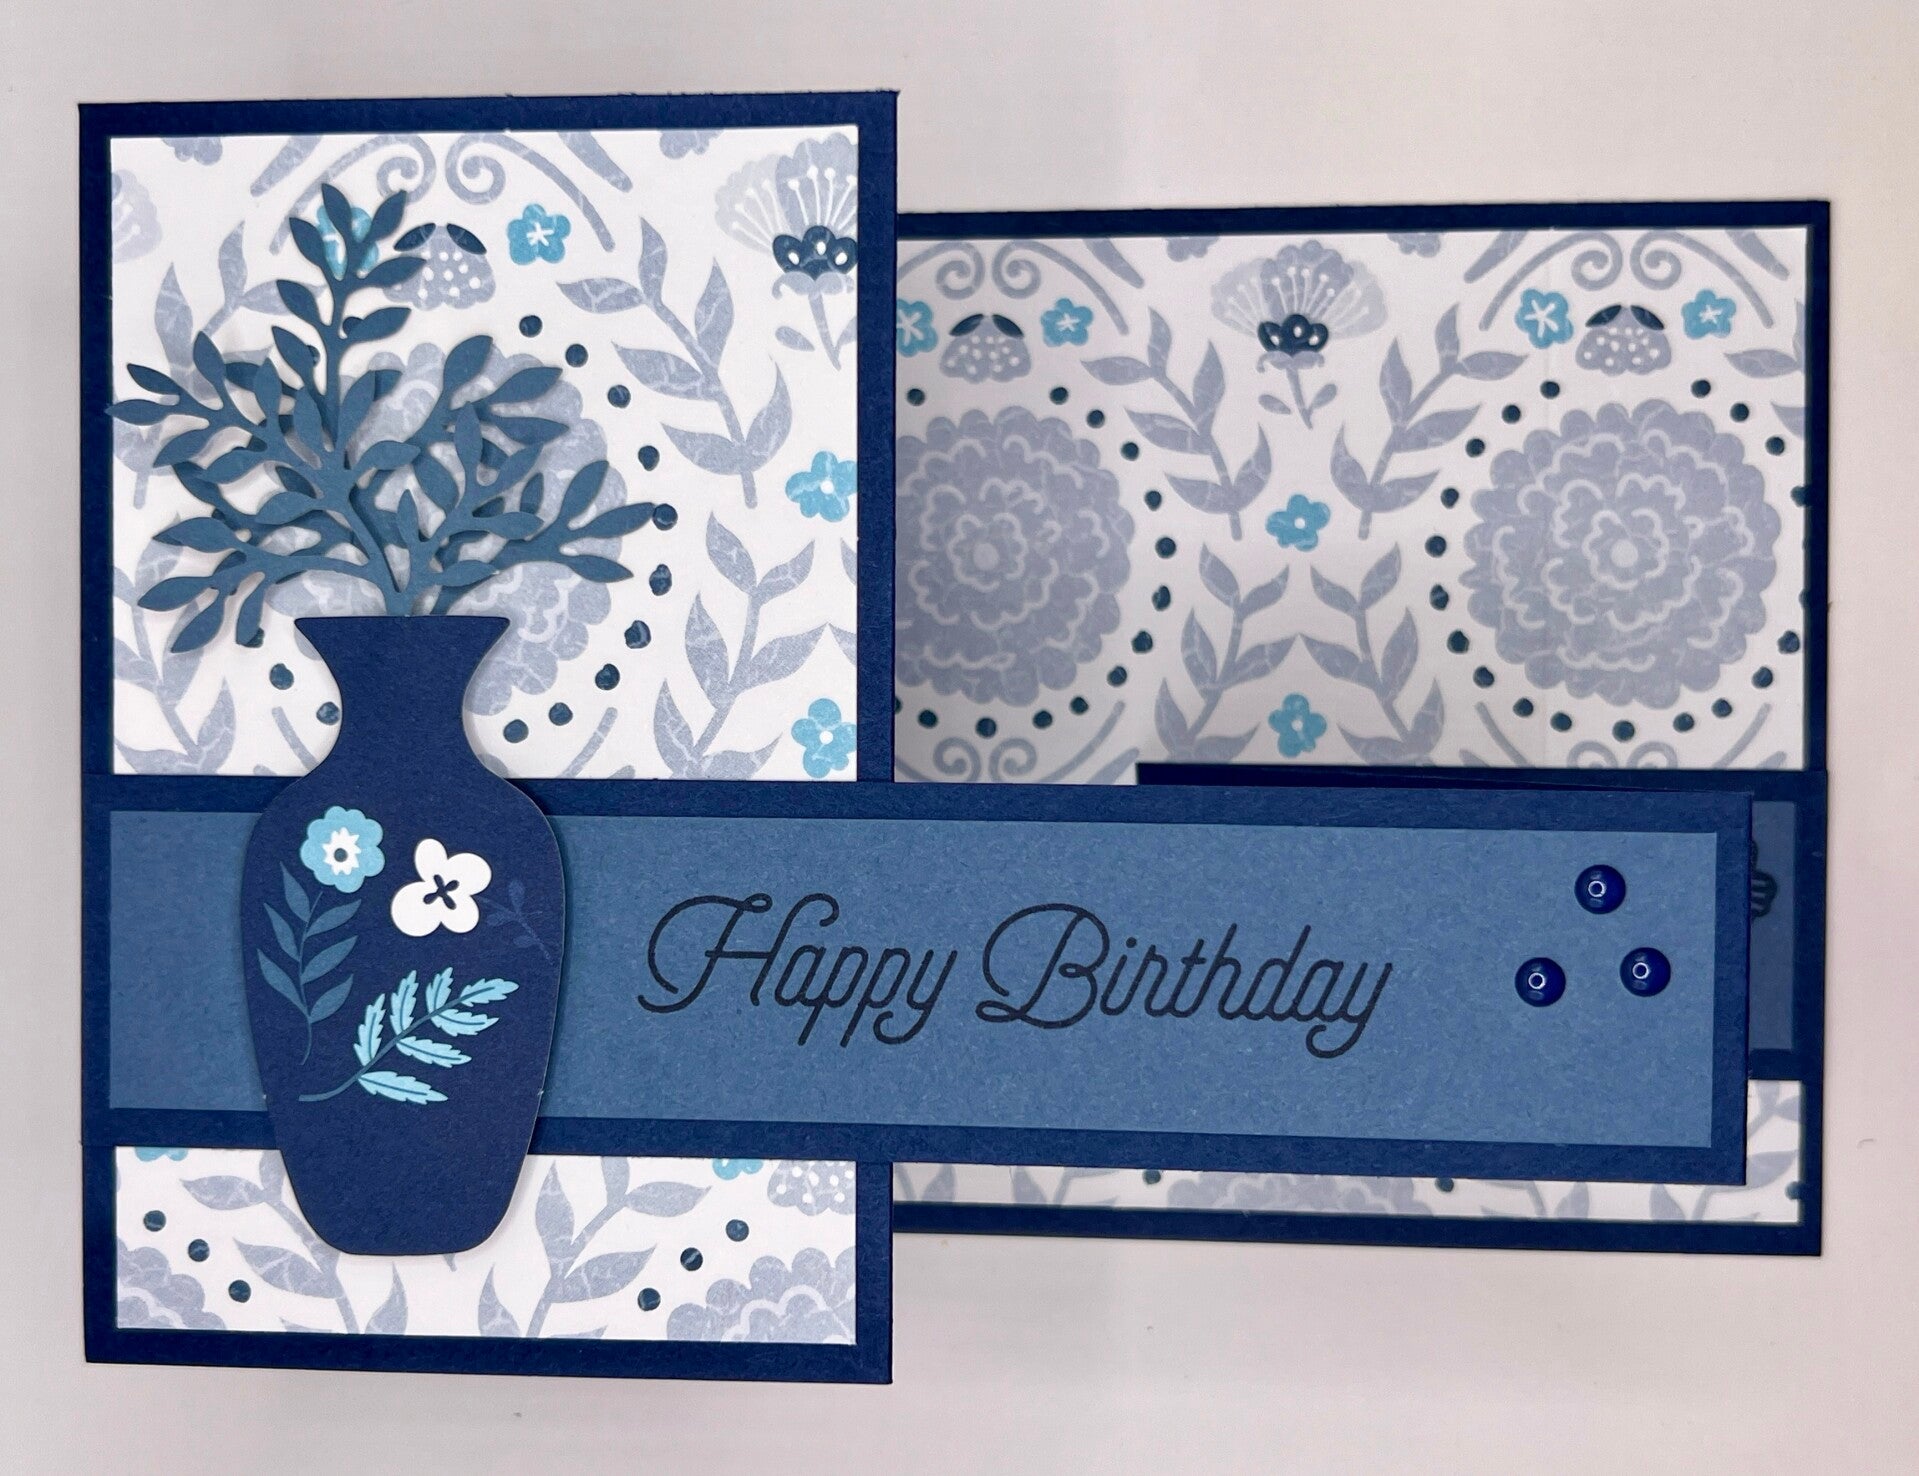
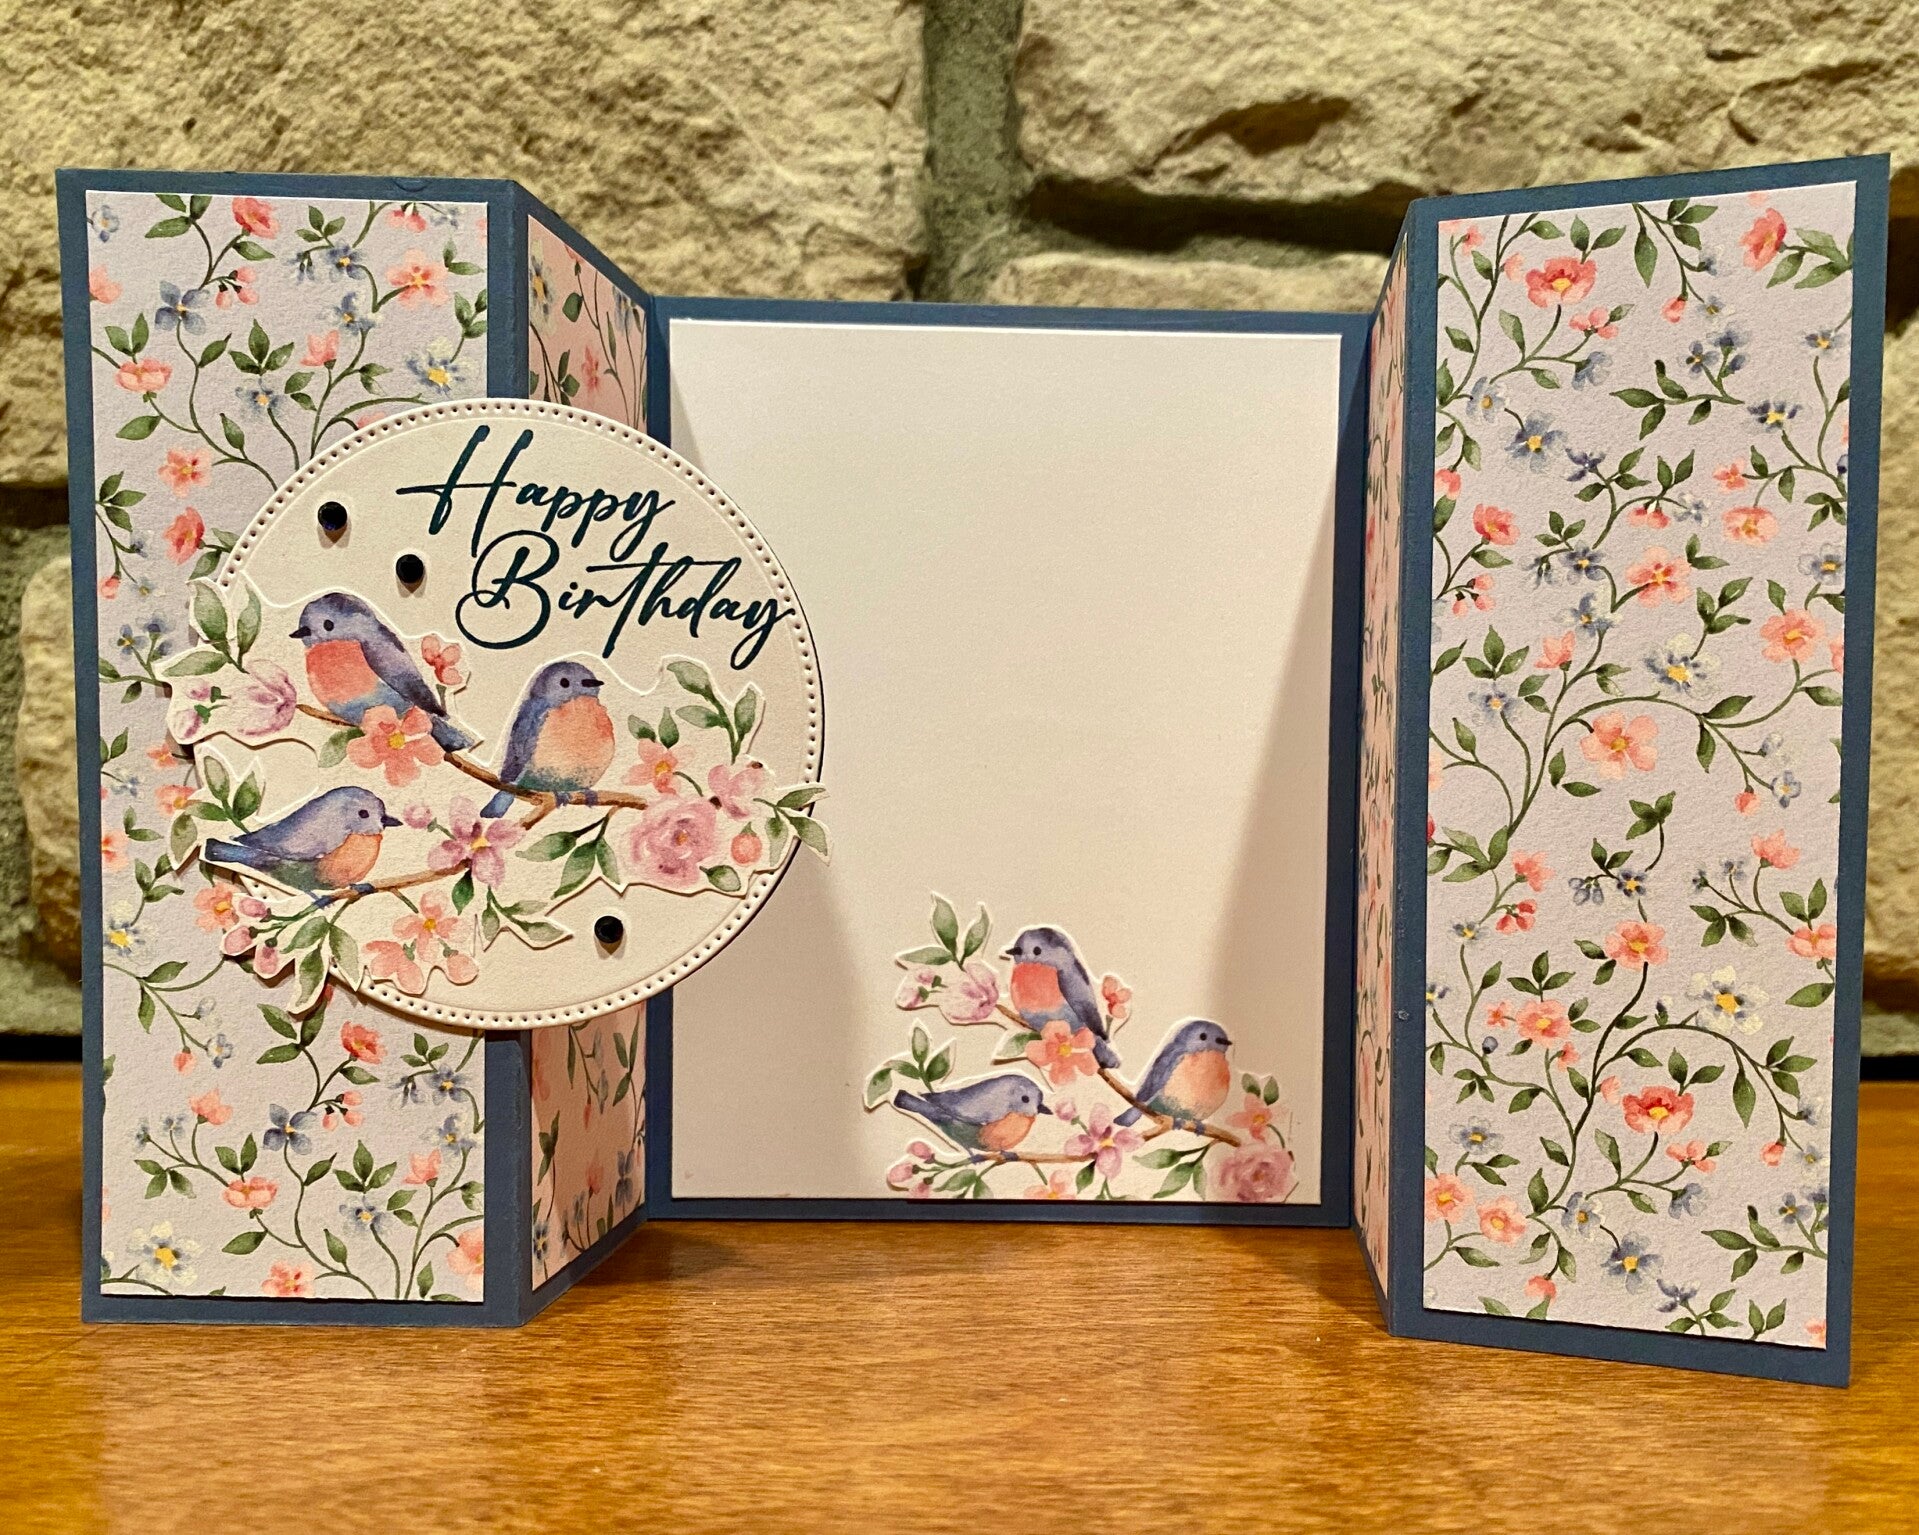
Sunday June 29, 2025 - Tonight's card was suggested by Sharon, as a repeat of a card we made a few years back. I'm not sure what it is called, so we will just call it a double fold z card. Thanks Sharon!
Cutting & Scoring
Cardstock
- Base - 4 1/4" x 11", scored at 5 1/2" & 8 1/4"
- Nested inner card - size can vary based on what you are adding to the front - 8" x 3 1/4" scored in half at 4" but size it based on what you are adding. Can be larger or smaller.
- The bird card has just the flap with a 1/2" score since my dsp was pale enough to just stamp on. The height of this is 2 3/8" to fit the embellisment I found to add to it.
- The hydrangea card has the full inner card but I then covered it with a die cut with my sentiment on it. It is only 2" high.
- White for the inside - whatever size will fit your sentiment and be covered by the right side opening.
Designer Paper
- Left two panels - 2 1/2" x 4" (cut two)
- Right inside panel - 5 1/4" x 4"
- Piece on front flap - depending on what size inner nested card is. Can be smaller to show the card, or larger to hide the card...
Assembly
- Add the designer paper to all three sections of card base.
- Add the nested inner card section to the base of the card, opening towards the right.
- Add the design to the front of the inner card section.
- Finish the inside of the card by stamping or adding a white piece with a sentiment.


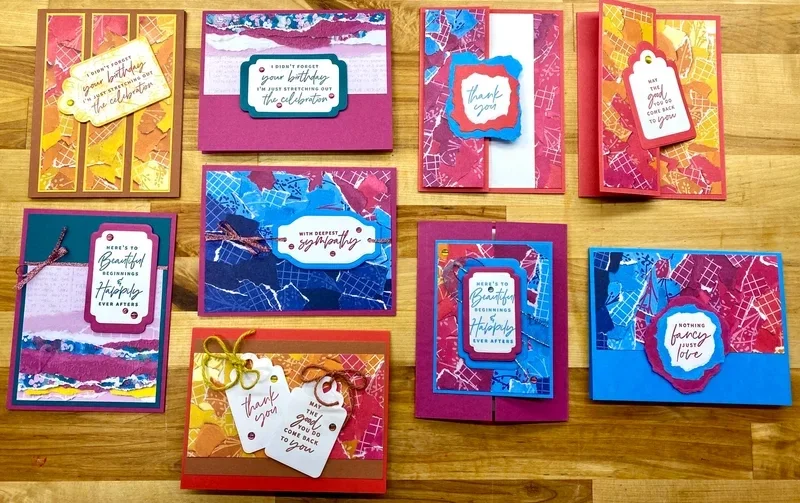
Sunday June 22, 2025 - Tonight's card was inspired by an explosion card by Patty Bennet. Patty Bennet's cards directions can be found here. We mixed it up a bit and made a bookfold then added the explosion to the bookfold.
Cutting & Scoring Directions
- Base - 4 1/4" x 11", score at 5 1/2" and 6 3/4"
- Mats for front pieces - 4" x 1", 4" x 4"
- Designer Paper -
- Inside piece is 6" x 6",
- front pieces are 3 7/8" x 7/8", 3 7/8" x 3 7/8"
- White for Inside 2 3/4" x 2 3/4" (2 pieces)
- Sentiment piece, can be whatever shape will work well with the card
The only tricky part of this card is the inside fold (see images below for clarification).
- With the 6" x 6" paper you will make three folds.
- Fold in half (with pretty side inside)
- Turn the paper 90 degrees and fold in half again (pretty side inside)
- Turn the paper 45 degrees (points will be up, down, left, right - like a diamond) and bring the left and right sides together to form a triangle (pretty side outside).
- Burnish all folds and bring the triangle creases together and fold down into a square.
Assembly
- Add the mat pieces to the front of the card
- Add the designer pieces to the mats
- Add ribbon (if adding) to the left section of the card. The ribbon can be sandwiched between the section you will be gluing down.
- Glue down the left section of the card. This will leave you with a 4 1/4" x 4 1/4" opening on the right of the card.
- f. Add your folded square to the card, positioned like a diamond, which when you open it will have the folded points top and bottom, and the unfolded square sections left and right. Add glue to the top of this diamond, and close your card down to adhere. Next do the same with the back portion.
- Stamp your white inside pieces (remember to turn on the diagonal) and add them to the inside of the card.
We also used this same design to make cards for our Monthly Card Class. Such a fun and easy card to make!


Sunday June 15, 2025 - Tonight's card is made using directions from a card that Margery made a while back. Super easy fancy fold card to make!
Cutting & Scoring
Cardstock
- Base - 5 1/2" x 4 1/4"
- Front Flap - 8 1/2" x 3", scored in half at 4 1/4"
- Front Panel - 4 1/4" x 3 1/4"
- White inside - 4" x 2 3/4"
Designer Paper
- Left and Right sections on base - 1" x 4" (cut two)
- Piece on front flap - 4" x 2 3/4"
- Piece on front panel - 4" x 3" (designer paper or stamp an image on white paper)
Assembly
- Add the 1" designer paper to the left and right on the base piece.
- Add the front flap between the two 1" pieces on the base.
- Add the designer paper to the front of the flap.
- Add the designer paper to the front panel.
- Add the front panel to the front of the flap, centering it top/bottom and left/right.


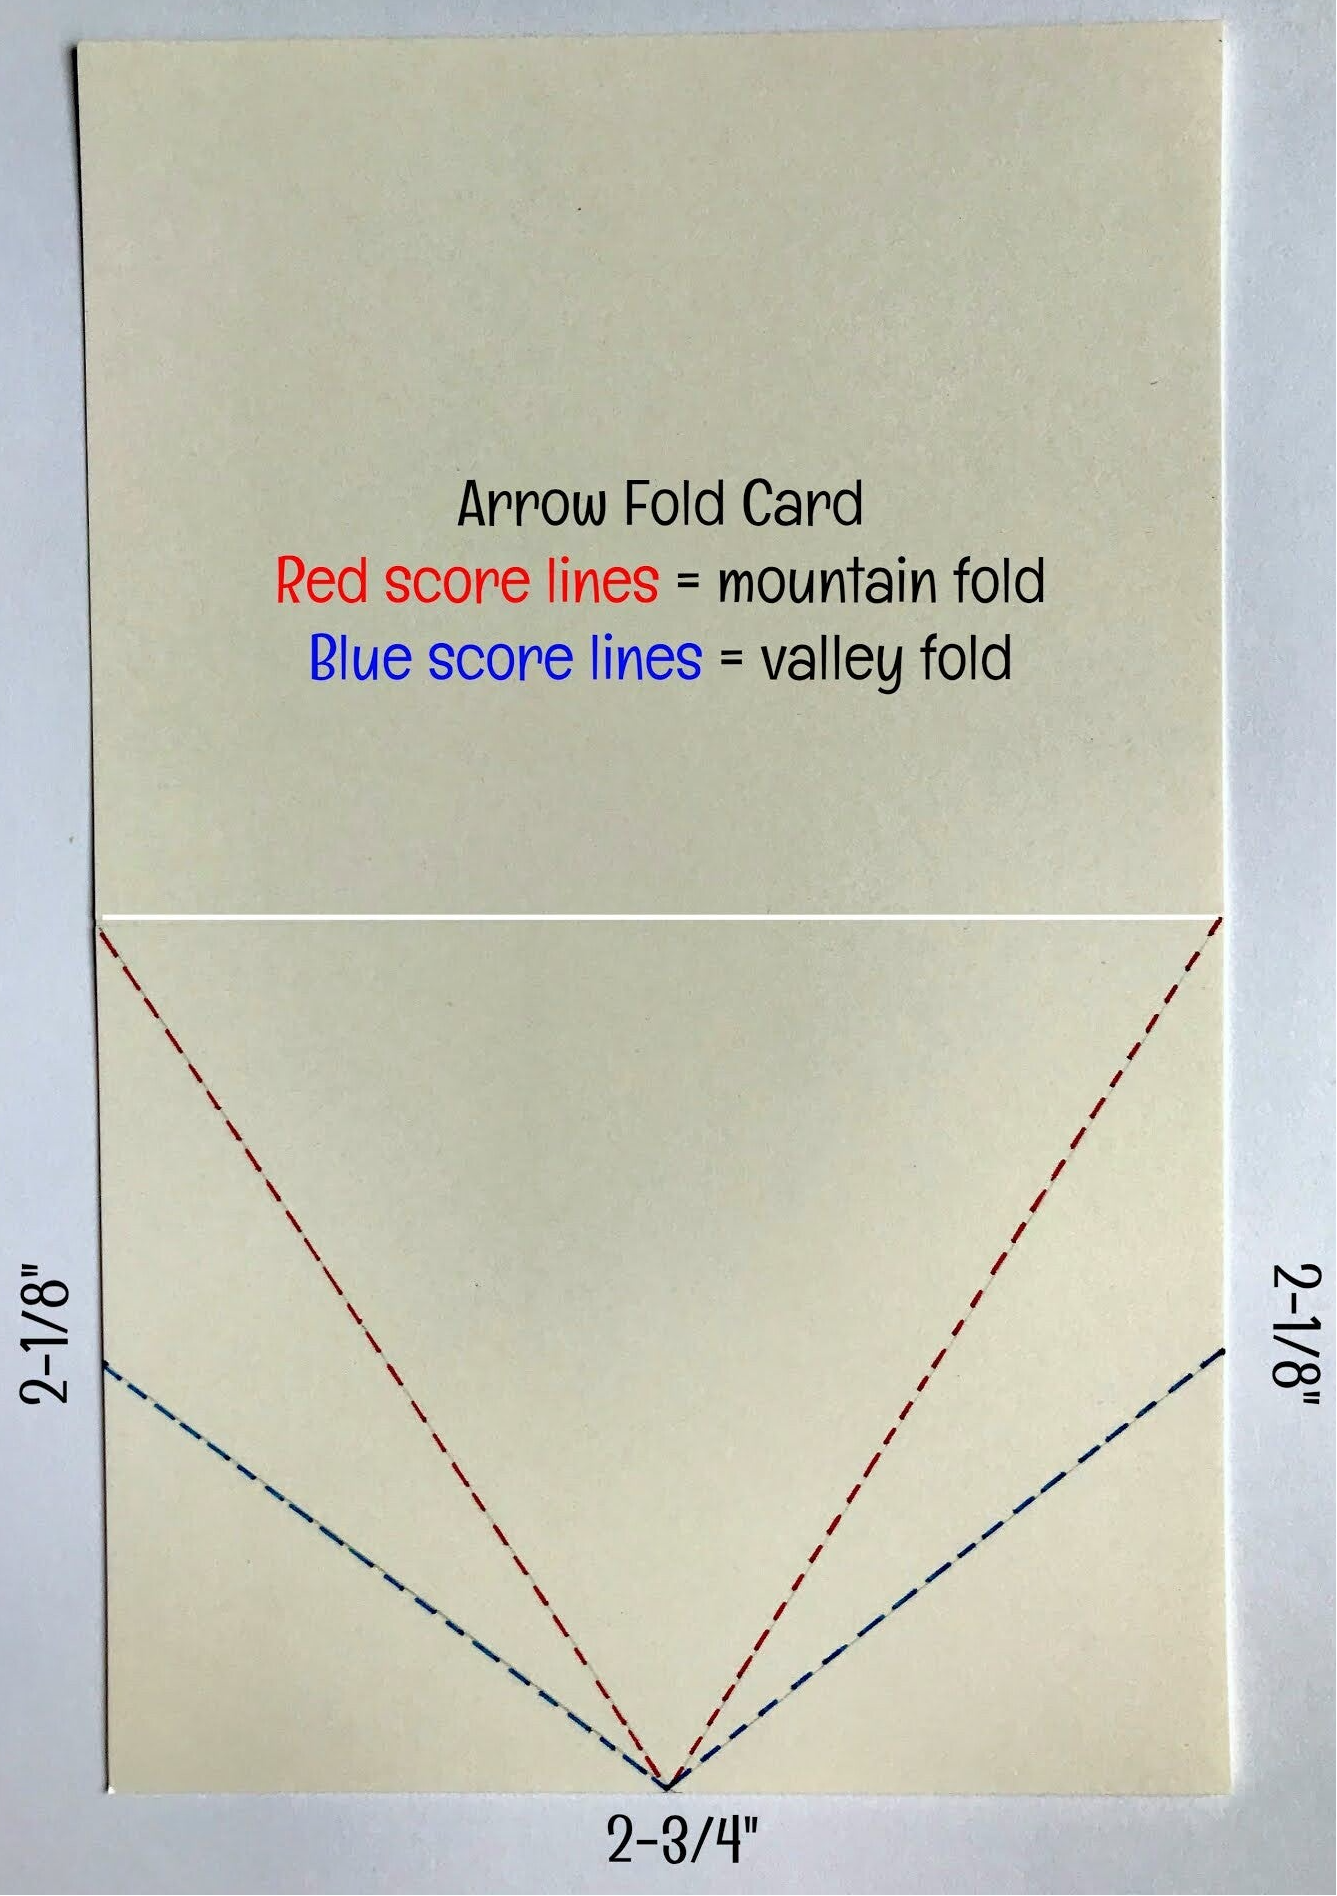
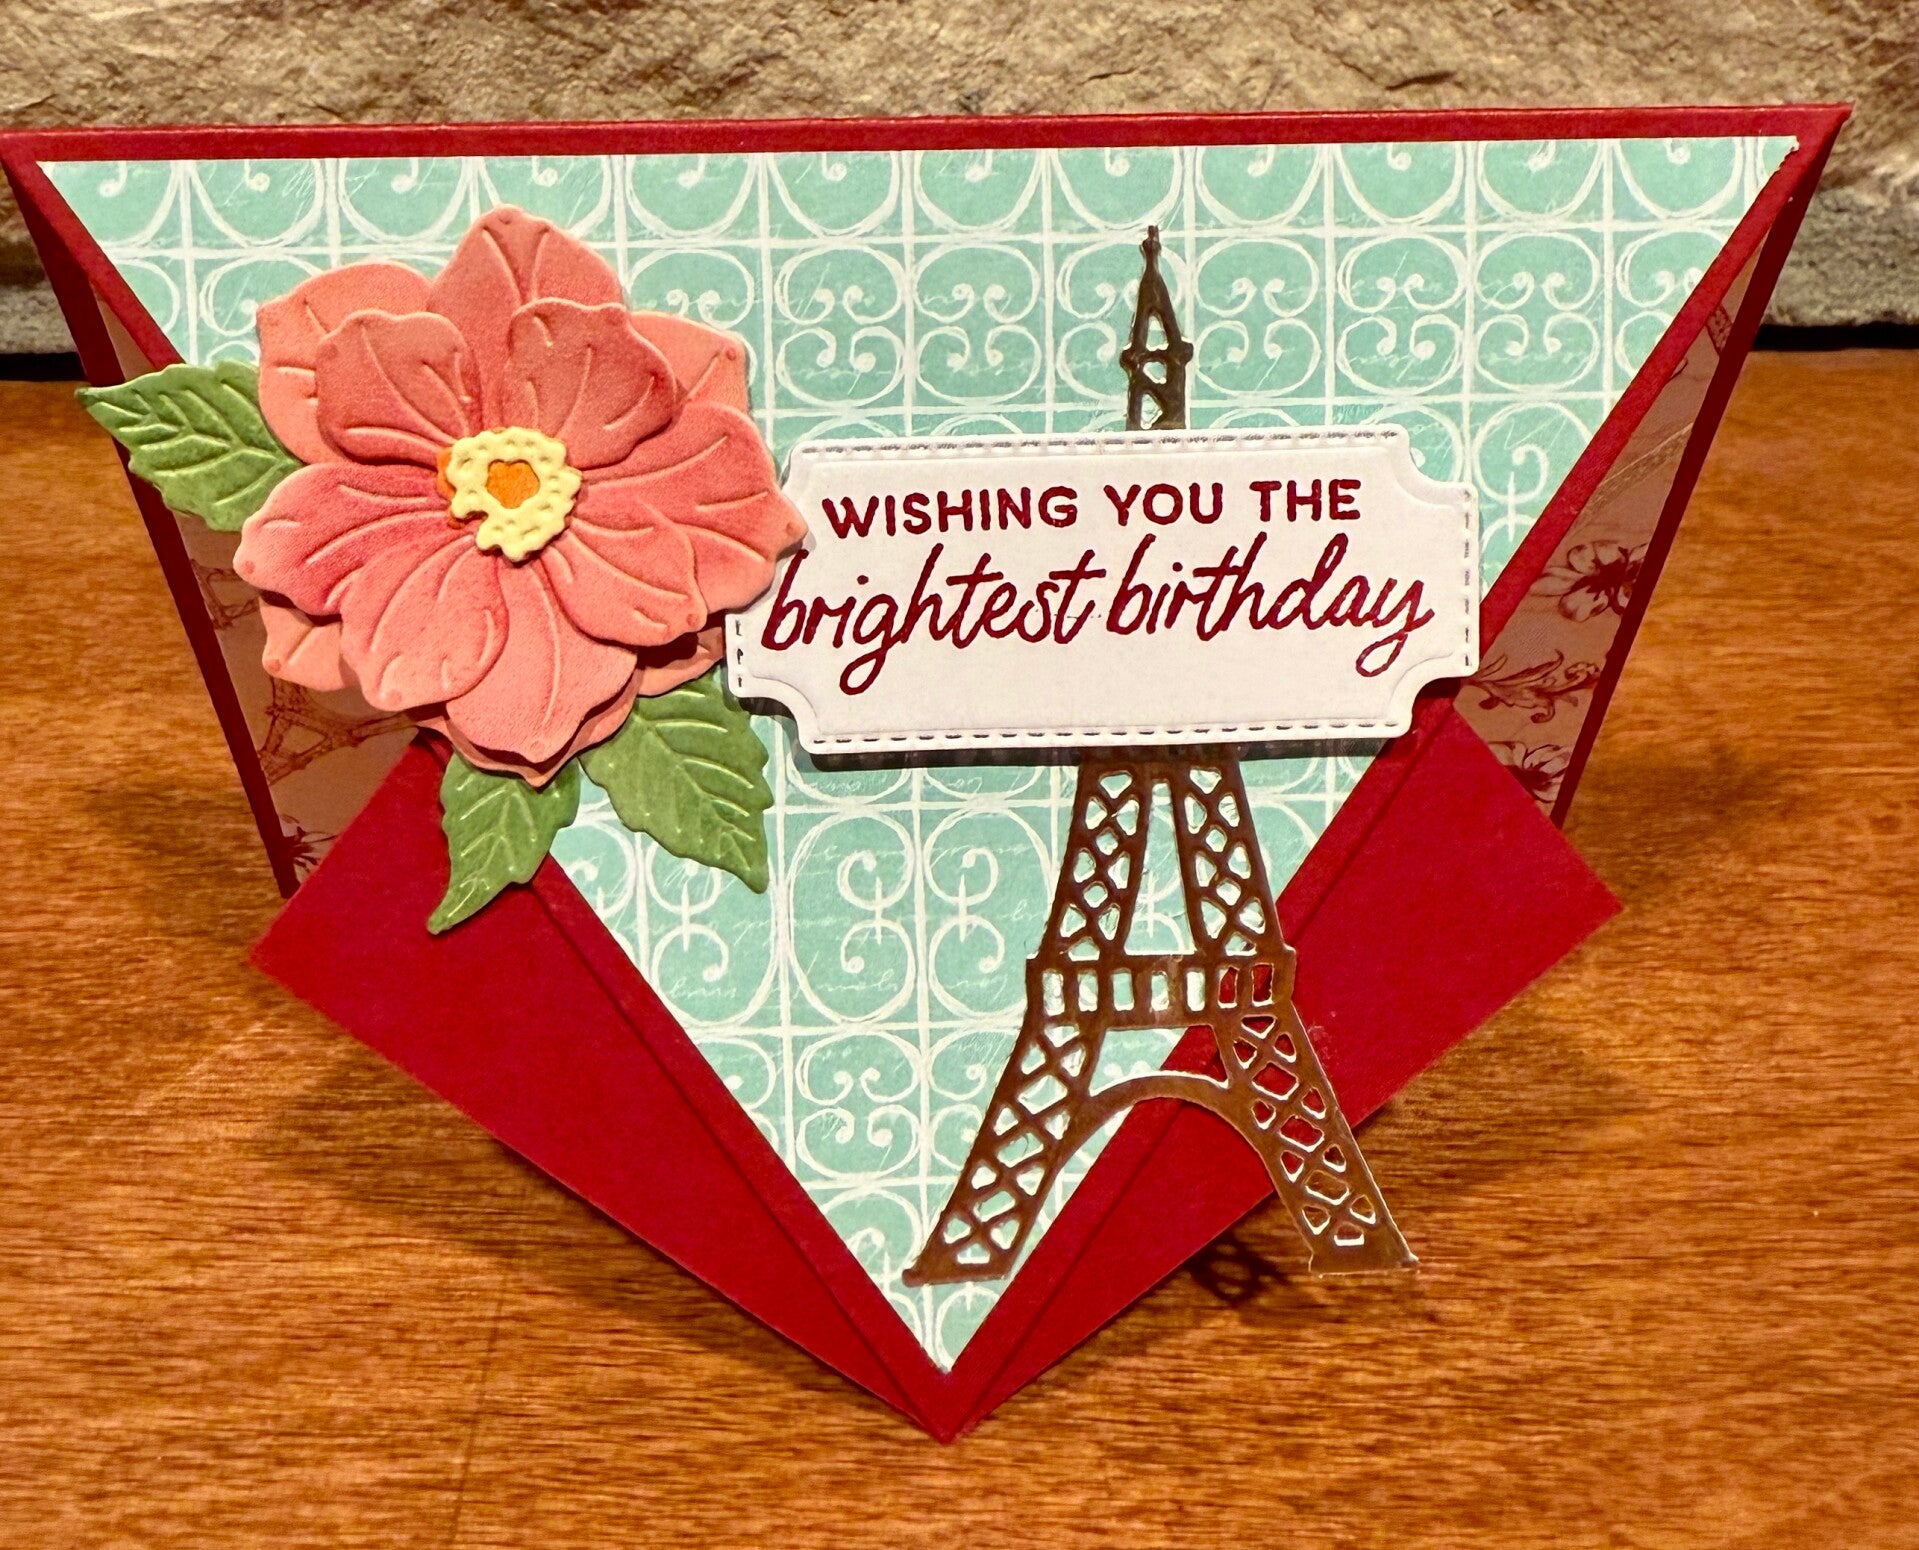
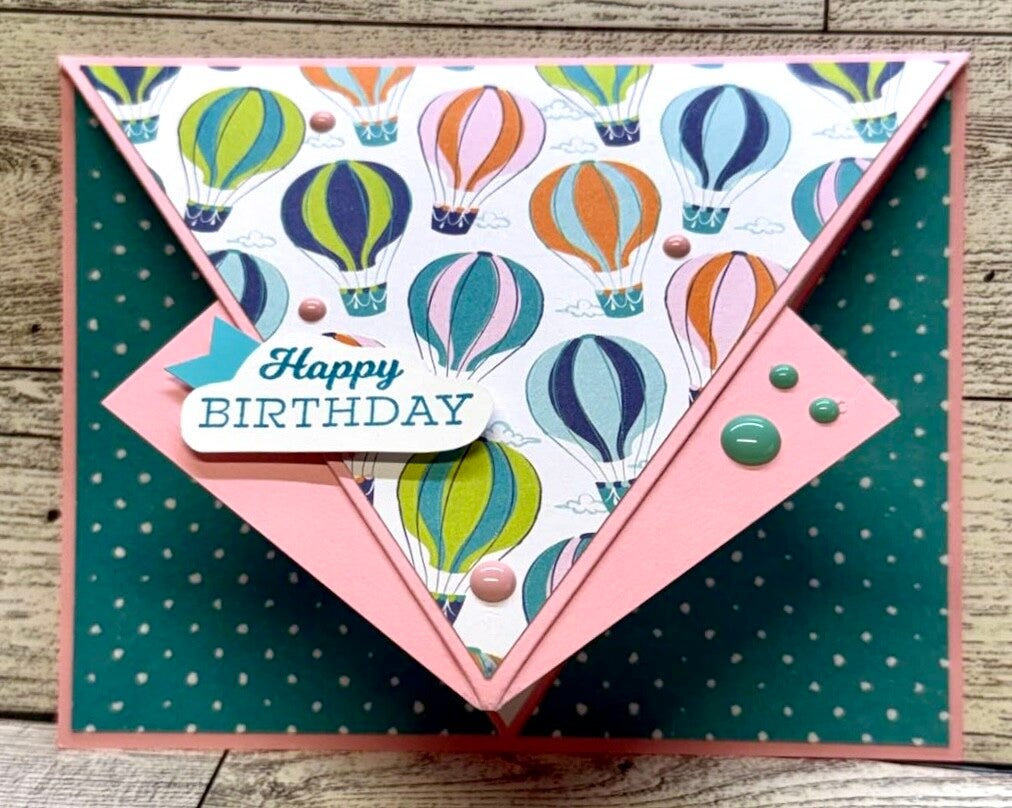
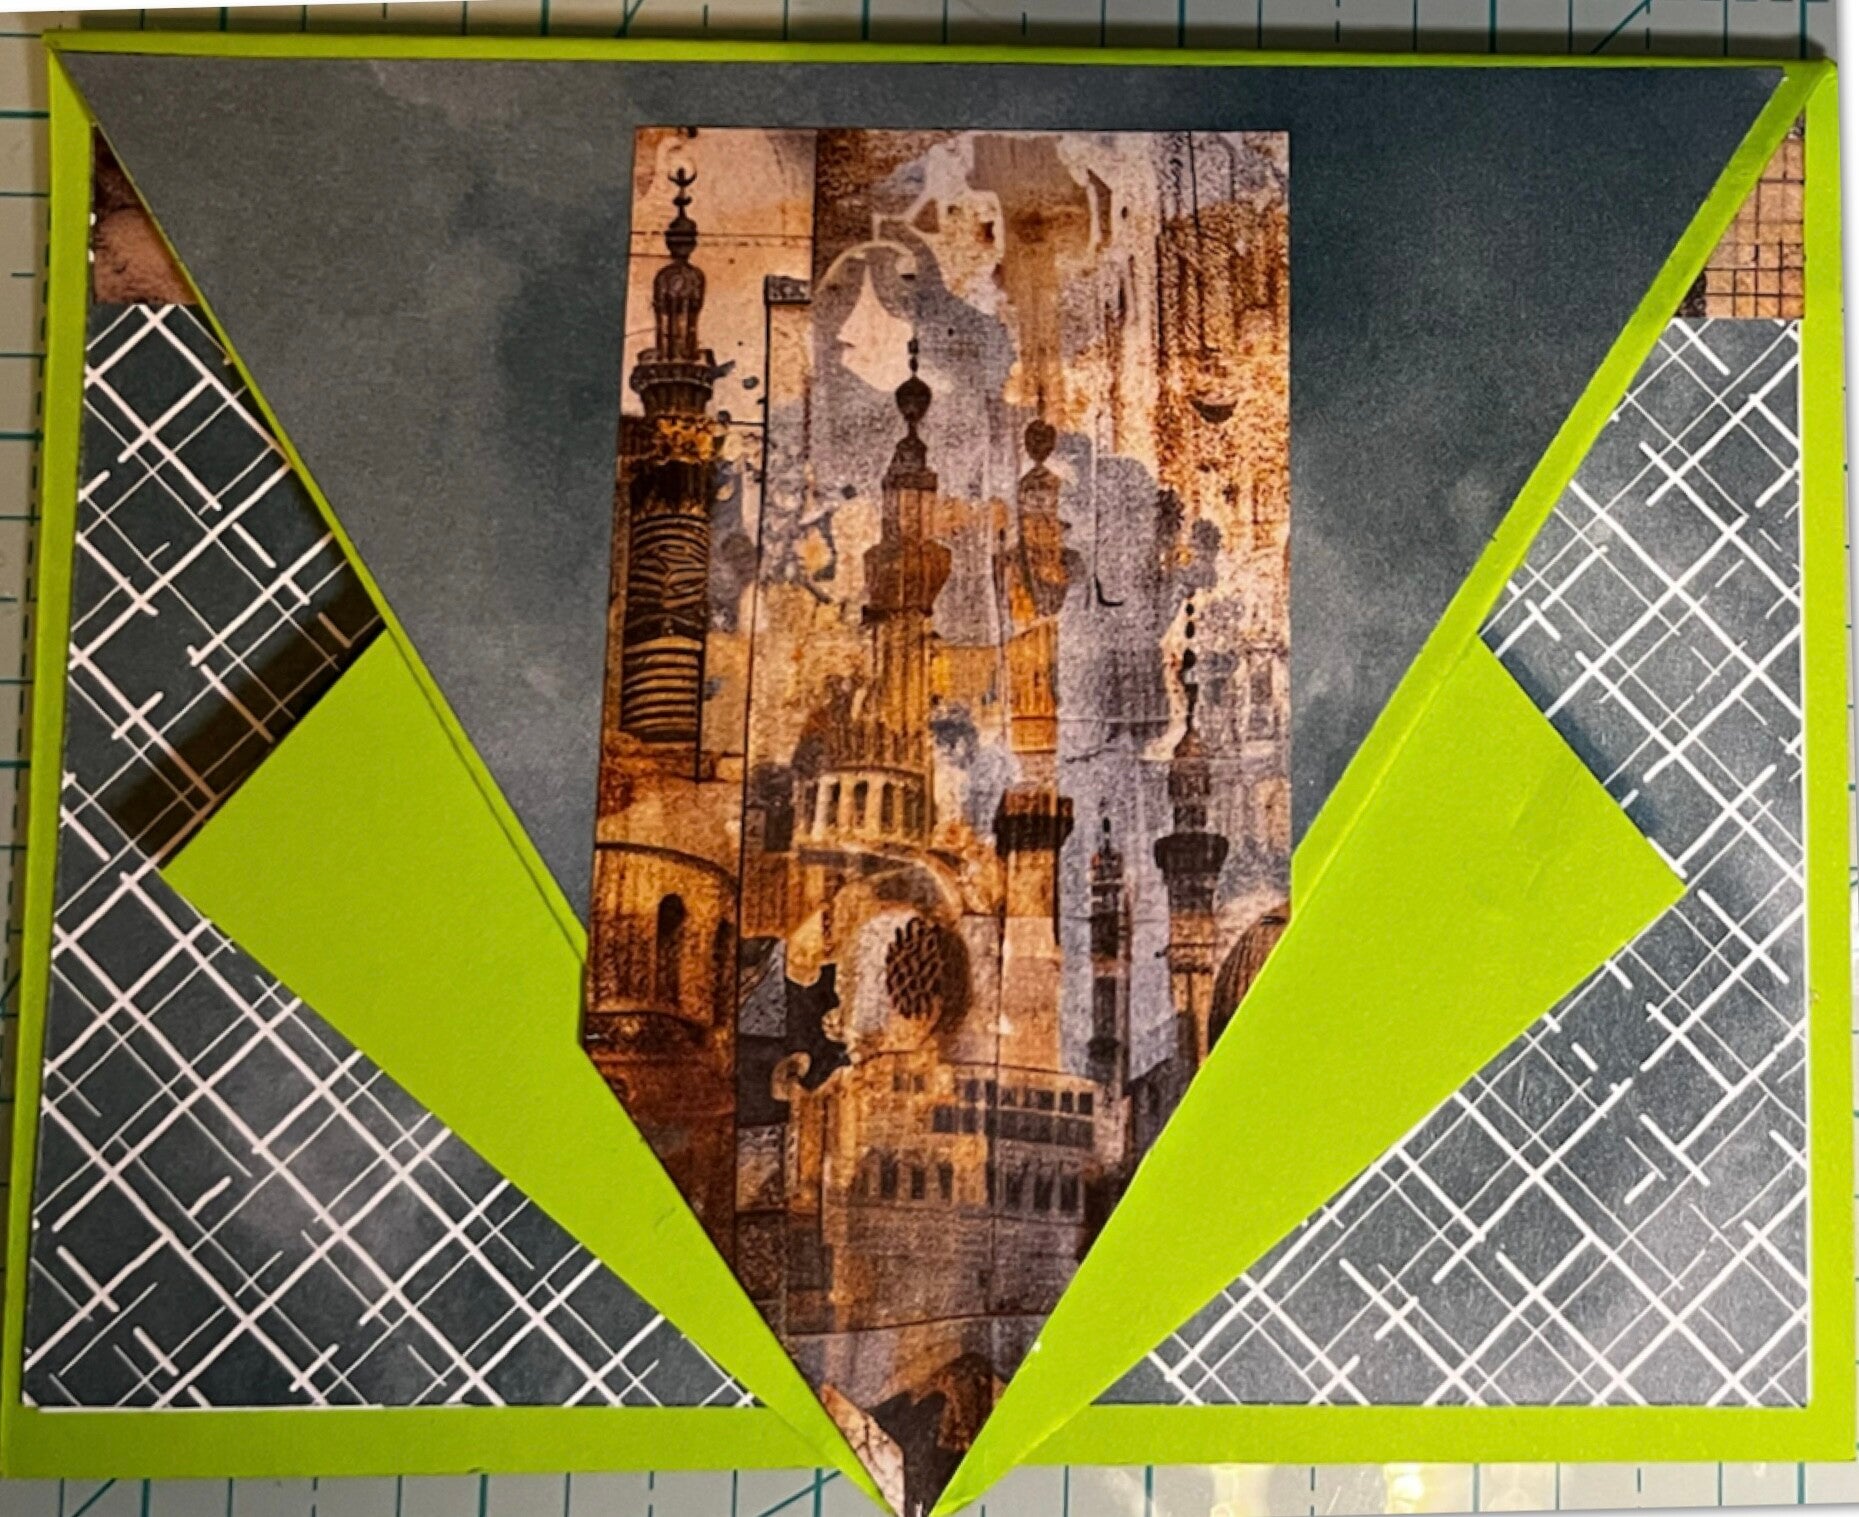
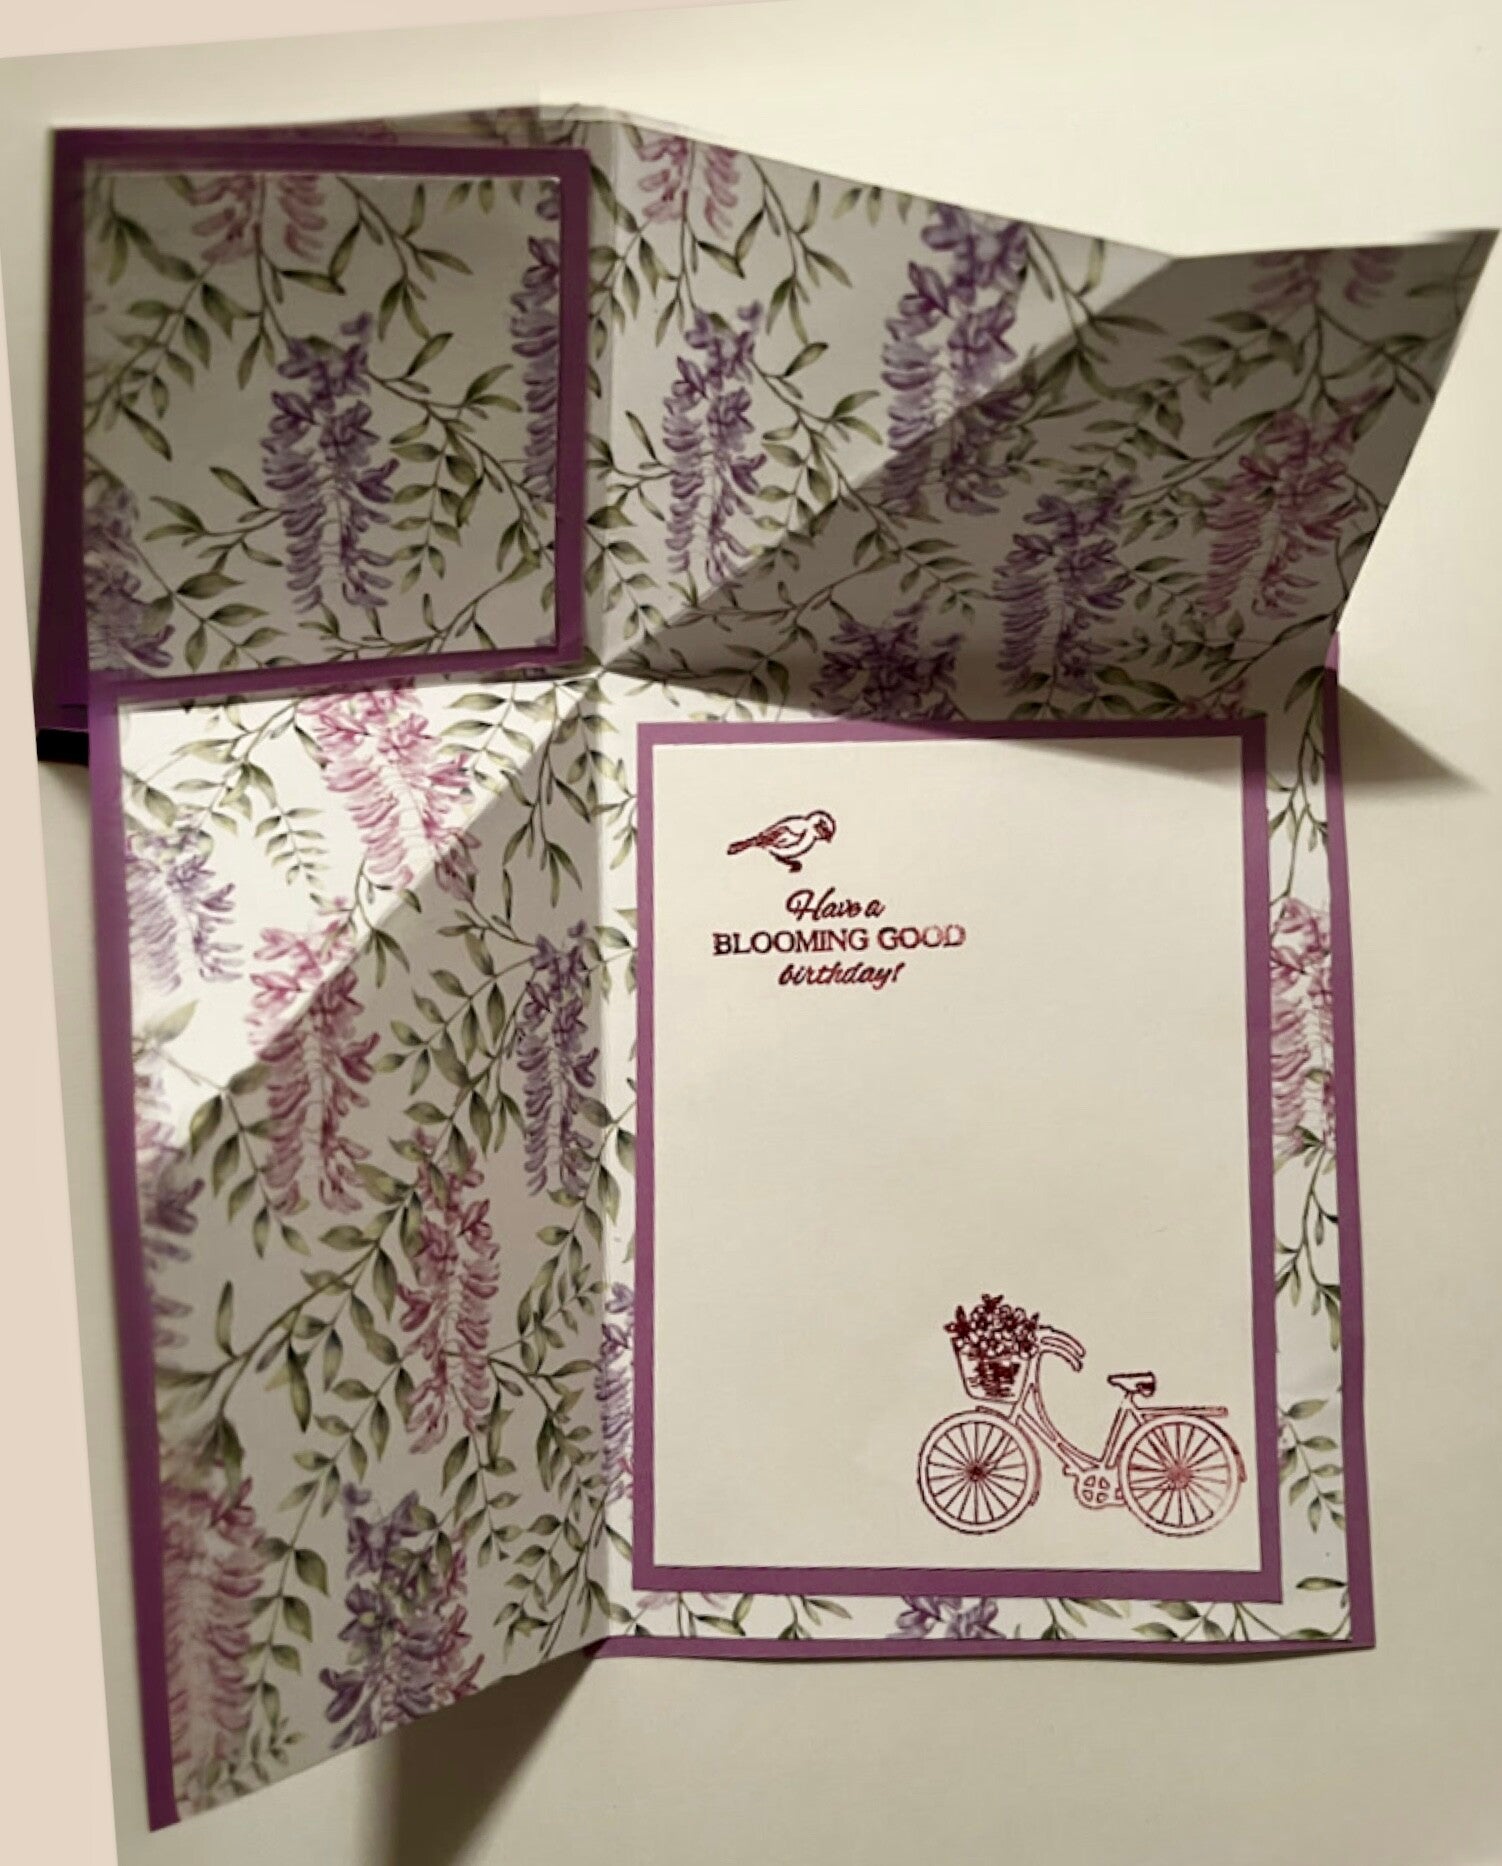
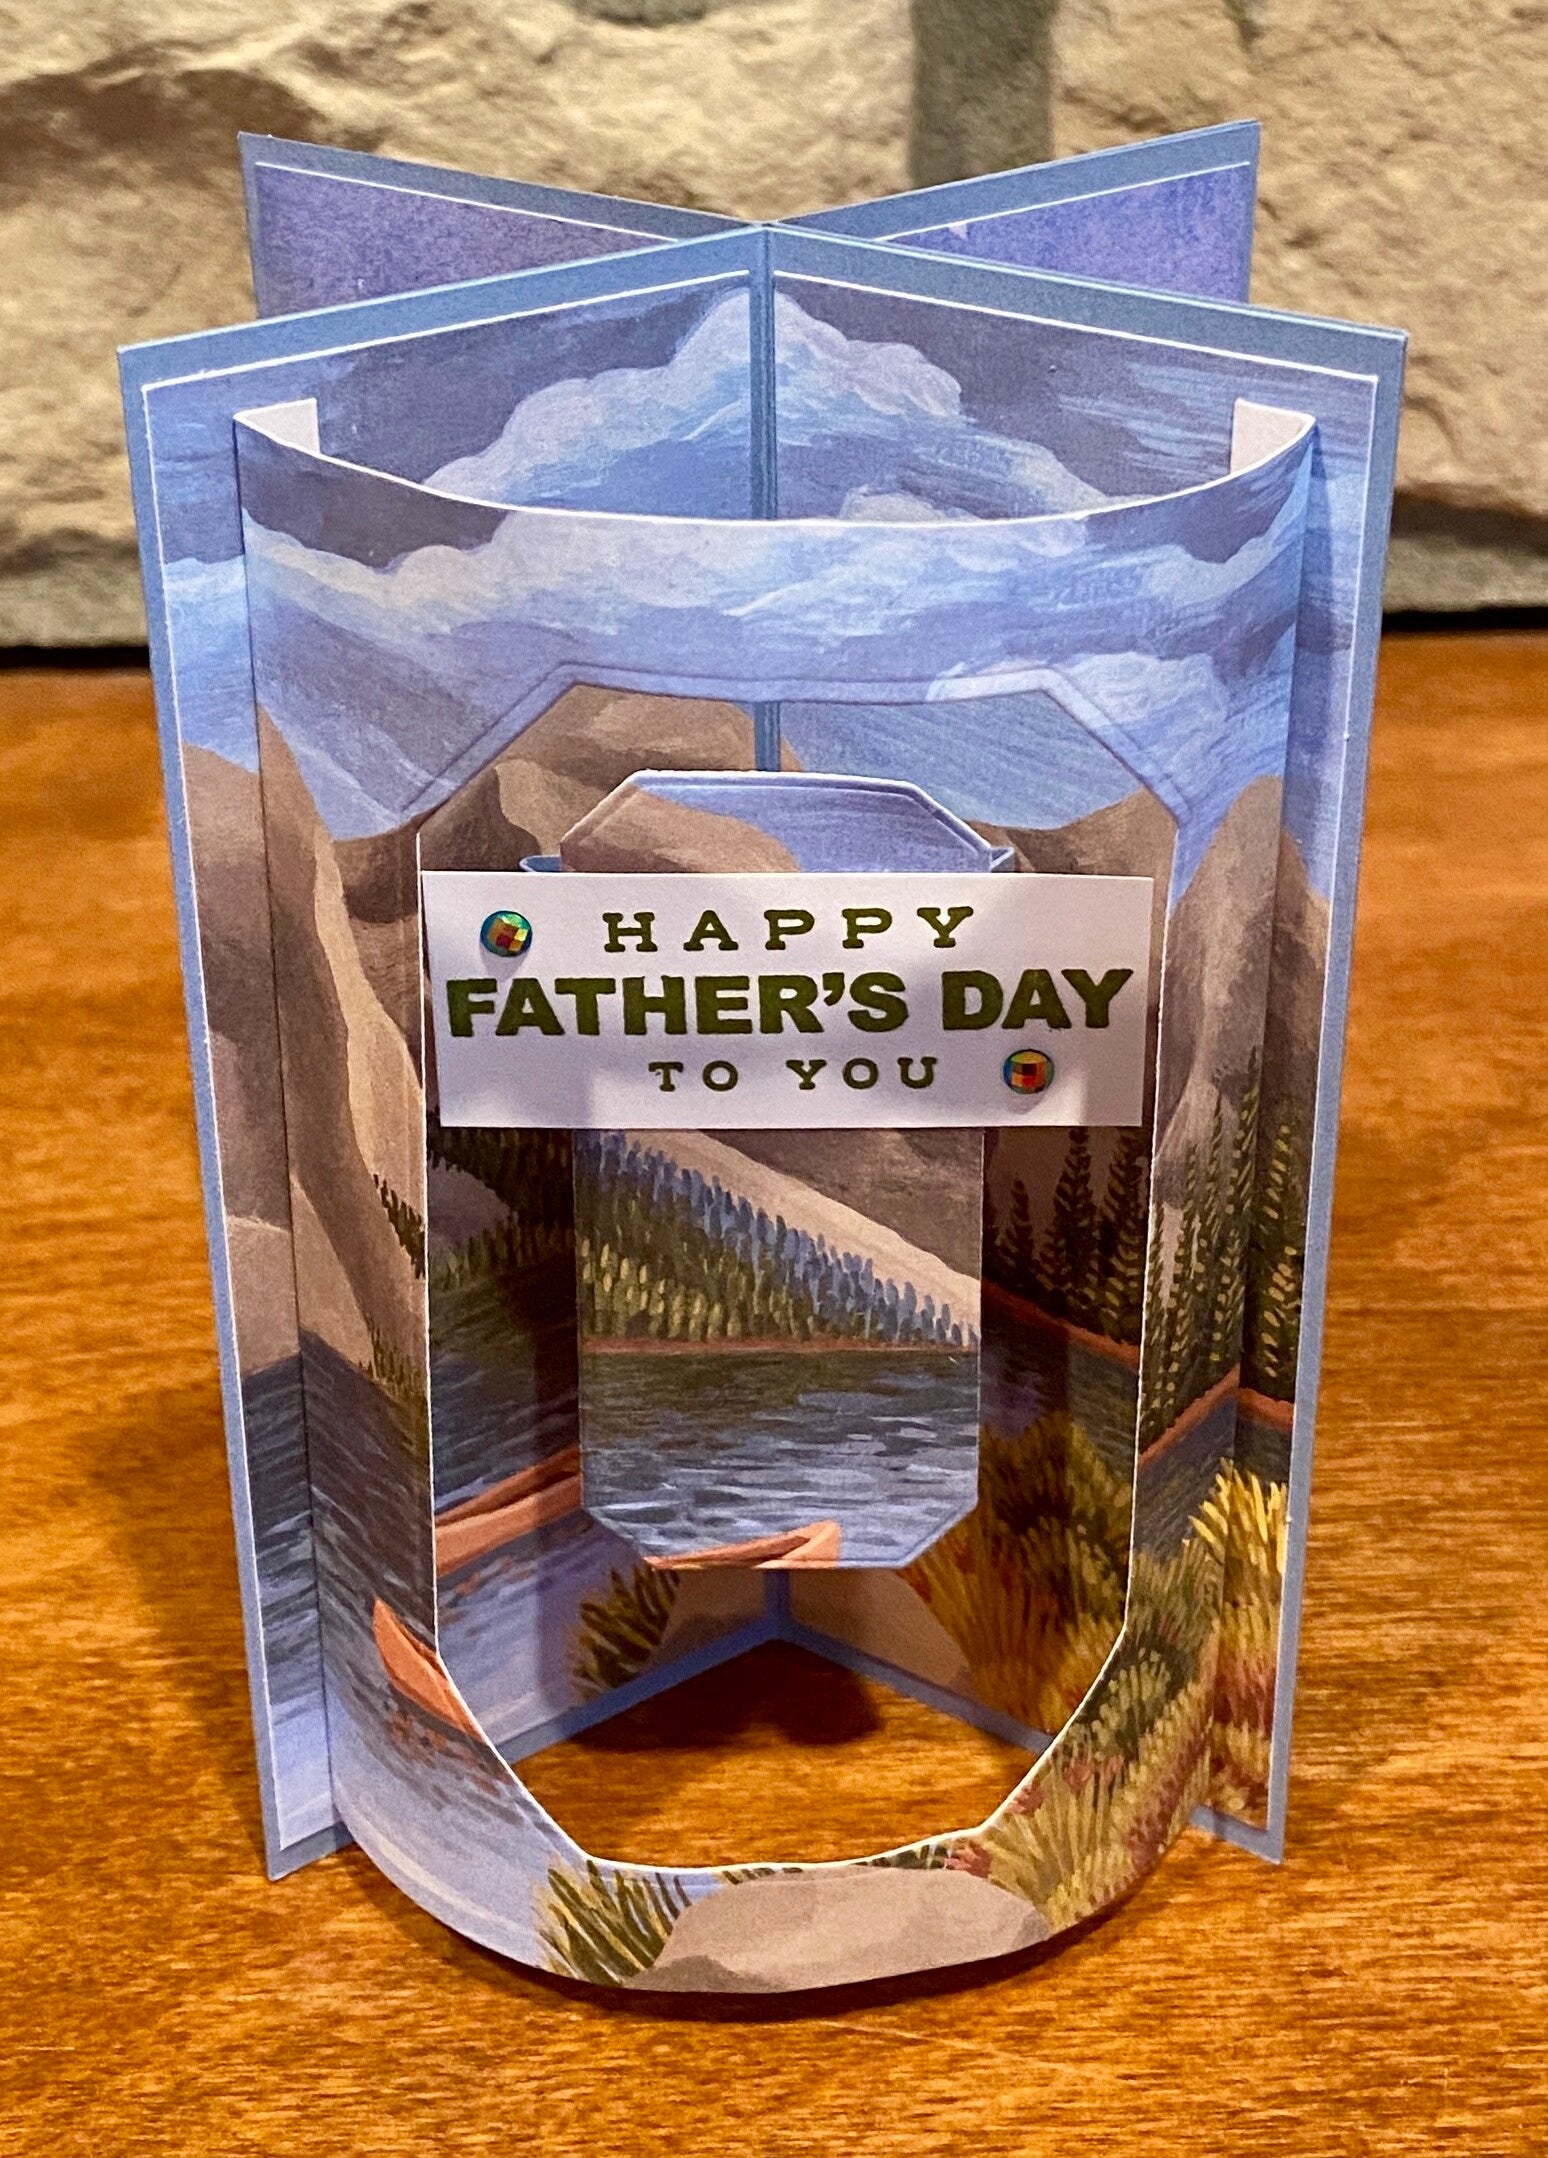
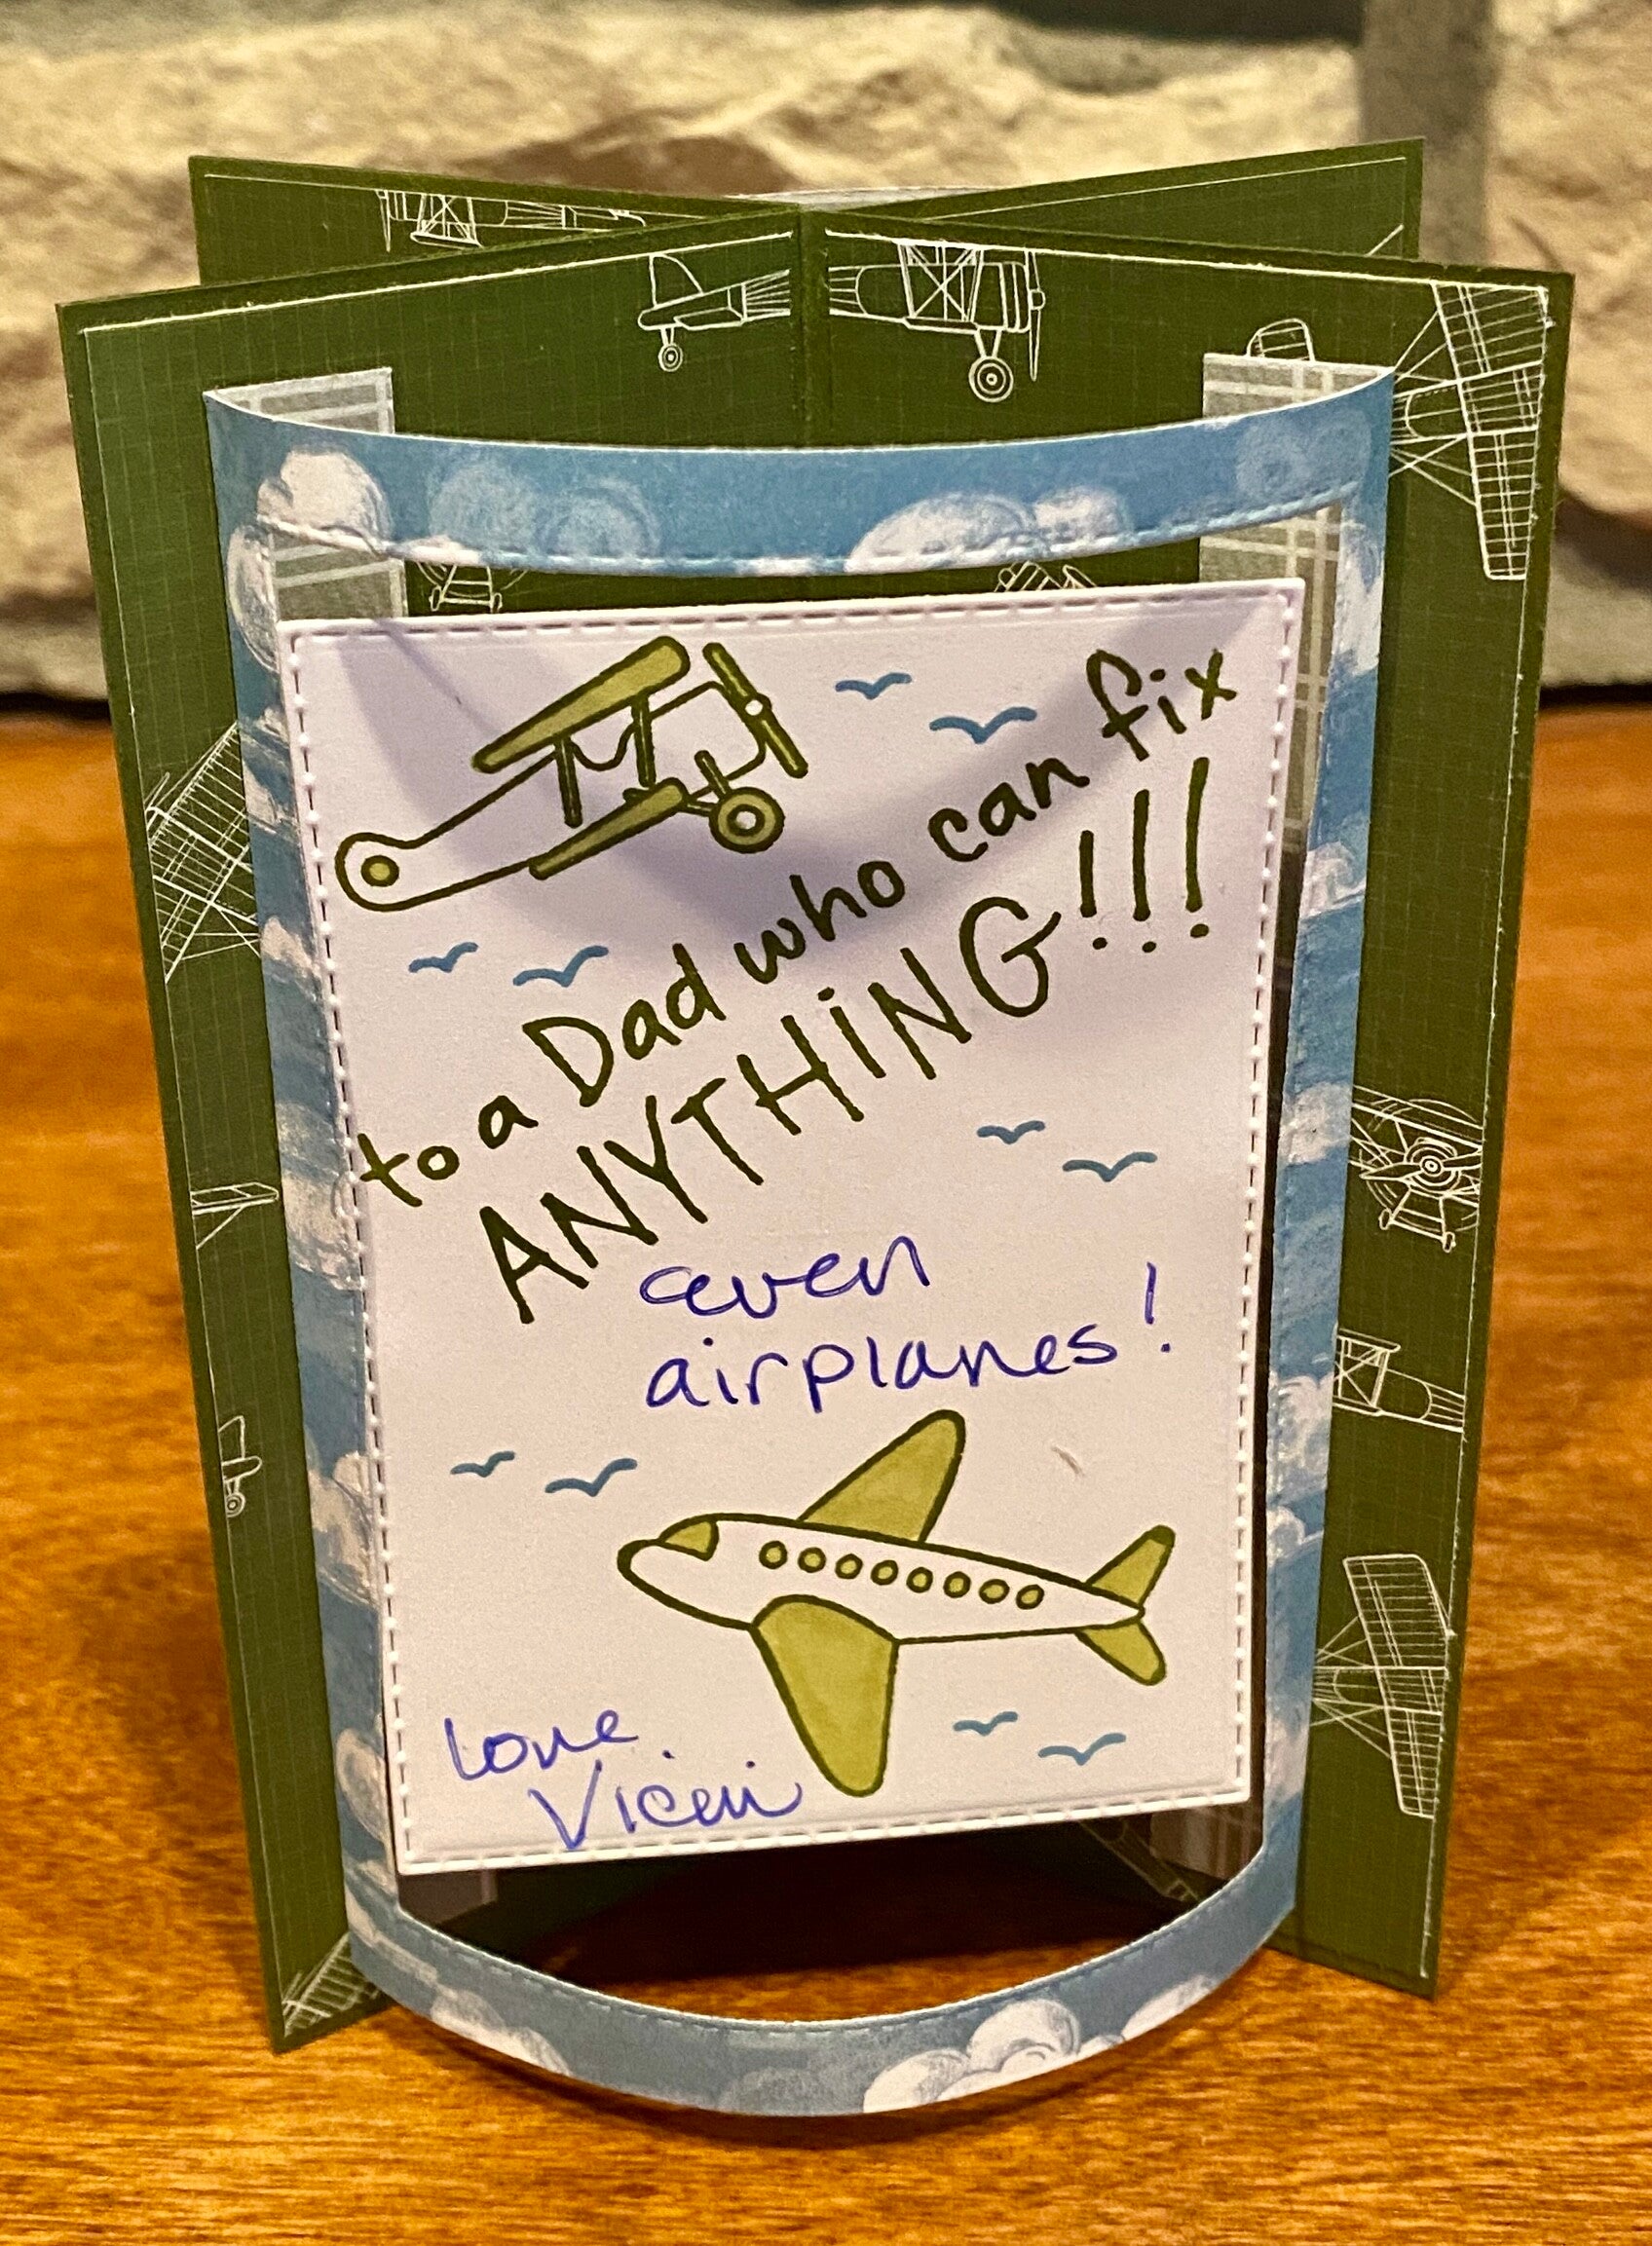
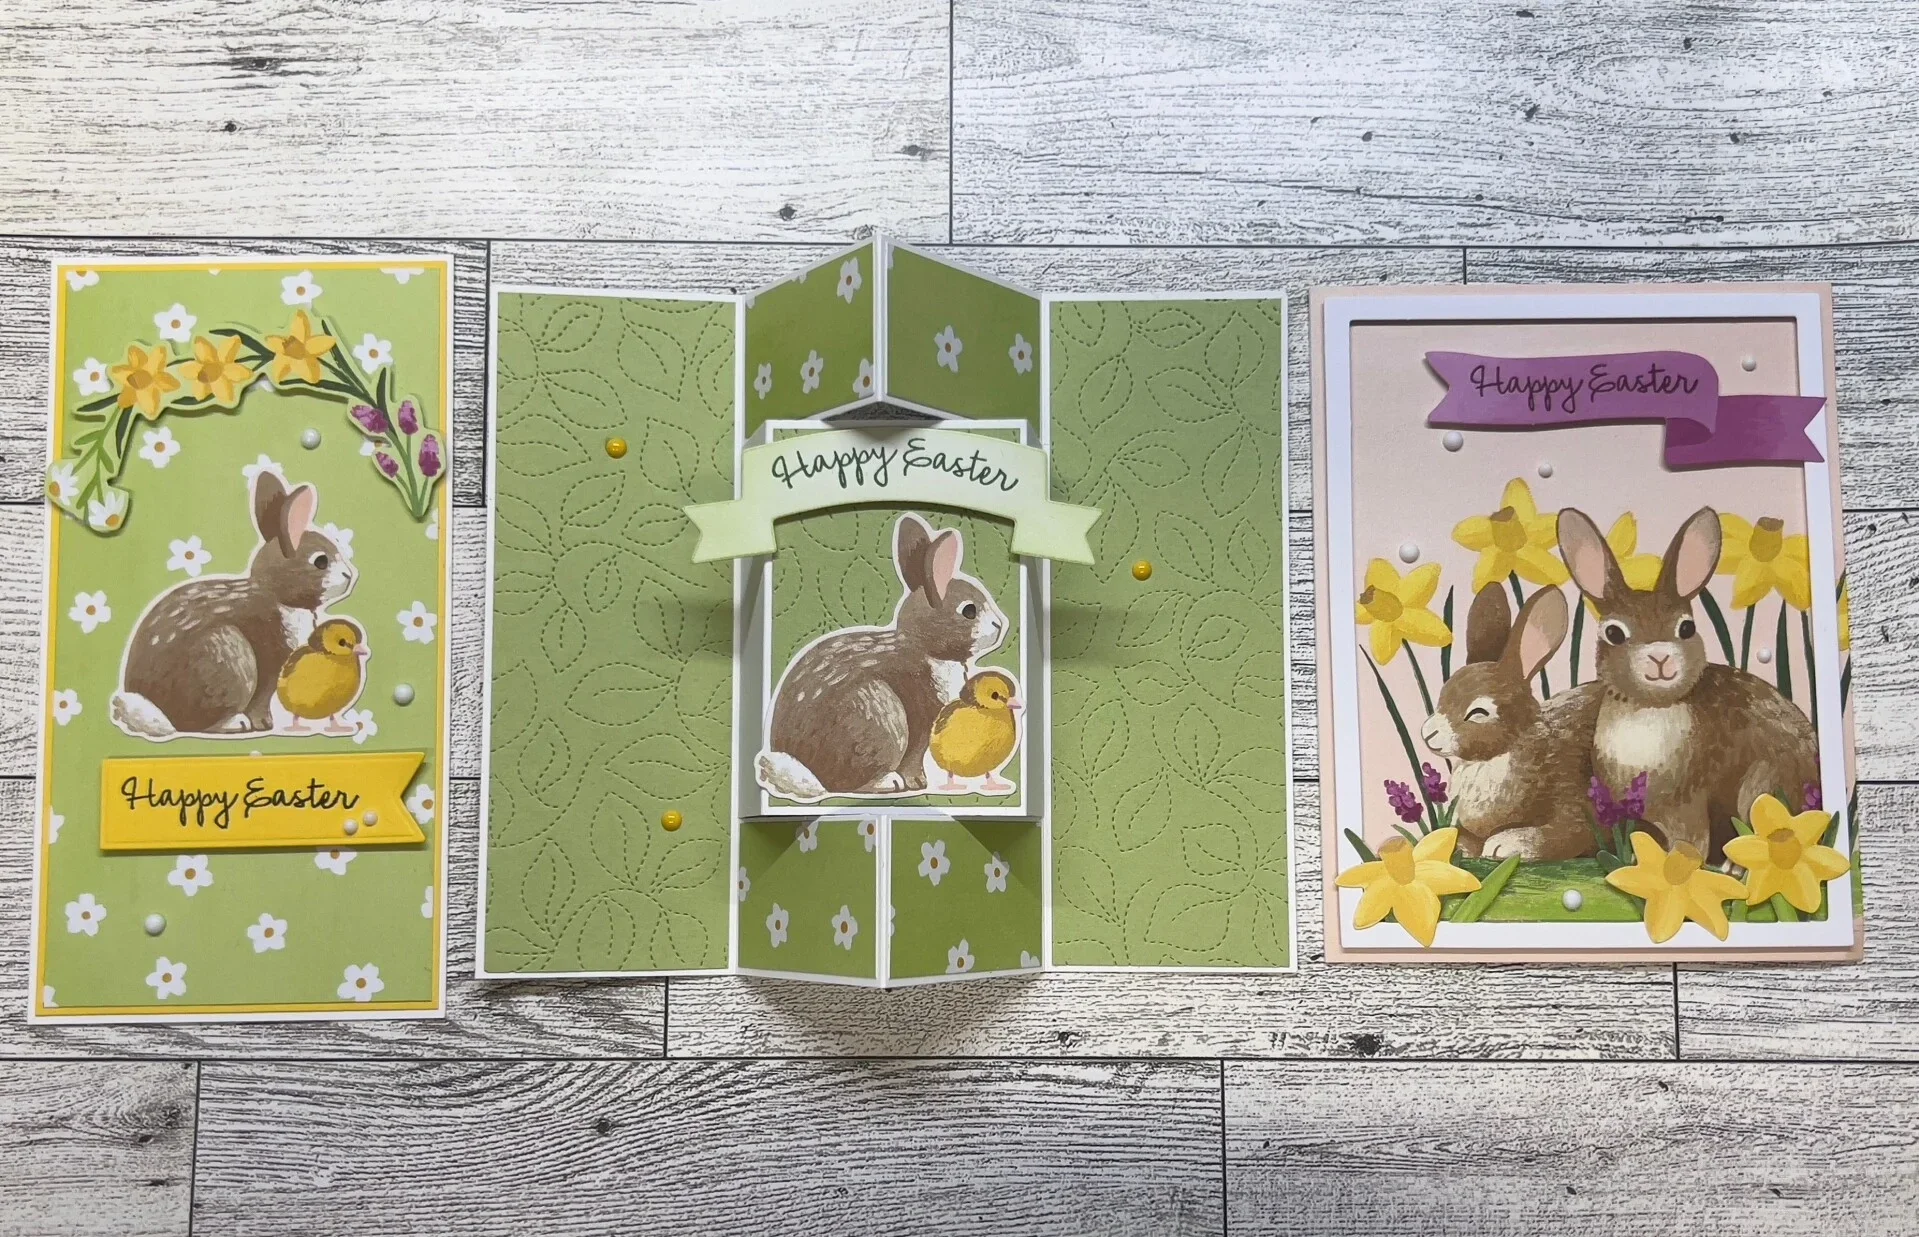
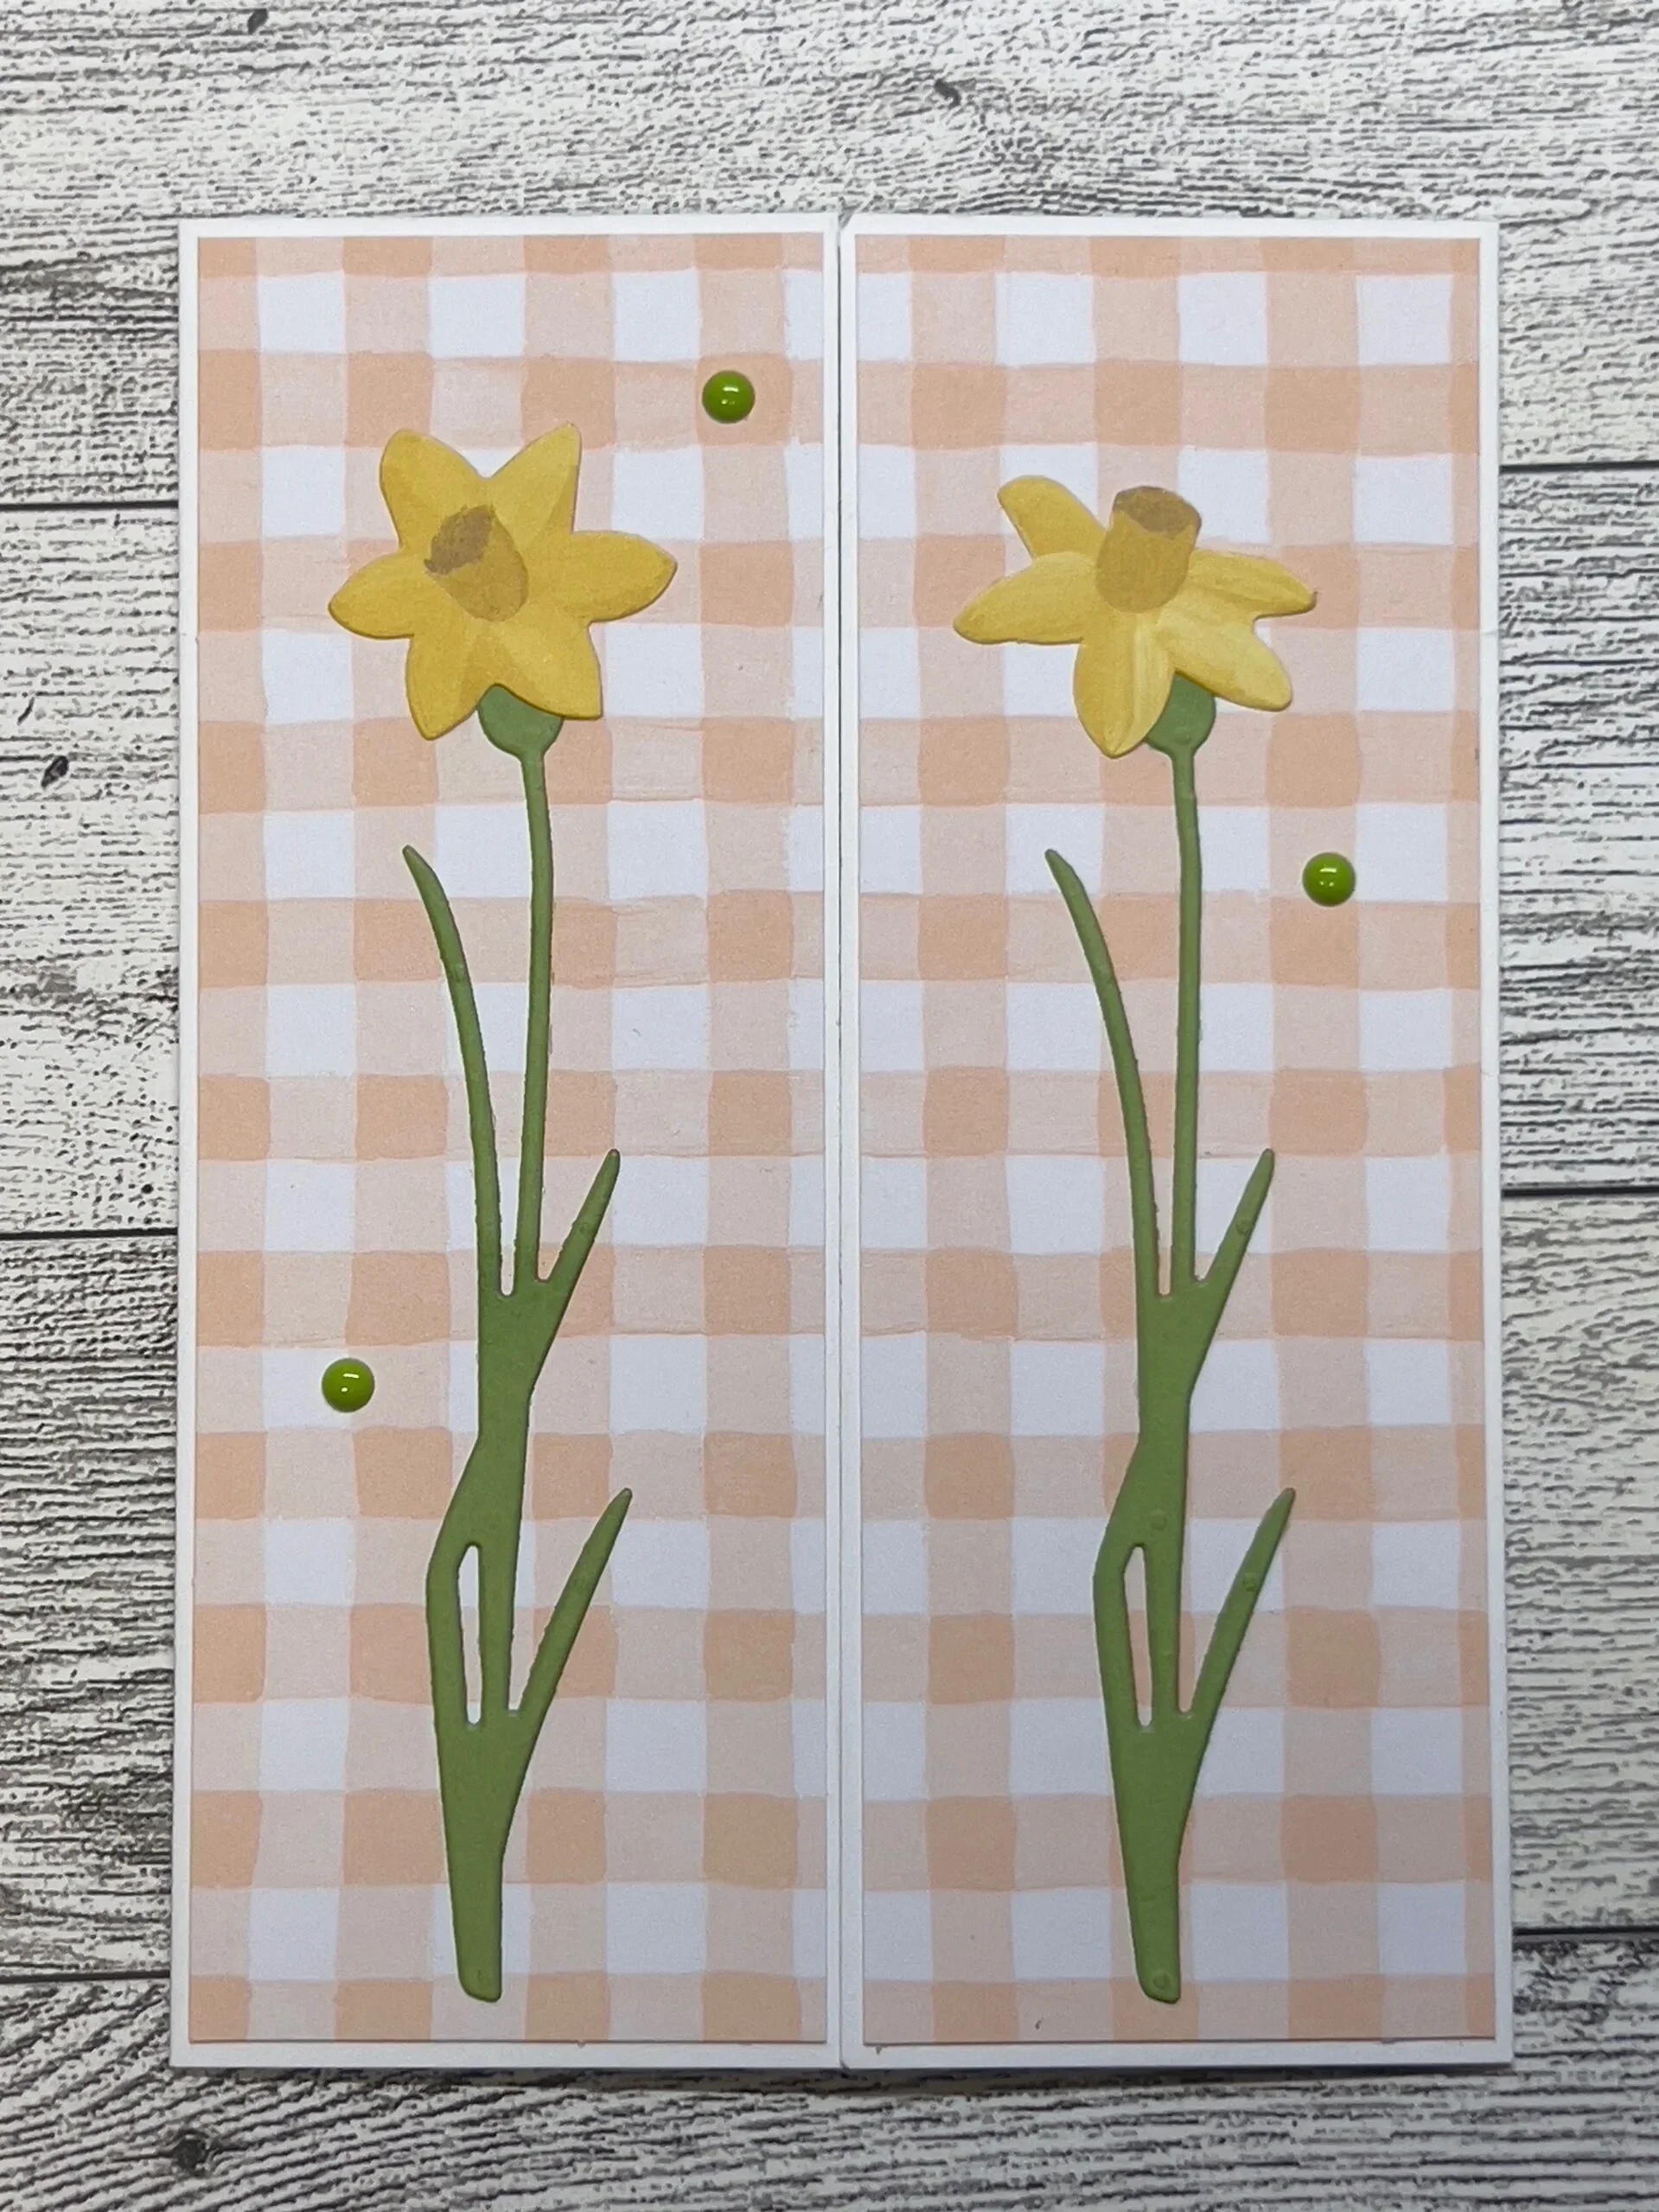
Sunday June 8, 2025 - Tonight's card is made using directions from Ramblin' Stamper. This Arrow Fold card is easier than it looks (just make sure to score carefully). Margery found this cute fold while looking for ideas to use her leftover sheets of Playful Pets Stampin' Up designer paper. You can access full directions here!
Cutting Directions
- Base - 5 1/2" x 8 1/2"
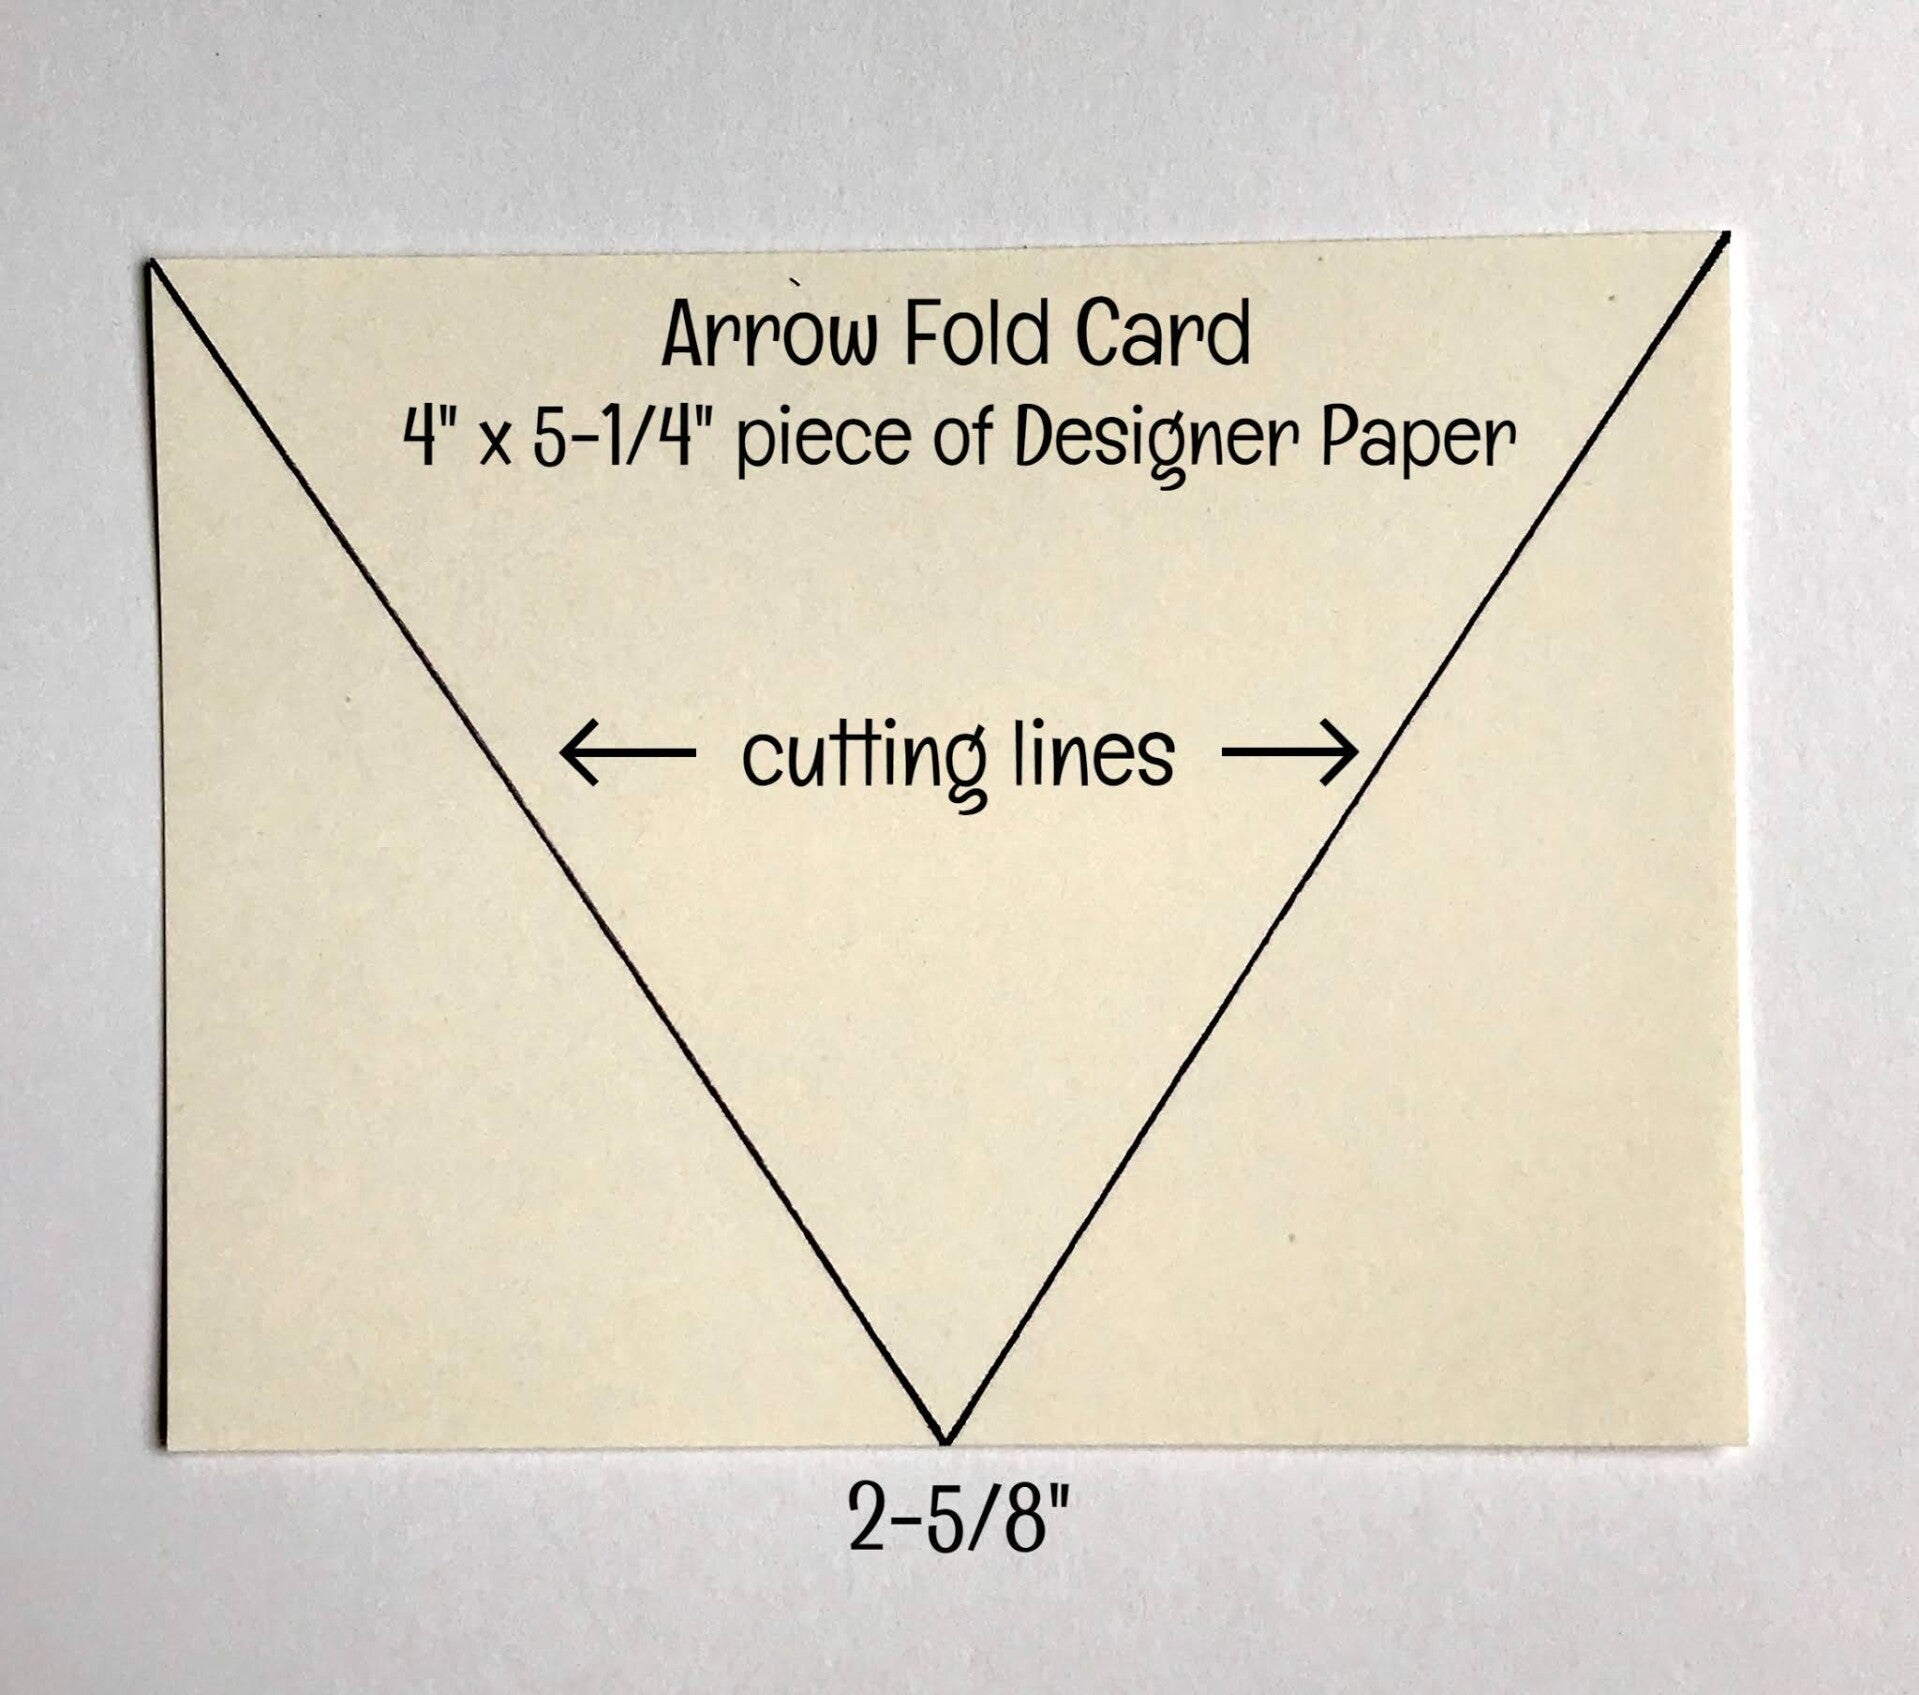
- Designer Paper - 4" x 5 1/4" (landscape)
- White for inside of card - 4" x 5 1/4"
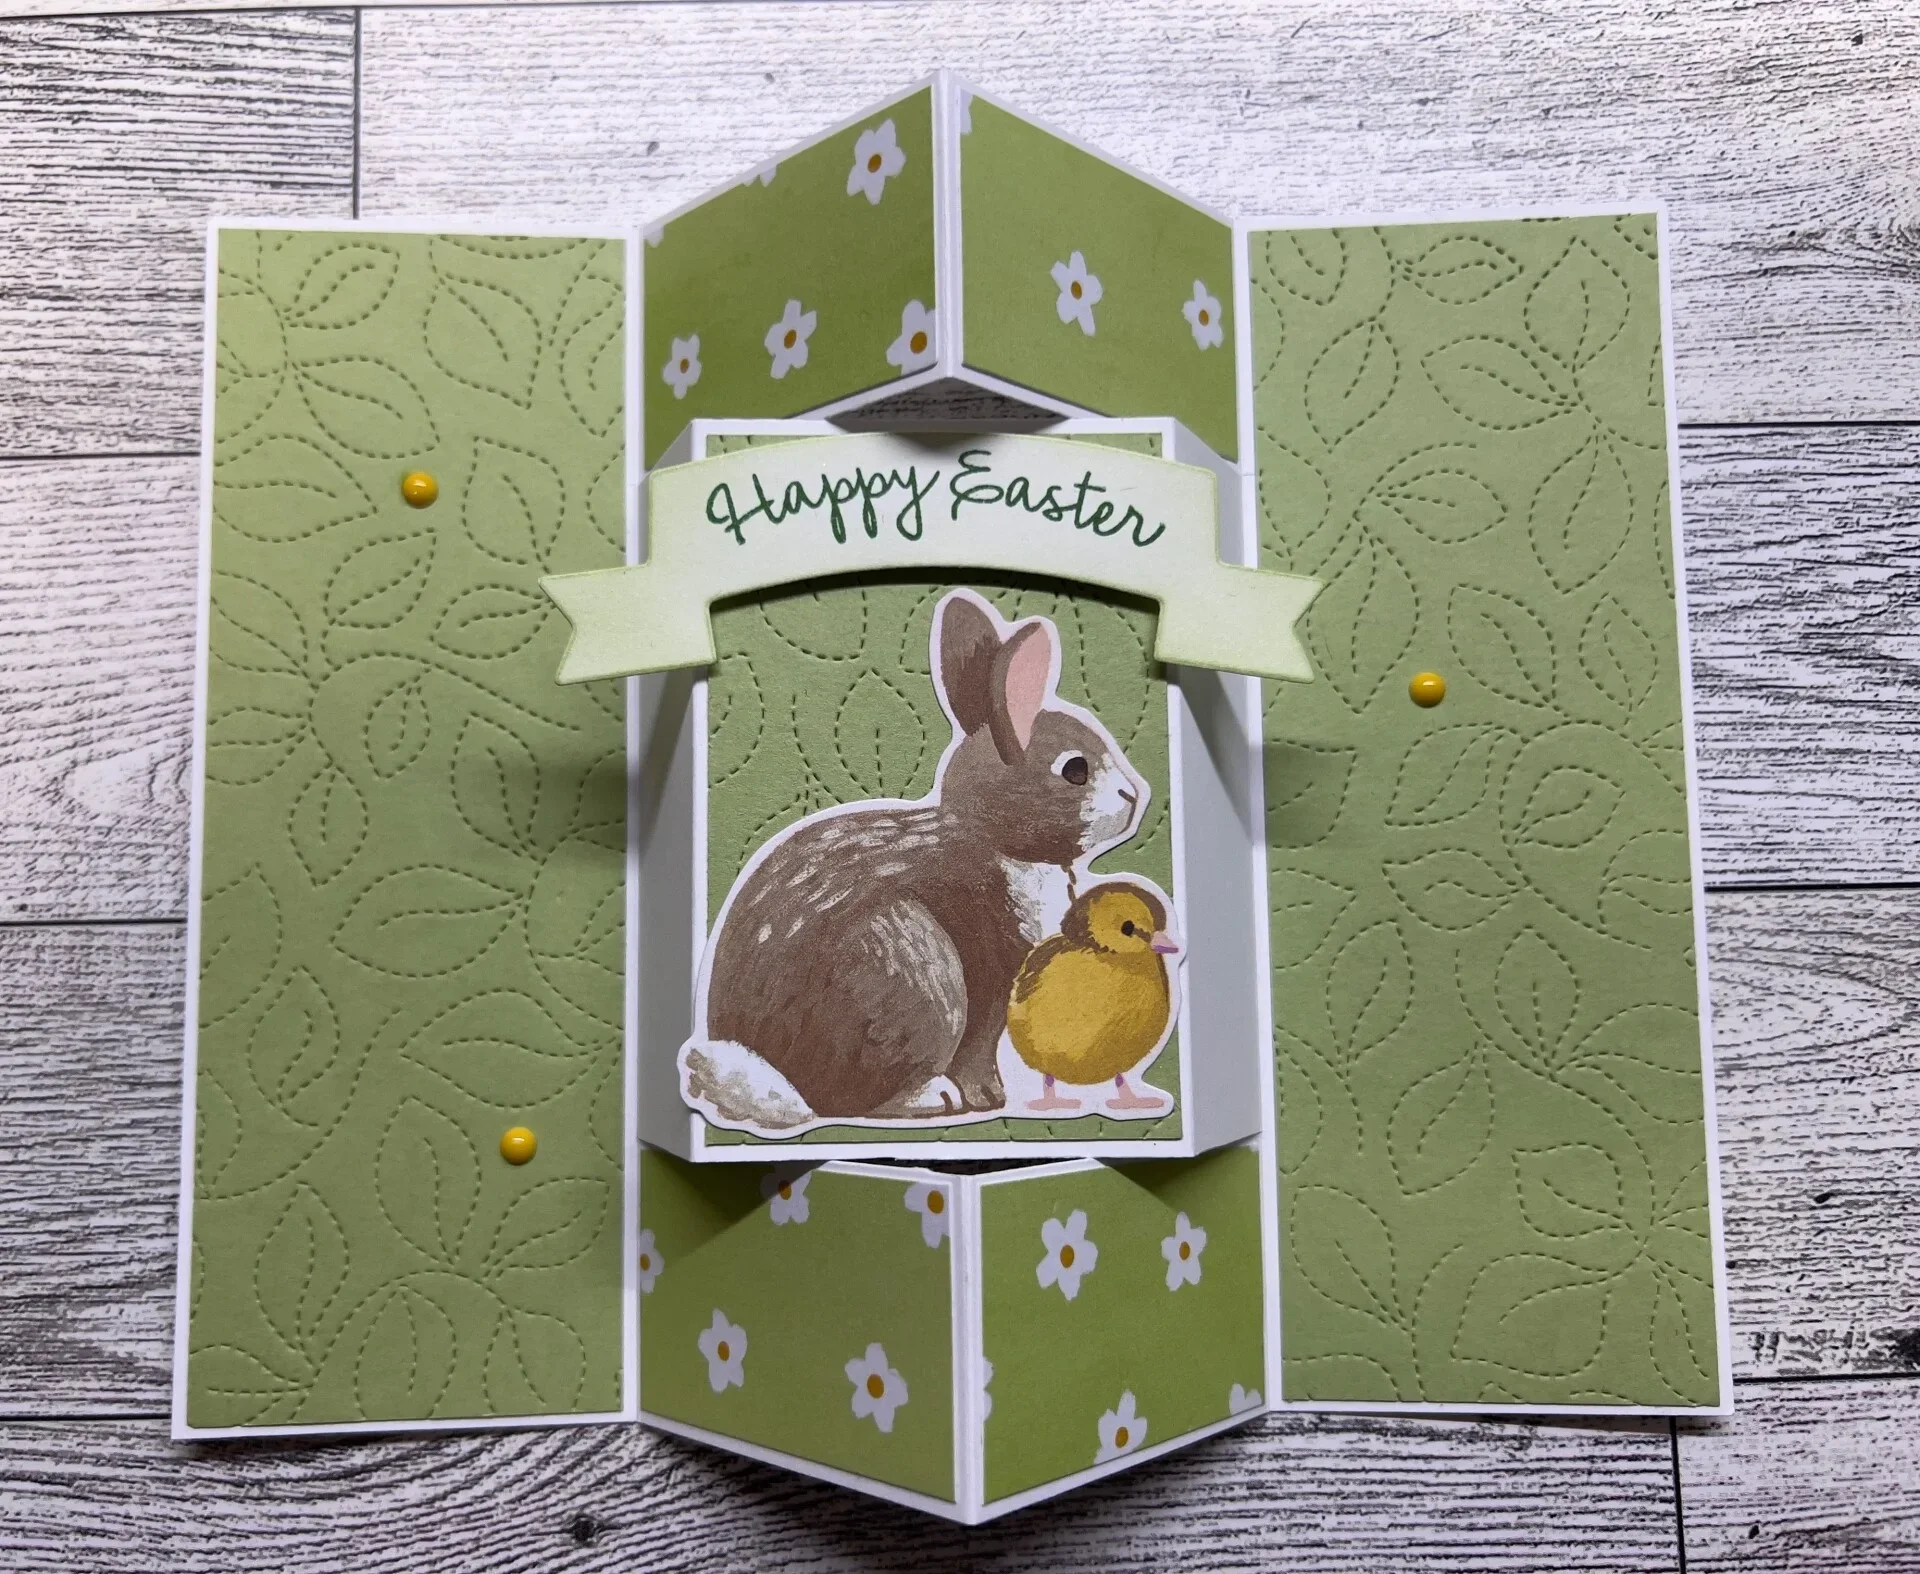
Scoring Directions
- Base - (see first diagram)
- Score and fold in half at 4 1/4"
- Measure across the bottom edge of the front of the card at 2 3/4". Score from each fold edge, left and right, to the center point.
- Measure 2 1/8" up from the bottom, left and right. Score from 2 1/8" to the center point, left and right.
- Fold and burnish folds, then use glue to hold the folds in place.
White for Inside of Card
- Adhere your white piece inside the card.
- Alternately, you can cut a triangle as described below, and adhere it after after the designer paper.
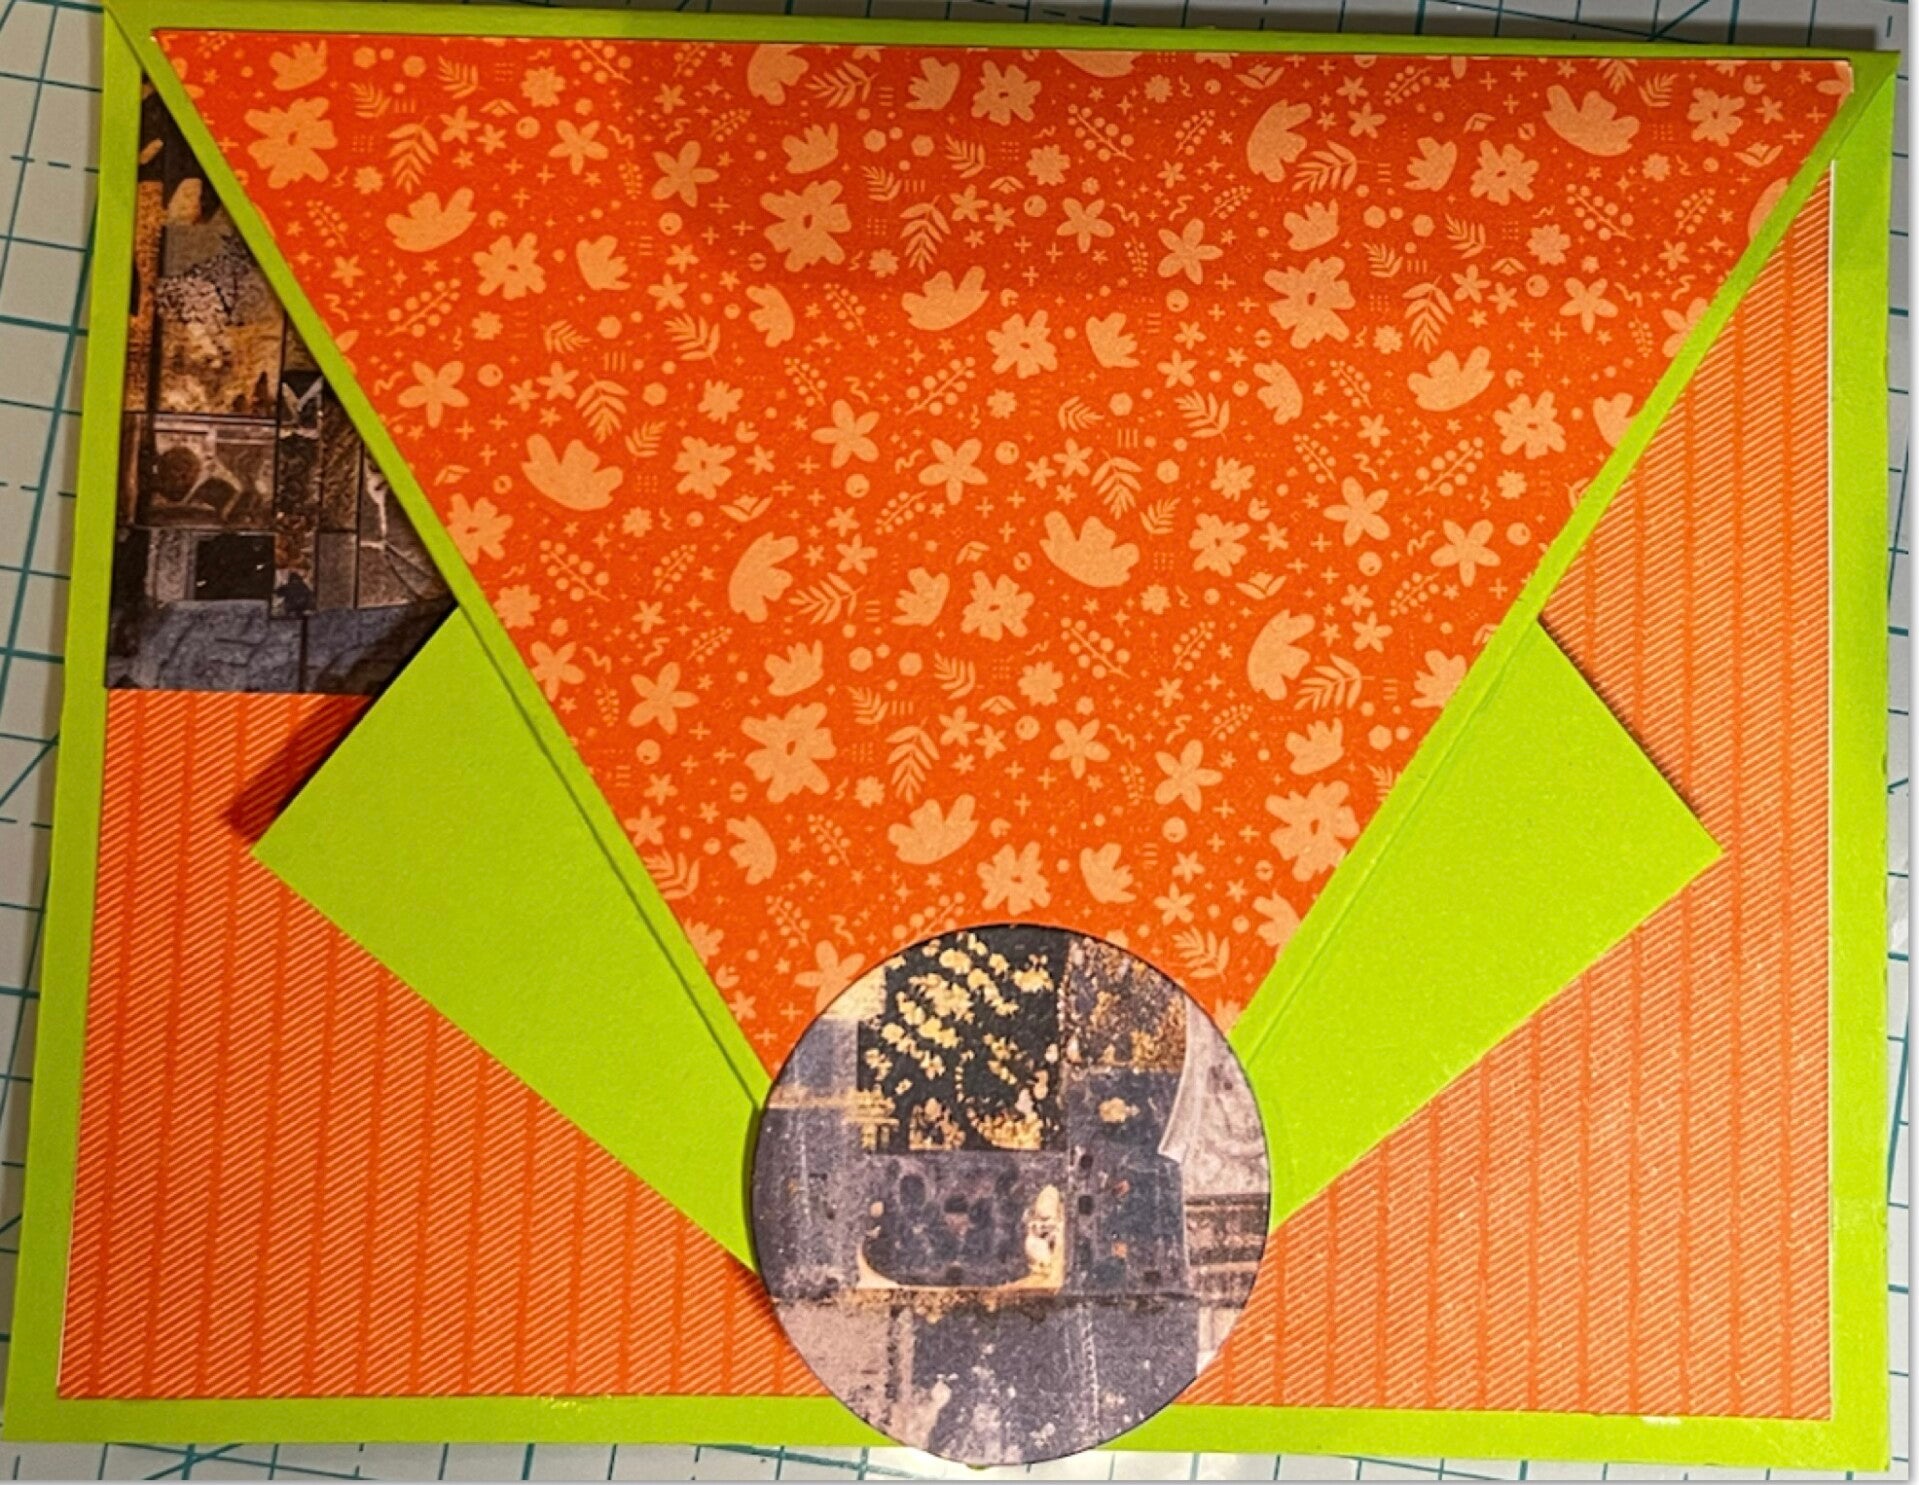
Designer Paper (see second diagram)
- Designer Paper - (see first diagram on right)
- Measure across the bottom edge at 2 5/8", making sure you paper is right side up.
- Cut from your center point to the upper left corner, then from center point to upper right corner.
- Adhere the middle triangle to the front of your folded card base.
- Flip the left and right triangles over (to use the other side of your paper) and adhere them to the inside of your card base.


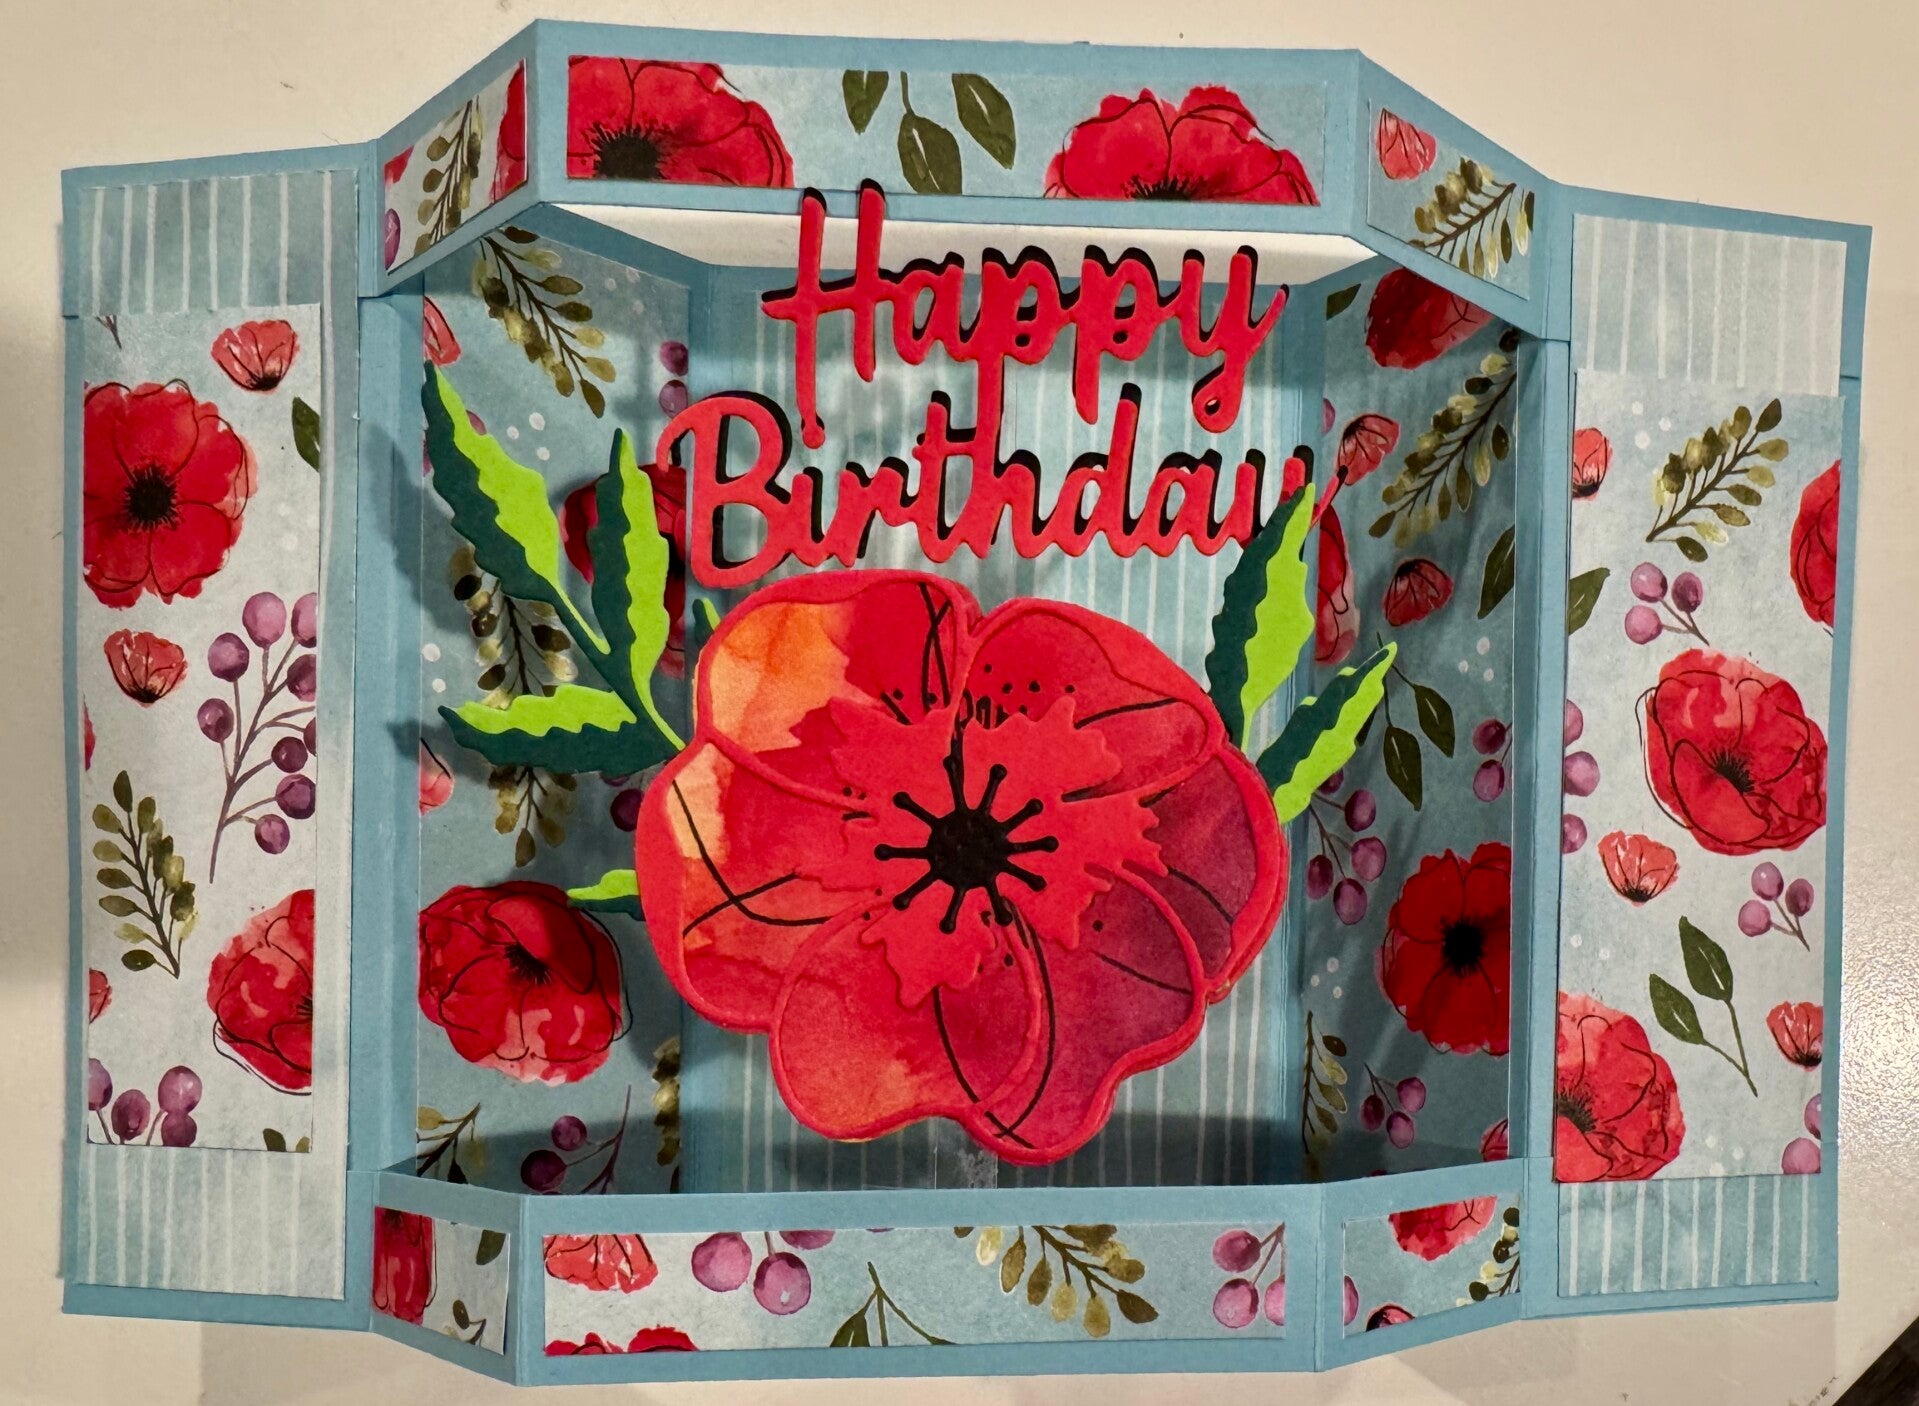
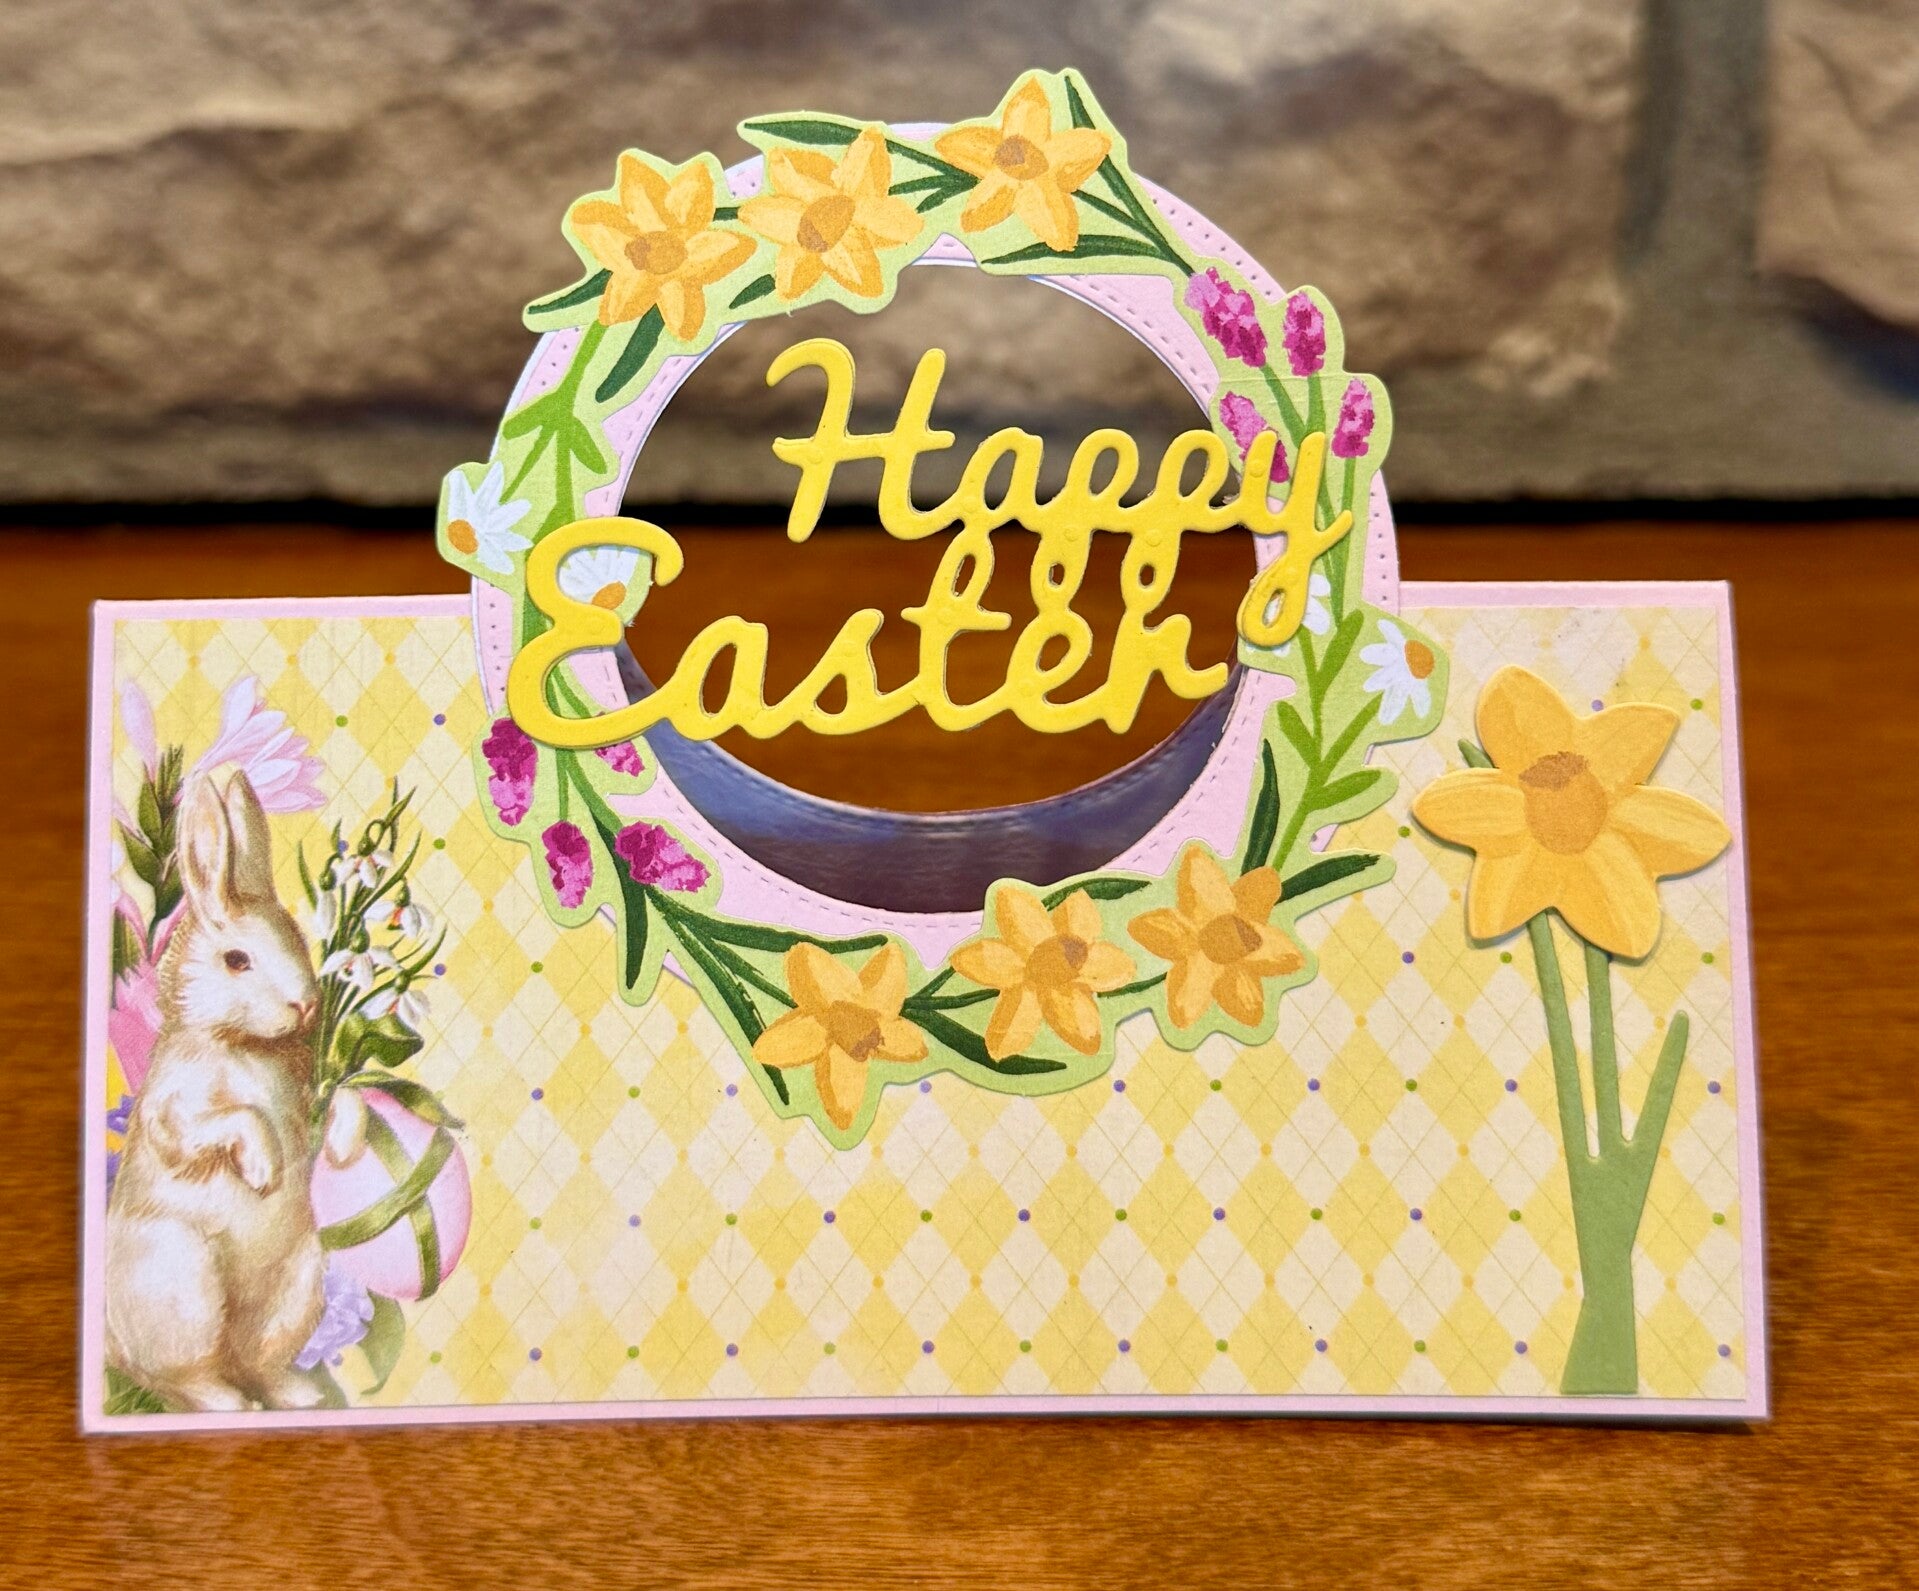
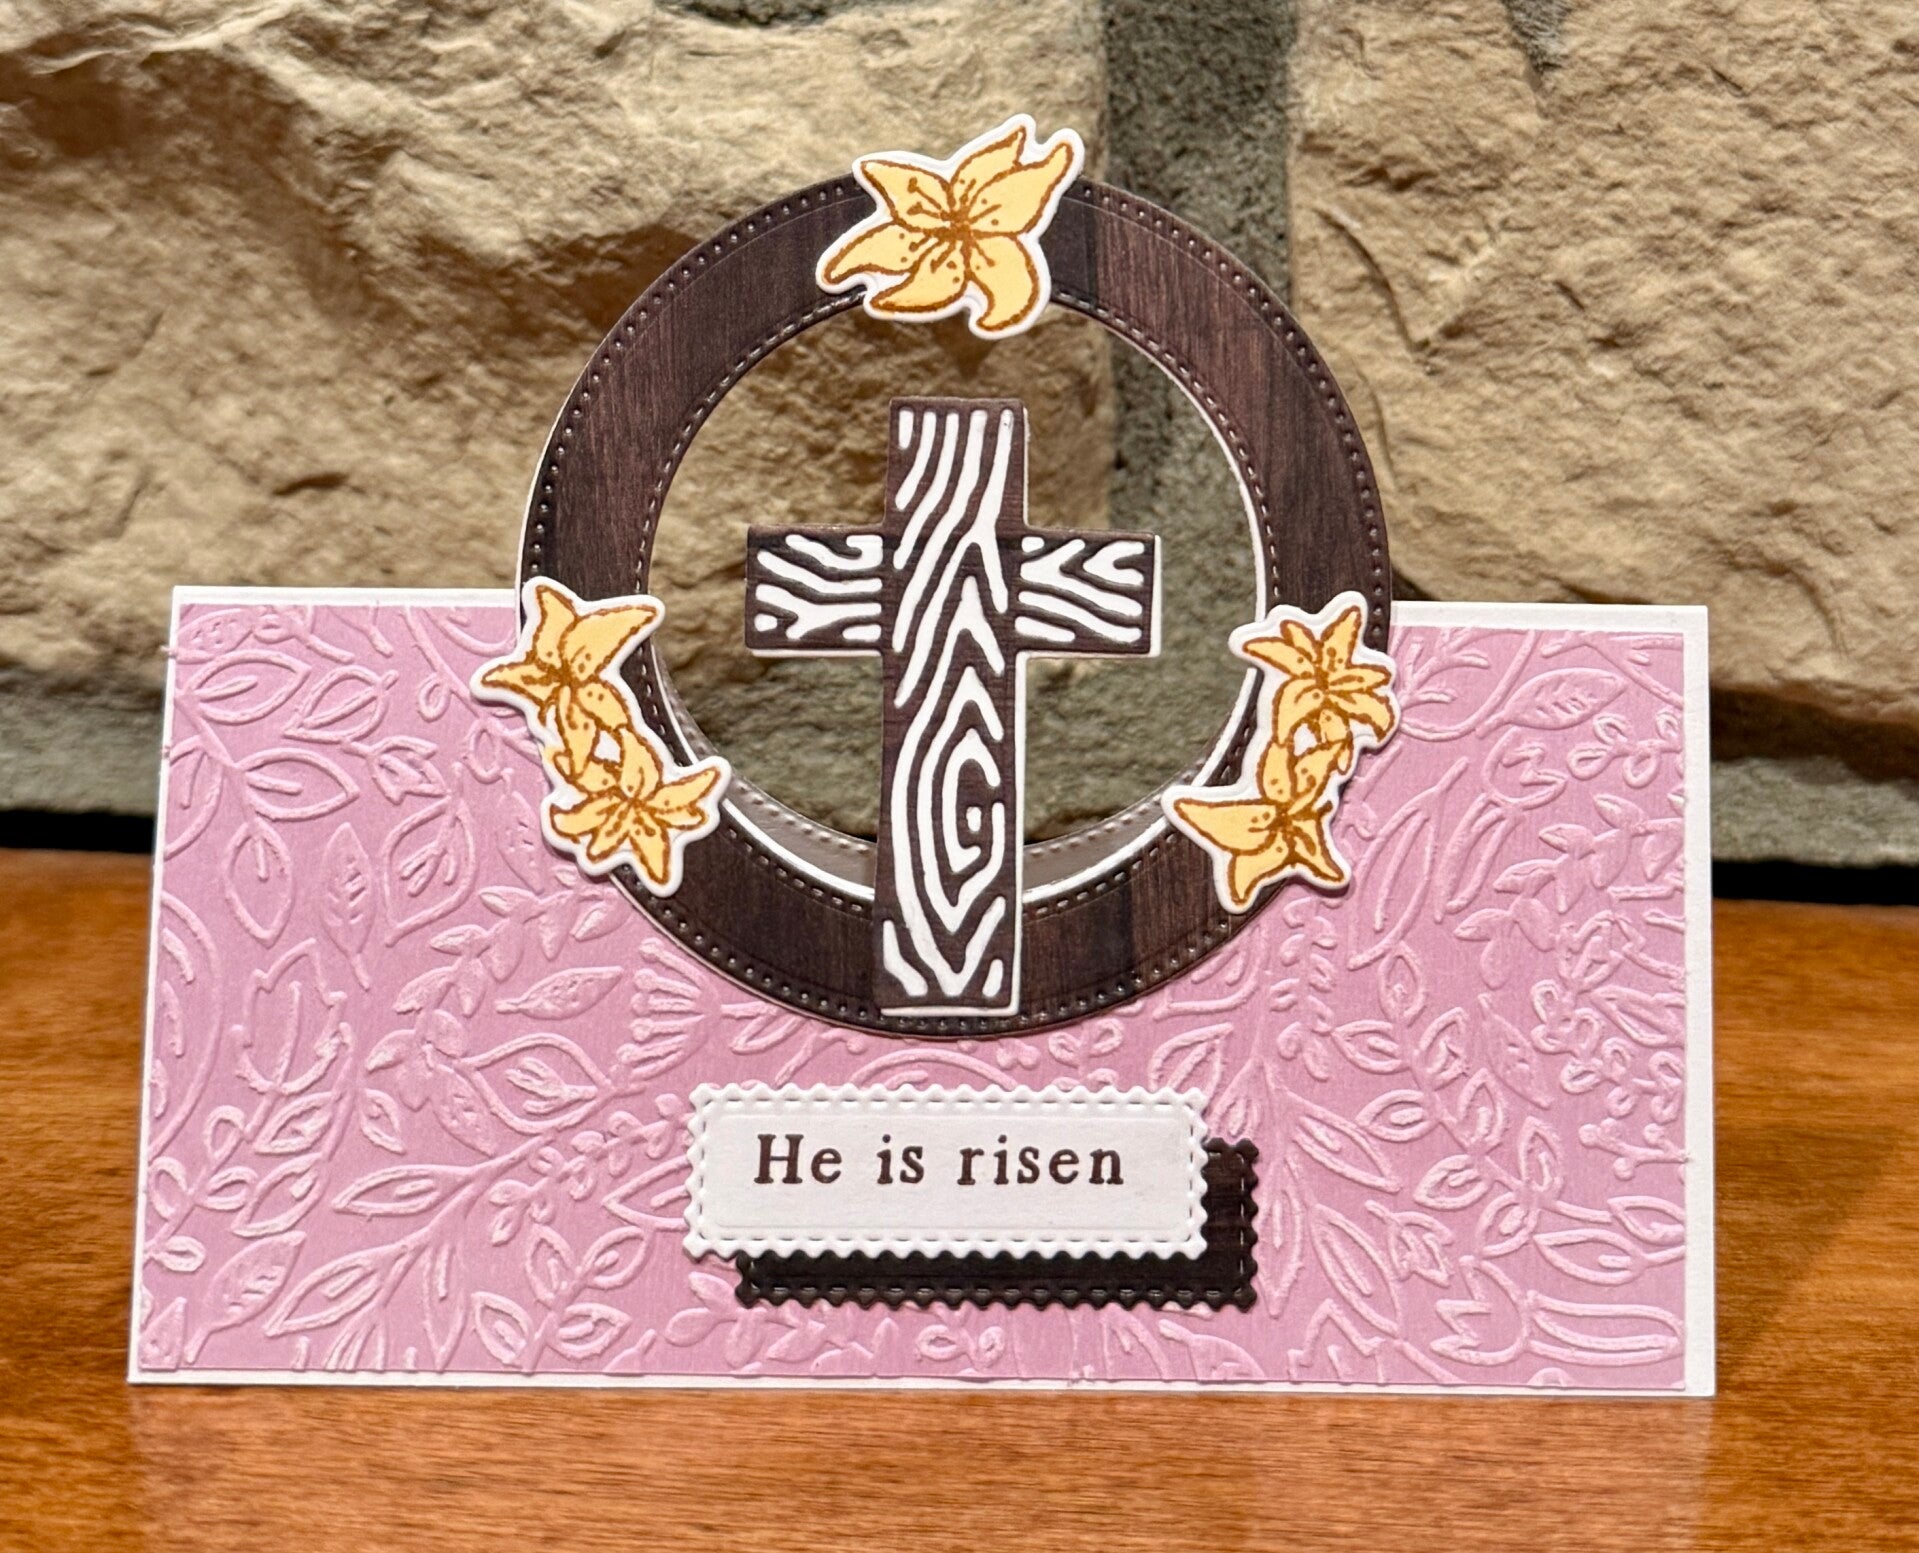
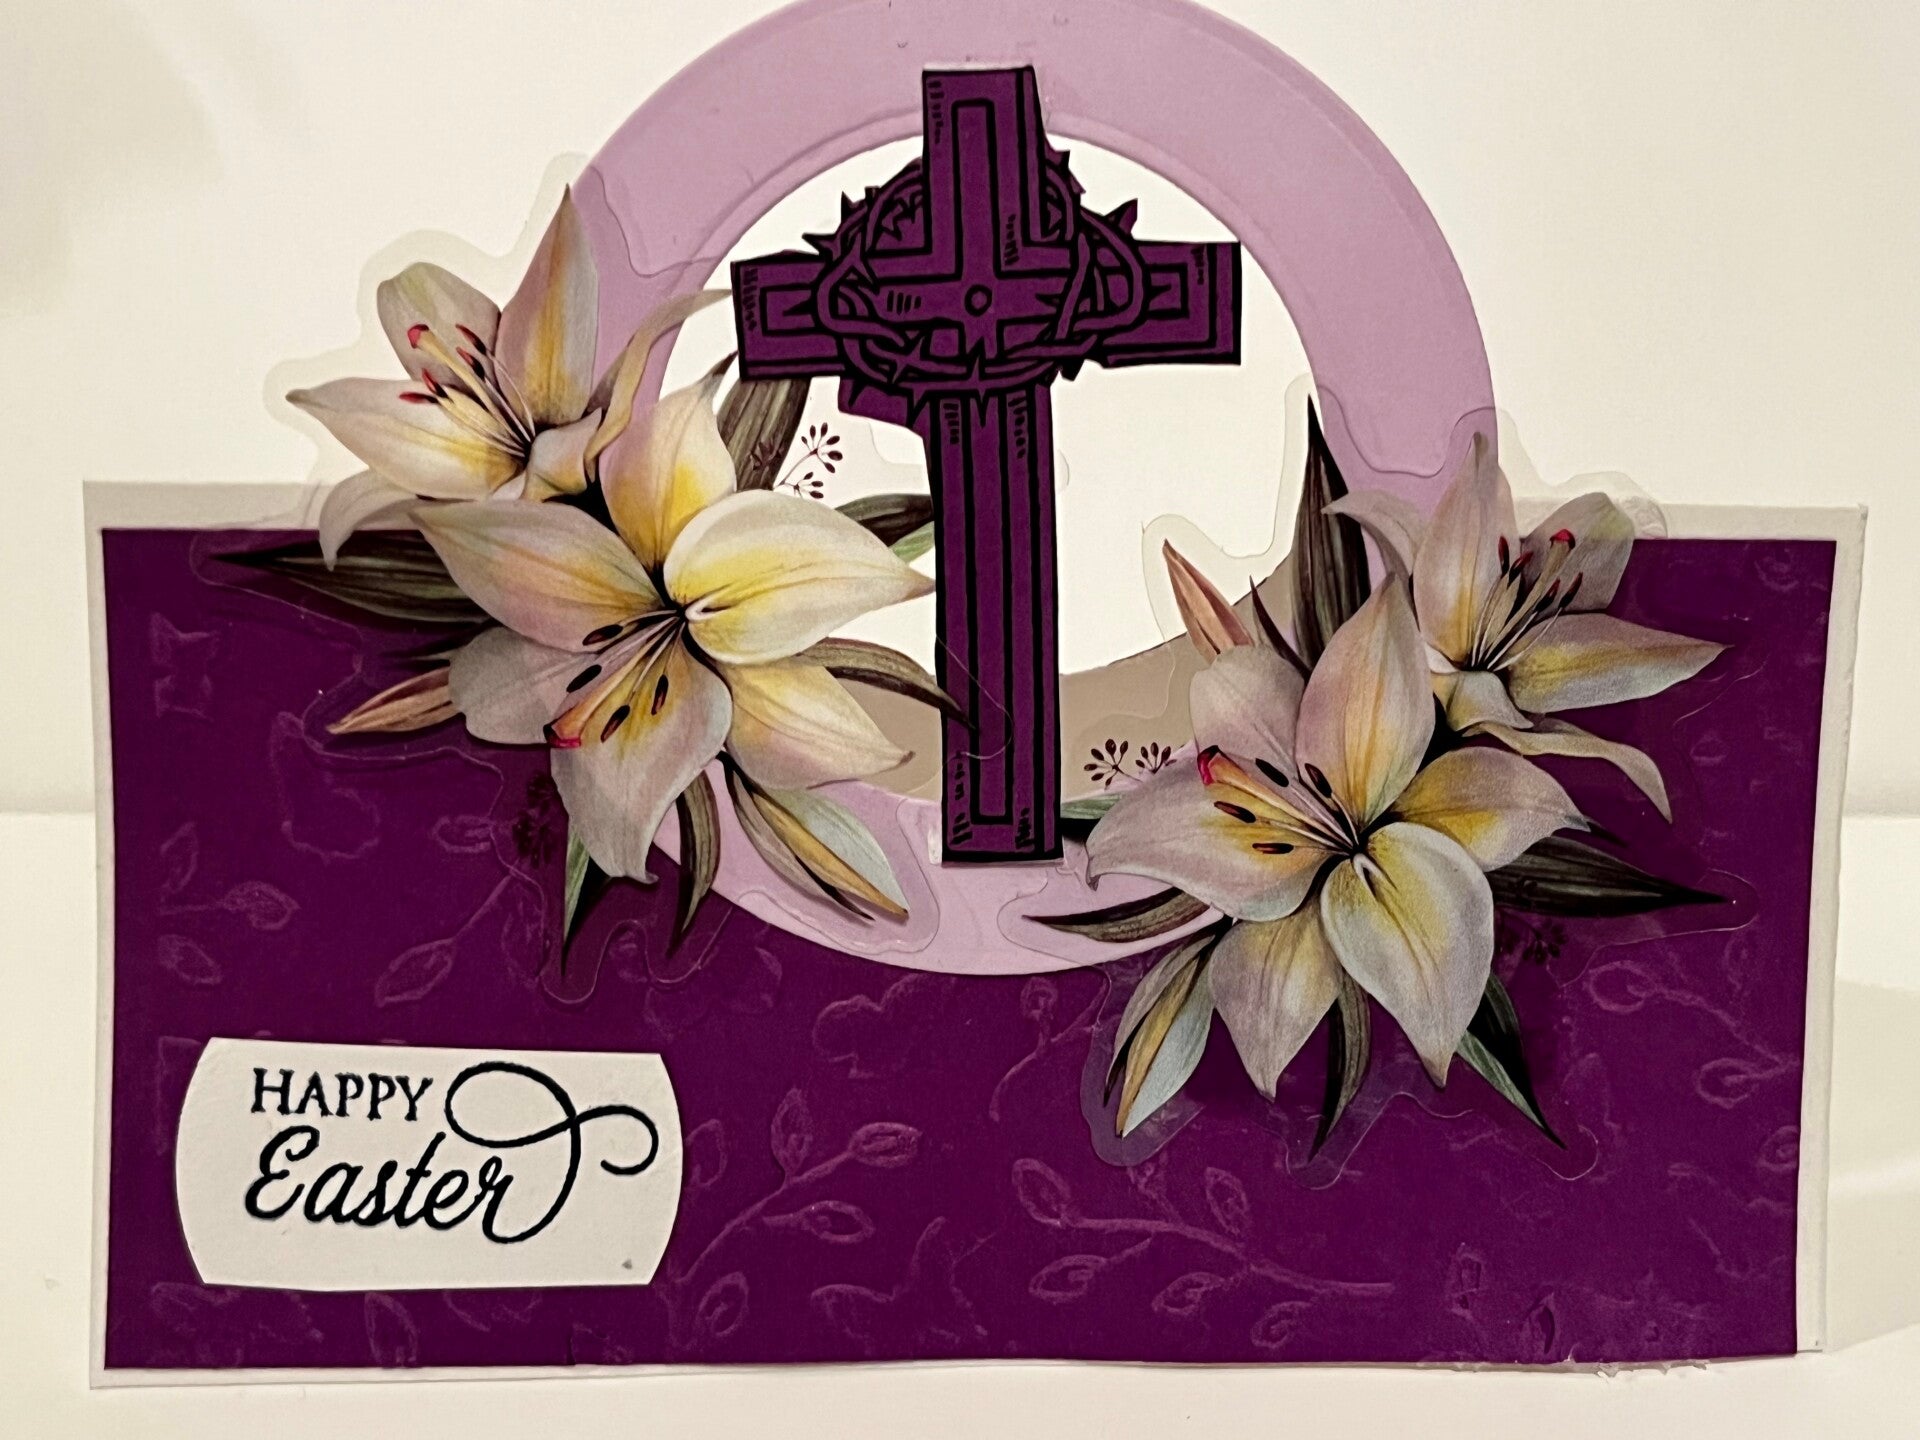
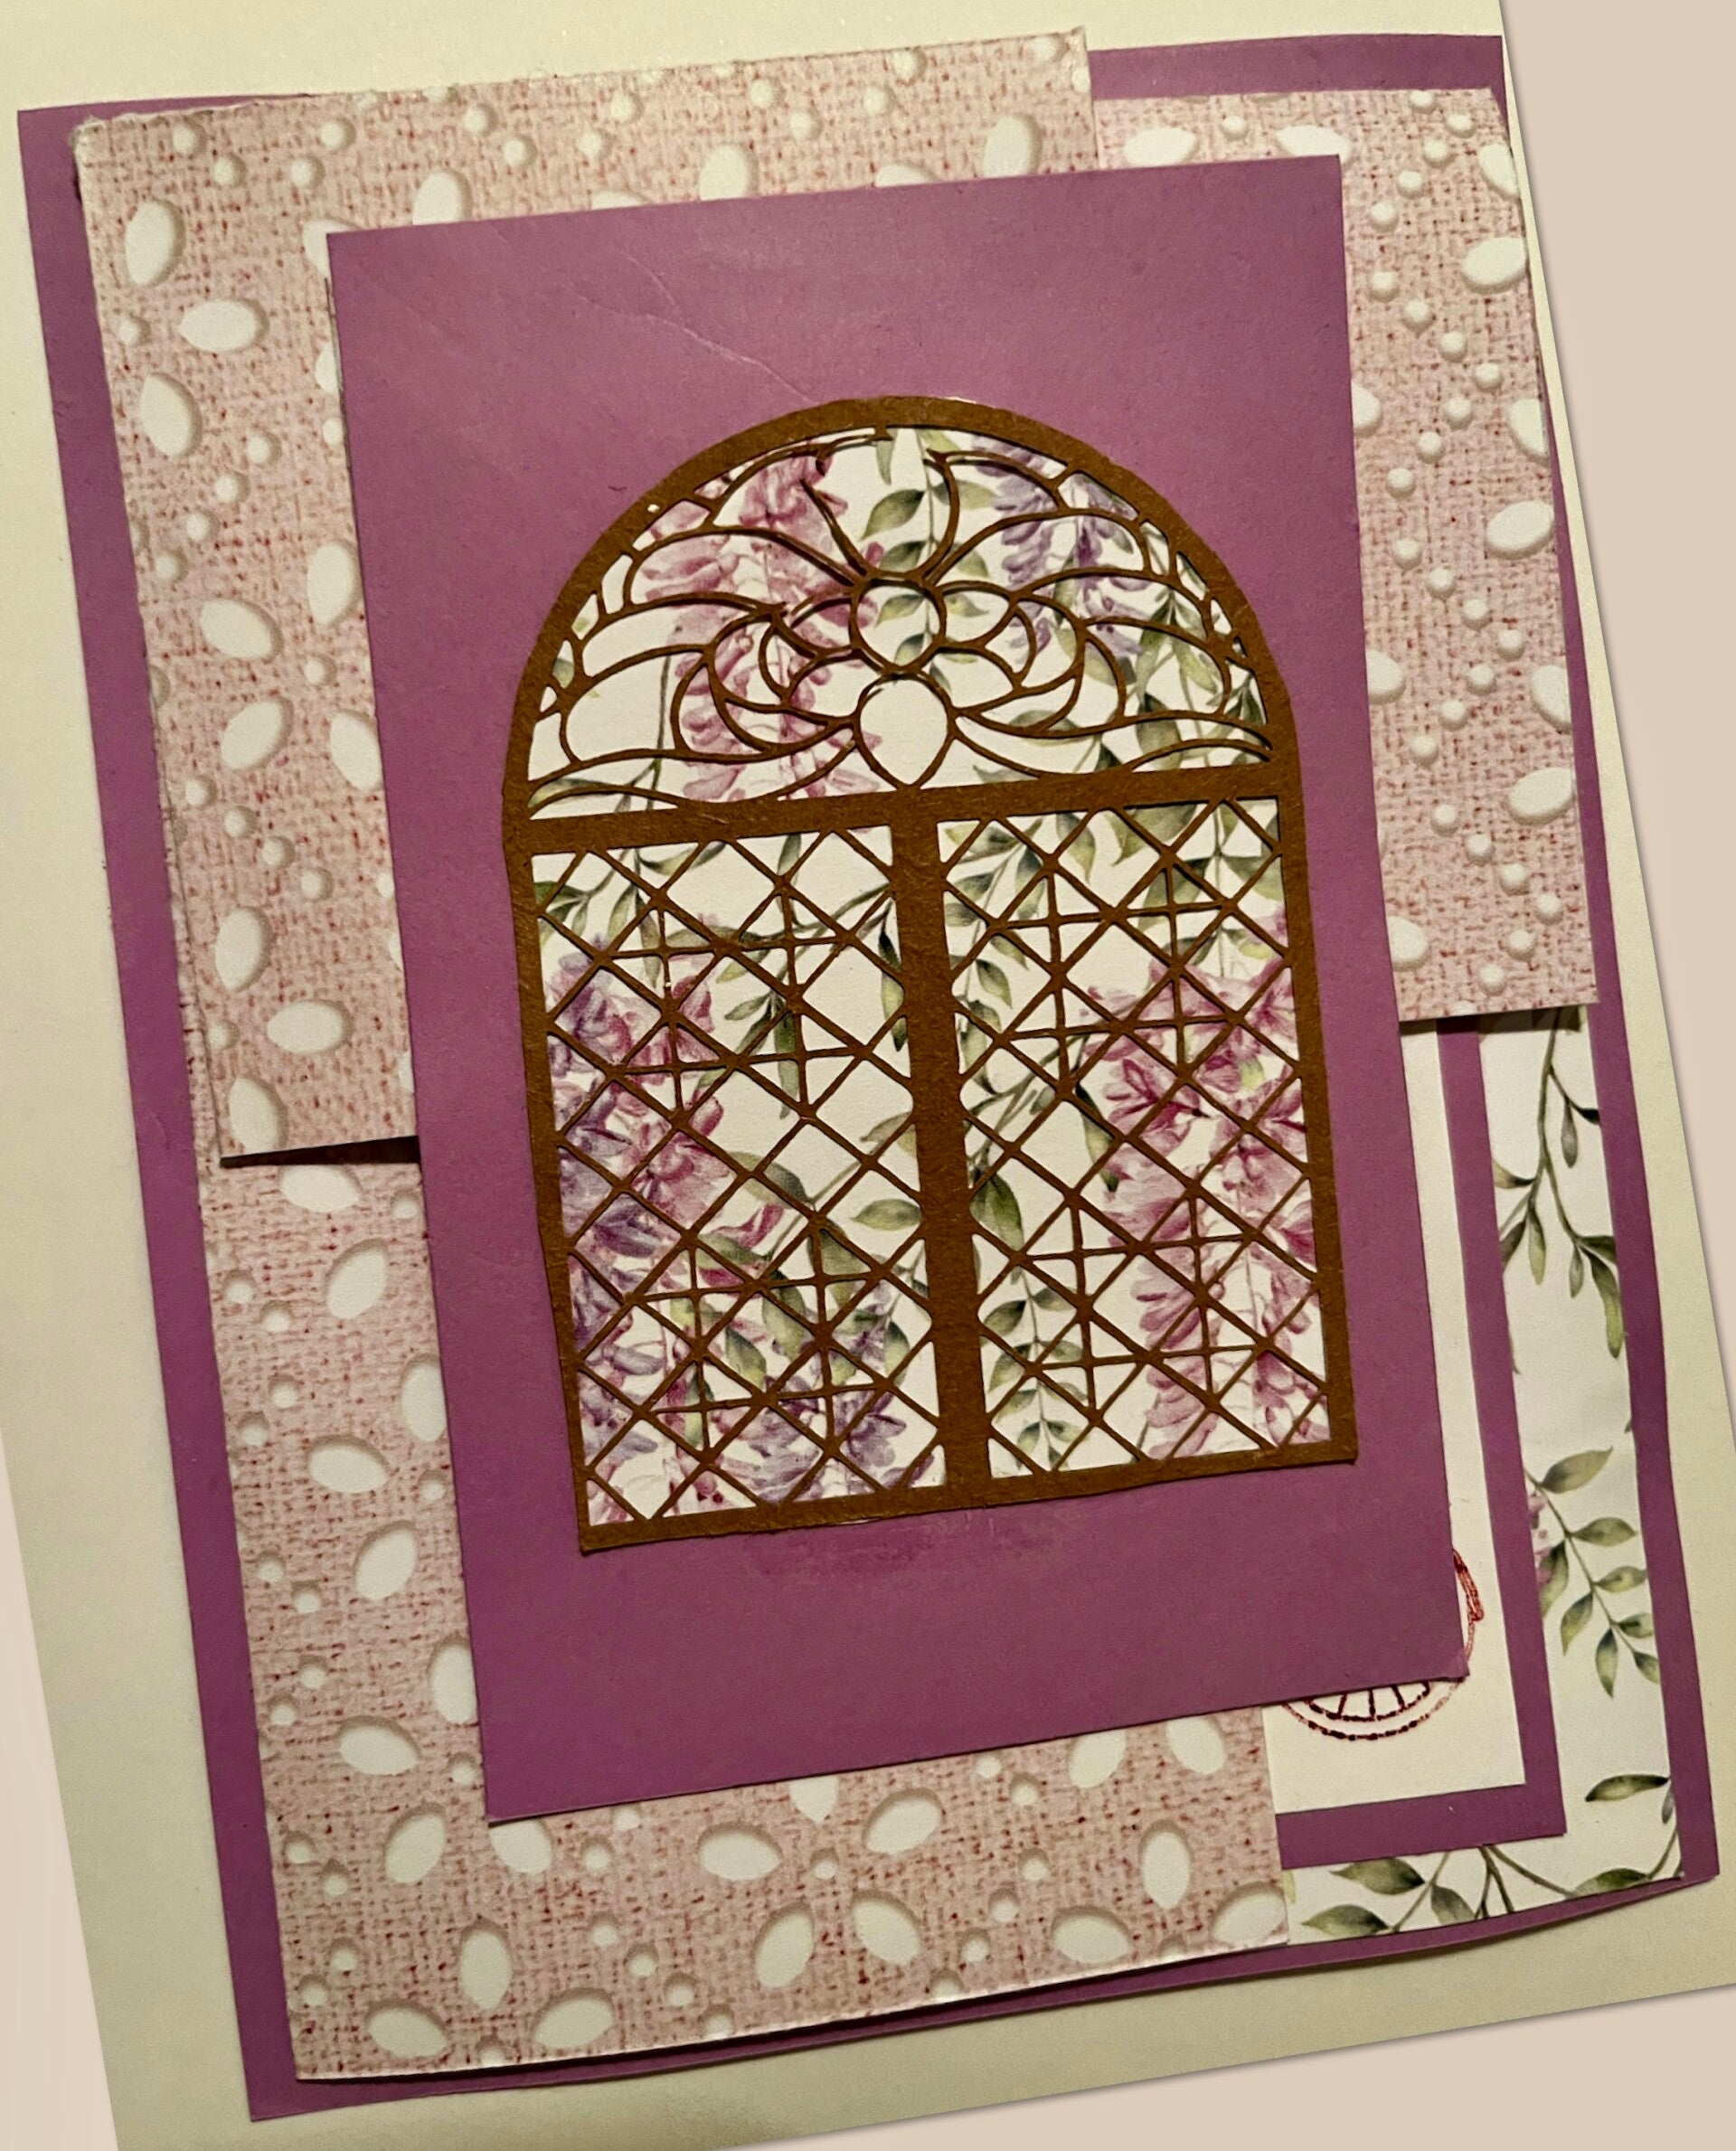
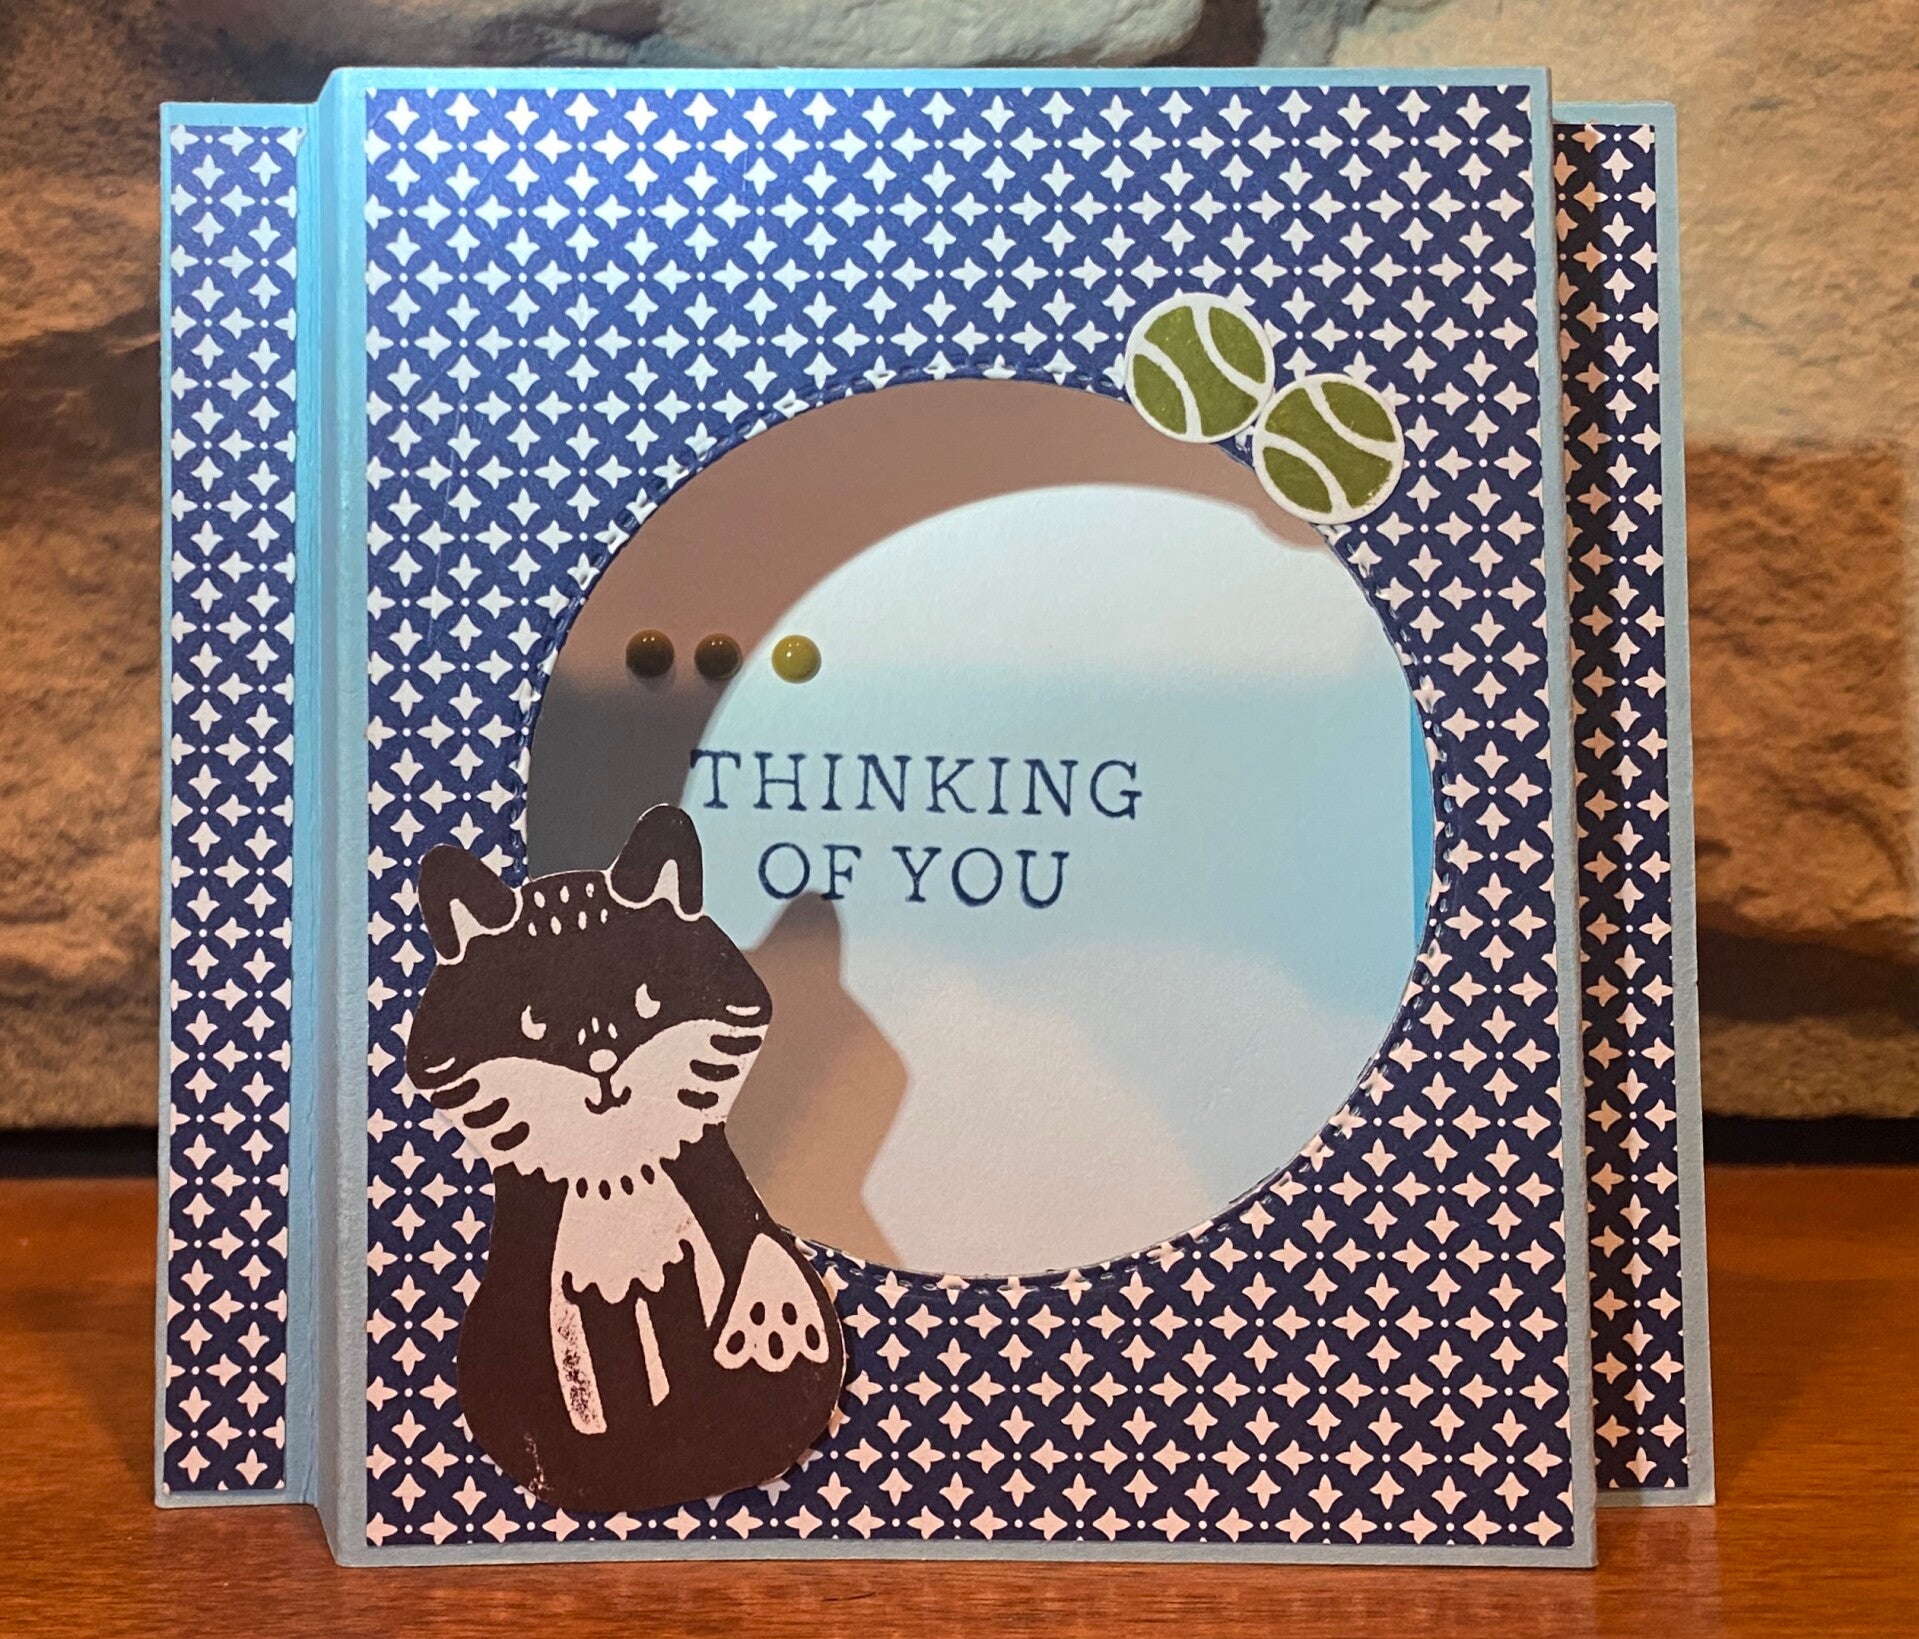
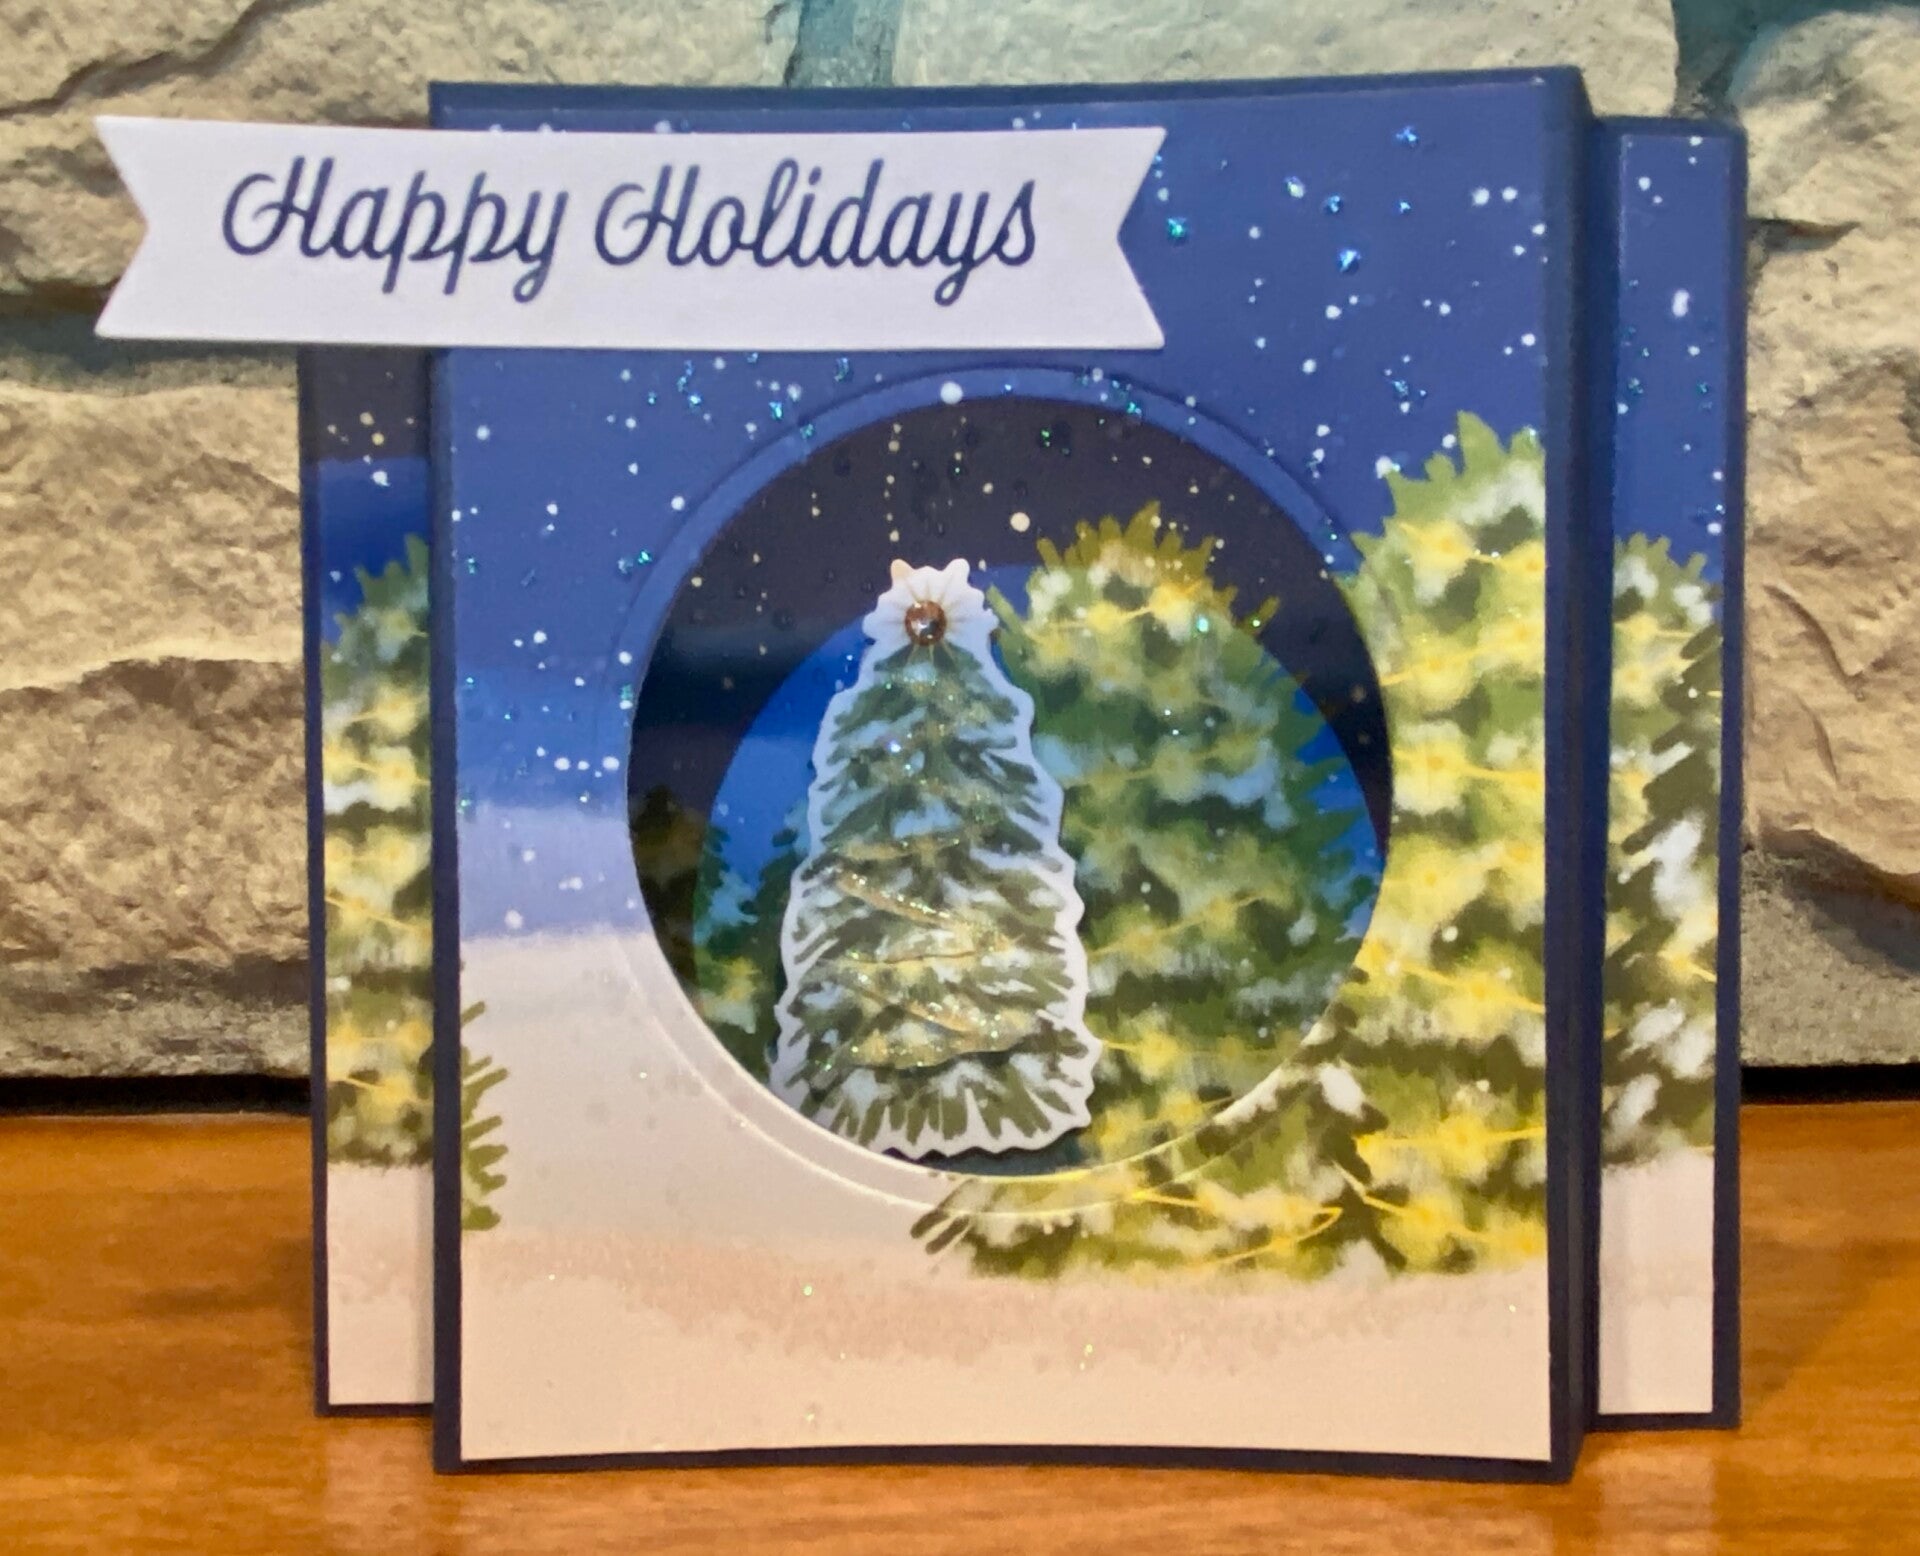
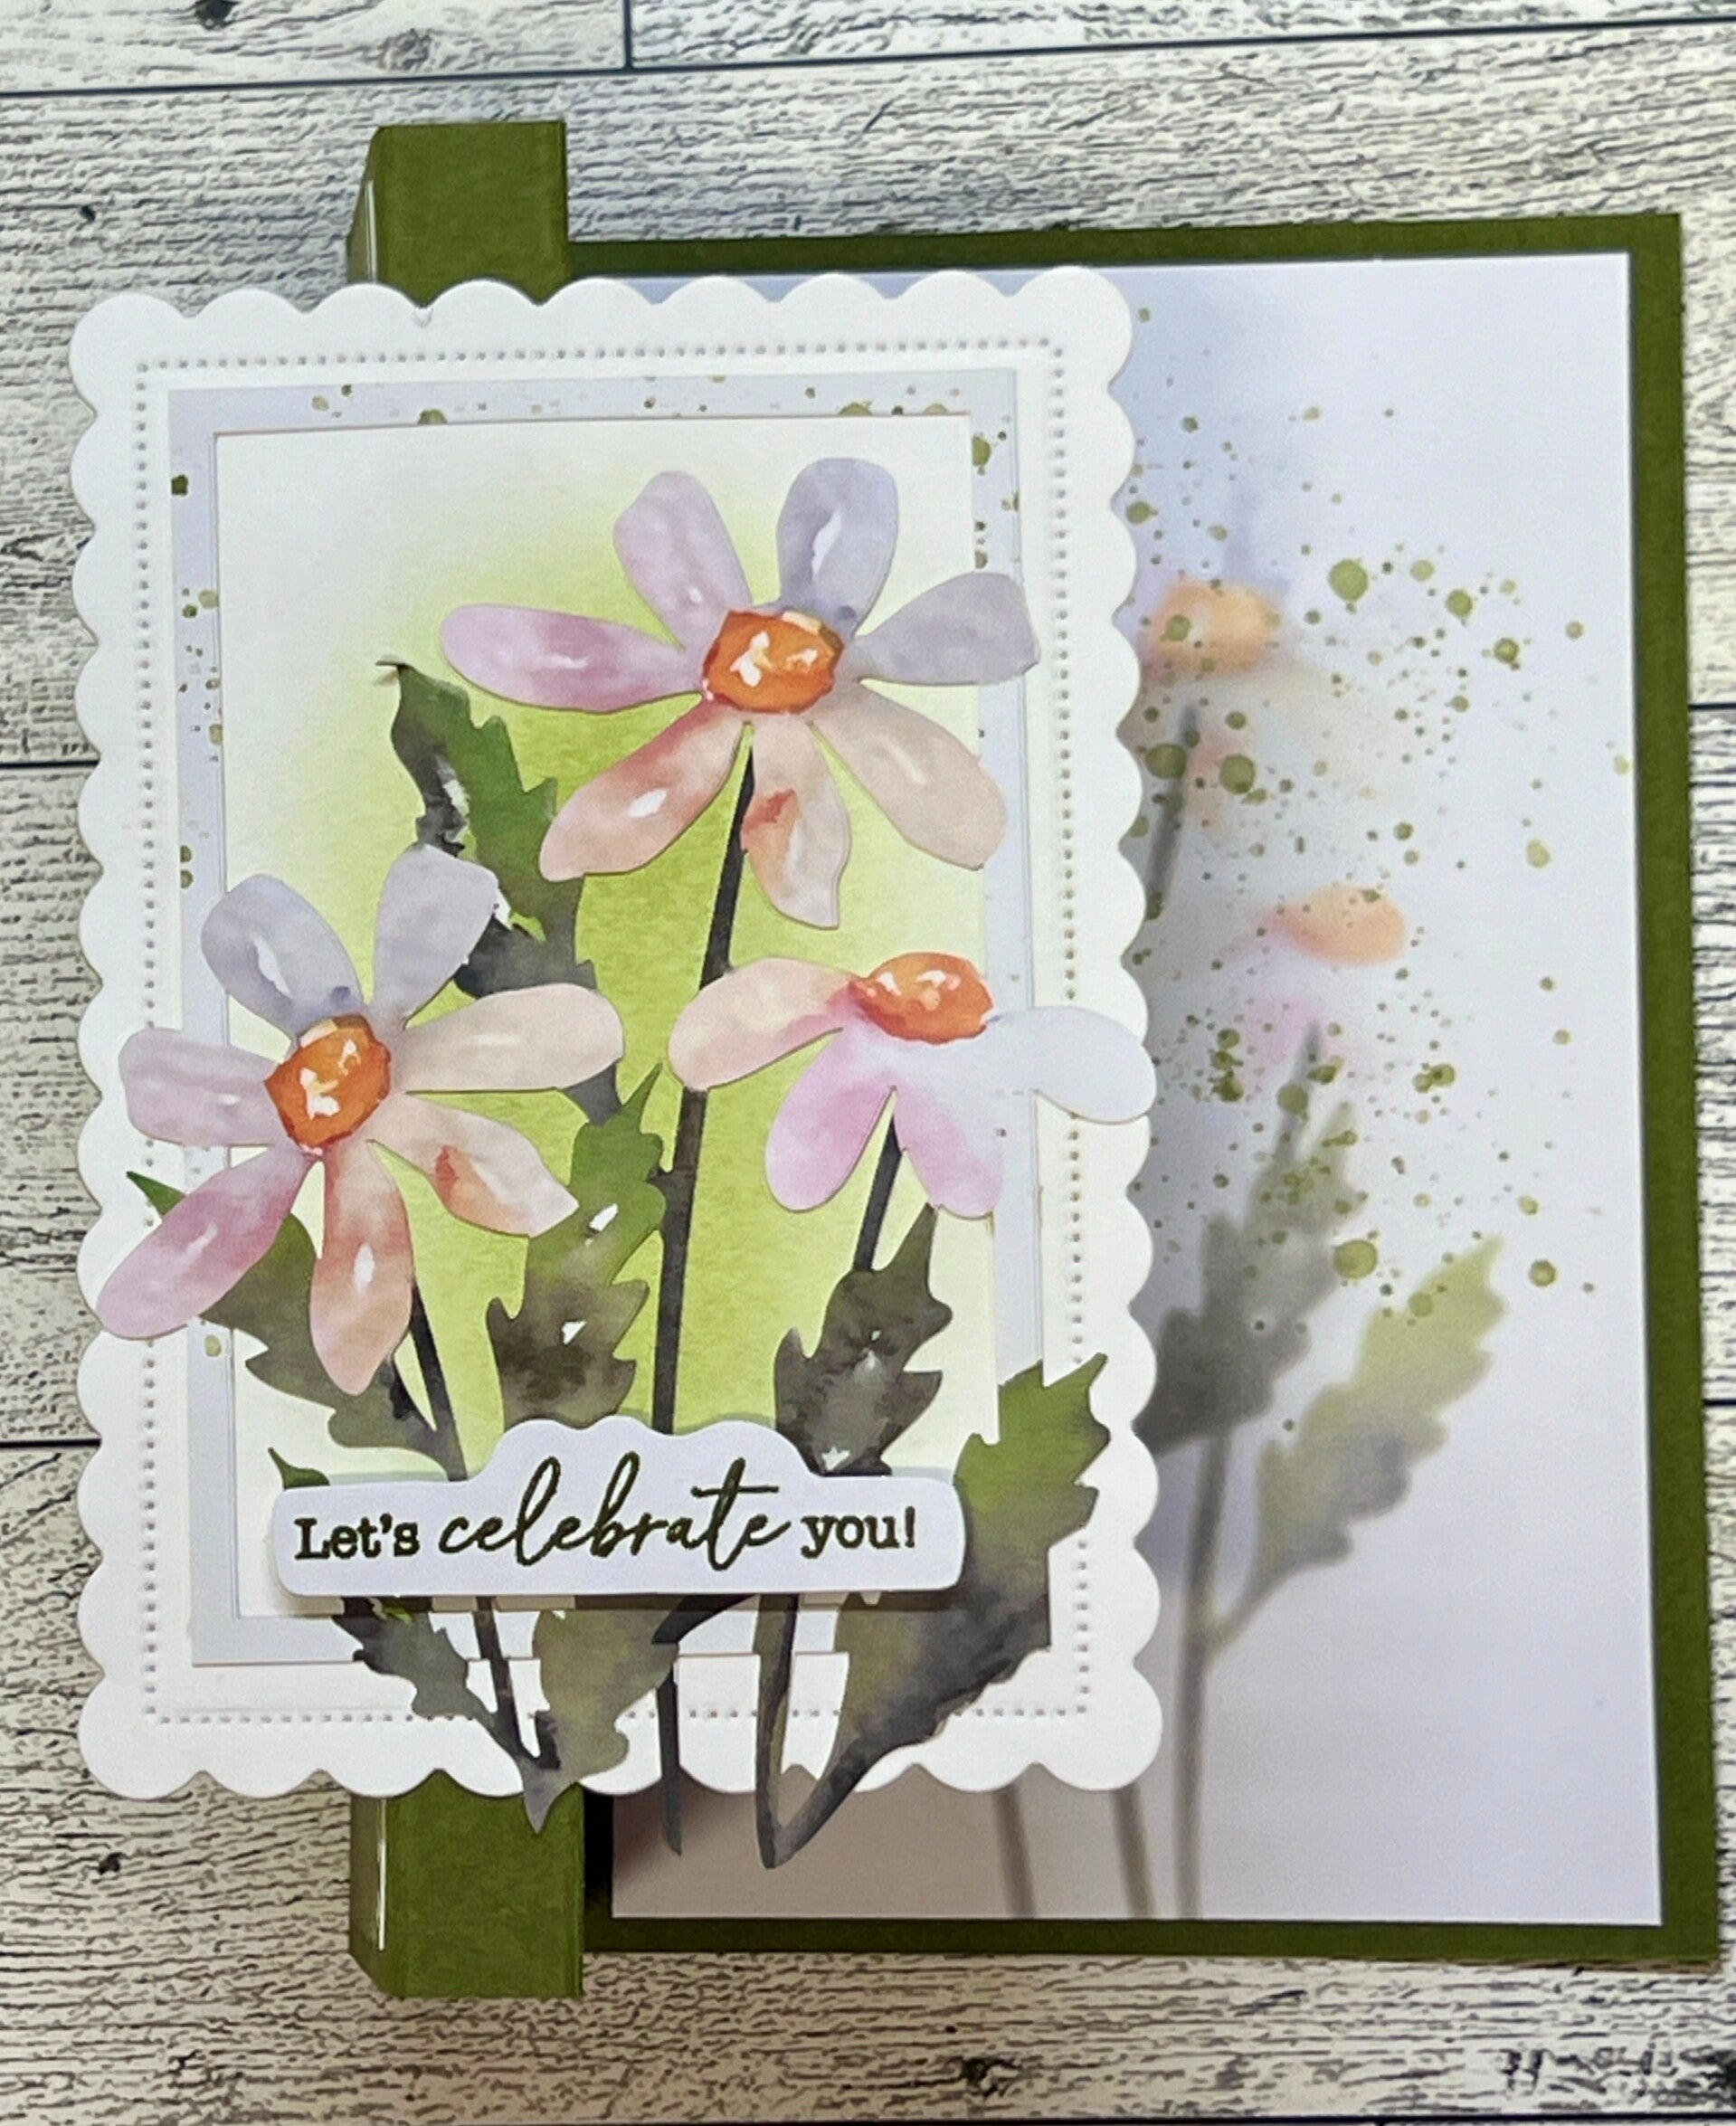
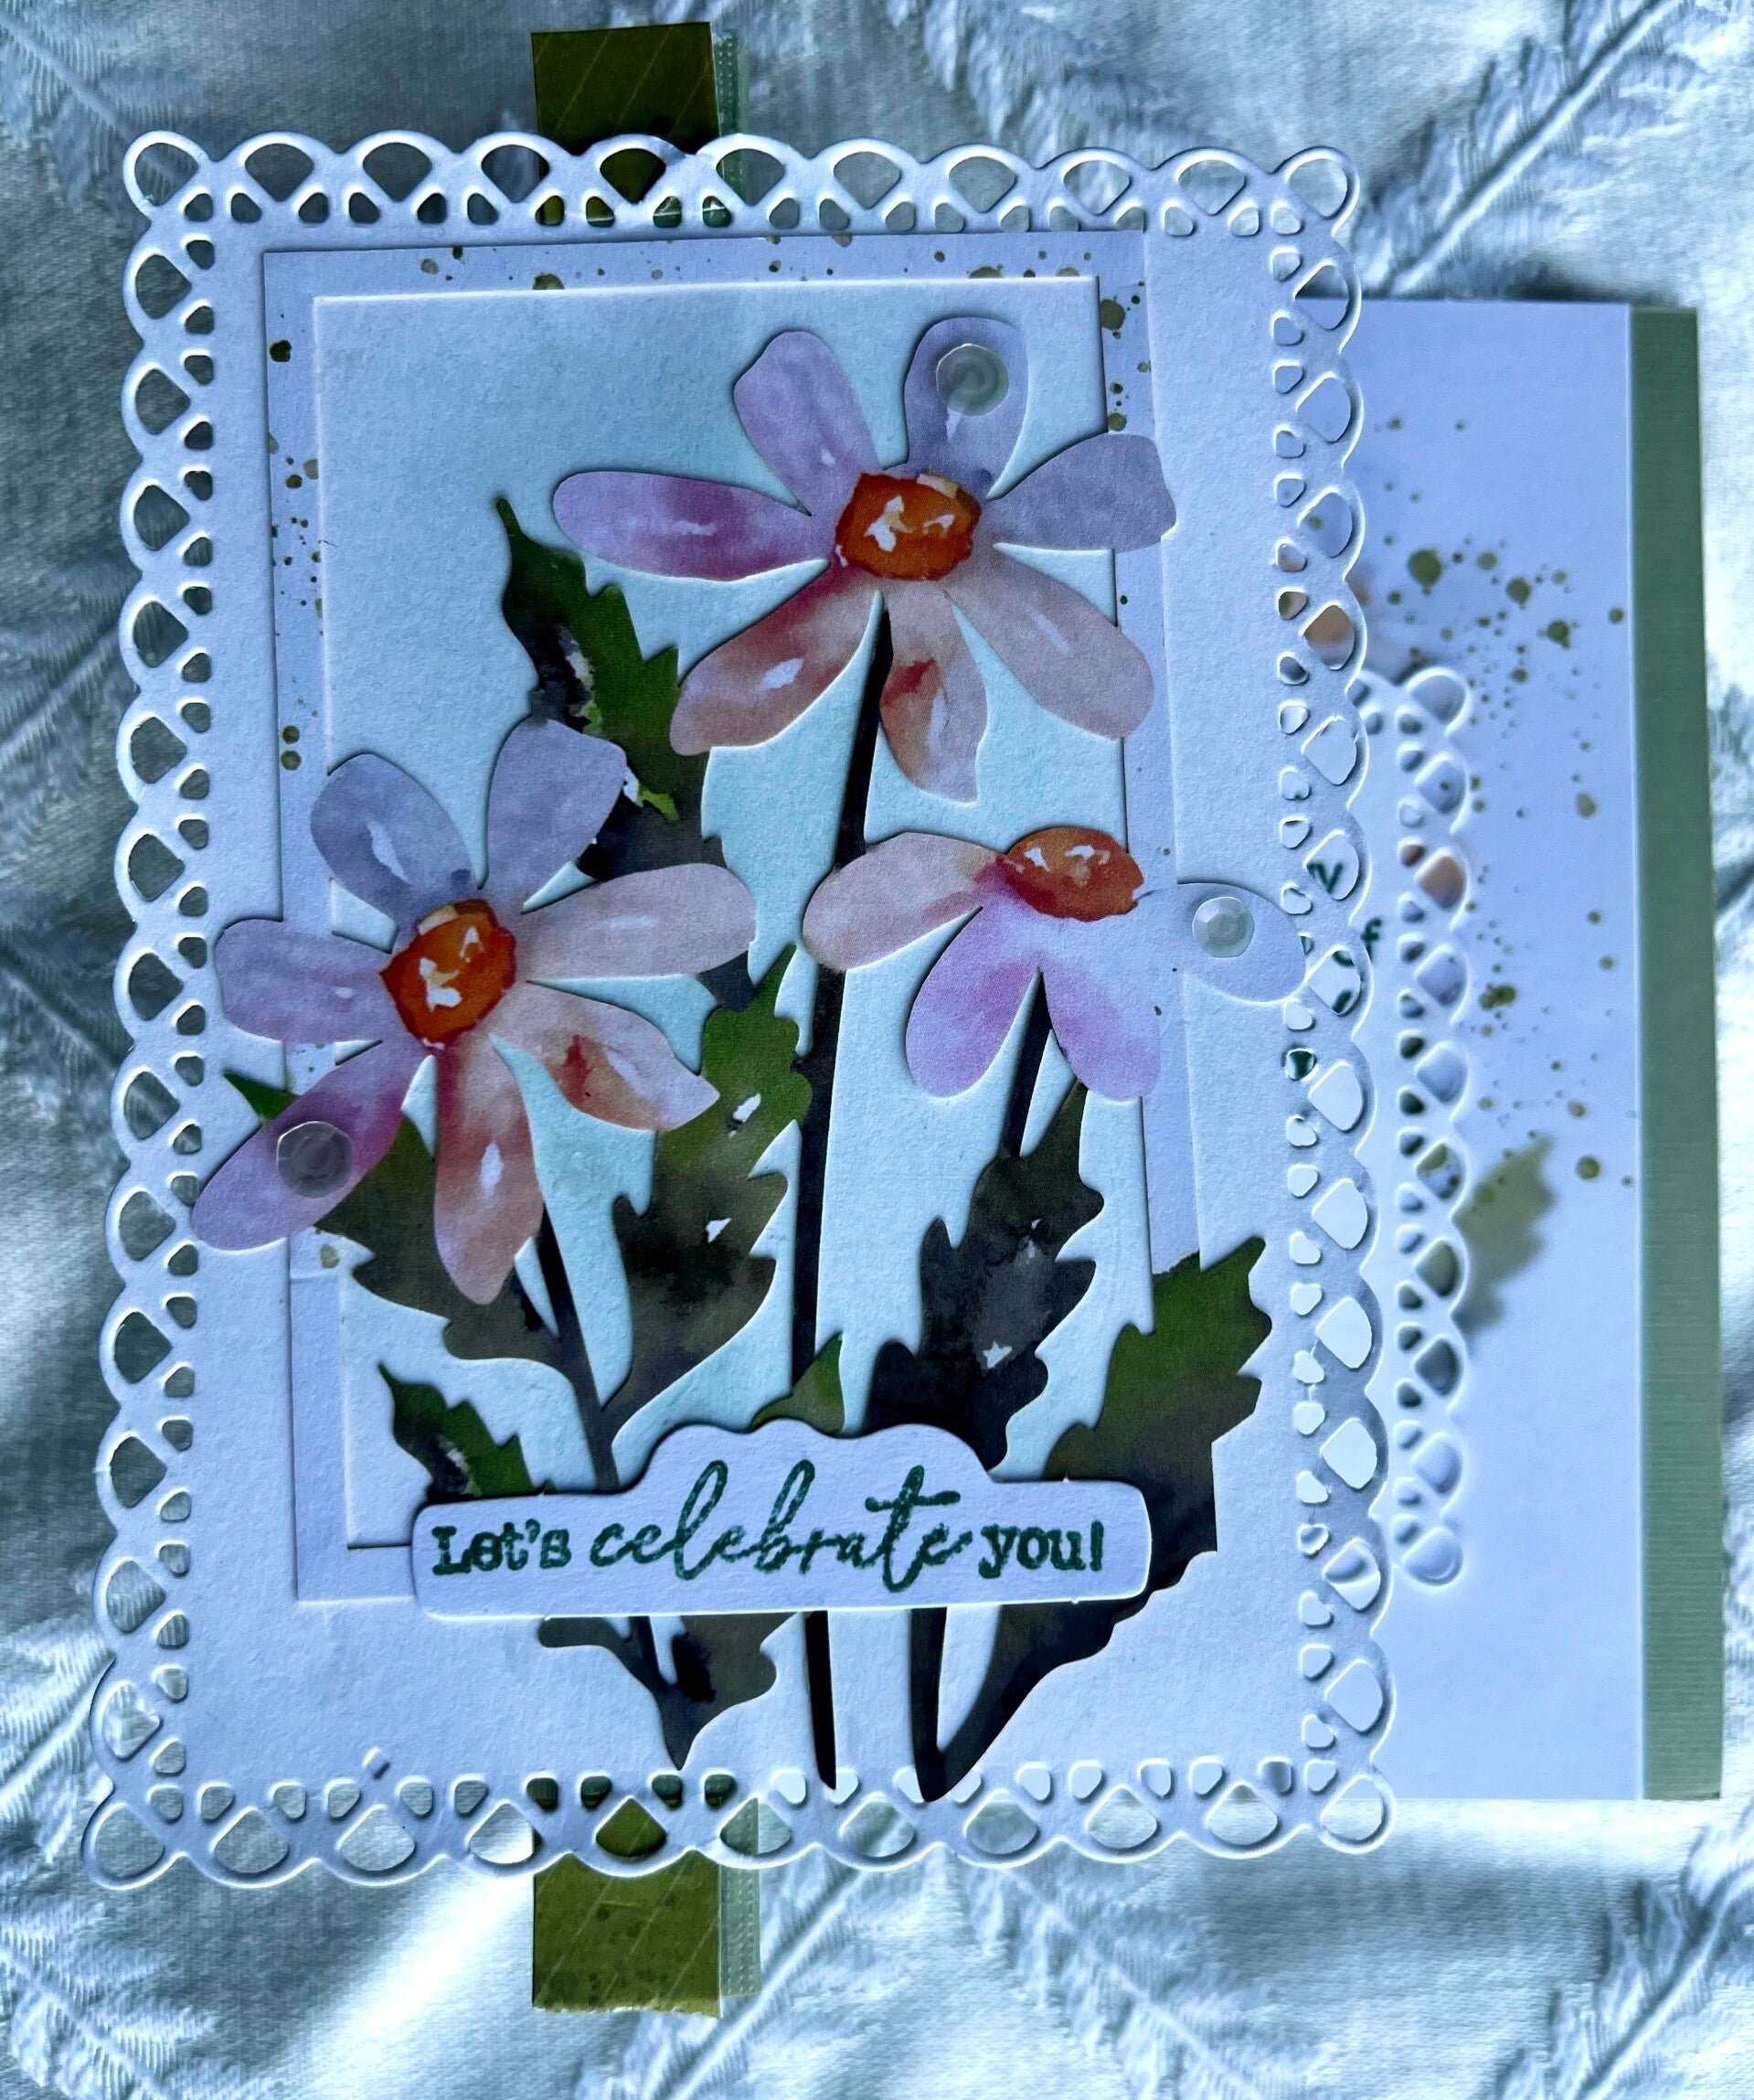
SundayJune 1, 2025 - Plans for tonight include making another fancy fold card, the Shutter Card. We also made this card in Card Class on May 20th. I watched a video by LV Handcrafted in a Card Making Summit. The video has expired and you would need to purchase the program if you want to watch it. Basic directions are below and I am sure you can find other similar card tutorials on YouTube. You can find card class photos here!
Shutter Card Cutting Directions
- Base/Cardstock - cut to 8.5" x 5.5" from heavy cardstock, score 2 1/8" from left and right edges with the long edge on top of your cutter
- Belly Band/Cardstock - cut to 9 3/4" x 1"
- Shutter Mechanism/Cardstock - cut to 2.5" x 6.75". (Once the flag section is cut, you will have two pieces 2.5" x 3 3/8")
- Mark the middle at 3 3/8". Using a square die (measured 2.5" on the diagonal), cut the two pieces apart from the middle, creating "flags" on each side. This helps keep the two sides exactly aligned for the shutter opening.
- If you do not have a die, cut the pieces in half at 3 3/8" and cut the ends to create the V flags in each. Score the side opposite the flag cut at 0.5".
- Designer Paper for card front - cut to 4" w x 5.25" h. Then cut in half to have two pieces 2" x 5.25". Make sure to keep the left and right sides arranged properly so the design will line up on the front of the card.
- Designer Paper for inside of card - cut to 3 1/8" w x 6" h. Cut a hole with a circle die, apx 1.75" in diameter and 1" down from the top of the paper in this designer paper. Score the top and bottom edges (the shorter edges) at 1/4". If you are going to make multiple cards, make a template from a scrap piece of paper and you can use it to set the die in the same place each time.
- Optional, you can use your circle dies to cut a border circle to outline the hole that you cut in your designer paper.
- Sentiment piece, can be whatever shape will work well with the card
Shutter Card Assembly Directions
- Stamp your sentiment inside the card first, using the template you made above (or your piece of designer paper) to align the sentiment so it wil show in the shutter opening when the card is opened.
- Adhere the designer paper to the left and right sides to the front of the card, aligning the designer paper to the center edge of the card (no card showing in the middle)
- Adhere the circle edge to the circle for the designer paper in the middle of the card.
- With the edges folded towards the middle of the card, align your shutter mechanism with your sentiment, and adhere the folded edge of the mechanism to the left side of your card, with the bottom of the flap sitting against the card fold. Do the same on the right hand side.
- Adhere the designer piece for the inside of the card on just the 1/4" flaps, top and bottom only, folding them under and adhering just that small section to the base of the card. The shutter mechanism will move back and forth under this piece. Make sure to have one piece of the shutter mechanism on top of the other piece so they slide properly.
- With the card closed, fold the belly band around the card, not too loose nor to tightly, with the ends overlapping in the front and adhere the belly band together.
- Add a sentiment or other design element on the belly band to cover where the ends meet.
We also used this same design to make cards for our Monthly Card Class. It looks difficult, but with careful measuring and scoring it can turn out really nice!


Sunday May 18, 2025 - Tonight we made two super cute fancy fold cards. First was the Puzzle Slider Card by Brenda Quintana. Video and directions can be found here! Next we worked on a great Panoramic Accordian Fancy Fold Card by Tami White. Video and directions for this card can be found here! We also made the Accordian card in Card Class on May 20th.
Card 1 - Puzzle Slider Card Cutting Directions
- Base/Cardstock - Cut to 4.25" x 9.5", Score on the long edge at 1" from the left and right edges. Flip the card over (like a pancake) and score at 2" from the left and right edges. Crease the folds so that they fold inward towards the front. (See first photo below)
- Front Pieces/Cardstock - Cut to 5.5" x 4.25", then cut in half lengthwise at 2 1/8". Then cut the top piece at 3.25", and the bottom piece at 2.25", giving you two pieces that are 3.25" x 2 1/8", and two pieces that are 2.25" x 2 1/8"
- Inside White Card - Cut to 5.25" x 4"
- Front Pieces/Designer Paper - Look at your design to see what you want on your card front. Before cutting your length to 5", make sure to cut off two strips 0.5" x 5.25" to decorate the top and bottom of your inside white piece. Then cut to 5" w x 3.75" h. Take this cut piece and cut it in half lengthwise at 1 7/8". With the two pieces you now have, cut the section that will be on the top at 3" (from the left), and the bottom section at 2" (from the left), giving you two pieces that are 3" x 1 7/8", and two pieces that are 2" x 1 7/8". See picture of card below for clarity. Arrange them in the pattern they will be once the card is assembled.
Card 1 - Puzzle Slider Assembly Directions
- Complete any stamping prior to assembly.
- Adhere your .5" x 5.25" pieces to the top and bottom of the white card, then adhere the white card into the center section of the card.
- Adhere your designer paper to each of the panels (see cards below for examples). Make sure that the cardstock pieces back together to form a 5.5" x 4.25" rectangle before you glue your pieces on (the 2.25" x 2 1/8" pieces are easy to accidently turn around).
- Add adhesive (glue works best) to the left strip of your card, the align the left top panel with the top and left sides of the card and adhere.
- Next add the left bottom panel, aligning it to the left side of the card, and the panel above.
- Complete the right side in the same manner, the smaller panel first, then the larger panel.
Please refer to the video instructions for more clairty in assembling. Have fun!!!
Card 2 - Panoramic Accordian Fancy Fold Cutting Directions
- Base/Cardstock - Cut to 5.5" x 11", Score on the long edge at 1.75", 3.5", 5.25", and 7" and burnish your folds.
- Designer Paper - to cover two small sections and one large section as shown in some of the examples below:
- Start with a piece 5 3/8" tall x 7 1/8" wide. With the long edge of the paper at the top of your trimmer, cut 1 5/8", 1 5/8", leaving a 3 7/8" section remaining.
- If you want to cover more panels with the designer paper, add 1 5/8" length to the measurement above (ie: covering three of the small panels, you would need to start with 7 1/8" + 1 5/8" = 8 6/8 or 7 3/4". You would then cut three sections 1 5/8", still leaving a 3 7/8 section at the end.
- If you would rather cut the large piece first, then turn your paper so you are looking at the design upside down before cutting. The largest section goes on the right side of the card.
- White Cardstock - cut two pieces 1 5/8" x 5 3/8".
Card 2 - Panoramic Accordian Fancy Fold Assembly Directions
- Complete any stamping prior to assembly.
- Lay out your designer paper with the white pieces to make sure you know what to adhere where. Adhere paper to card front.
- Add a sentiment as desired.
- You can add embelishments, but remember this card is very thick and my require package postage if it gets thicker than 1/4". Either use flat embellishments or hand deliver your card.
Please refer to the video instructions for more clairty in assembling. Have fun!!!


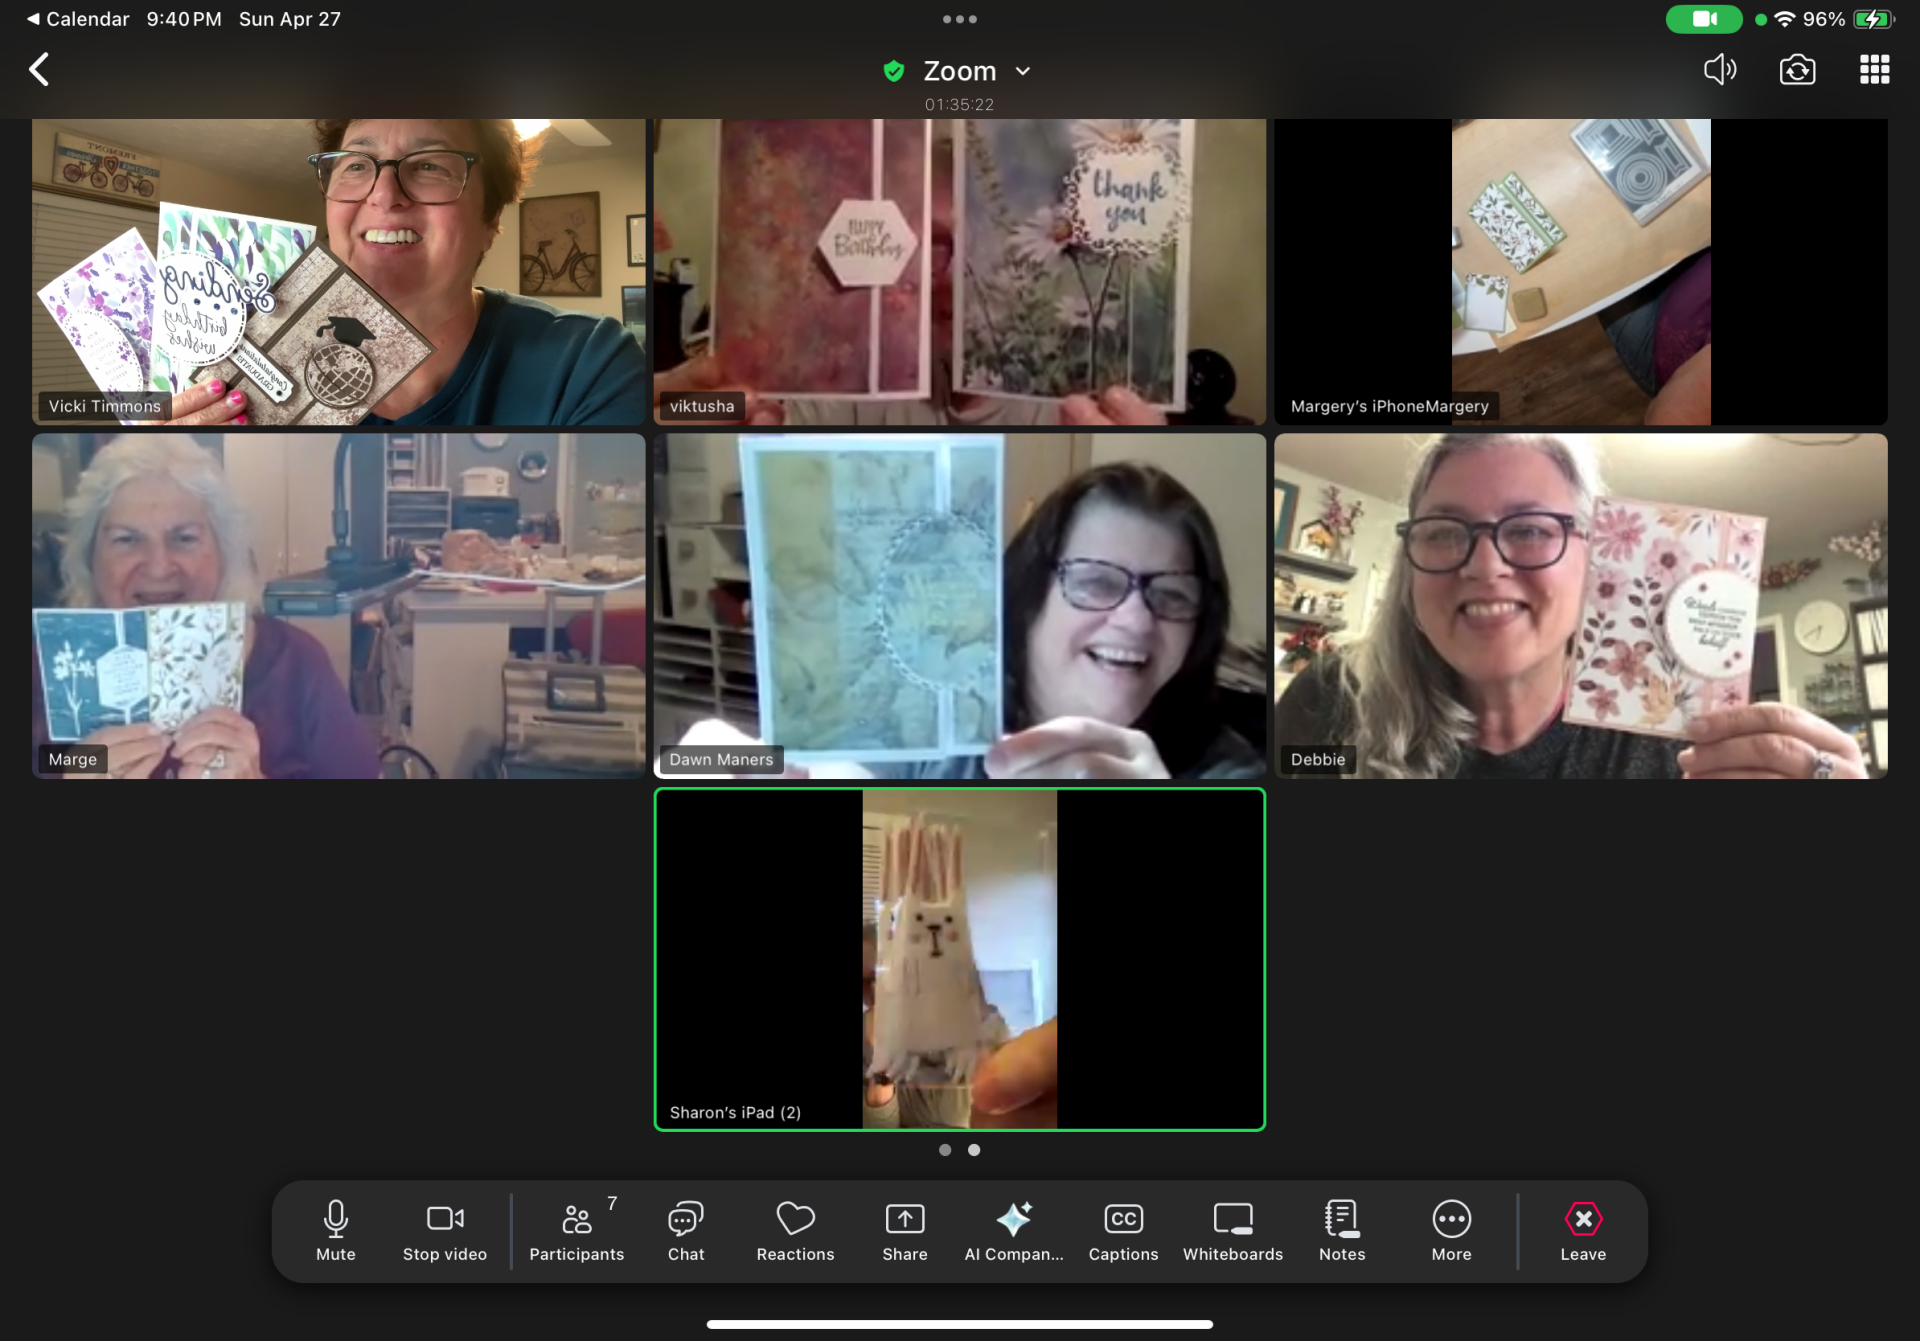
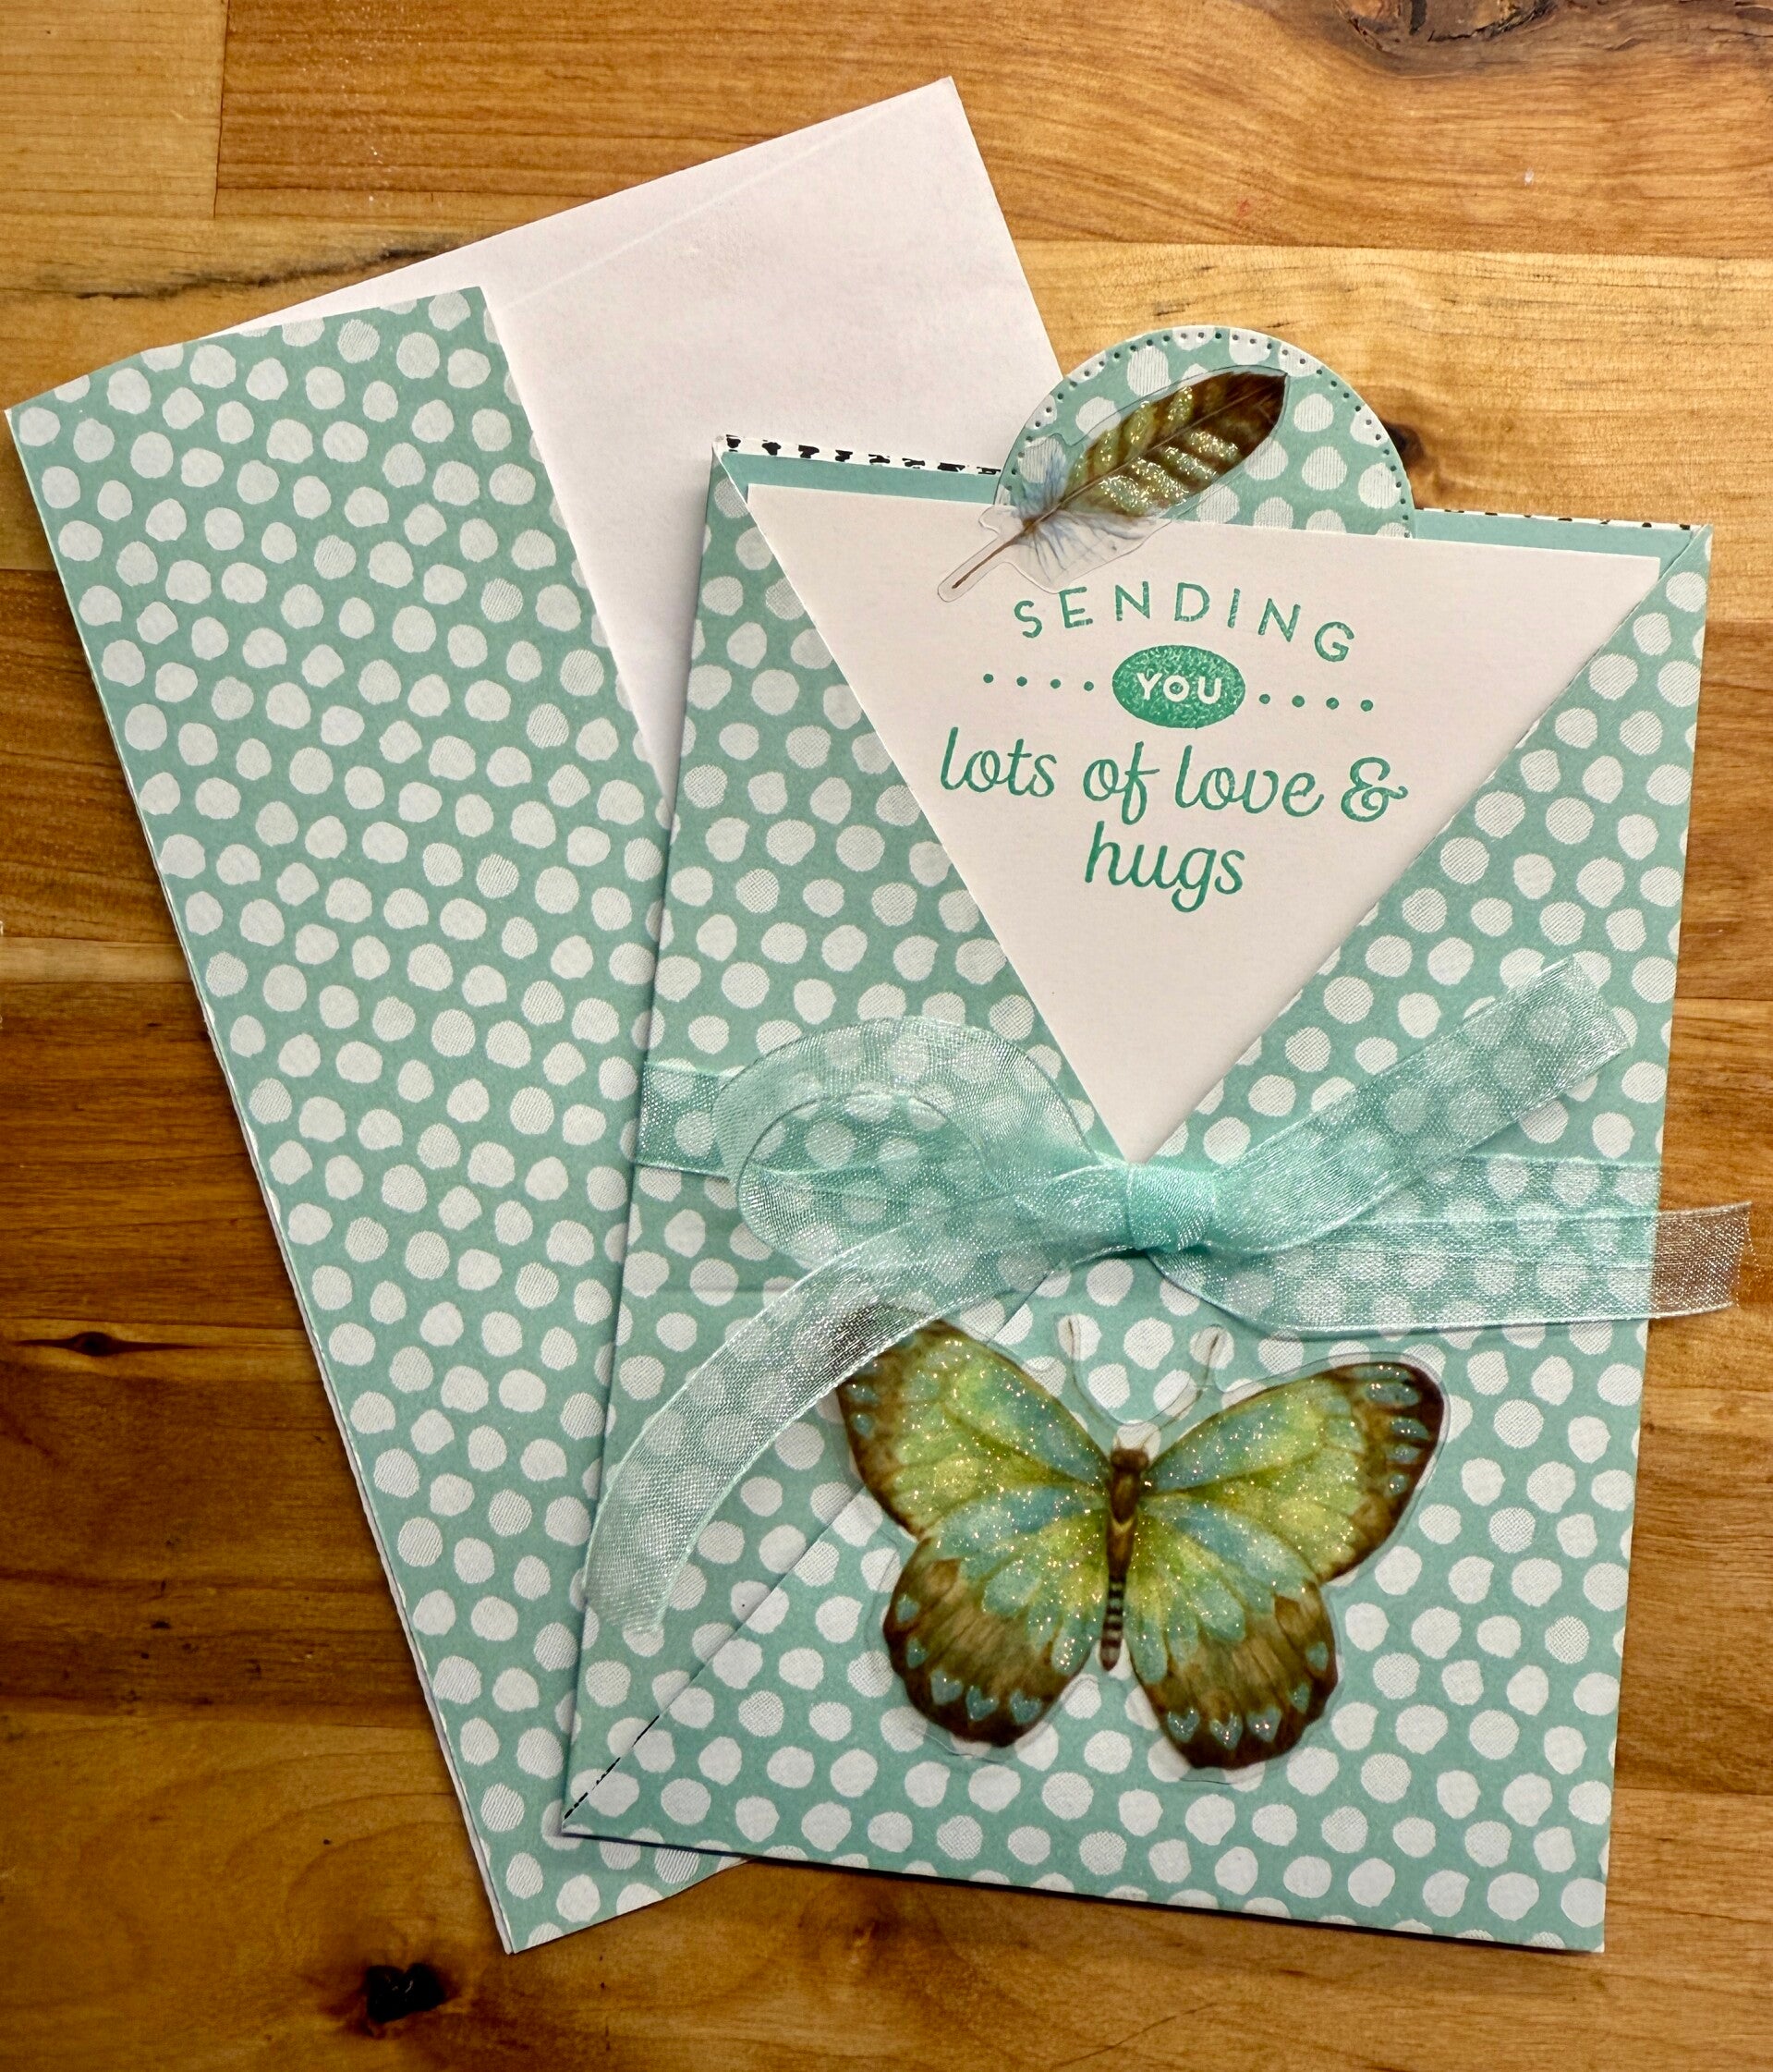
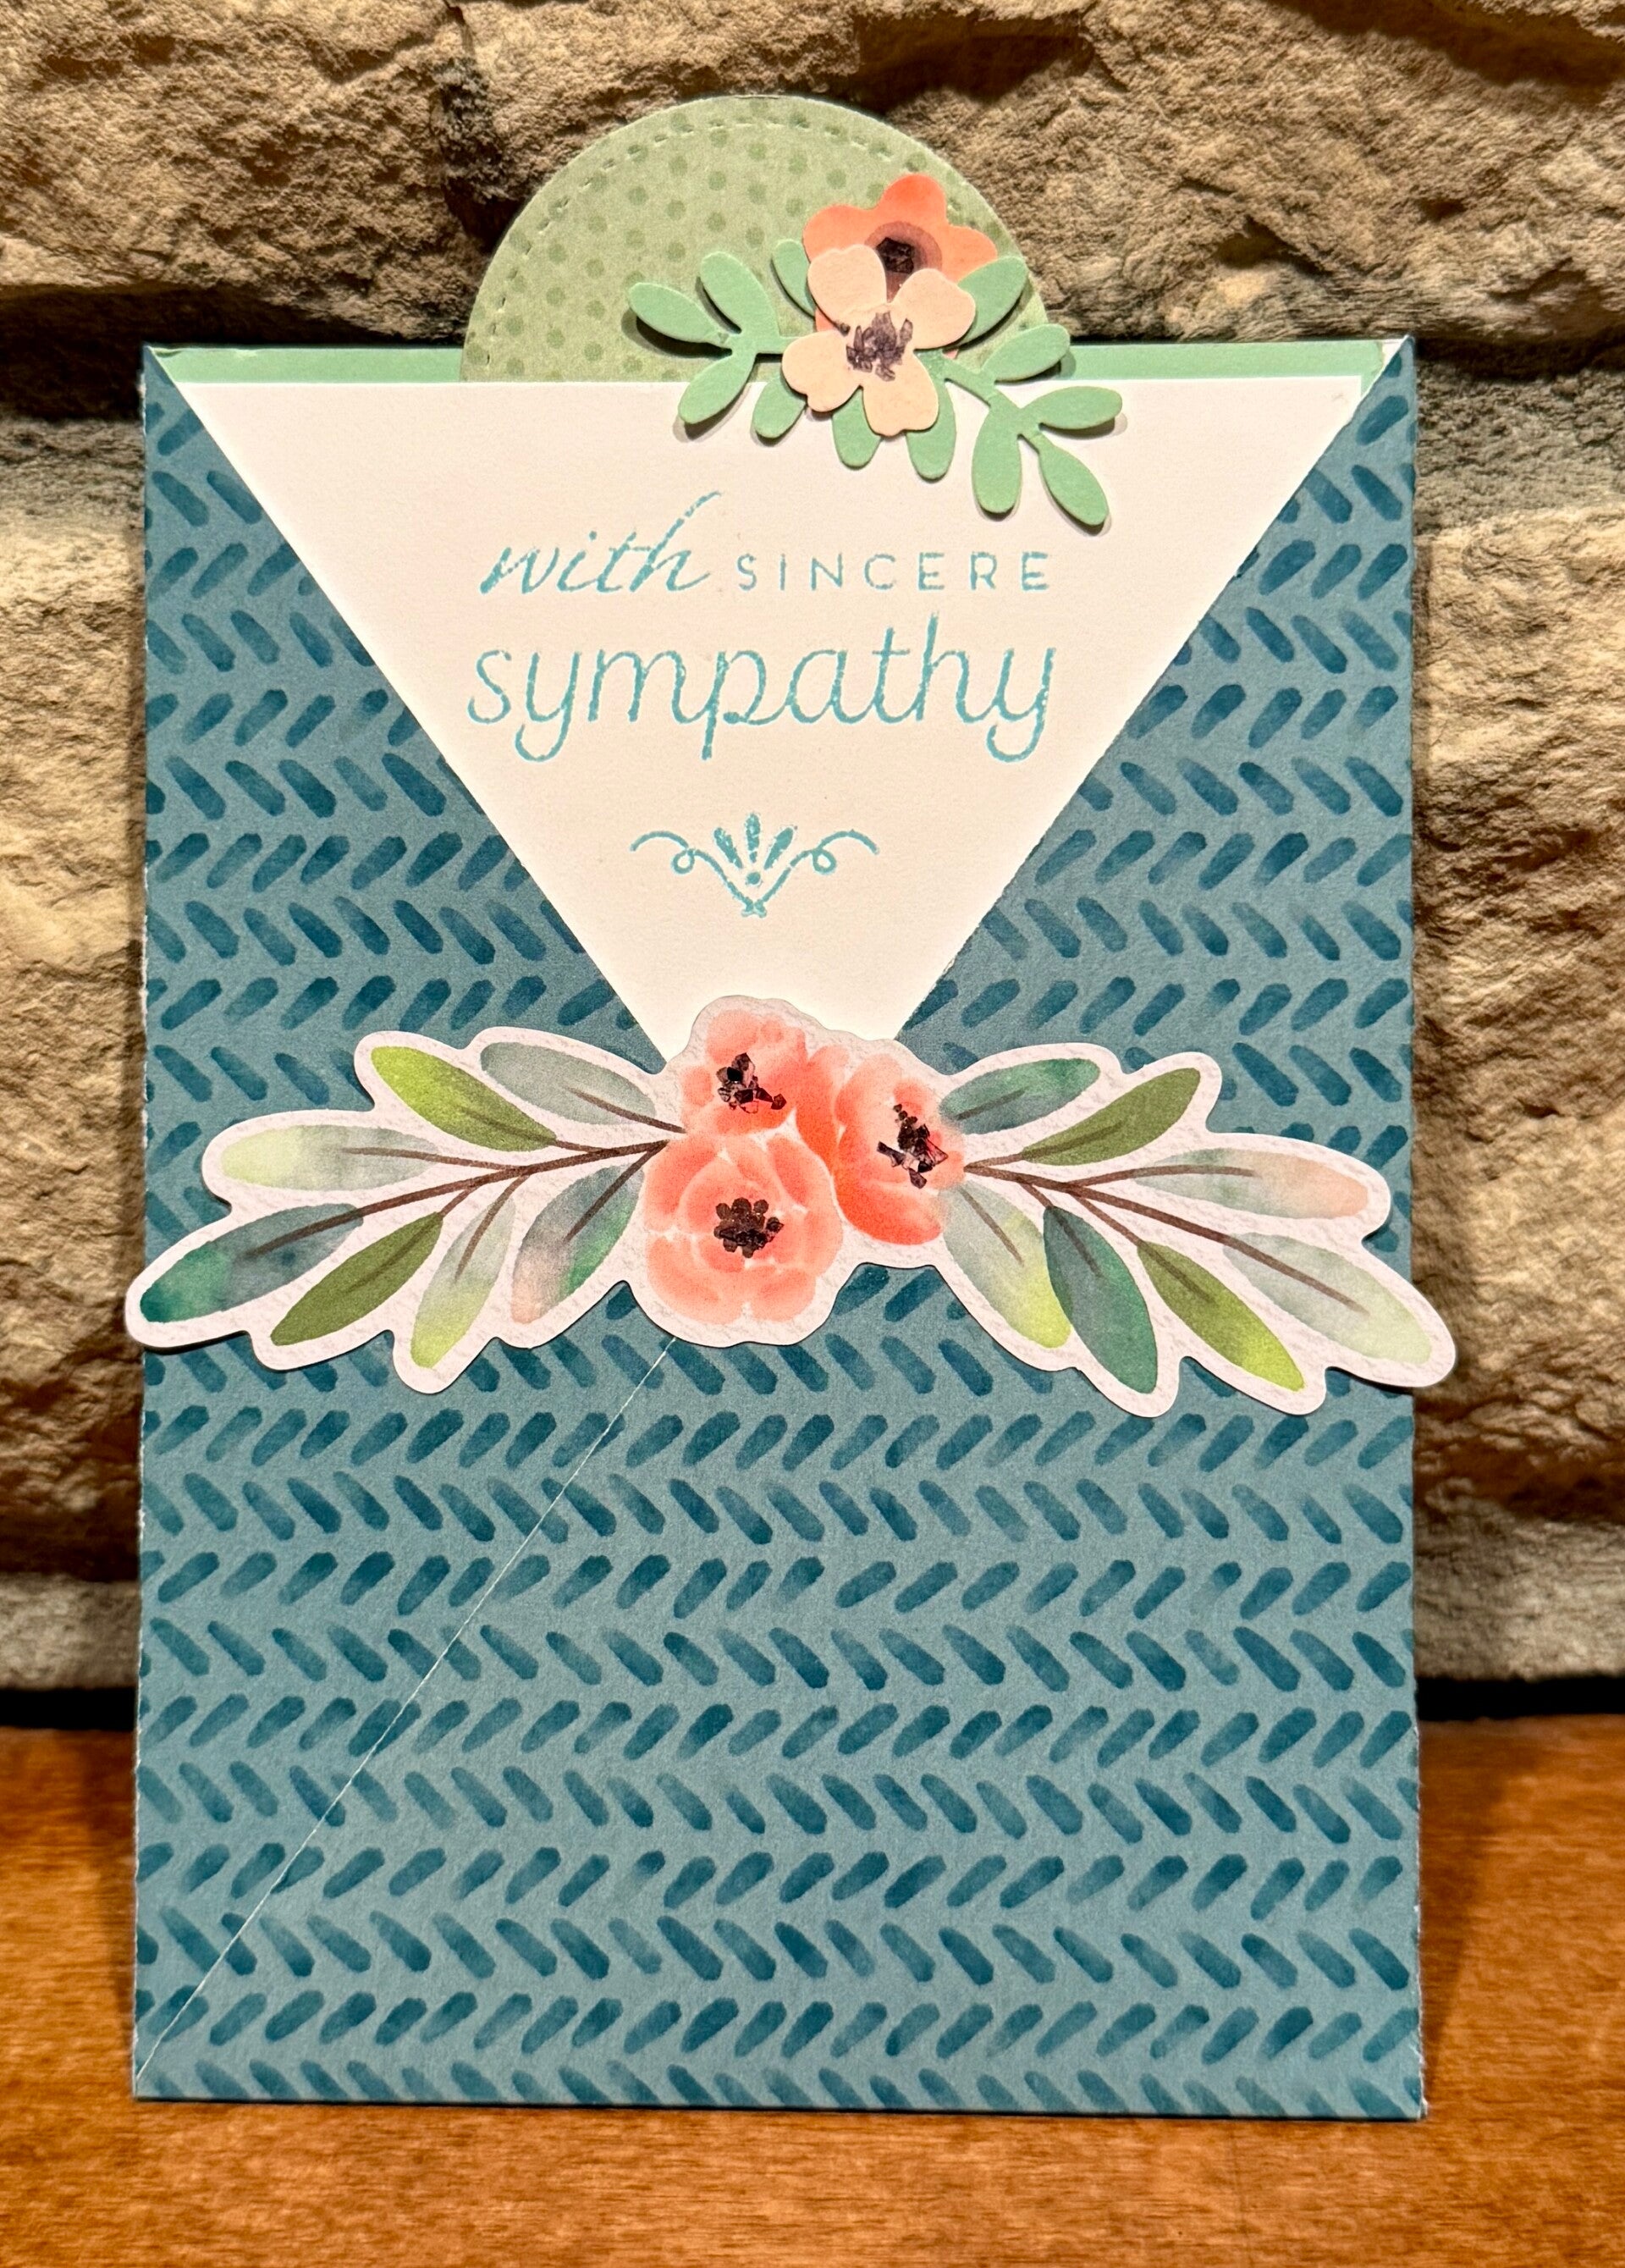
Sunday April 27, 2025 - Tonight we made these super simple right edge sentiment cards. Margery found them on Pinterest but I have not been able to find the link she used. If I do, I will give credit and point the link to the creator...
Right Edge Card Cutting Directions
- Base - Cut to 5.5" x 7.5", score at 3.25" and 6.5"
- Designer Paper - cut one piece 5.25" h x 3.75" wide, then cut 0.75" off right edge
- Sentiment piece, can be whatever shape will work well with the card
Right Edge Card Assembly Directions
- The 1" score section of the base will be on the right side of the card
- Fold the larger left side section to the front.
- Cover the front left section of the card with the 5.25" x 3" designer paper
- Cover the inside 1" section on the right of the card with the 0.75" designer paper - both pieces of designer paper will be visible from the front of the card
- Adhere your stamped sentiment piece to the 1" section on the right of the card. The sentiment piece will hold the card closed. To open the card you would fold back along the right score line with the sentiment piece.
We also used this same design to make cards for our Monthly Card Class. Such a fun and easy card to make!


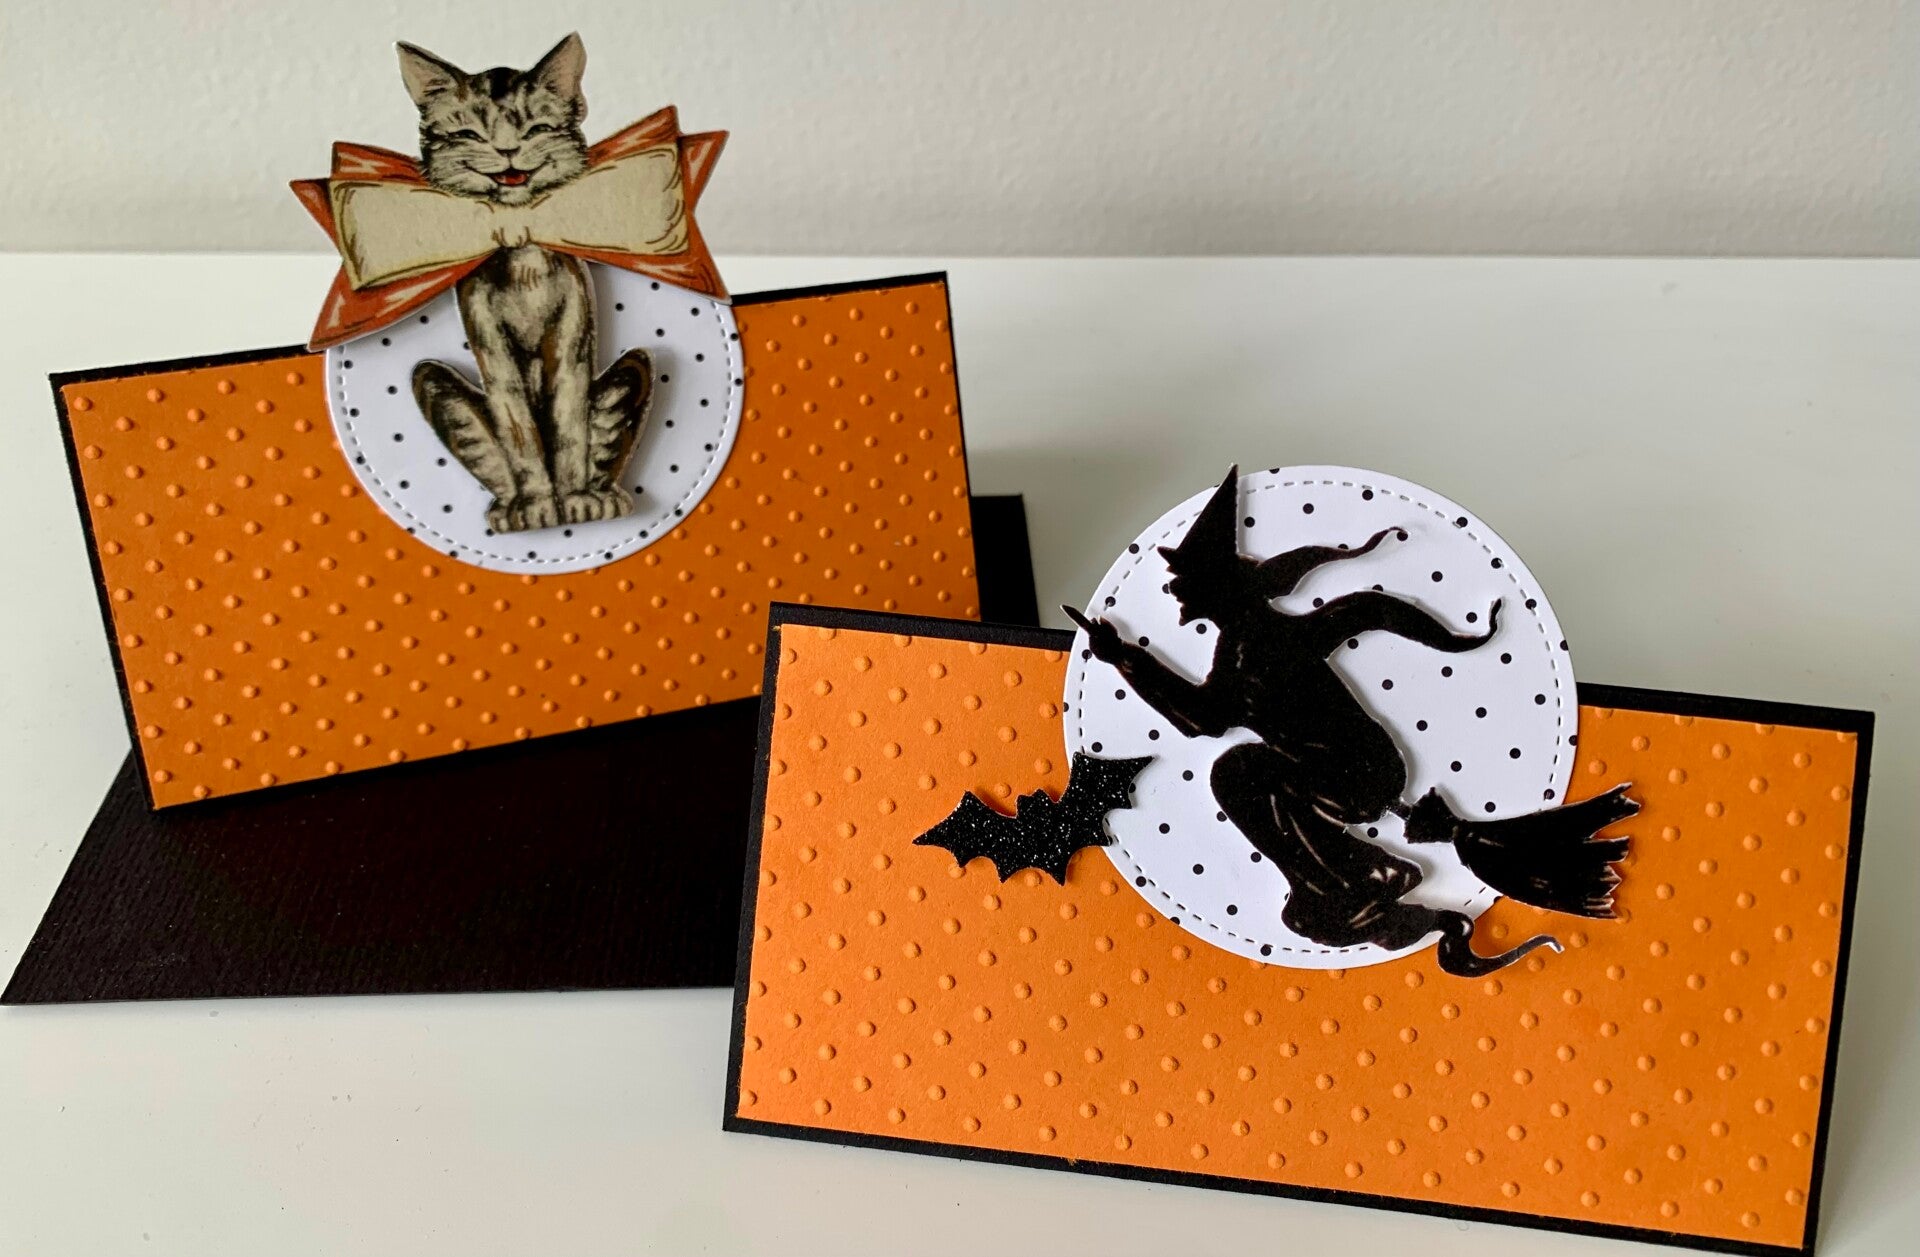
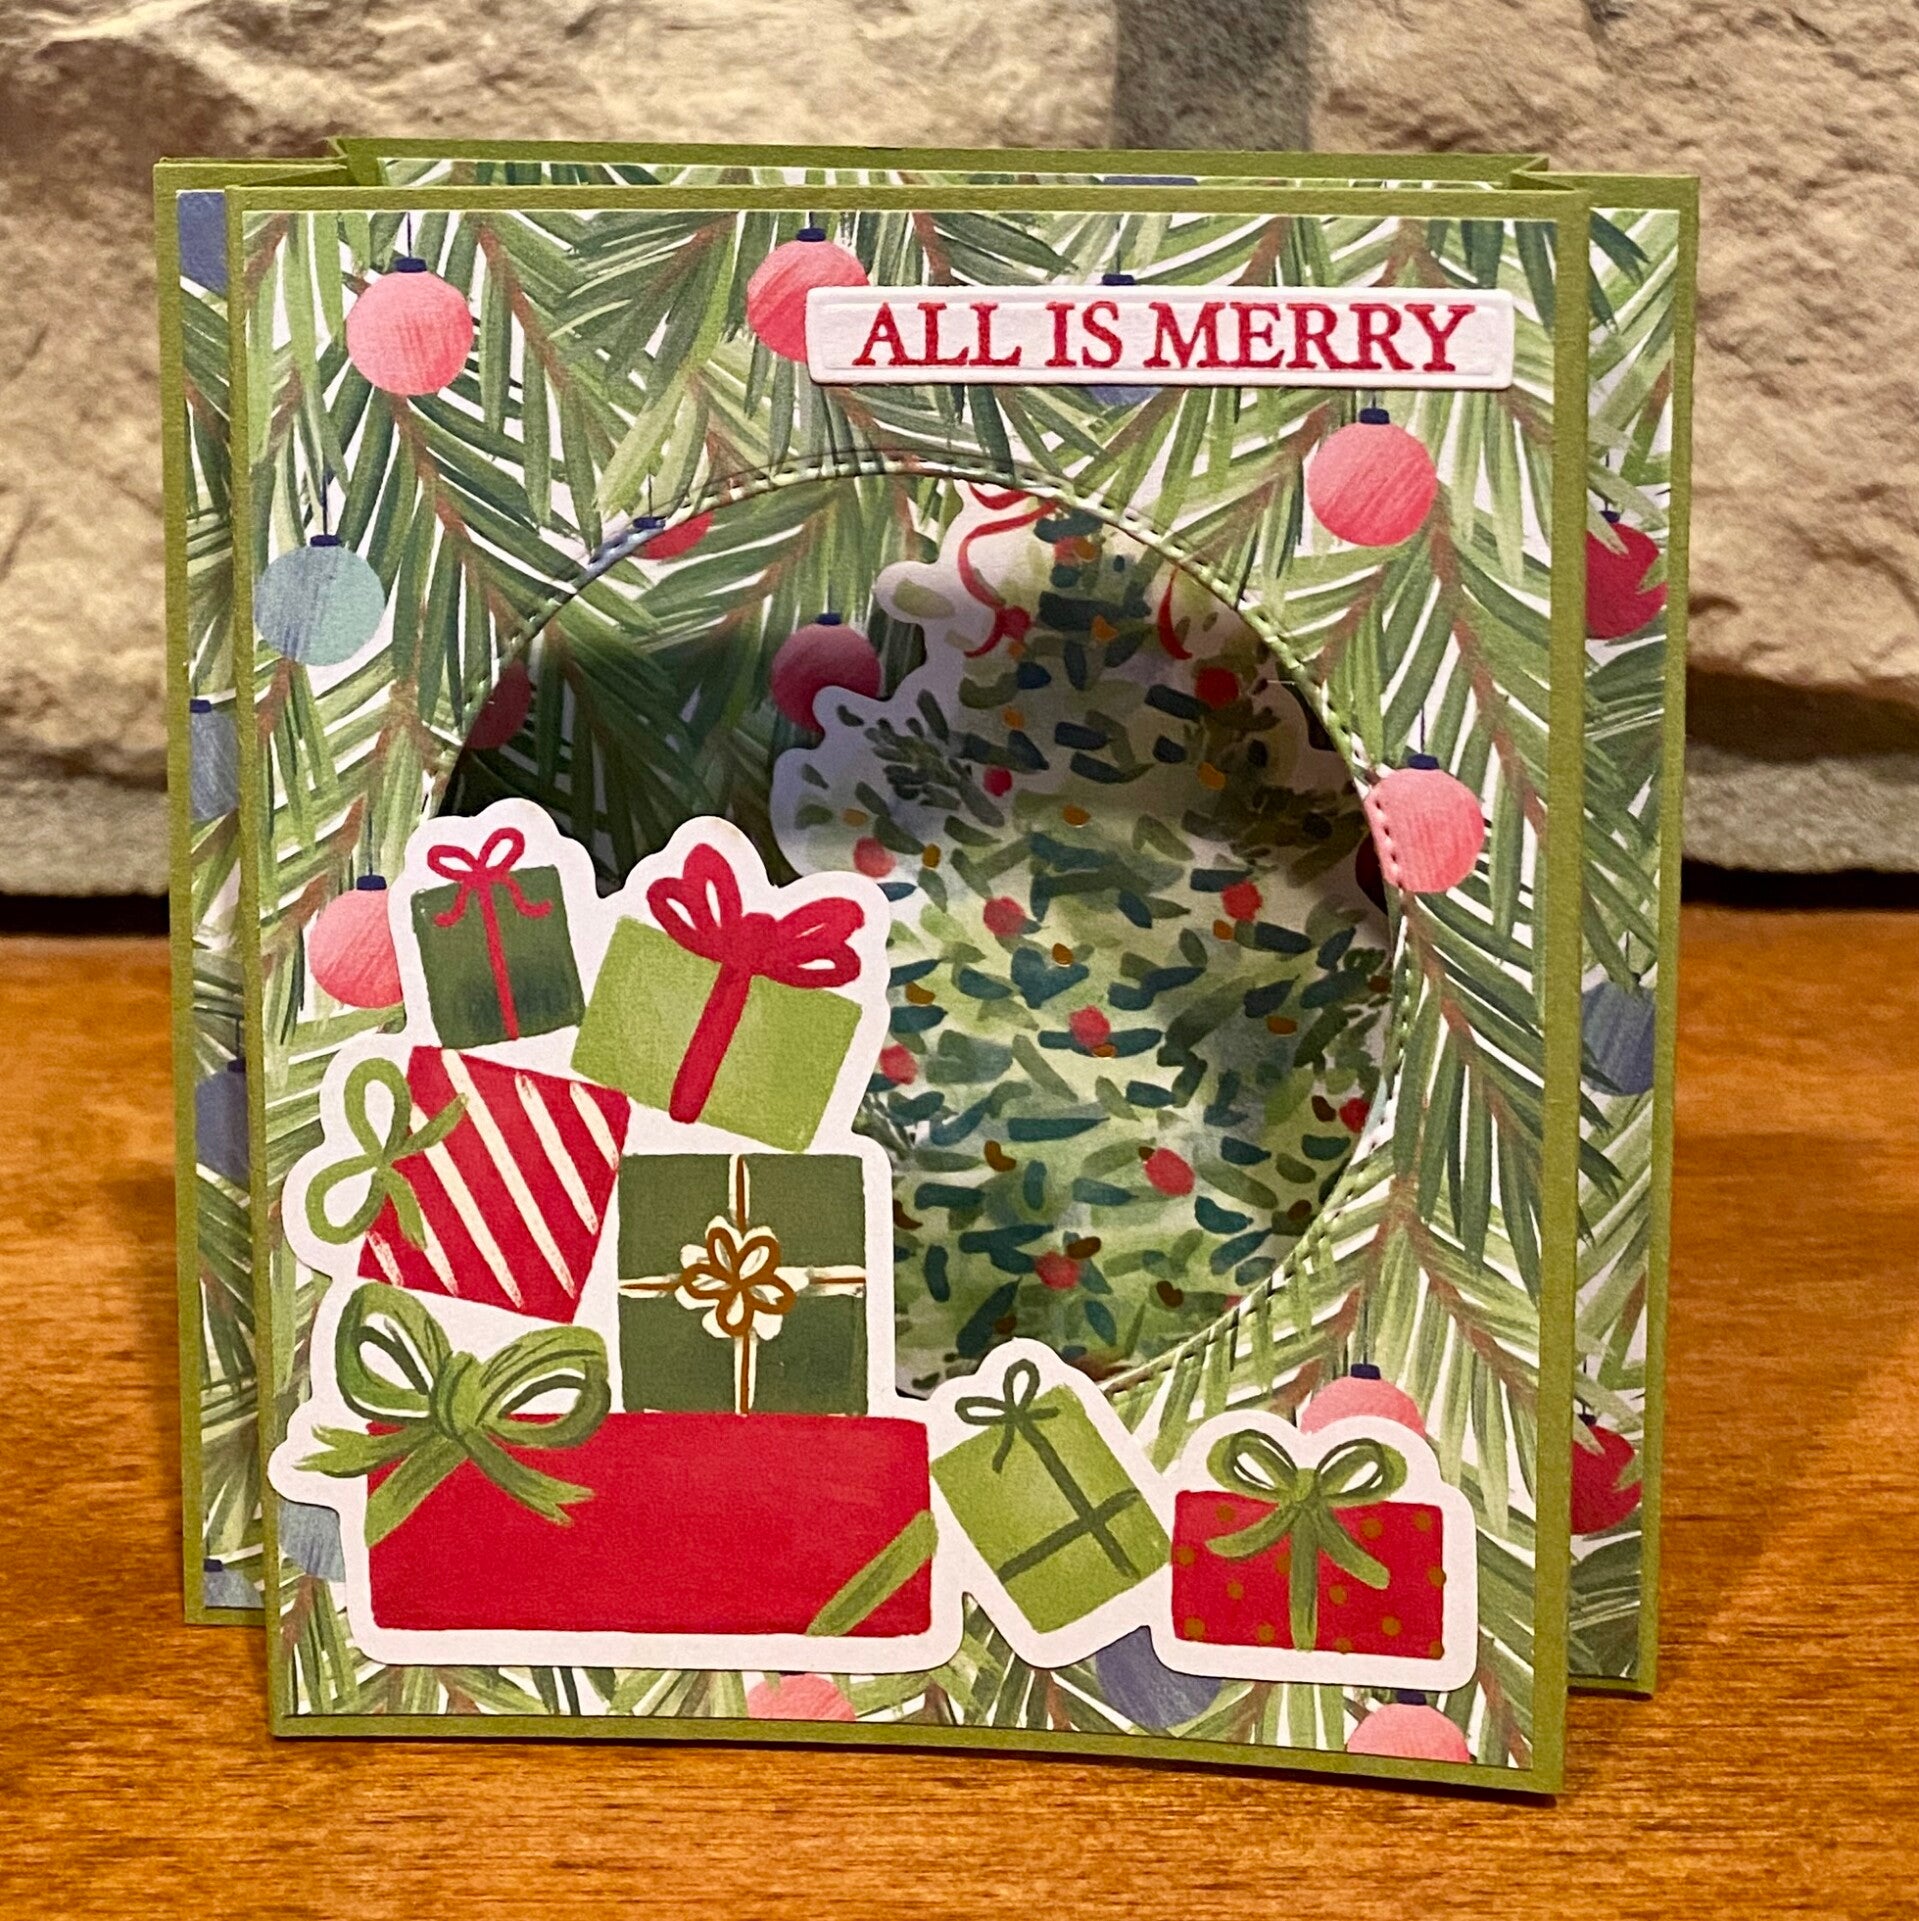
Sunday March 23, 2025 - Tonight we made these sweet circle frame cards from Stamping with Erin. Directions start about 15 minutes into the video.
(Hint: It is easier to glue your front piece of designer paper, and your inside piece of white cardstock, before cutting the circle from your base...)
Cutting Directions for Horizontal Card
- Card Base 5 1/4 x 5 1/4 - scored in half at 2 5/8
- Circles (if using designer paper also cut one from card stock for stiffness)
- Larger Circle ~ 3"
- Smaller Circle ~ 2.5"
- Designer Paper for front 5 1/8 x 2 1/2
- White for Inside (if using colored cardstock) 5 1/8 x 2 1/2
Cutting Directions for Vertical Card
- Card Base 4 1/4 x 8 1/2 - scored in half at 4 1/4
- Circles (if using designer paper also cut one from card stock for stiffness)
- Larger Circle ~ 3"
- Smaller Circle ~ 2.5"
- Designer Paper for front 4 x 4
- White for Inside (if using colored cardstock)4 x 4


Sunday March 2, 9, and 16 2025 - Vicki, Margery, Debbie, and Sherry were off on a cruise for two weeks. Then we just chatted and crafted to catch up! So nice to see everyone after being gone a few weeks!
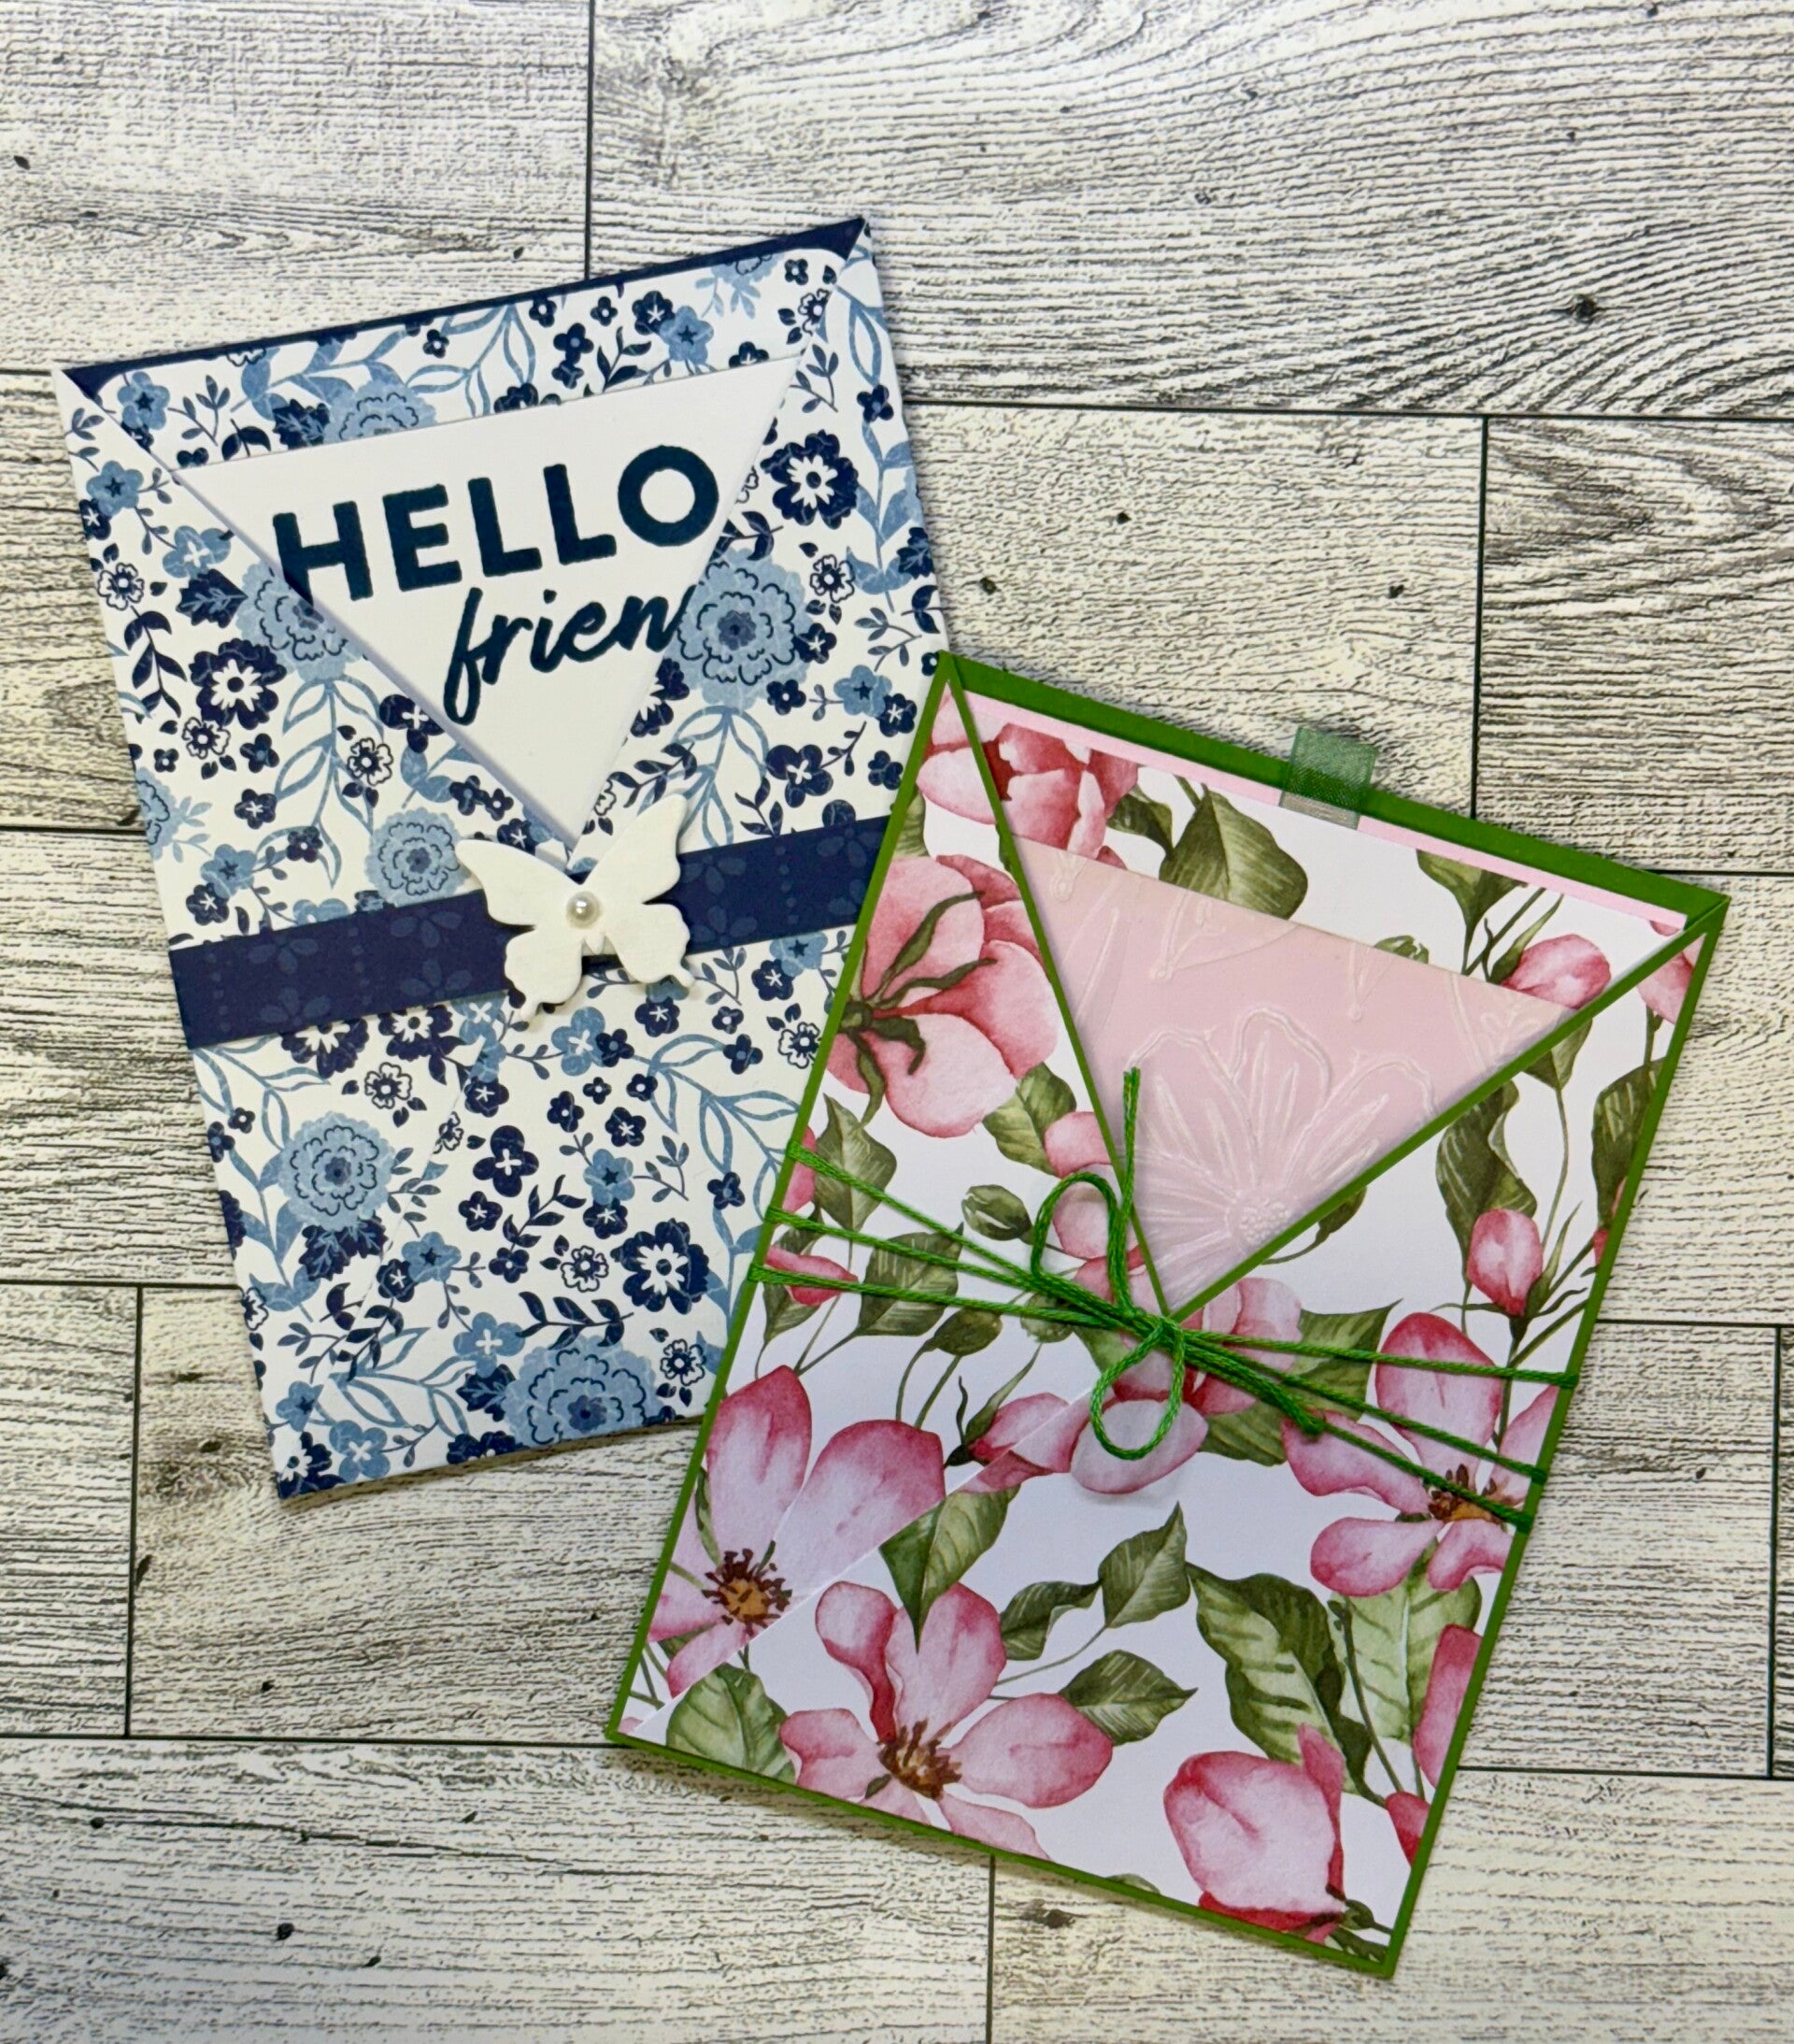
Sunday February 23, 2025 - Tonight Vicki showed how to make this corner fold card that shows off both sides of your designer paper. Find the original directions here by Connie Stewart at Simply Simple Stamping. So cute!
Cardstock (Colored):
- 4.25" x 5.5"
- 2.5" x 2.5"
- 2.75" x 4.25"
- 3" x 4.5" (optional, coordinating paper to add another layer to front flap)
Cardstock (White):
- 3.5" x 4.75"
- Additional for sentiment
Designer Paper (double sided):
- 6.75" x 8" (portrait orientation)
- 2.25" x 2.25"
- 2.5" x 4" (portrait orientation)
- Additional if you fussy cut designes from designer paper
Scoring Directions for largest piece of Designer Paper (with inside facing up)
- Score 2.75" from left edge
- Score 2.75" from top edge
- Fold left corner over to align the score marks on the folded edge with the score marks below - see video directions, starting at 10:50. It makes sense when you see it, but it is difficult to tell you how to do it!


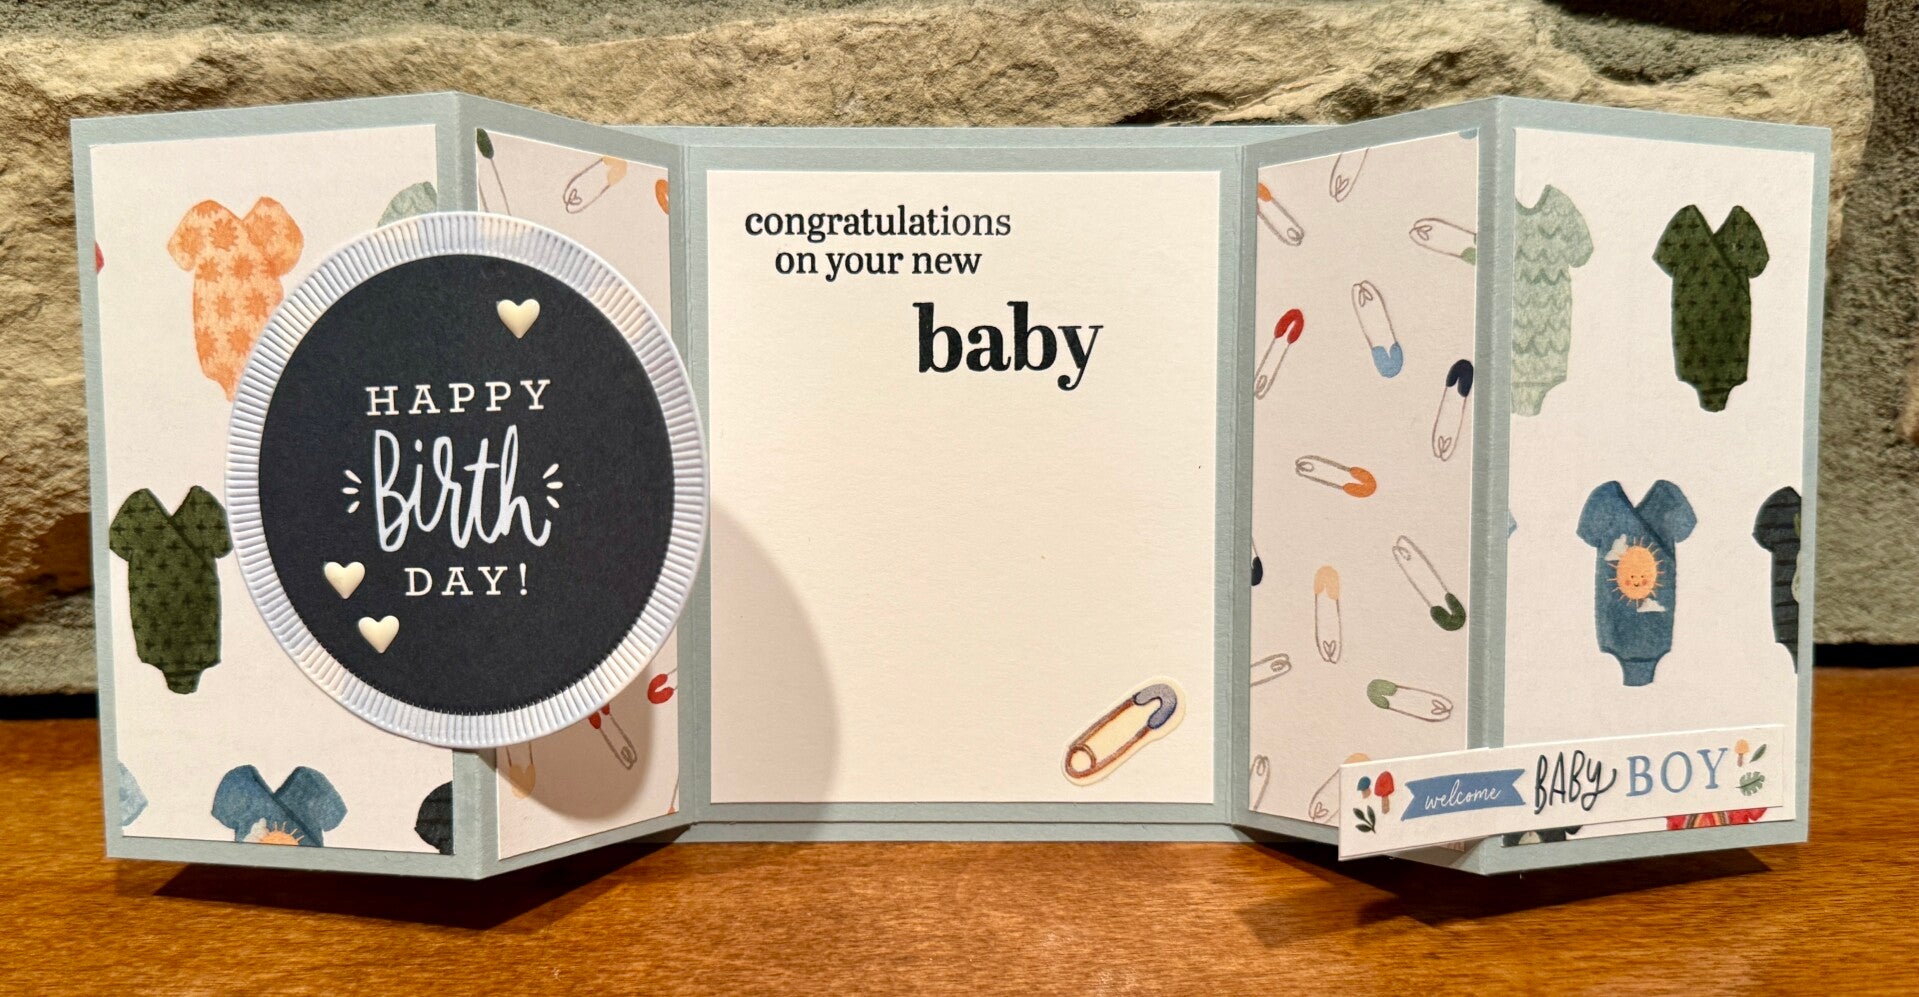
Sunday February 9, 2025 - Tonight Margery showed us how to make this super cute Pull Out card by Lynn Dunn.


Sunday January 26, 2025 - Tonight we worked on a super easy and cute folio (makes 2!) by May May Made It Crafts. Click here for the tutorial: Work Smarter Not Harder...Two for One Projects ROCK!
Supplies needed (this will make 2 books) are:
- Magnetic Closures
- Base: you will need 5 pieces of 8.50" x 11" cardstock, plus a scrap measuring 8.50" x 1.50"
- 2 Pieces - score on the 11" side at 2.25", 8.25", & 9.25" - then cut in half on the 8.5" side (at 4.25")
- 3 Pieces - score on the 11" side at 5.50" - then cut in half on the 8.5" side (at 4.25")
- Scrap Piece (8.50" x 1.50") - score on the 1.50" side at 0.75", fold and burnish then cut in half at 4.25"
- Mats: you will need approximately 3 pieces of 12" x 12" patterned paper (depending on number of patterns you want to use) - measurements are width x height - these are the quantities for one book, double the amount for the two books you cut above:
- 4 - Front and Back Cover (outside and inside) - 5.75" x 4"
- 11 - Inside Mats - 5.25" x 4"
- 1 - Pocket Page Top - 3" x 4"
- 1 - Pocket Page (on pocket) - 2" x 4"
- 4 - Spines - 0.75" x 4"
- 2 - Closures - 1.50" x 4"

Sunday January 19, 2025 - Craft & Chat to catch up on projects!
Sunday January 12, 2025 - Tonight we made Spinner Cards! Everyone made super cute cards!


Sunday January 5, 2025 - Happy New Year! We had a great time exchanging crafting storage and organizing ideas. Then we made this super easy and cute 6 x 6 one sheet wonder from Christina's Creative Corner. Each 6 x 6 makes two cards. Some of us followed directions, others got inspired for other great creations, including using scraps! And Debbie just cleaned her craft room...


November - December 2024 - With everyone so busy with the holidays we got together and did a chat and craft a few times
Sunday November 3, 2024 - Vicki taught us the accordian mini album. Using directions from Einat Kessler (see video directions here) we made these beautiful mini albums. There are a lot of pages. The foundation and designer paper covering can be completed in just a couple of hours.


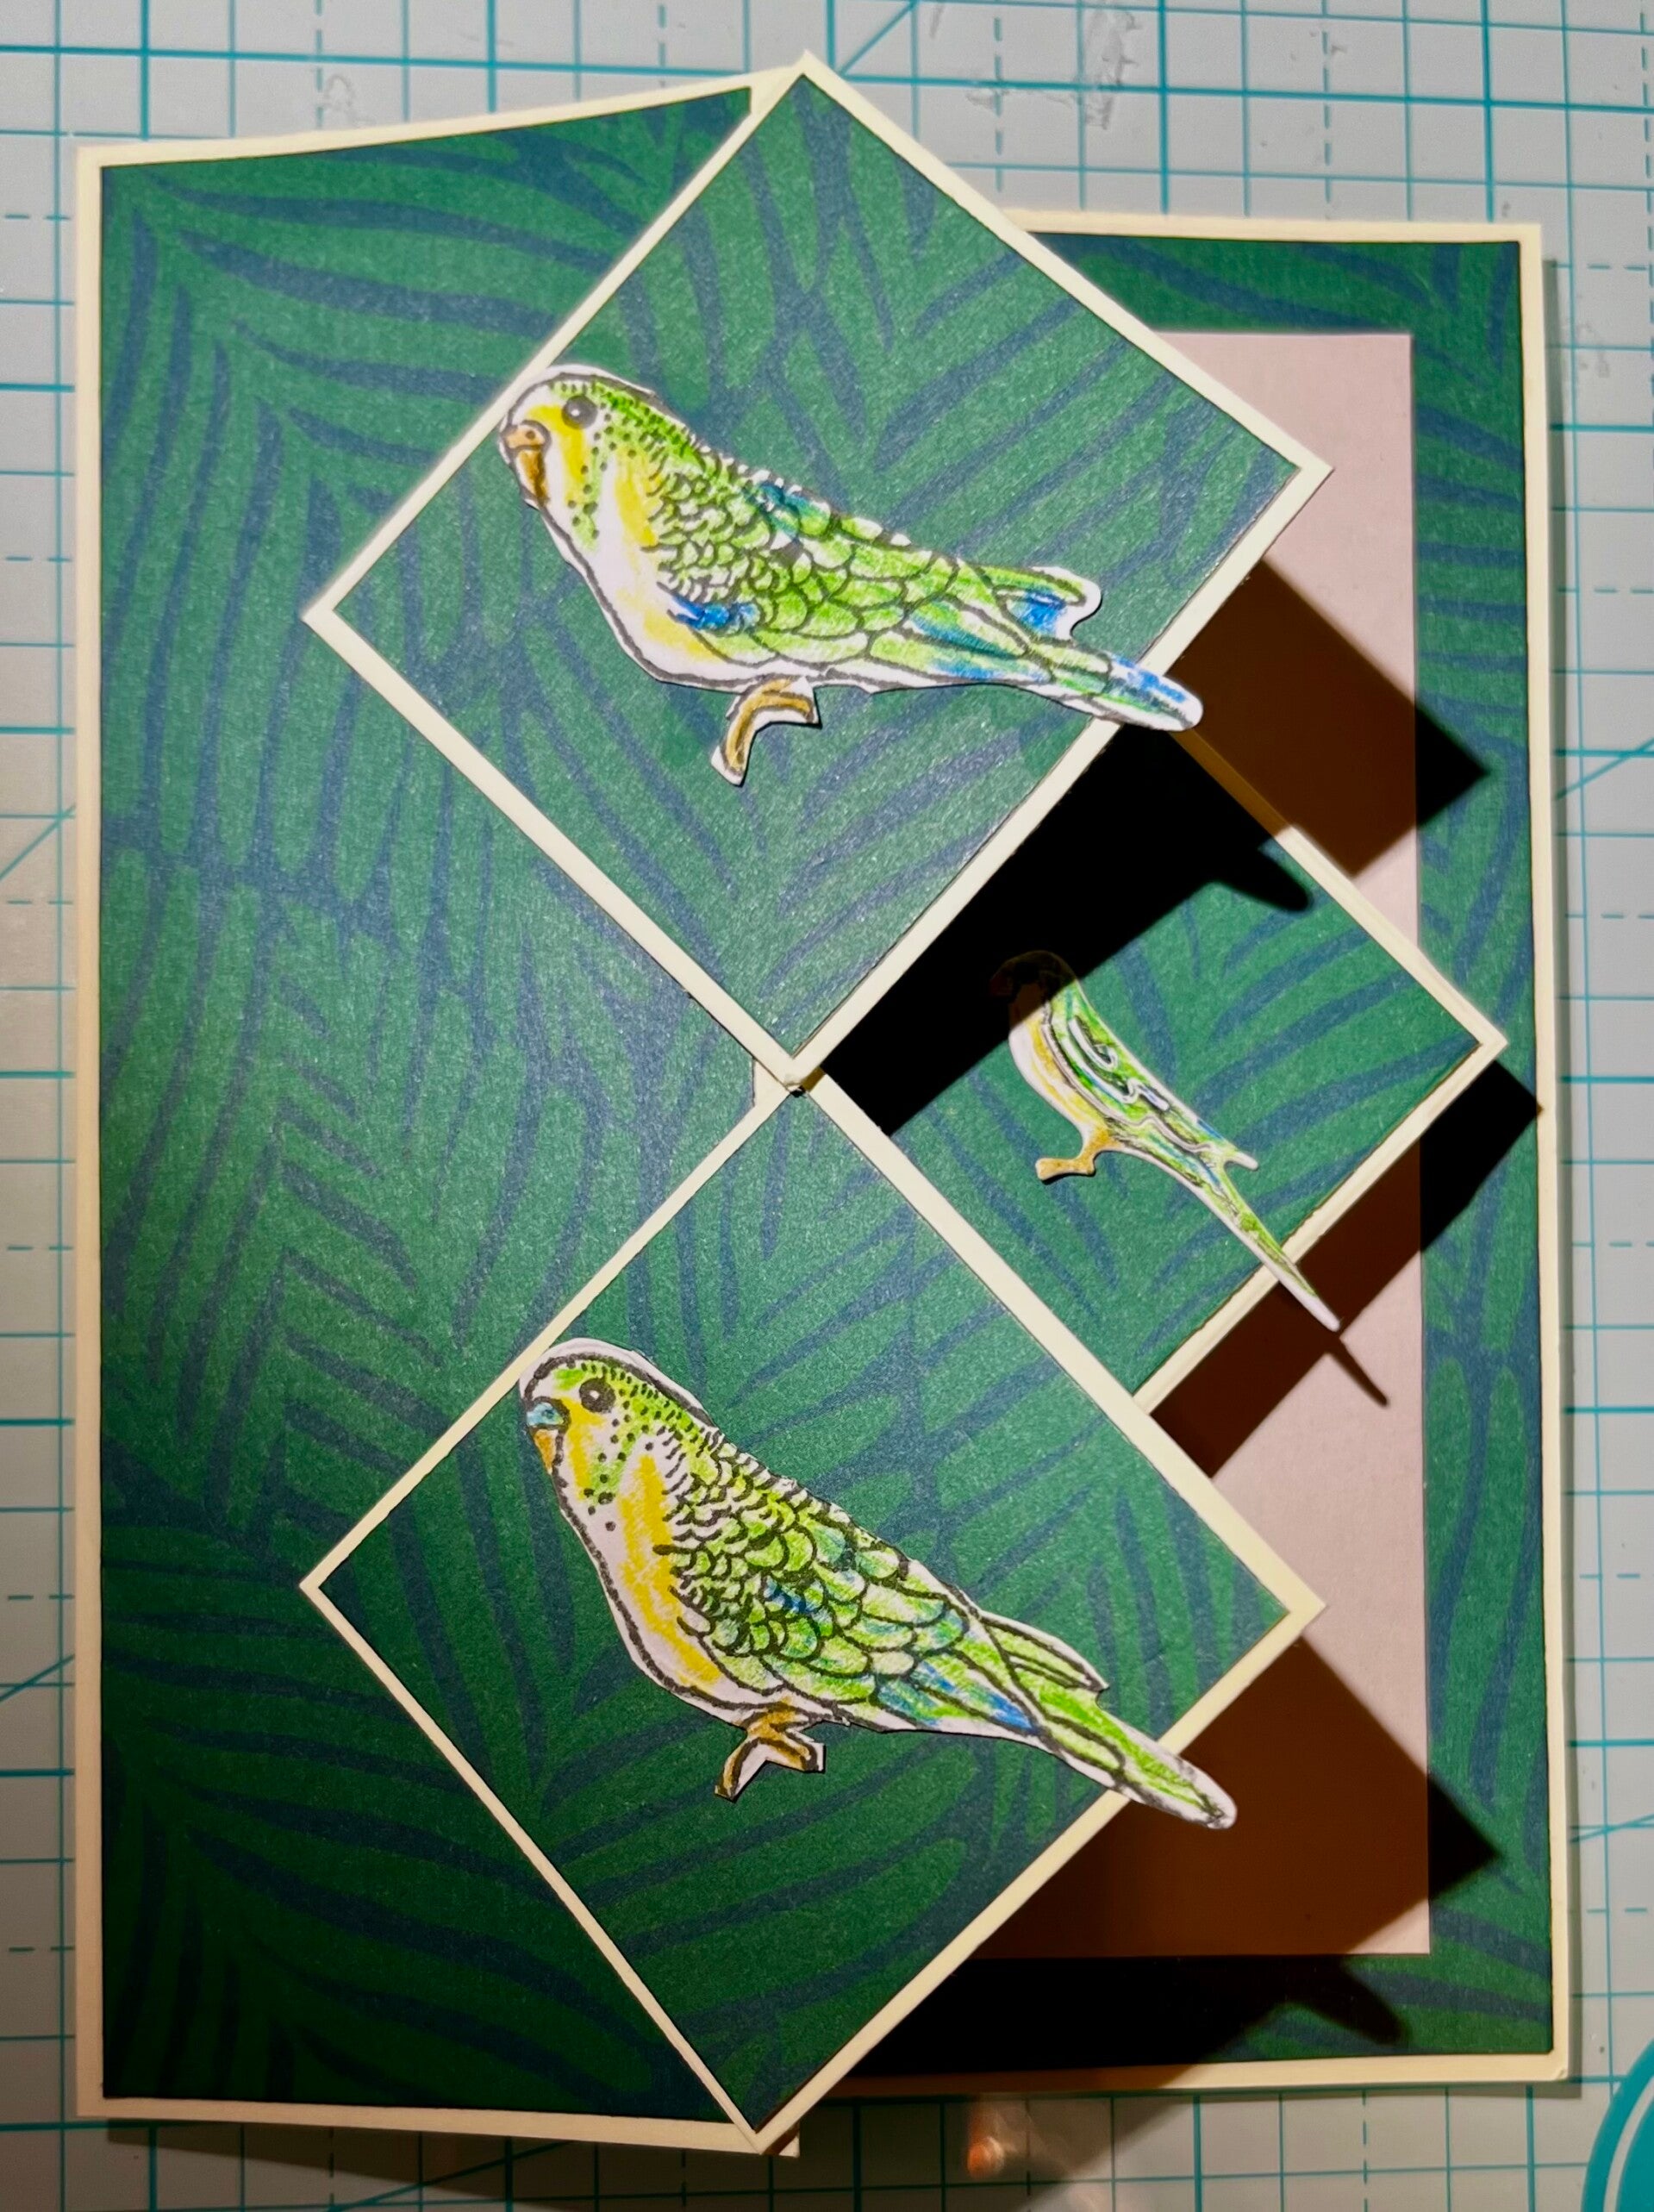
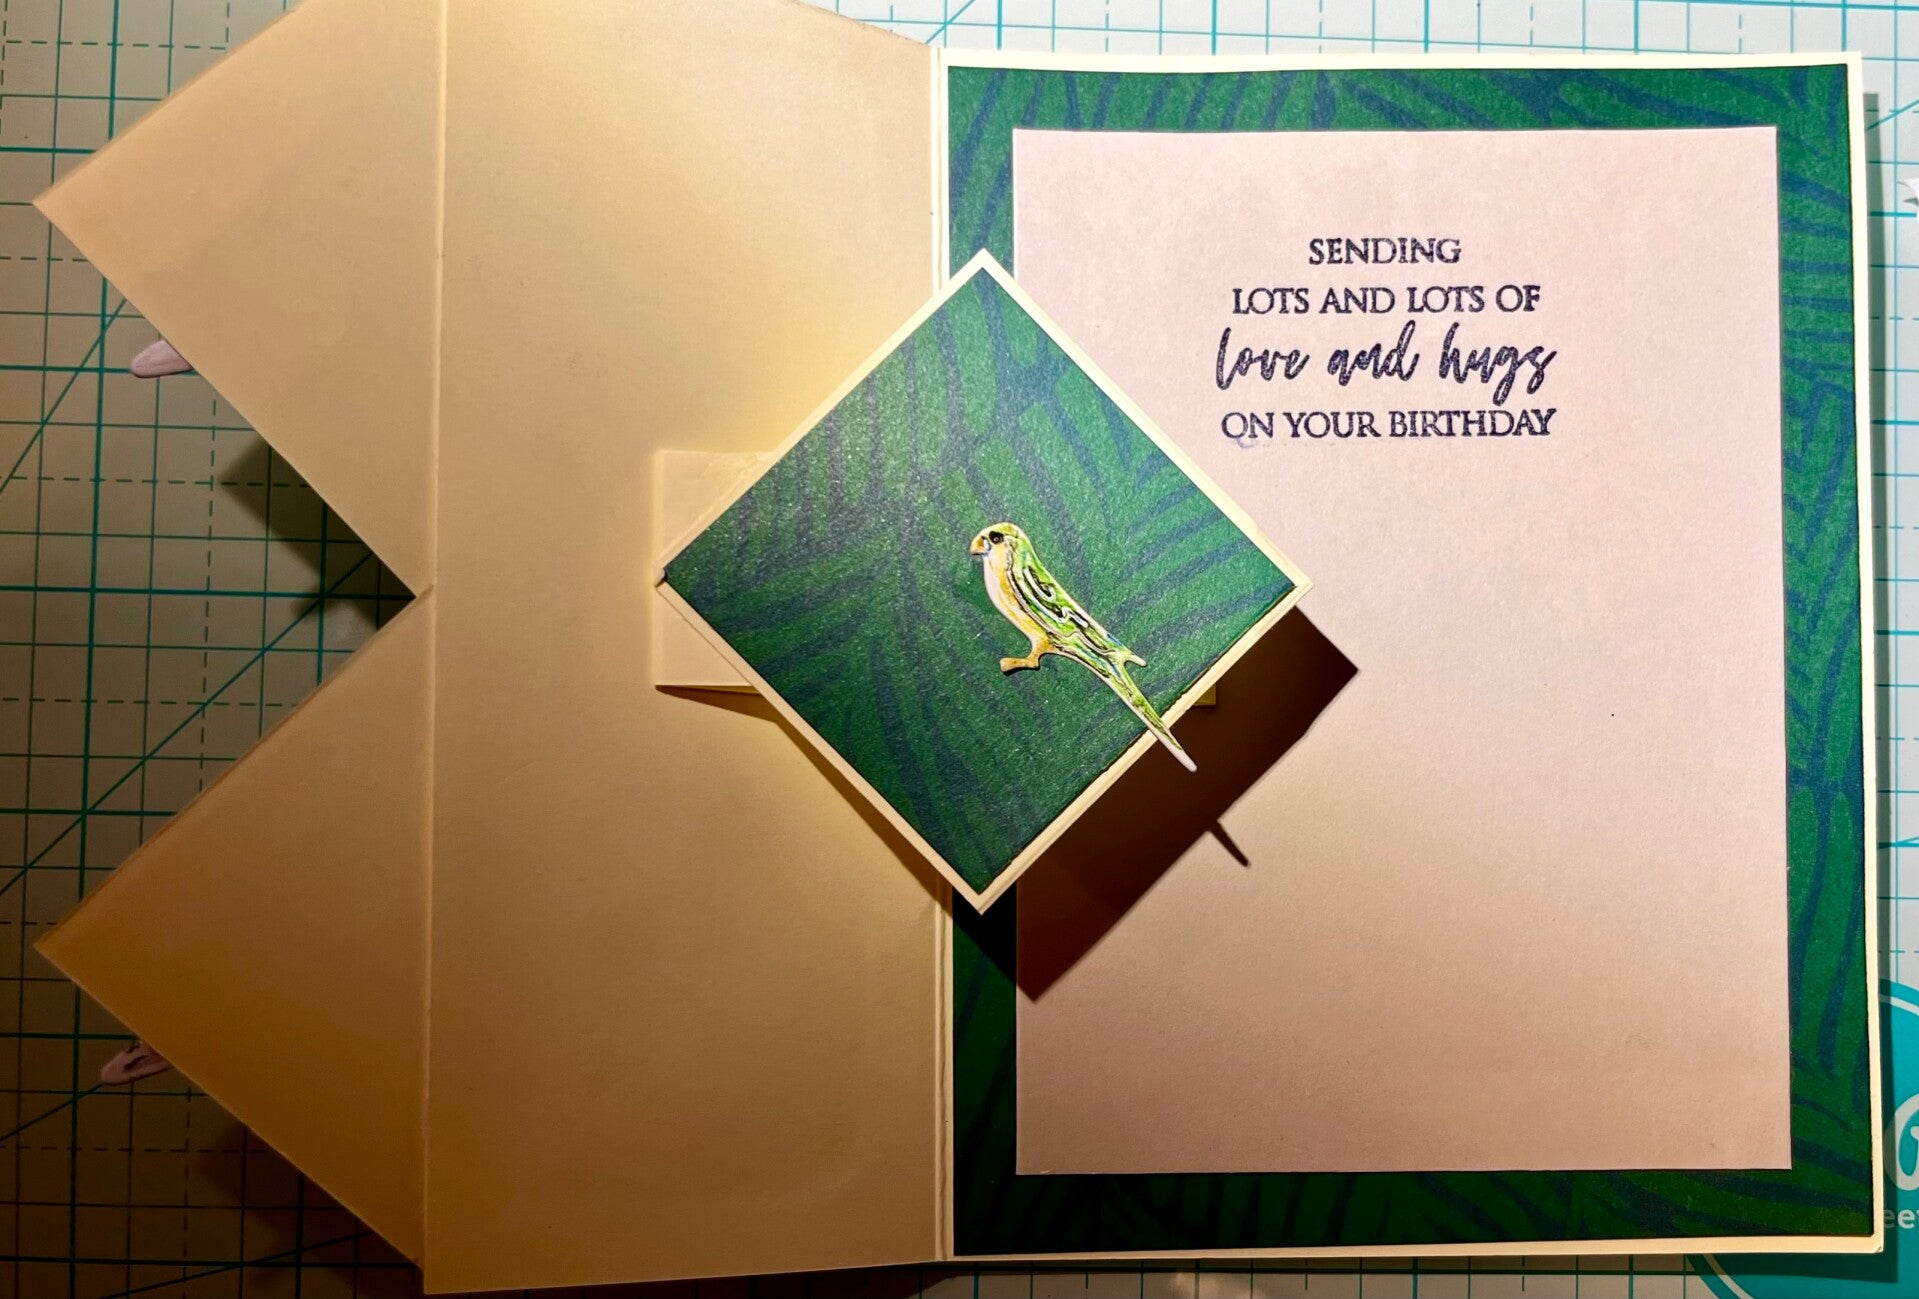
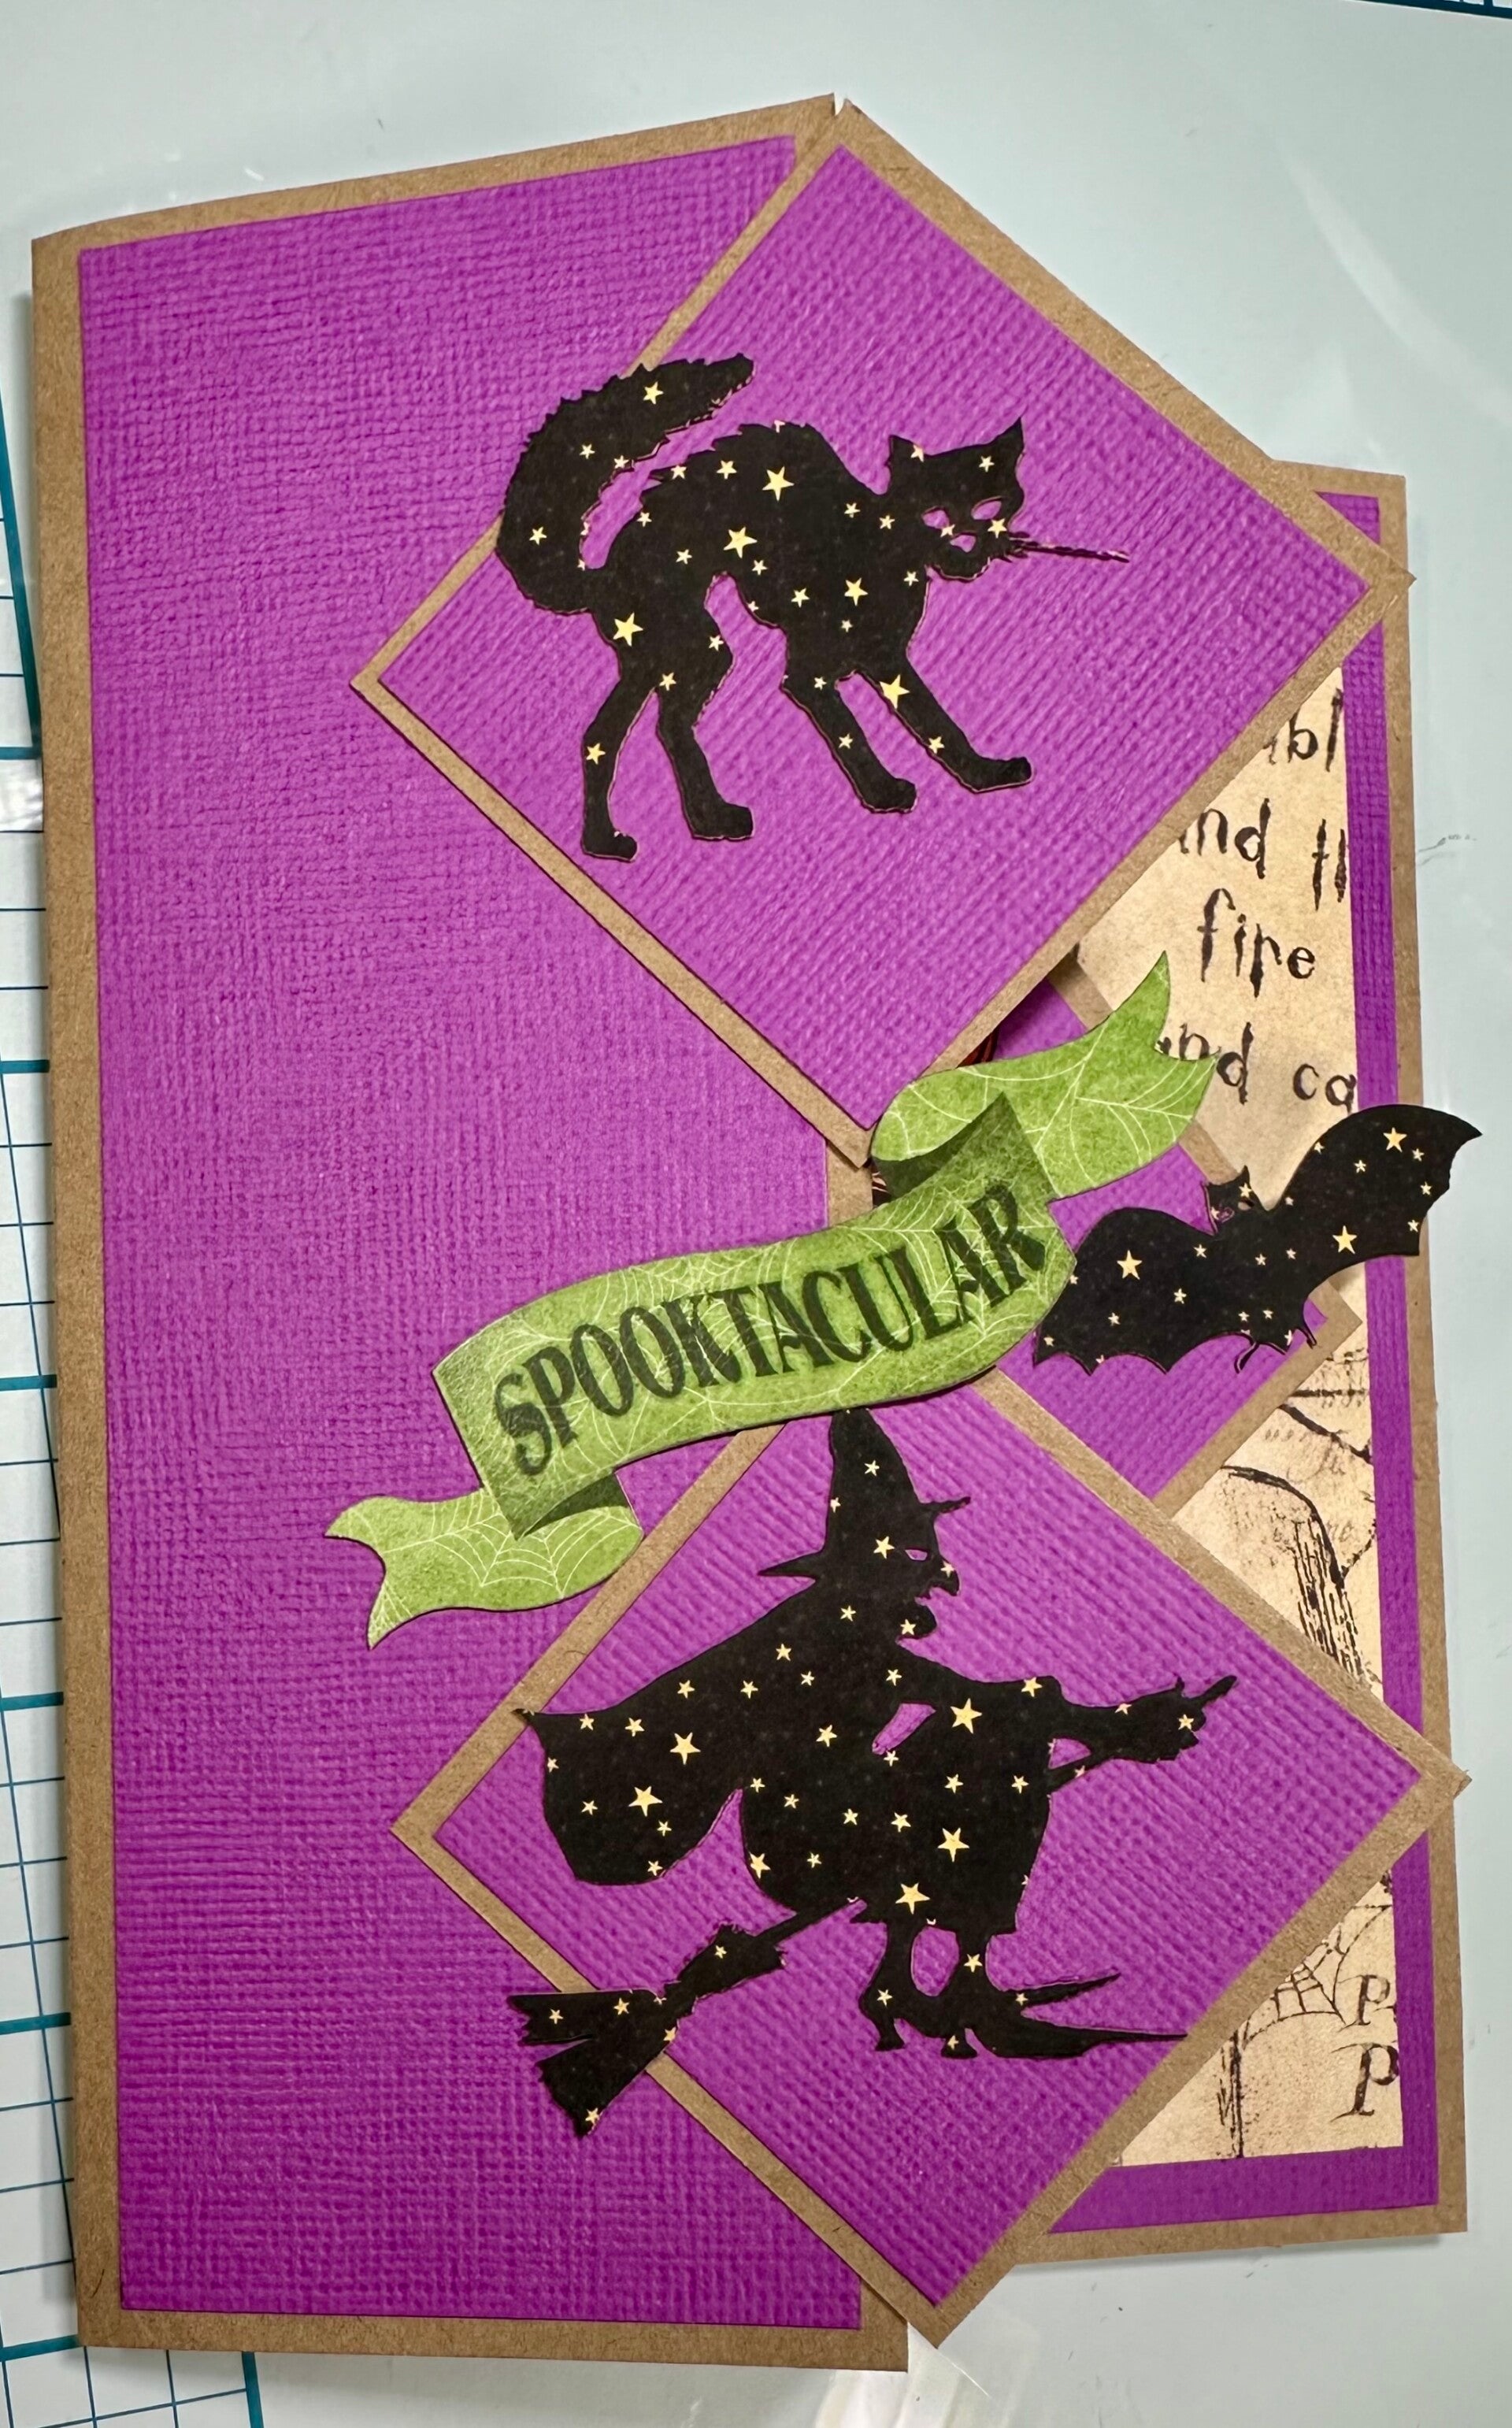
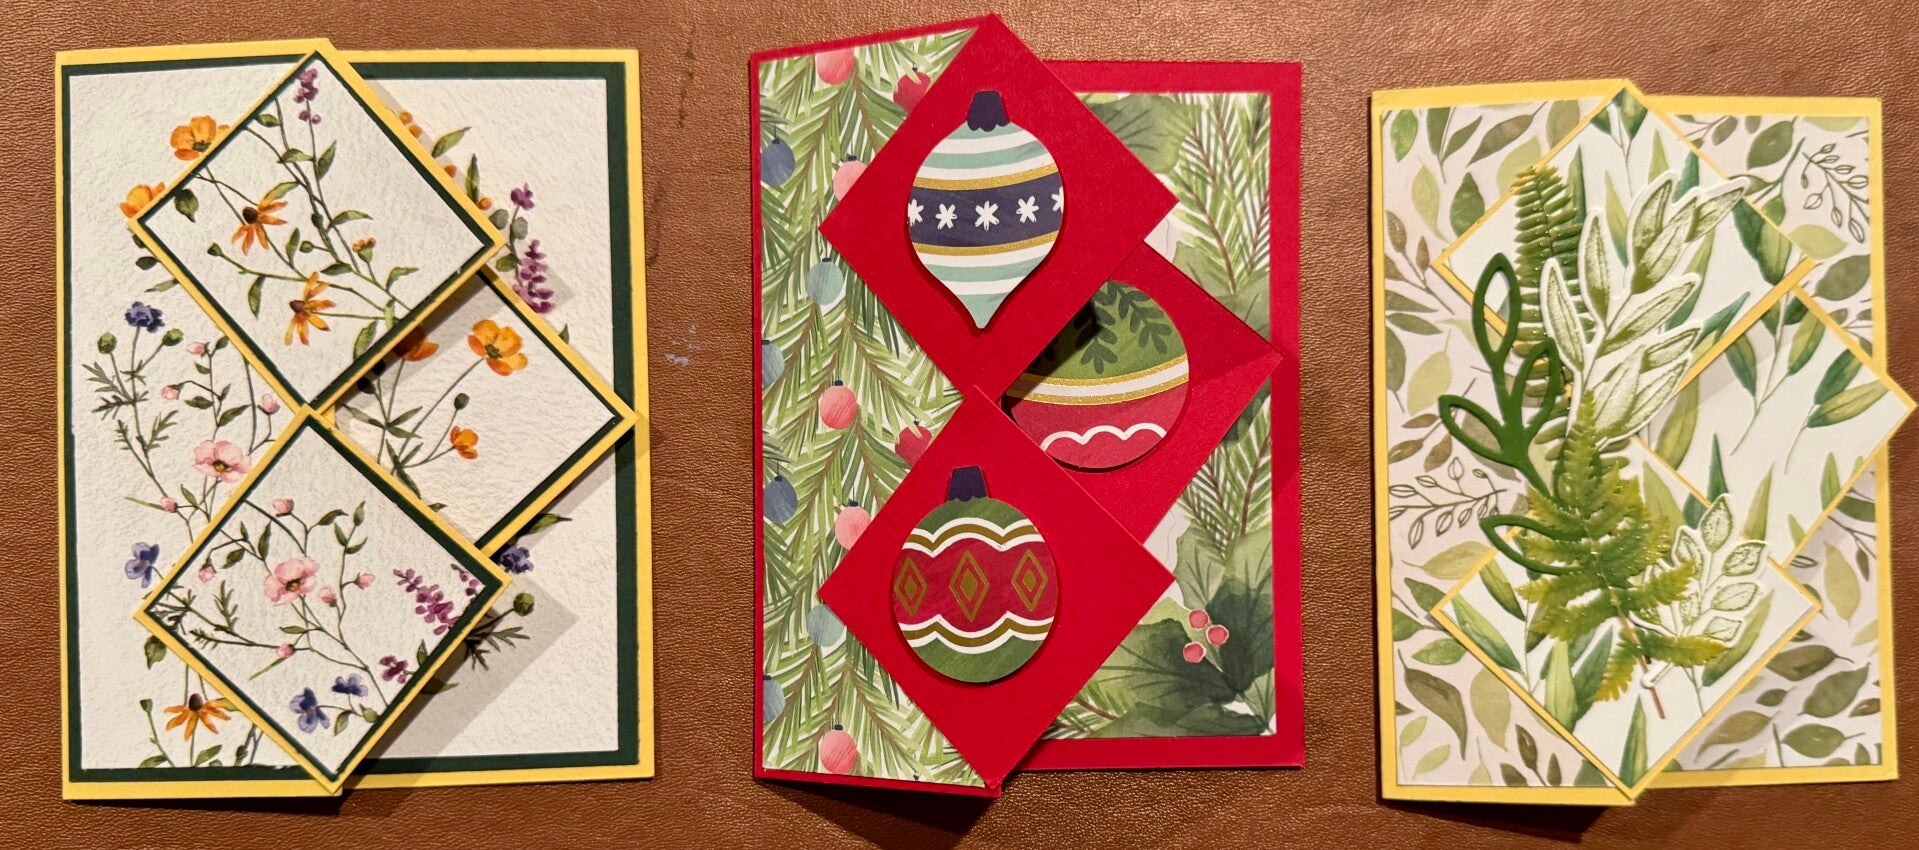
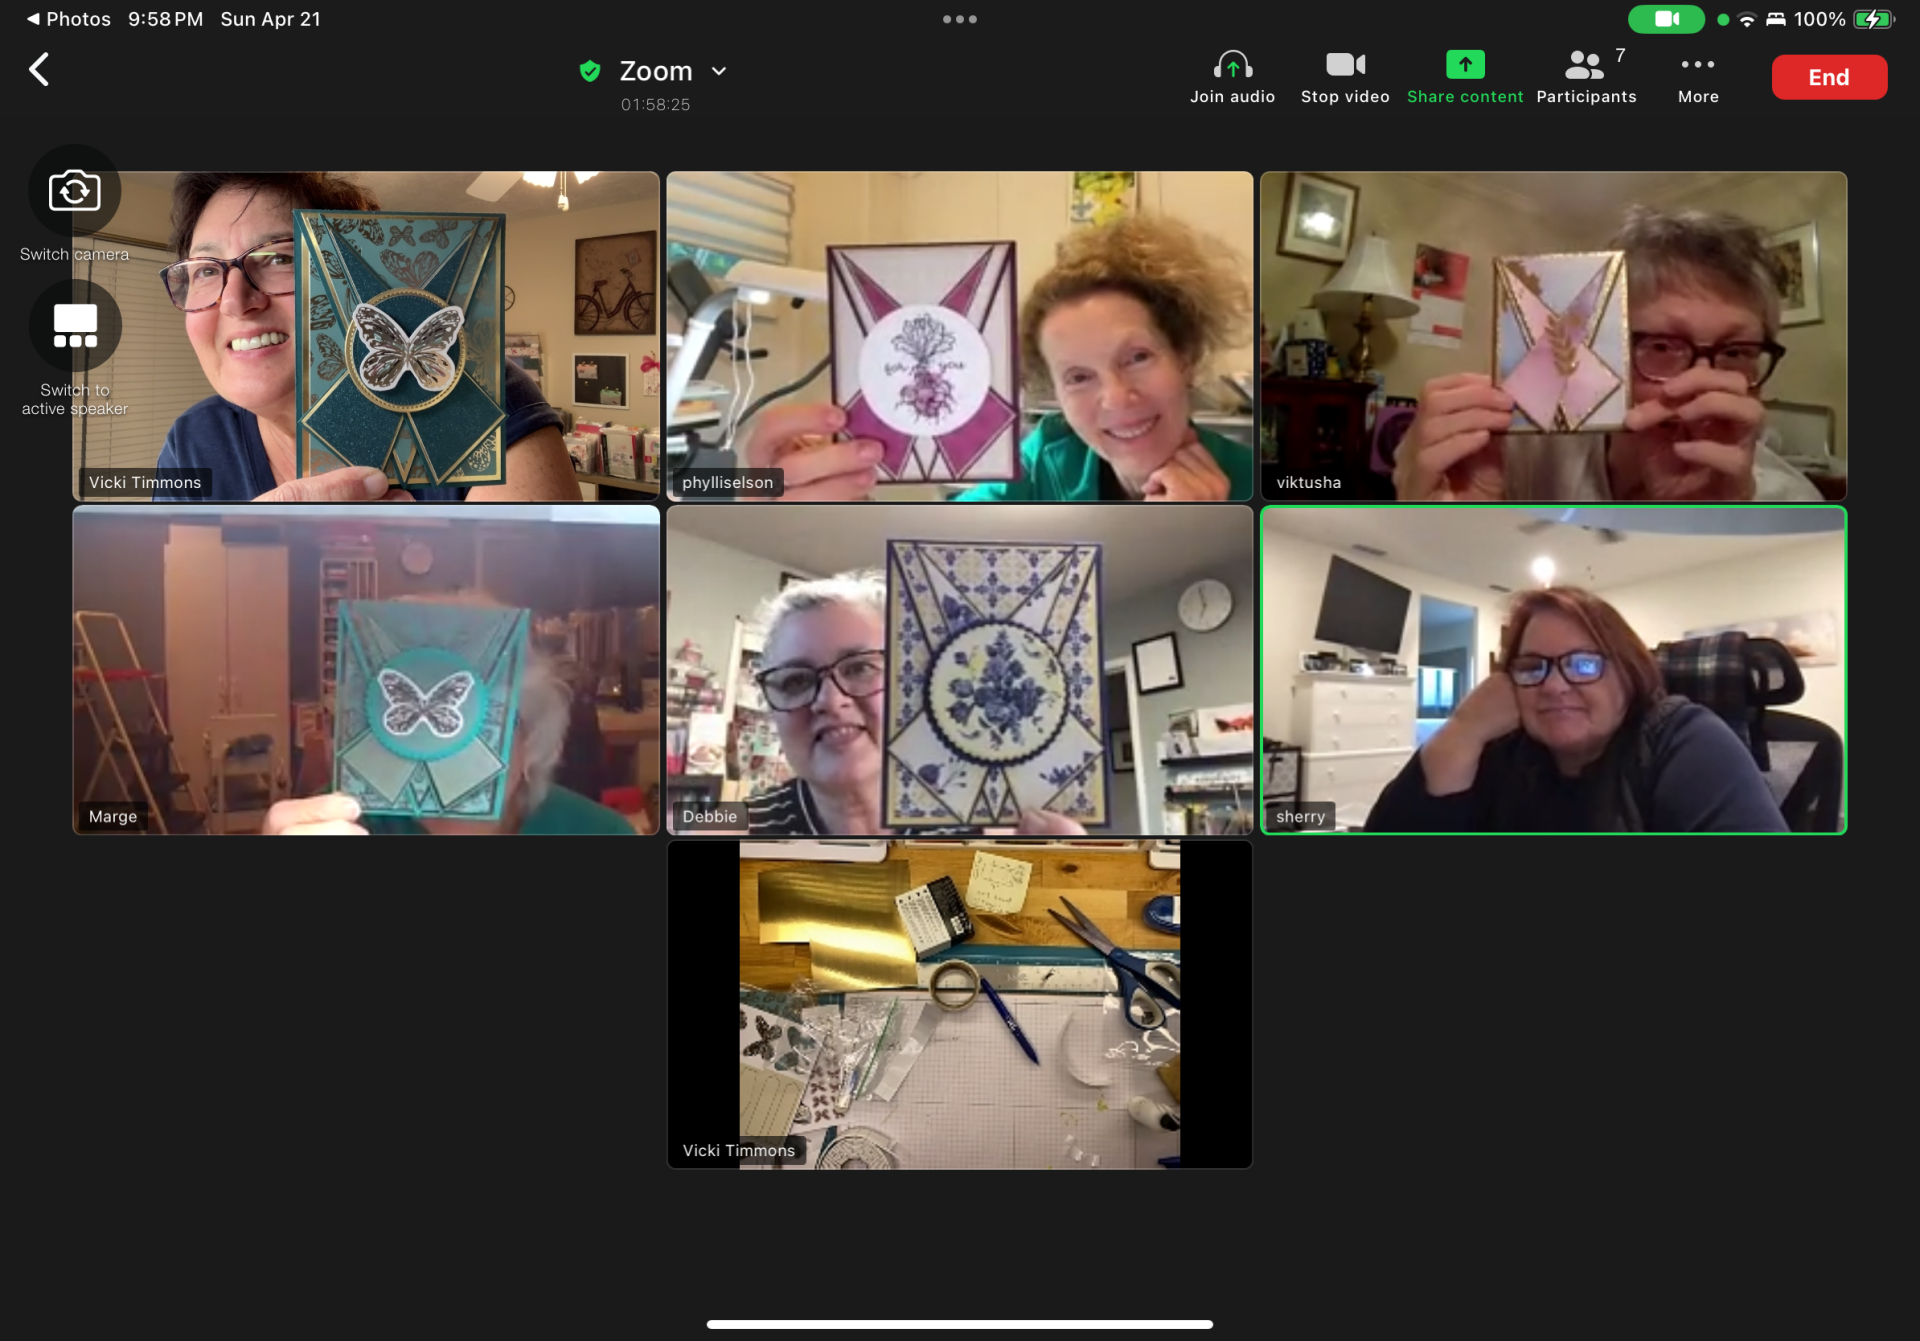
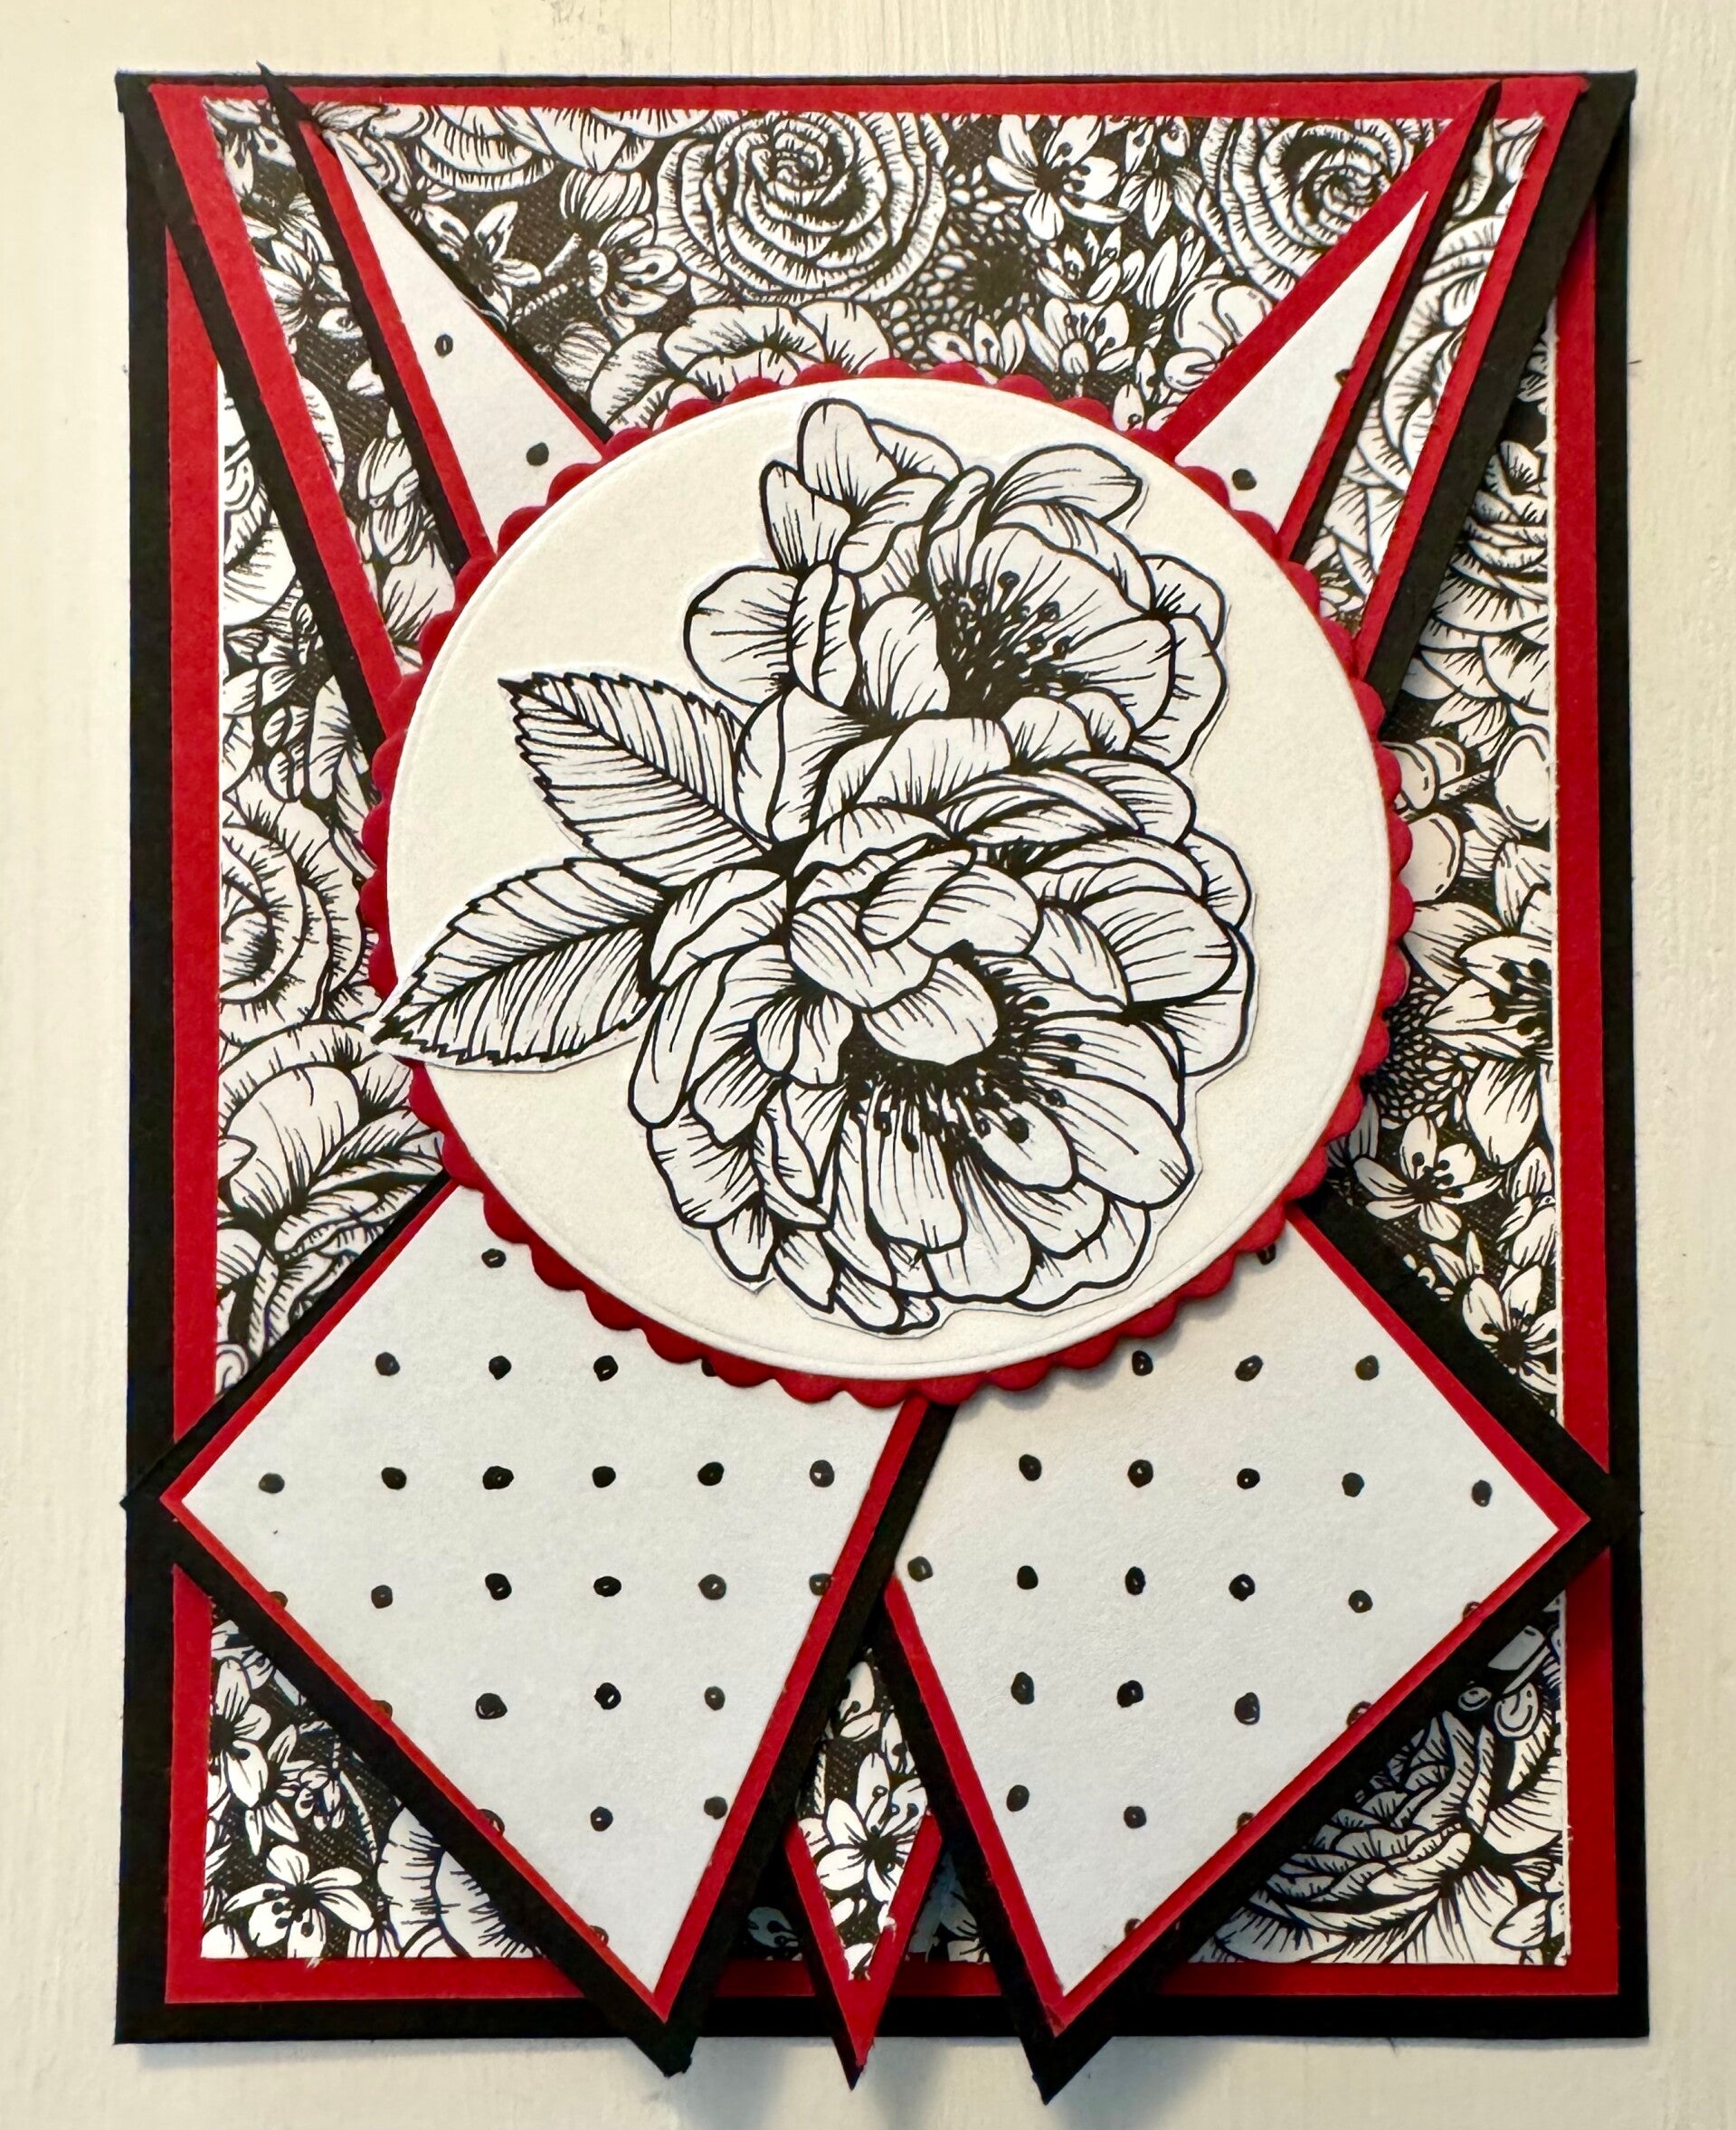
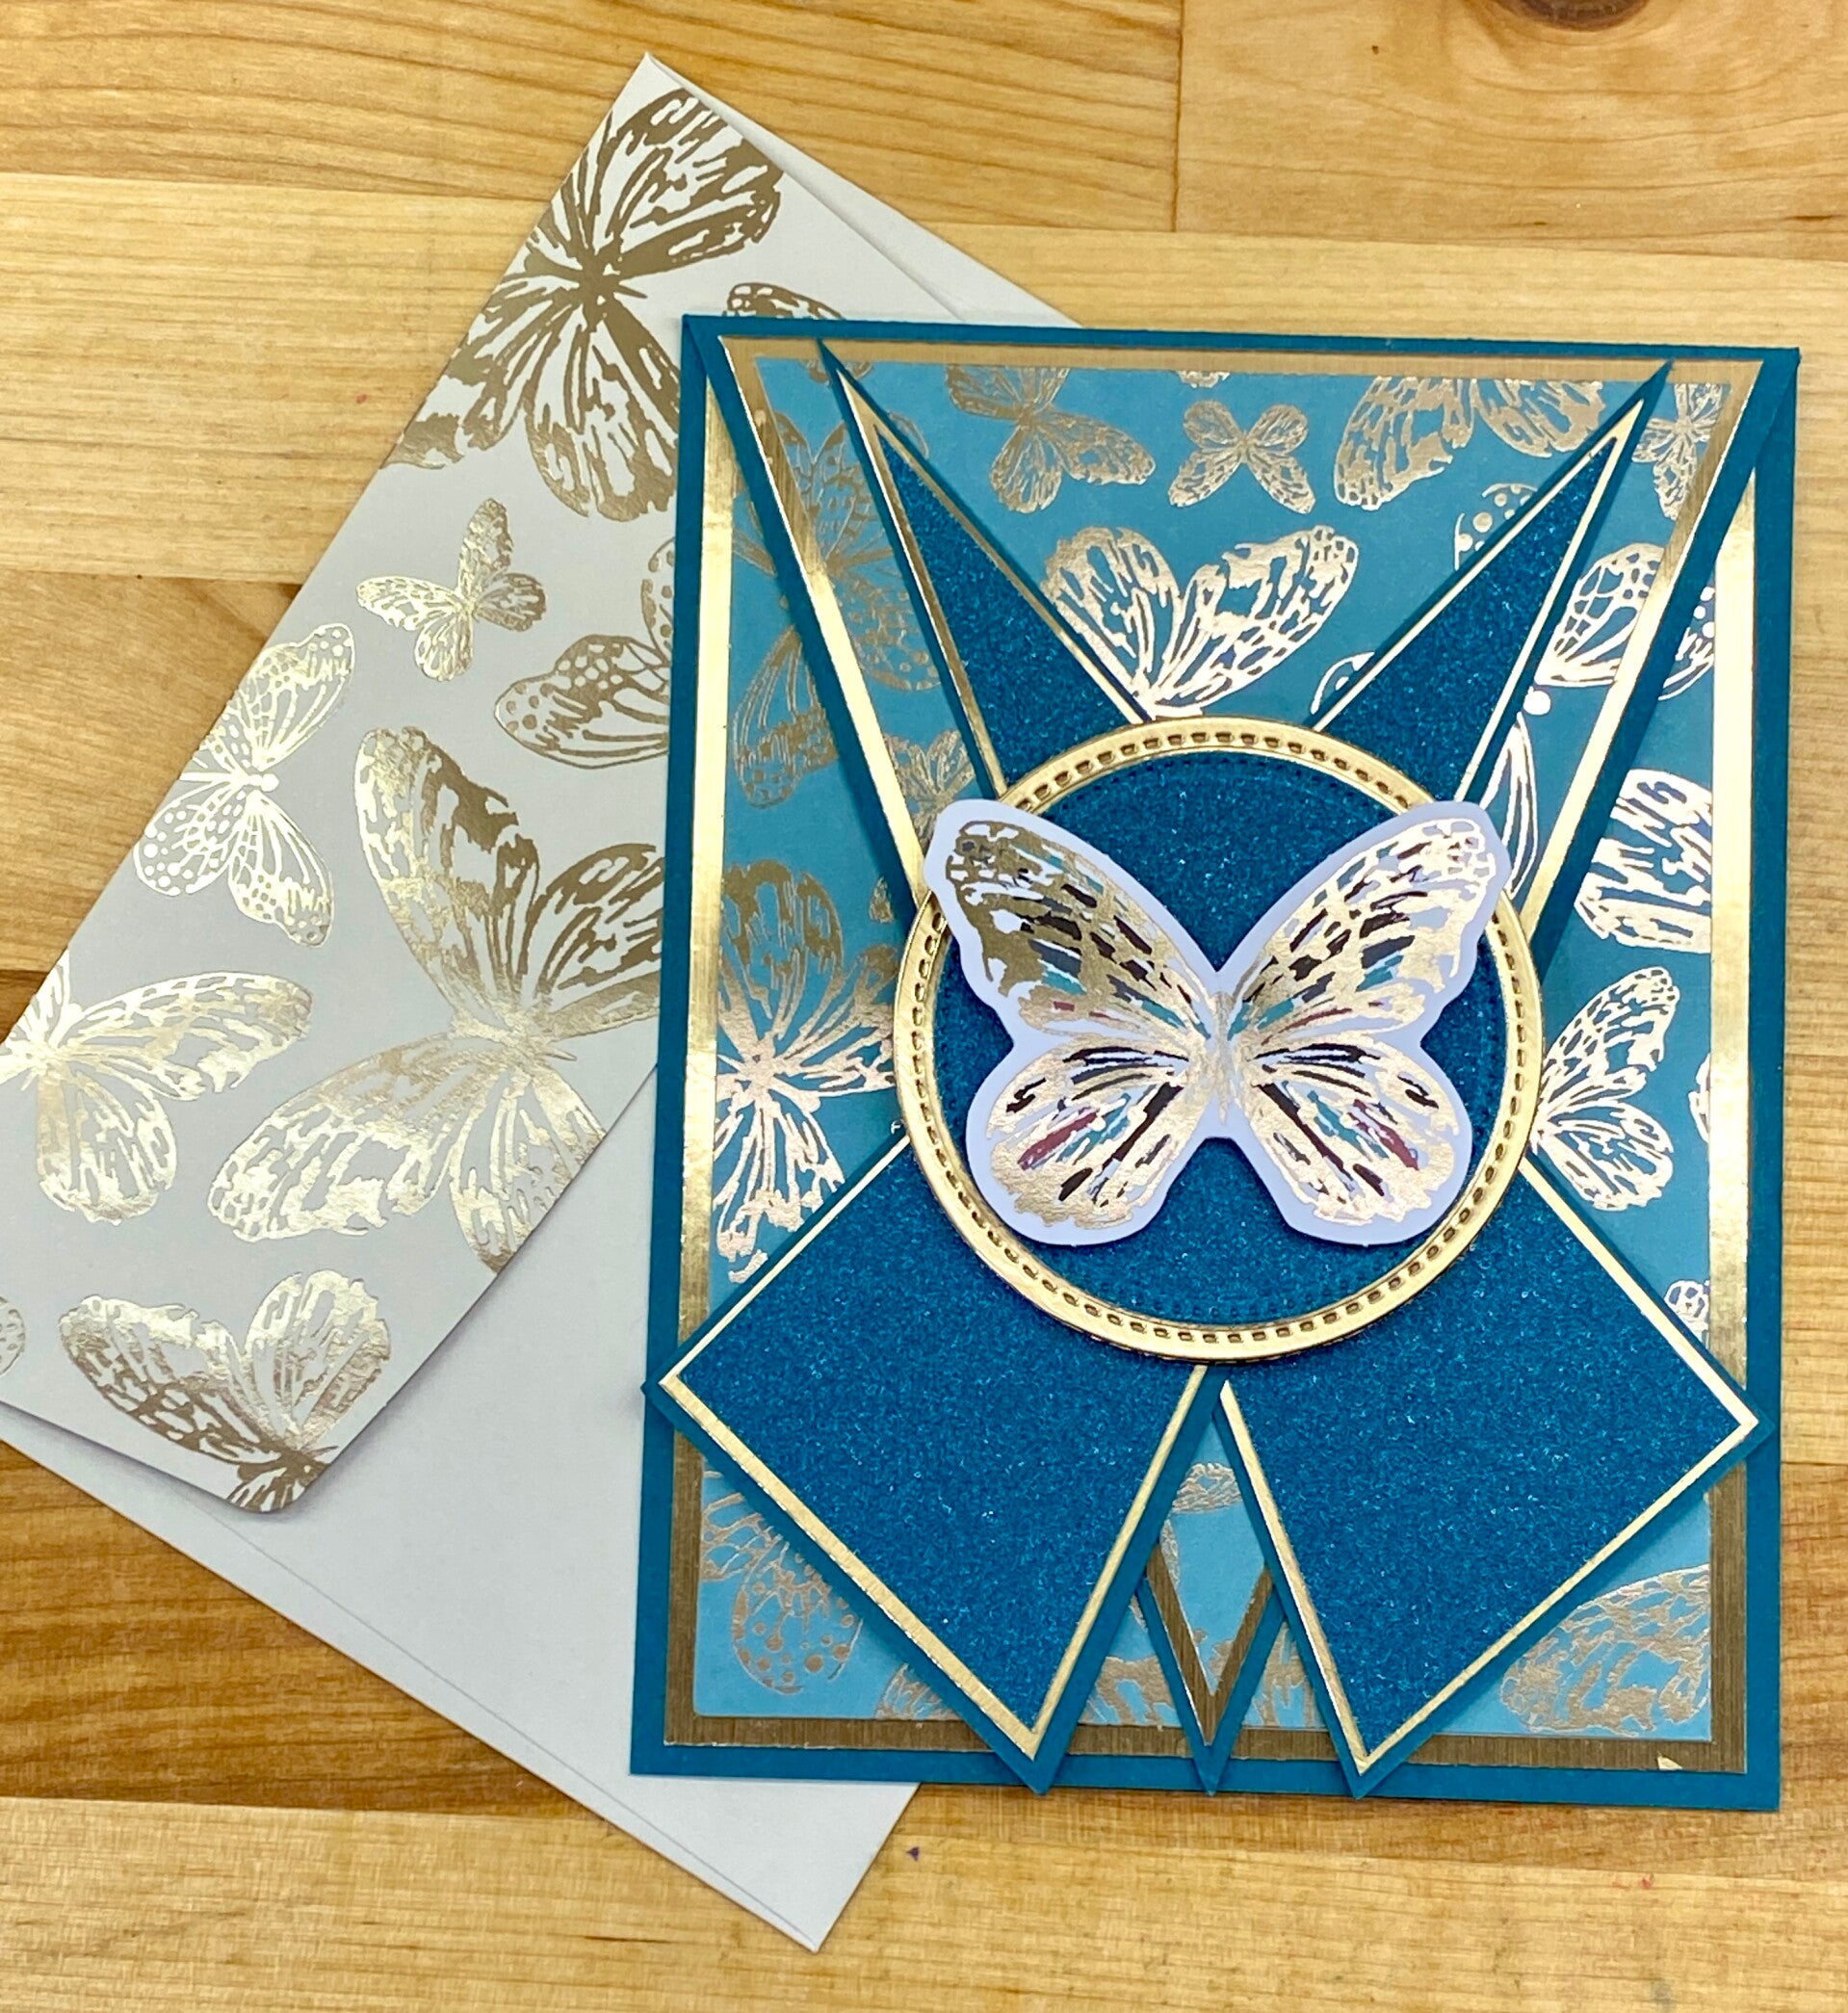
Sunday October 20, 2024 - Vicki taught us the three diamond card. Using directions from Vicky K, from a class from a few years back, Vicki resized the card to our stardard A2 card and "simplified" it a bit for a beautiful, fun, and easy card. Find the tutorial here! On our October 6th we just chatted and worked on our own projects.


Sunday September 22, 2024 - Margery taught us a fancy fold with a boxy front edge. Vicki taught us a shadow box card. And, as always, we had a great time chatting and creating! Find the directions for the shadow box card here.


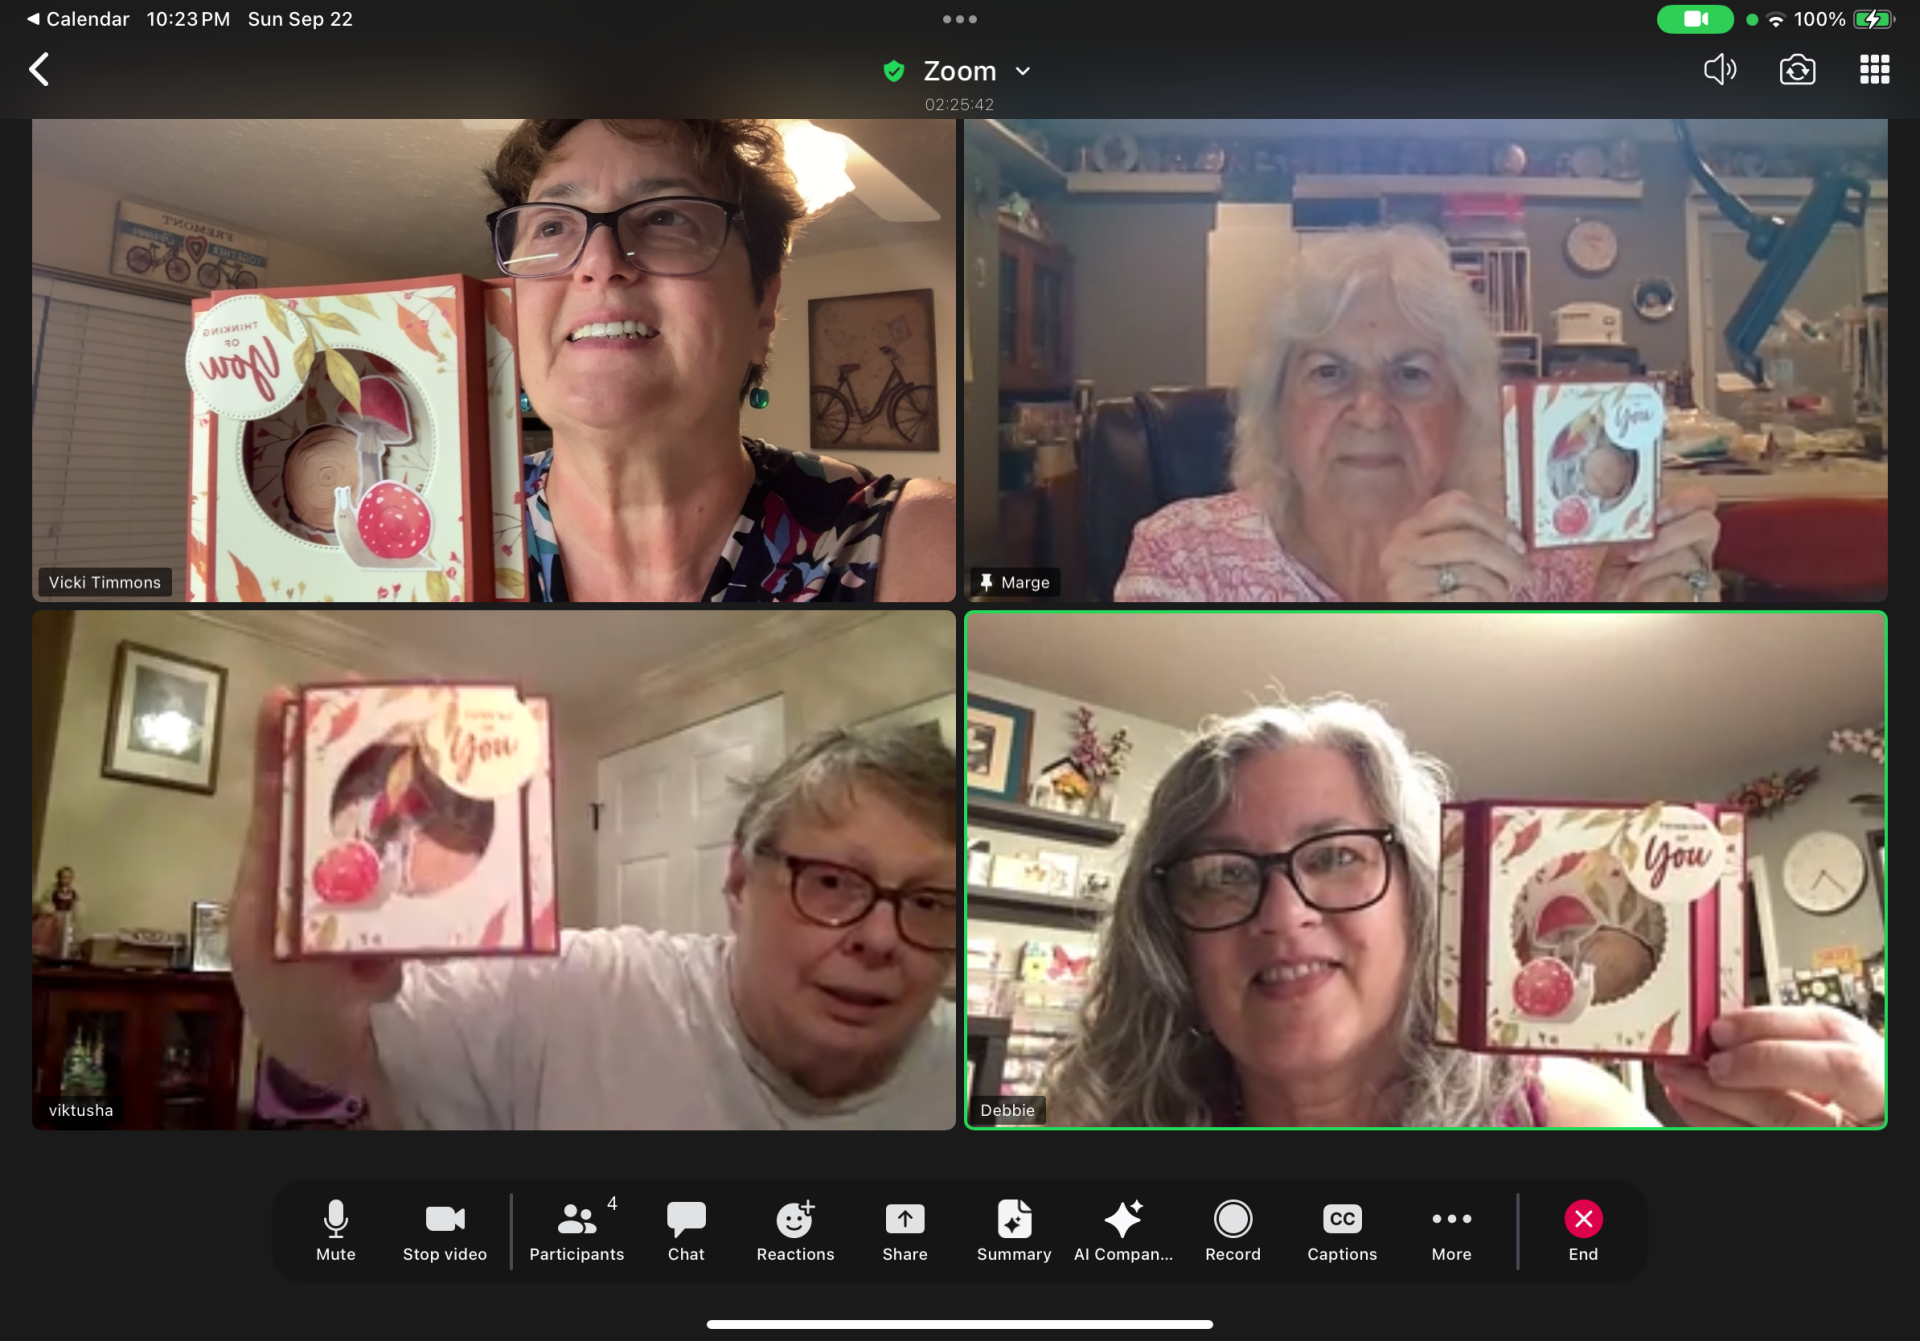
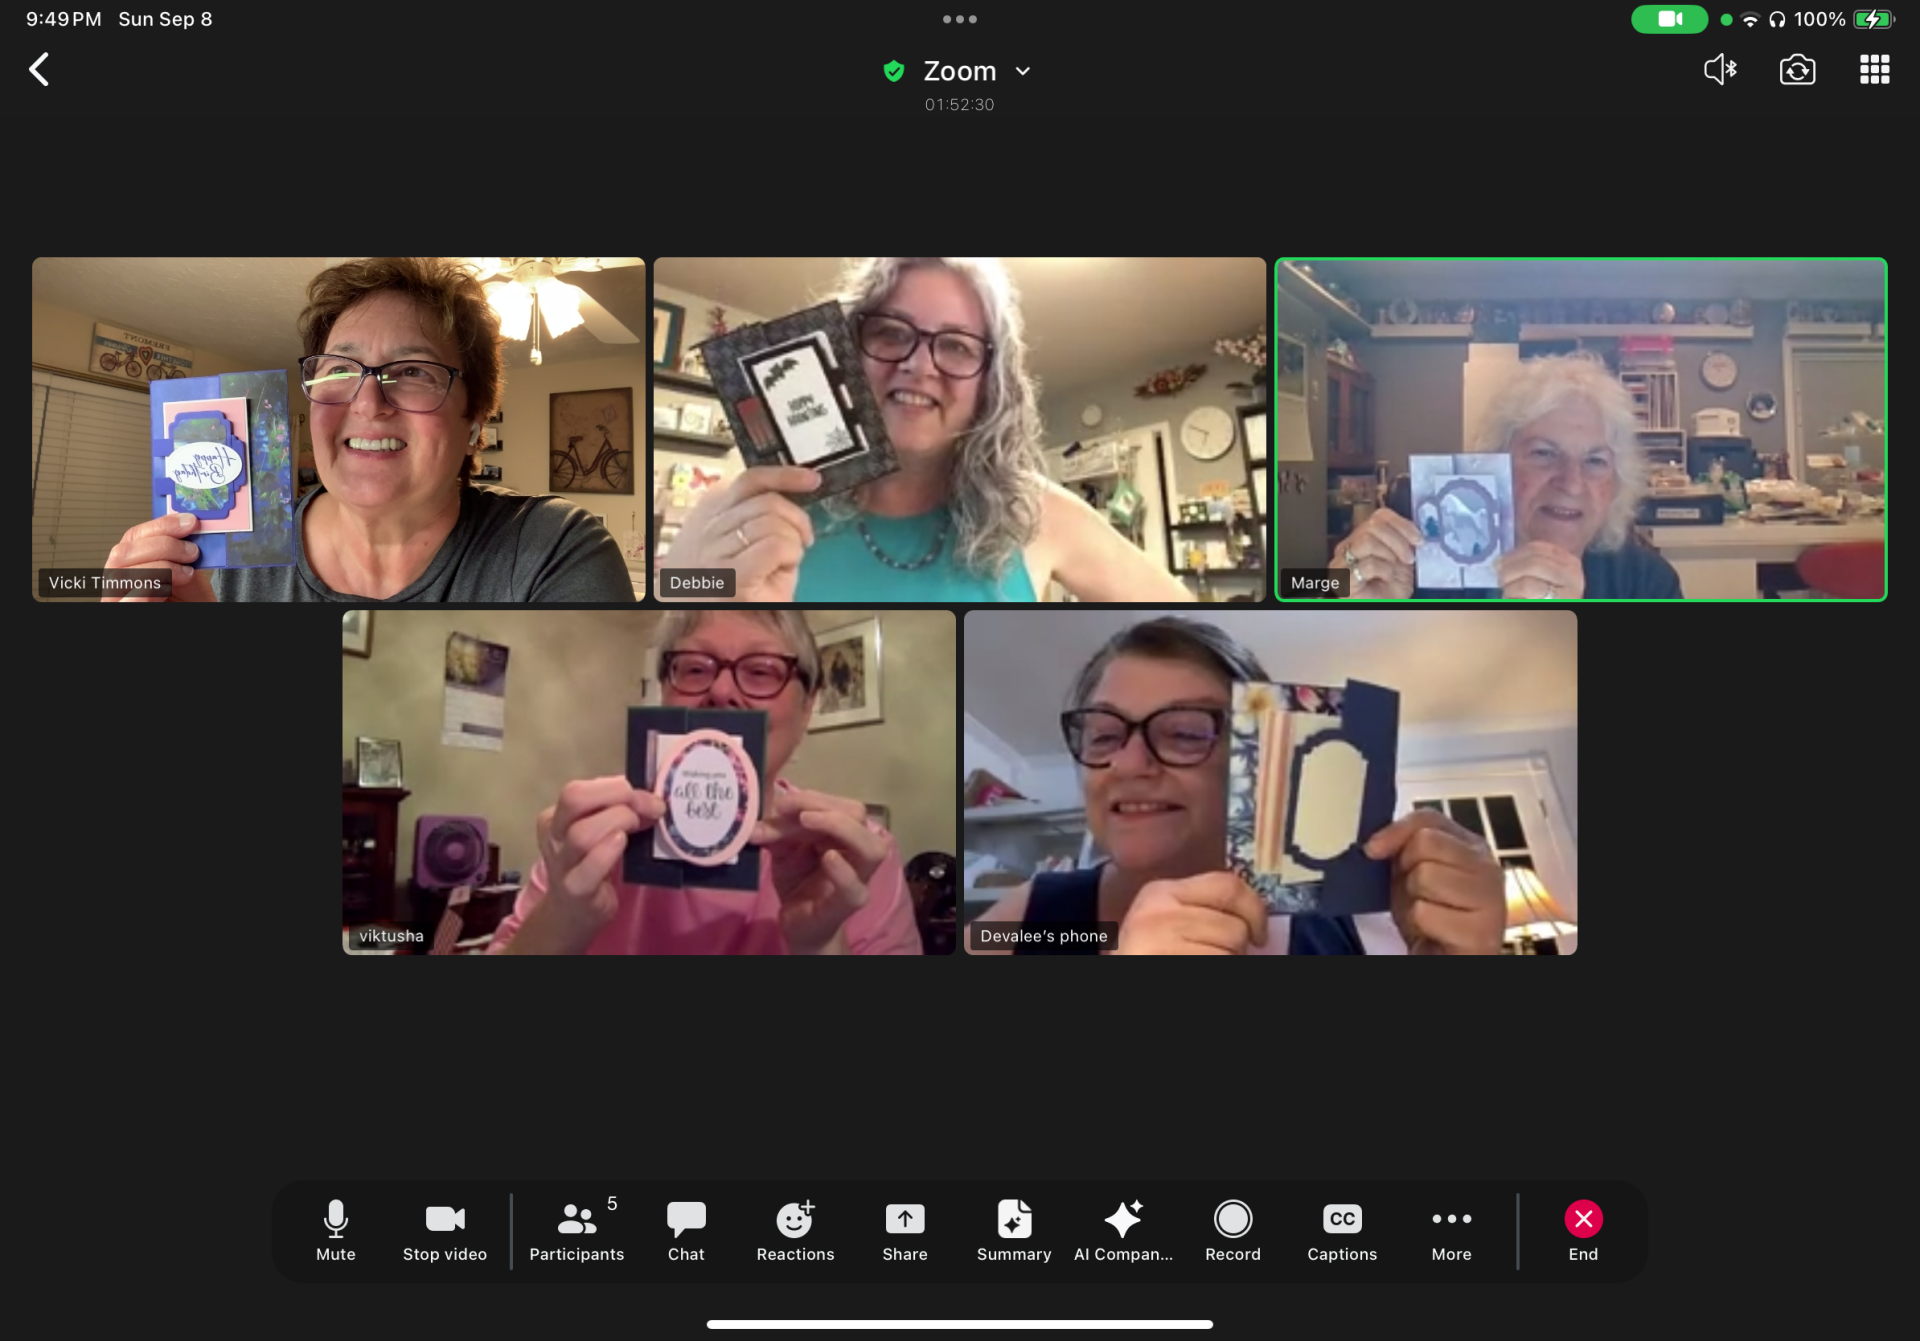
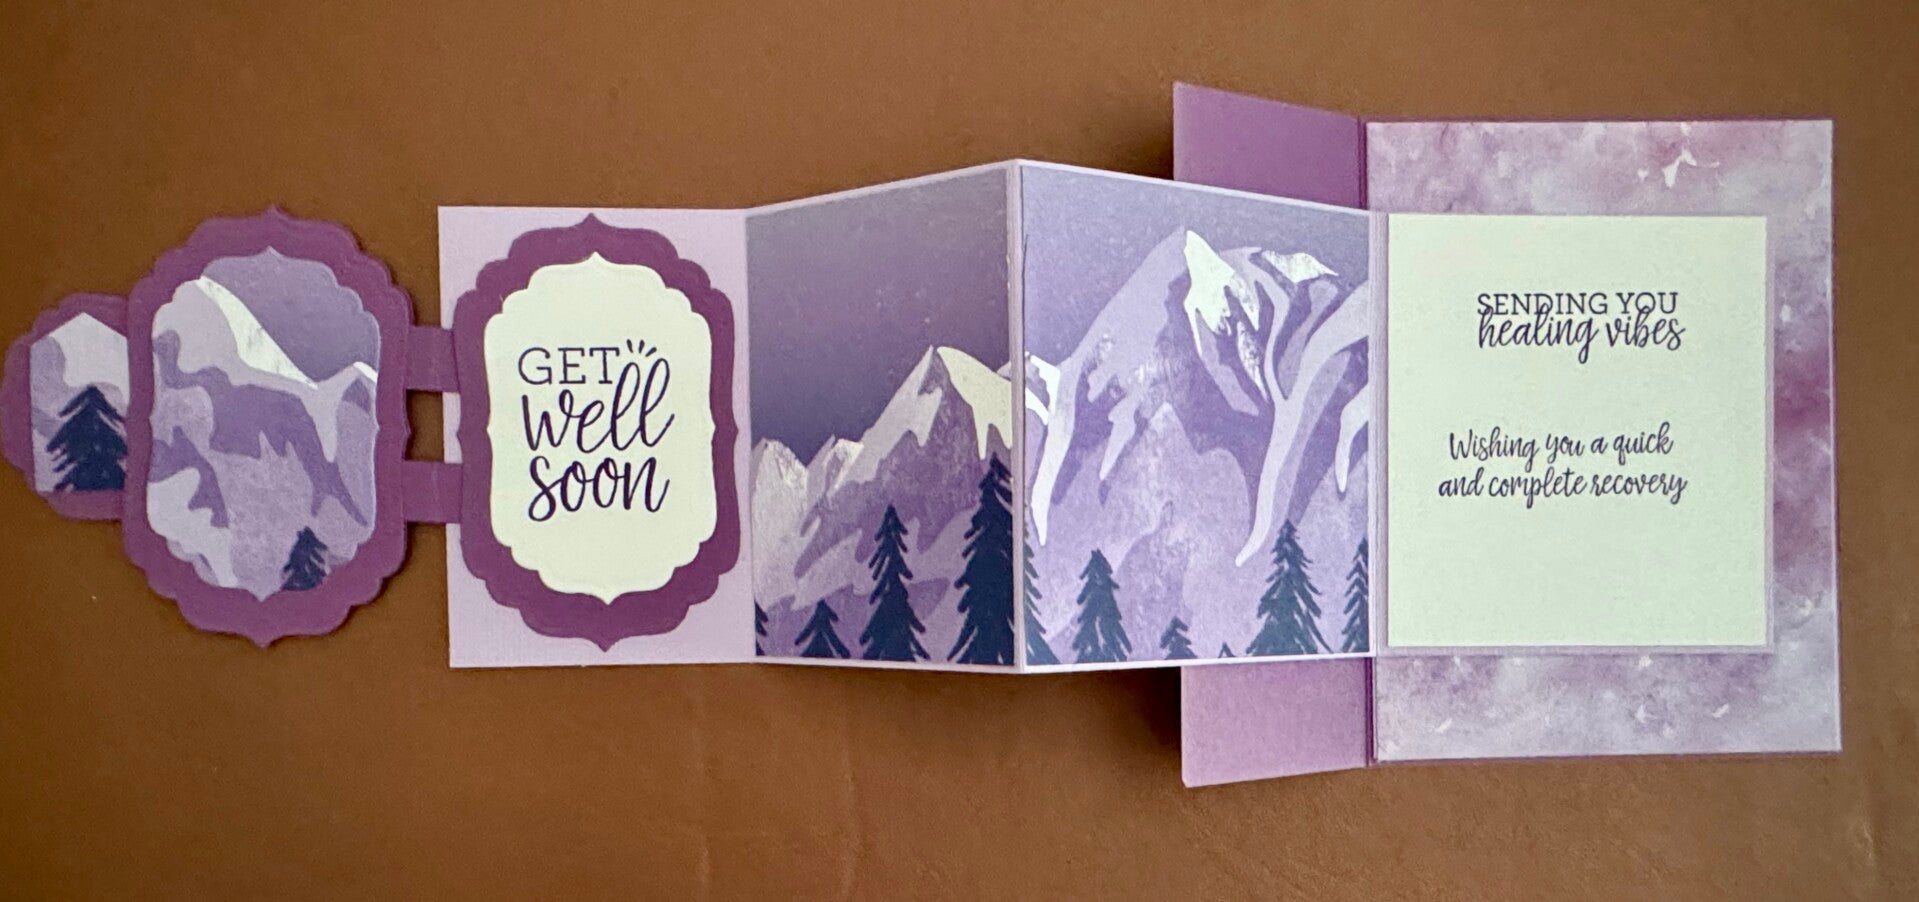
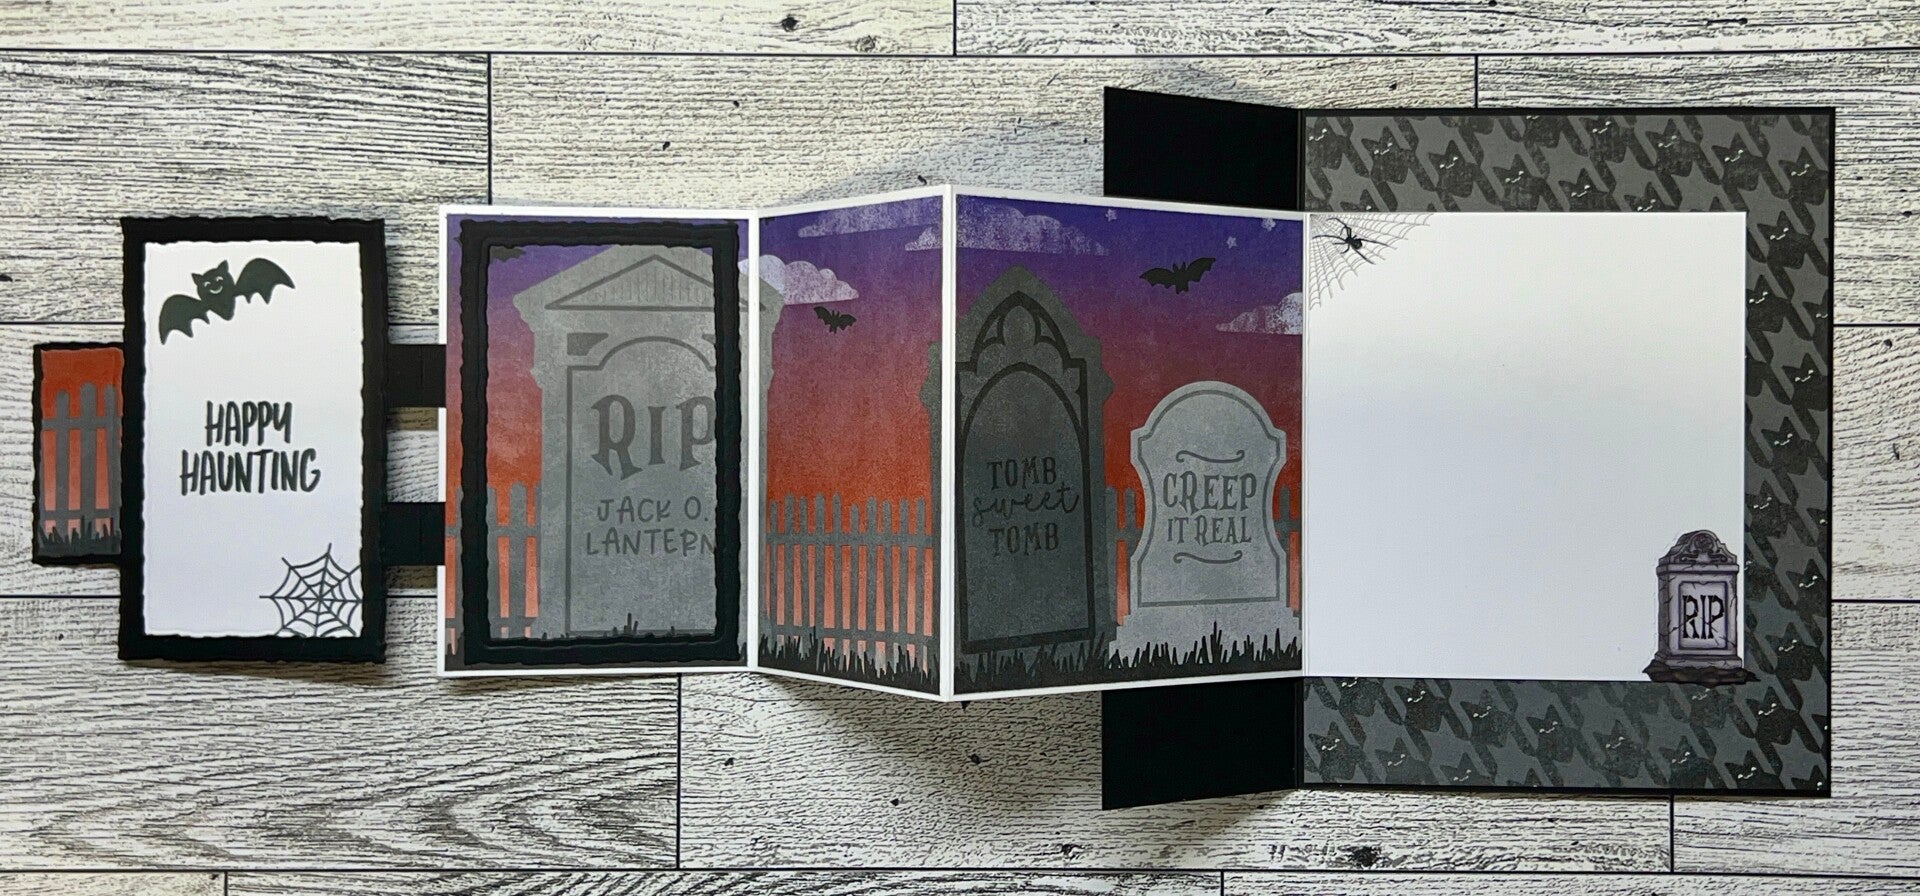
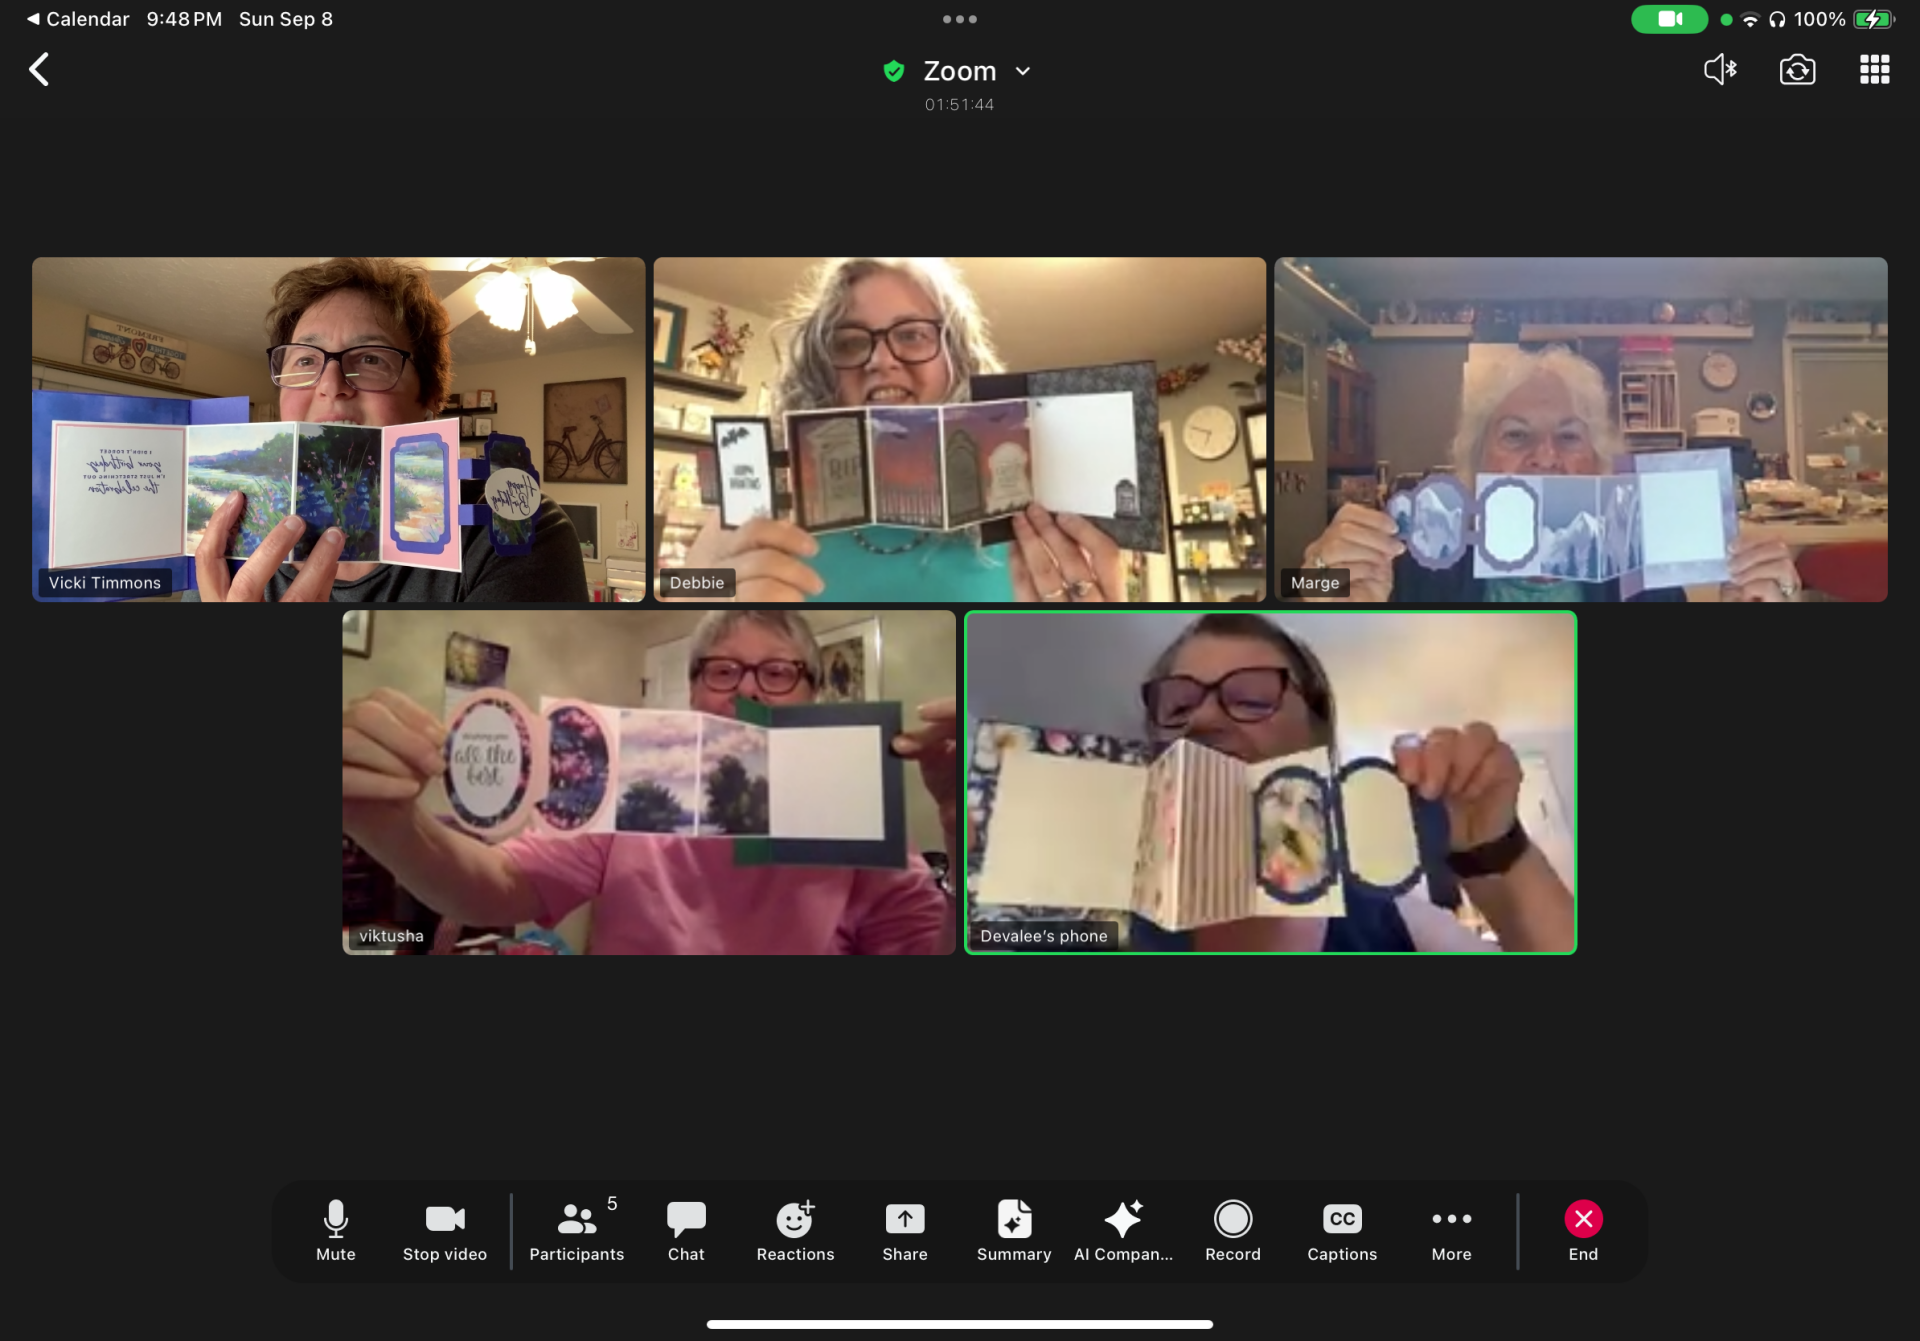
Sunday September 8, 2024 - We made Pop Out Accordian fun fold cards following directions by Lynn Dunn, suggested by Margery who subscribes to her blog. See her tutorial here. It was a bit more complicated than we expected, but we completed our cards! Everyone had a great time. No class next week.


Sunday August 25, 2024 - Phyllis walked us through making a fun and easy folio album. A similar tutorial can be found here. Since everyone is so busy at the end of summer, we decided to change our zoom meeting to every other Sunday for a few months. No class next week.

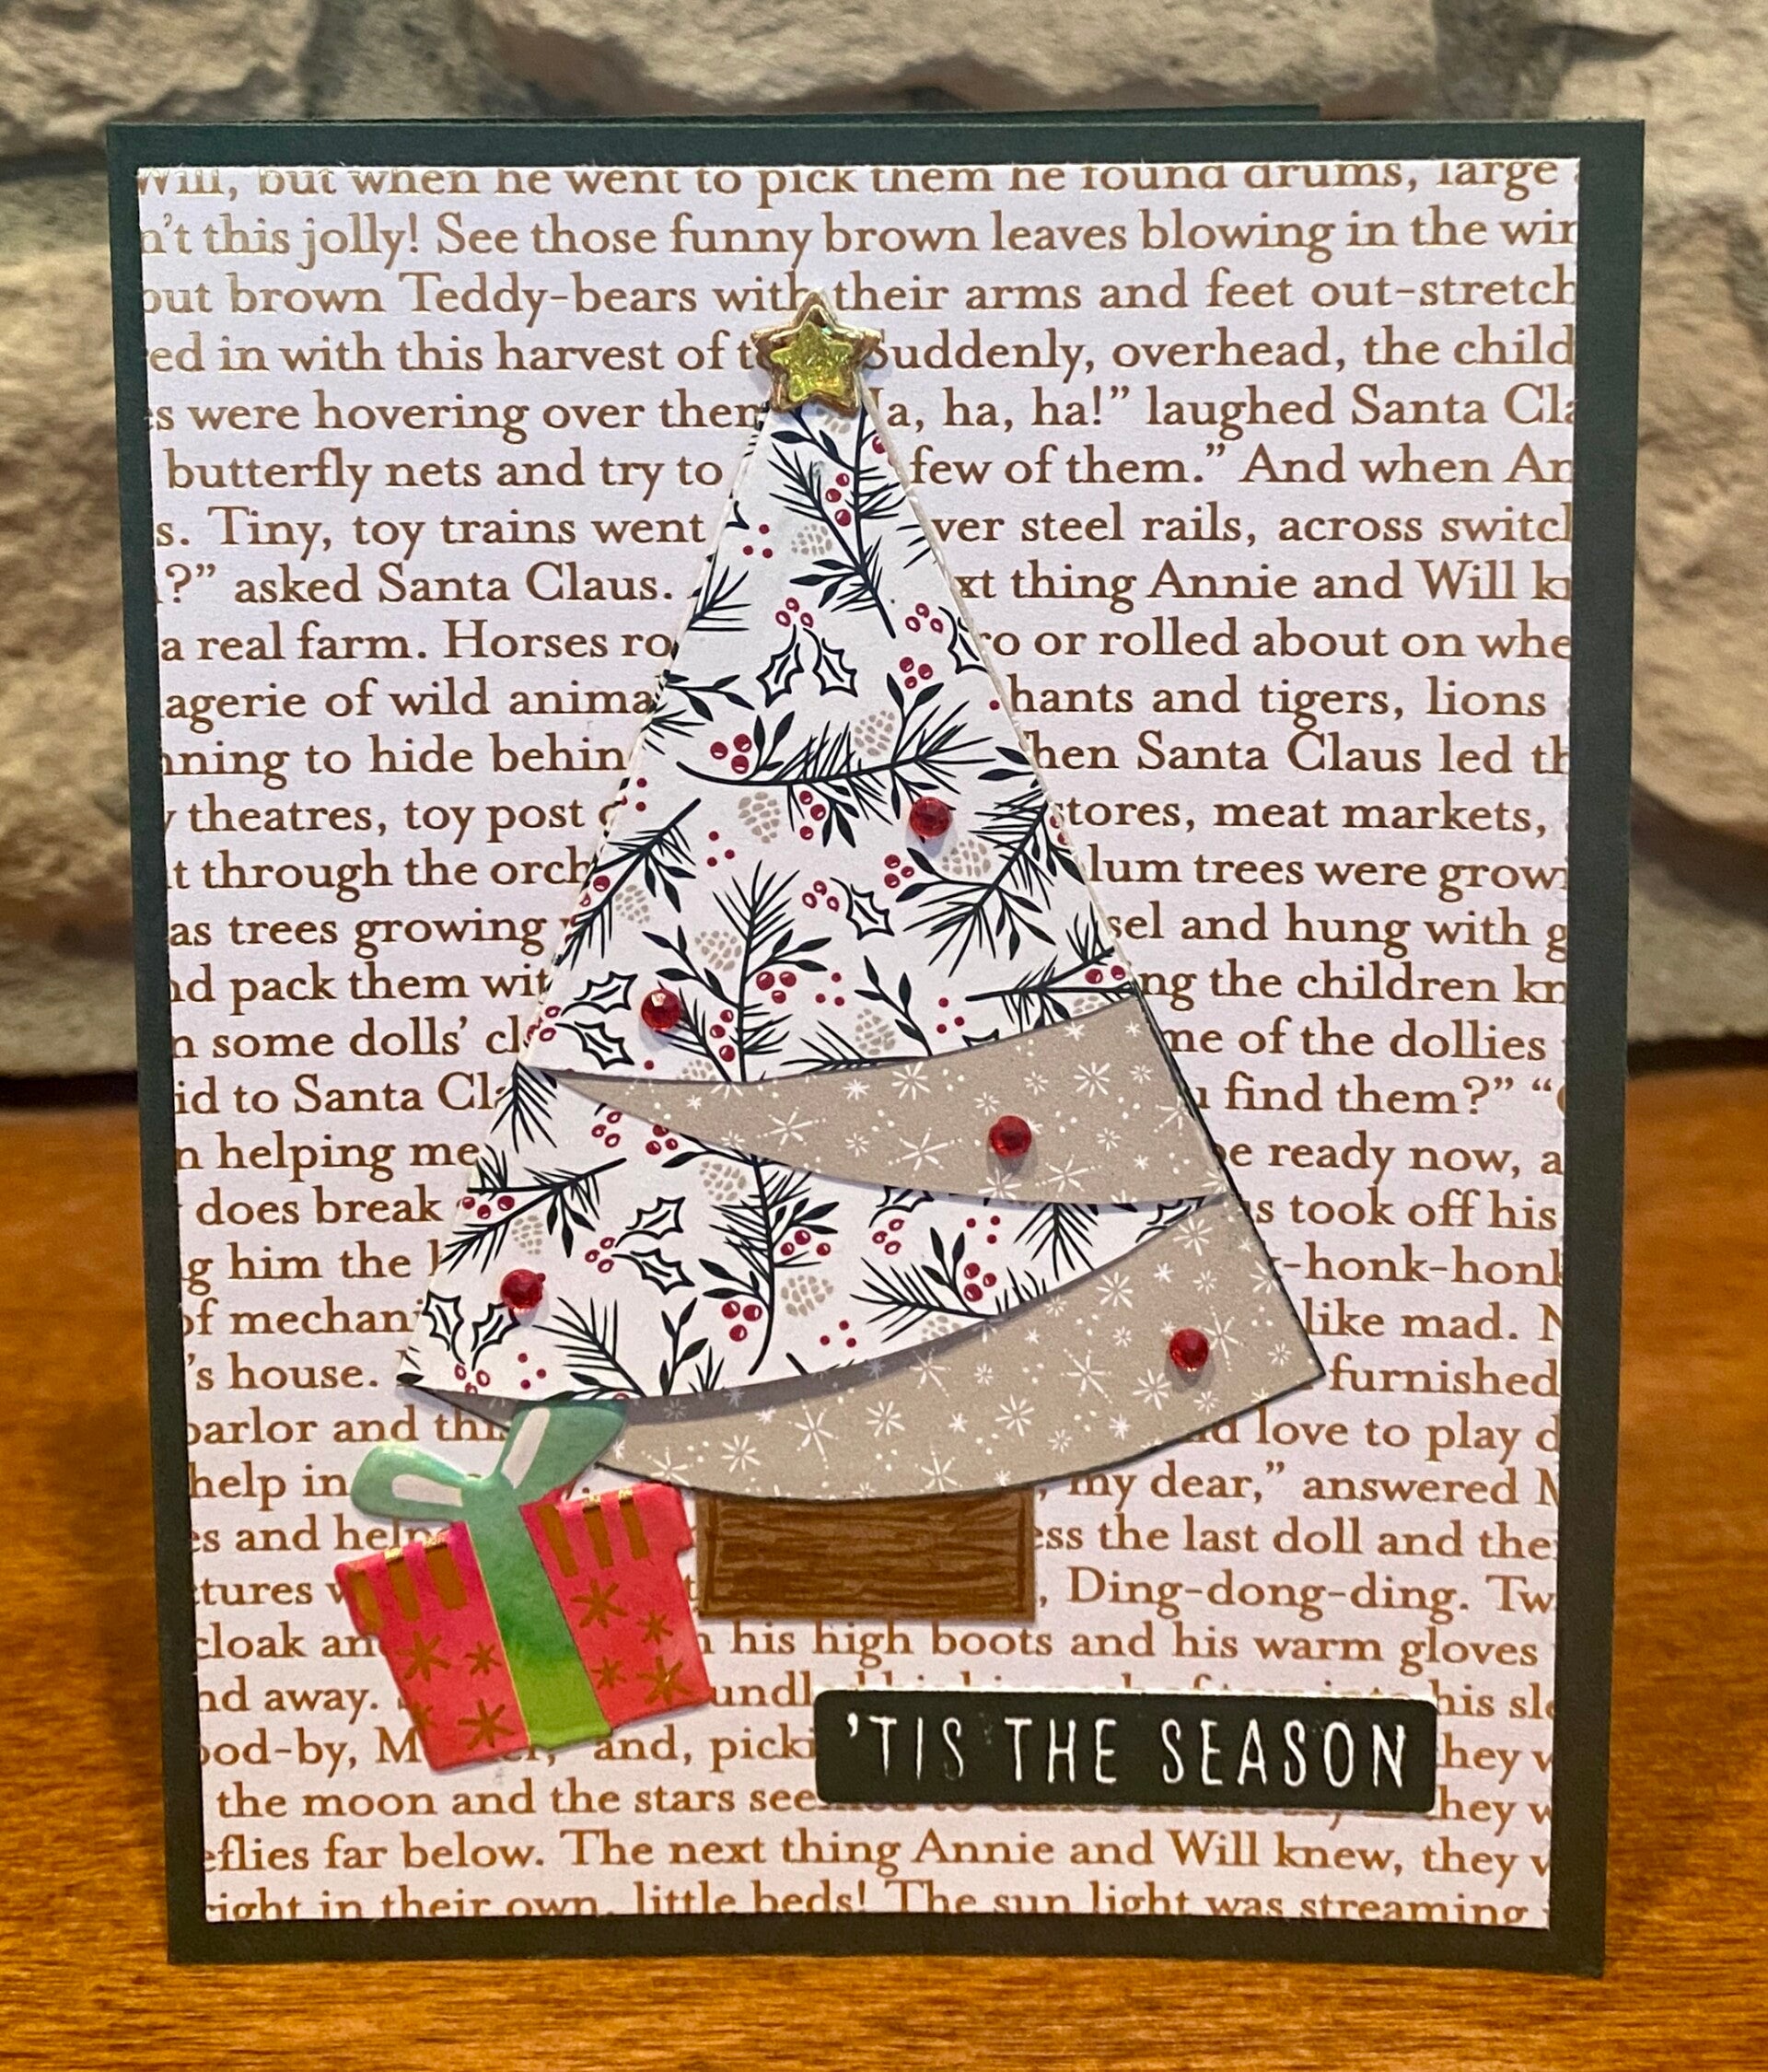
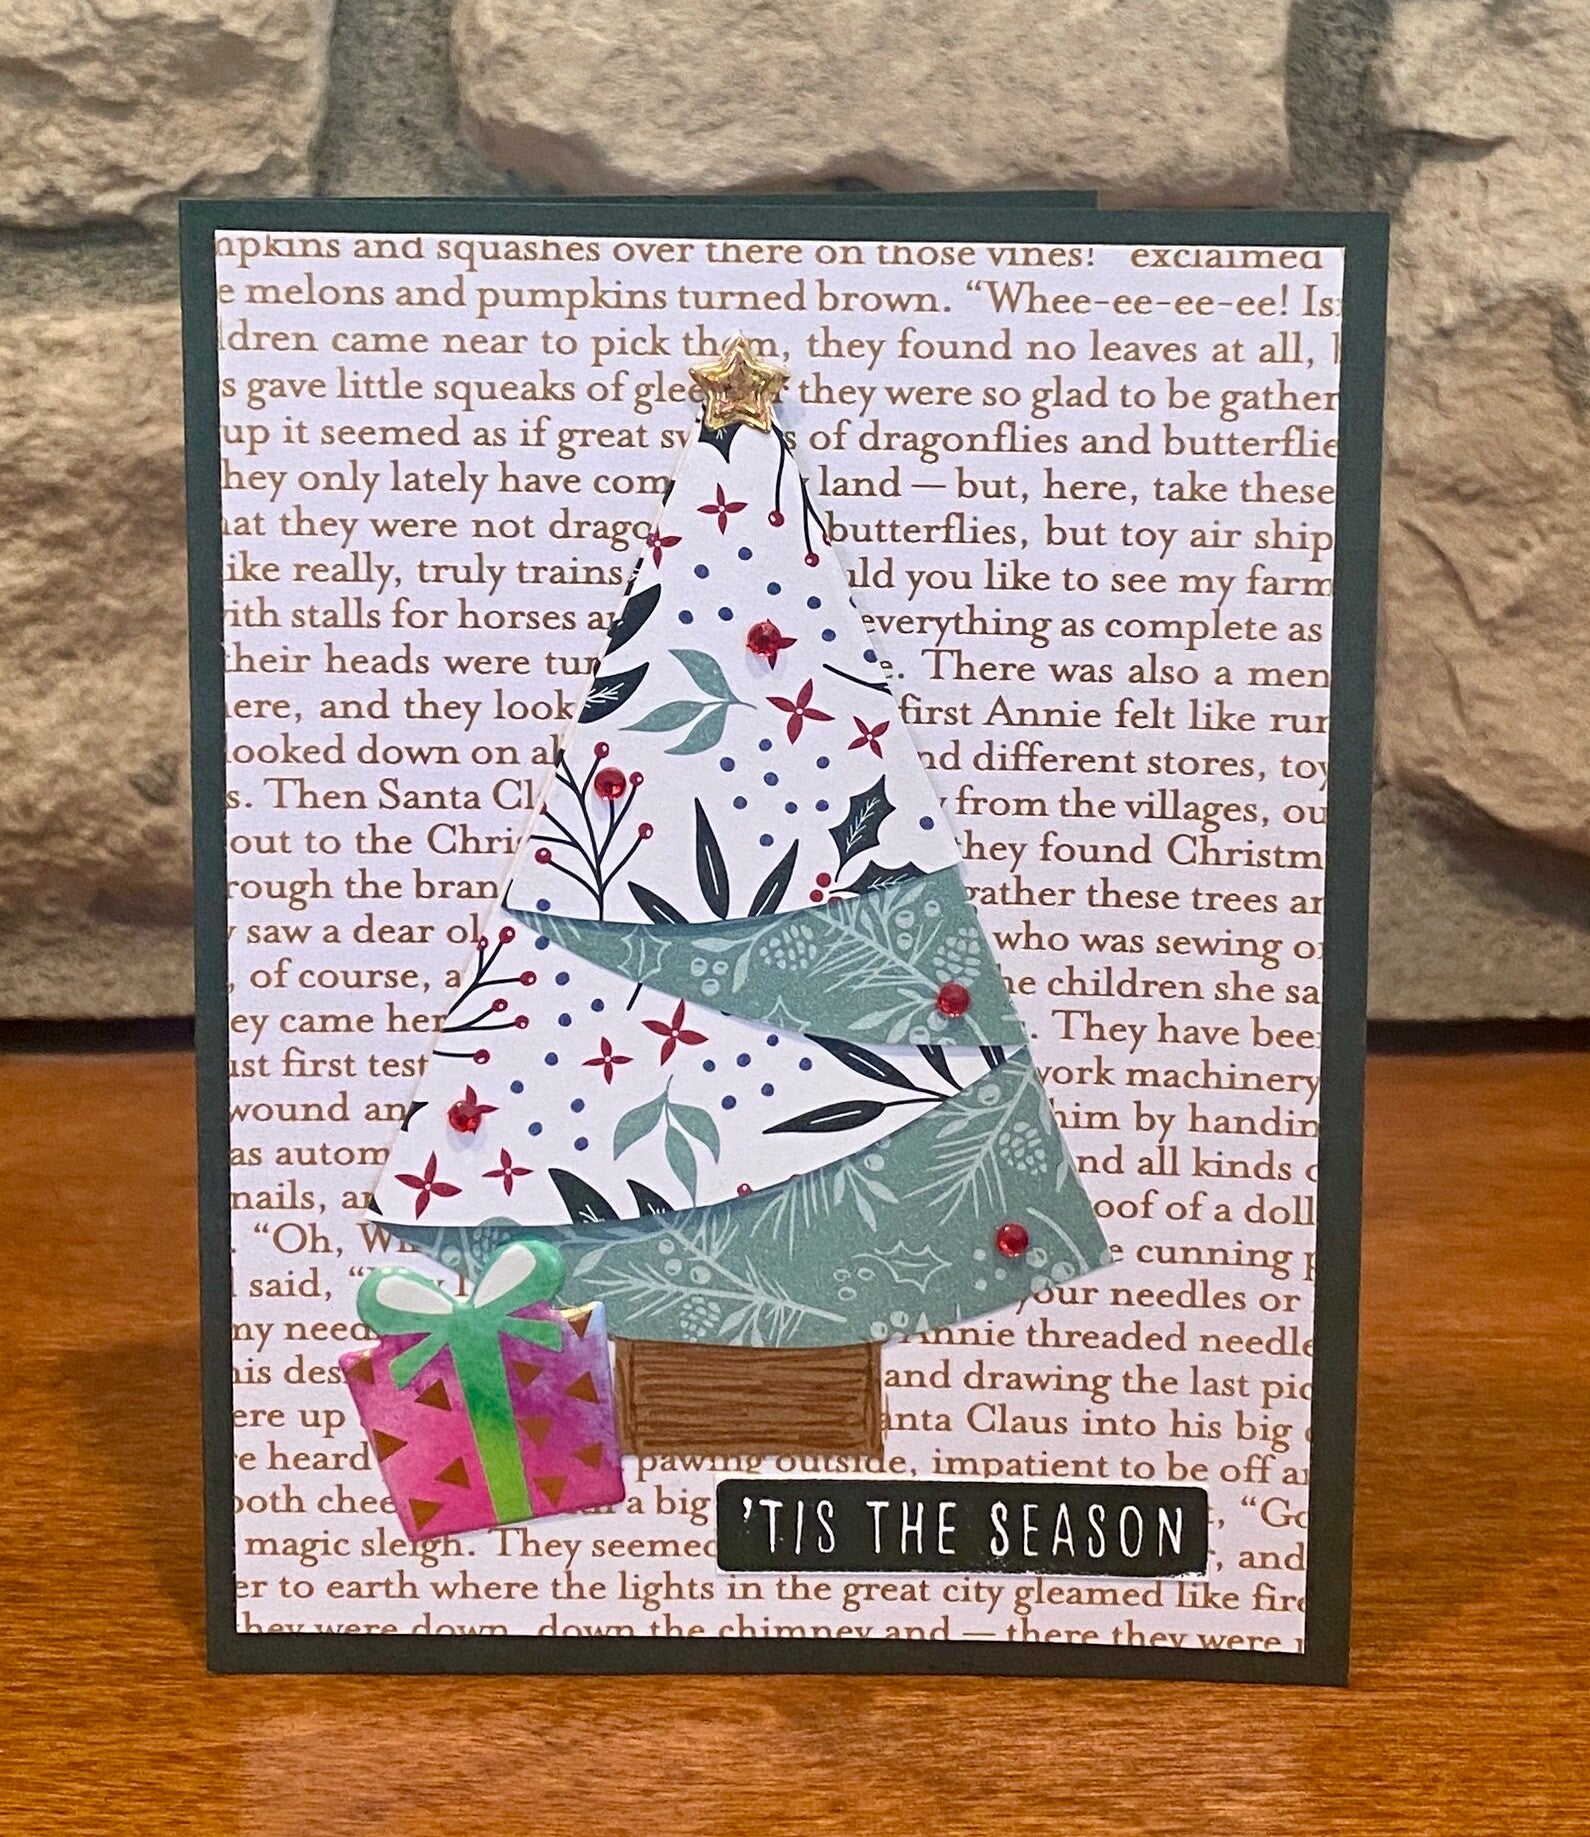
Sunday August 18, 2024 - Margery showed us how to make cute christmas trees from circles. A similar tutorial can be found here.


Sunday August 11, 2024 - we are still making cards using various one sheet wonder templates. Tonight I adapted a tutorial from Lynn Dunn. In the original tutorial she makes 12 cards with one sheet of designer paper (and of course matching cardstock). I changed it to make 9 cards (4 x 4 pieces) with one 12 x 12 sheet, along with 9 peices of 1 x 4, and 1/4 x 4 scraps. Find the original tutorial here. Last week 8/4 we chatted and crafted...


Sunday July 28, 2024 - tonight's cards were created using 6 pieces of 6" x 6" paper. We used the template from Julie Davidson. You can access her Pick Six tutorial here. Last week 7/21 we chatted and crafted...
Sunday July 21, 2024 - we revisited the fold from June 30th below.


Sunday July 14, 2024 - tonight we made cards using the Stack, Cut, & Shuffle Technique. We used the template from Cheryl at Paper Panacea. You canaccess her tutorial here.


Sunday July 7 2024 - Debbie and Phyllis had a great time chatting, crafting, and working on Paper Pumpkin Kits! (The rest of us couldn't make it on the Zoom) Debbie made alternate cards using the March 2020 kit, No Matter the Weather, and December 2020 kit, Beary Comforting. Phyllis made some alternate cards using the Enjoy the Adventure card pack.


Sunday June 30, 2024 - tonight we worked on a fun fold using this tutorial from Klompen Stampers - Fun Fold Card Making Templates - volume 2. You can also see other cards using these folds on our Paper Pumpkin Page, June 2024 Life is Sweet. (Sherry skedaddled out early and missed getting in the photo!)


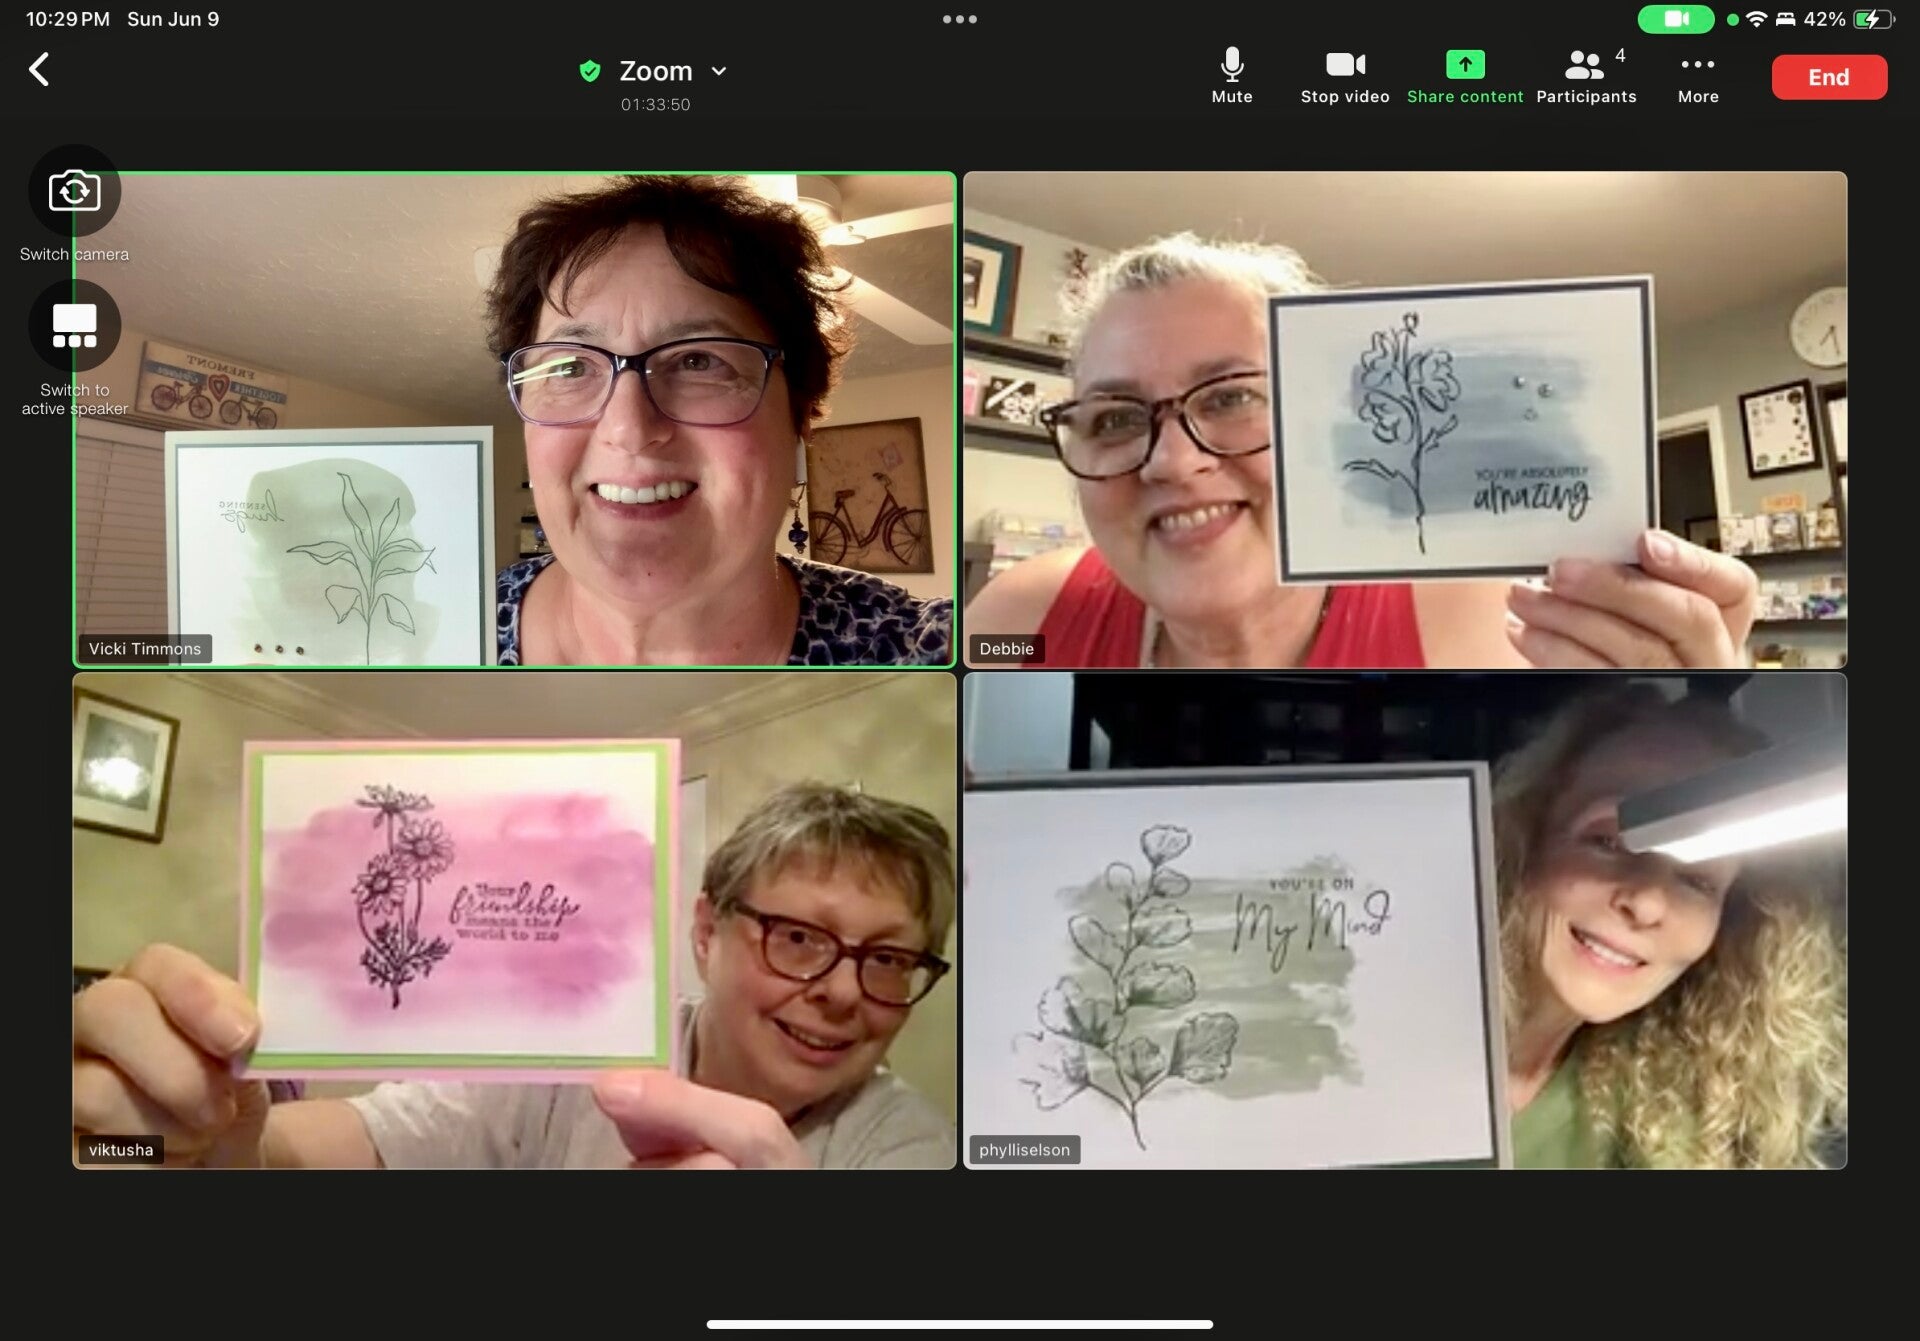
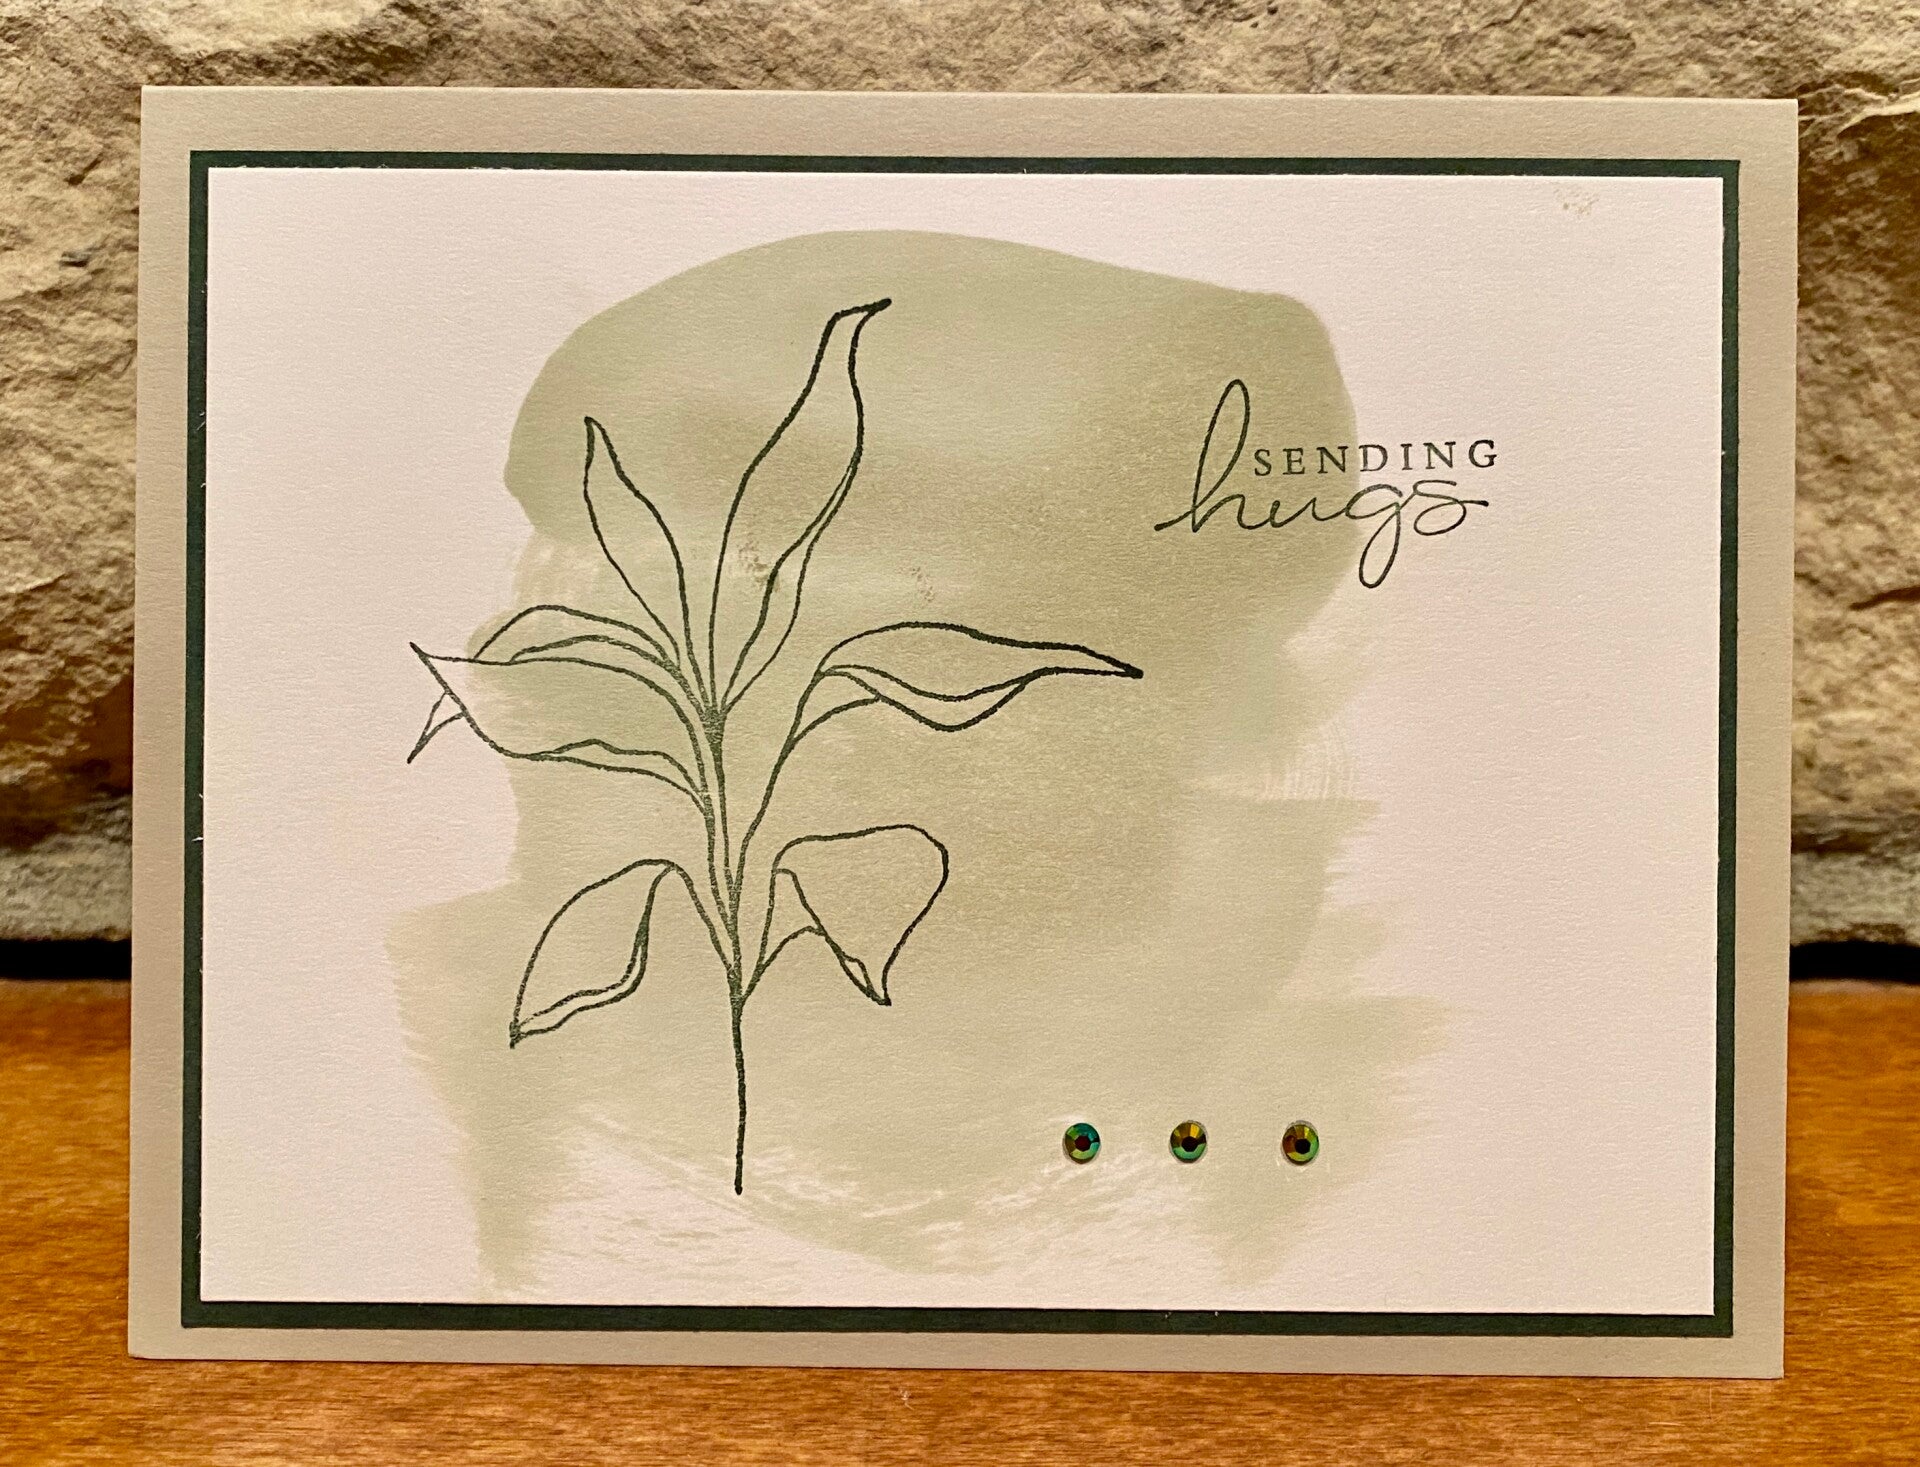
Sunday June 9, 2024 - Phyllis taught some fun inking techniques using water based ink and alcohol. It is interesting how the ink changes colors when it comes into contact with the alcohol. (We skipped June 16th for Father’s Day, and June 23 was a chat and craft where just a few of us got together and worked on our own projects.)


Sunday June 2, 2024 - tonight we made a fun fold window card that bends, using this tutorial from Lisa Curcio. Here is a direct link to her printable directions too!


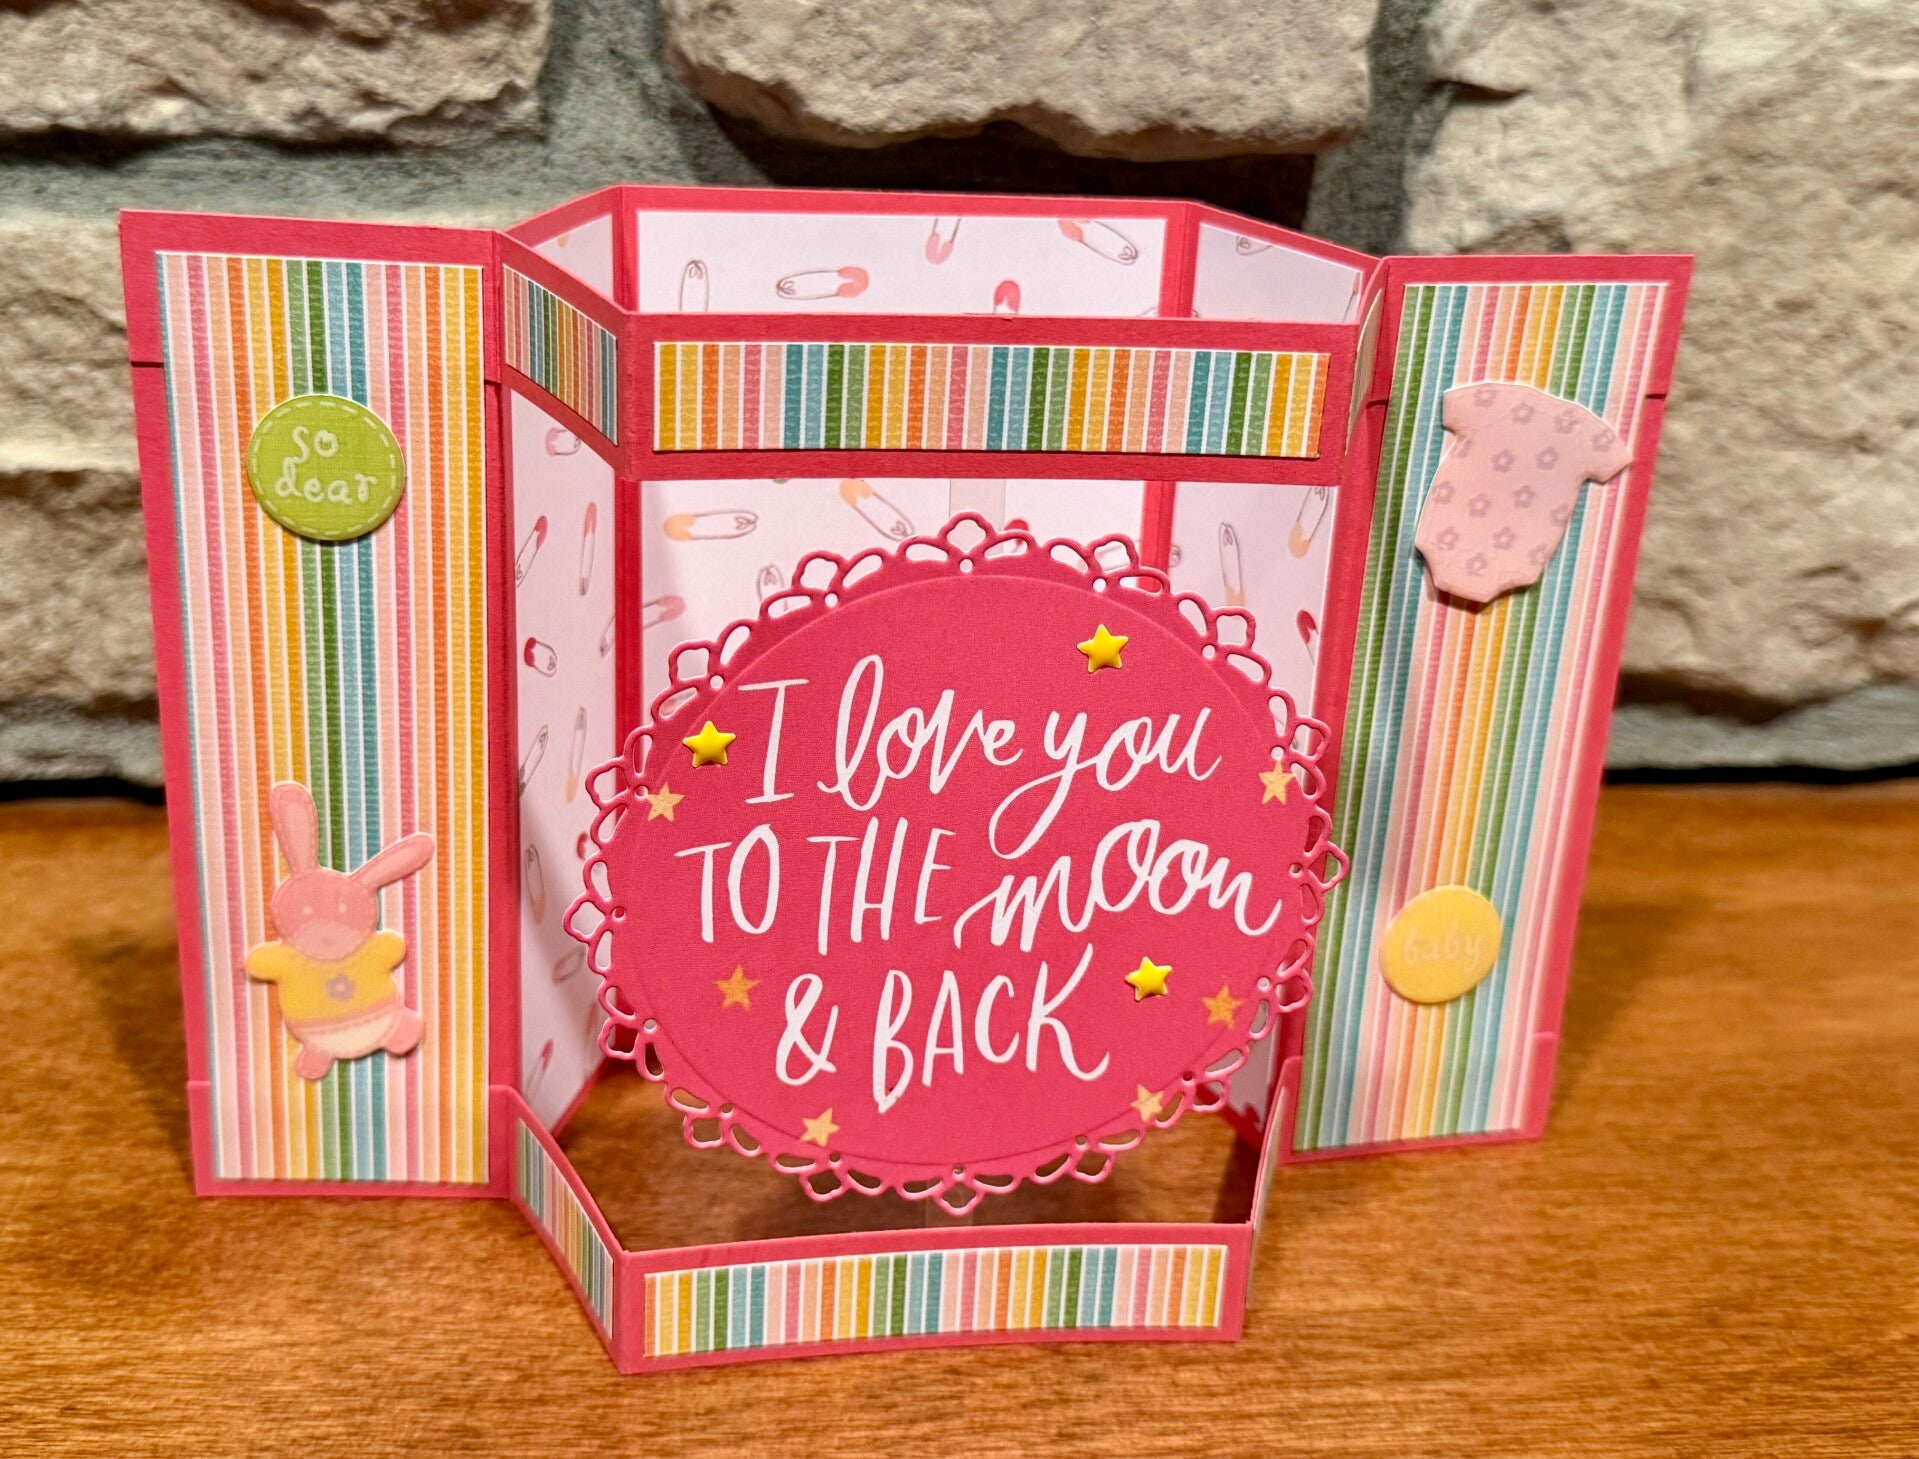
Sunday May 26, 2024 - We made the same fancy fold online that we made in our in-person card class. So fun seeing how everyone adapts it to their own style. Debbie also made a super cute "onesie" baby card too. Find the tutorial for the fancy folds here! And other samples here (from the in-person card class).


Sunday May 19, 2024 - We continued to play with inking techniques. This time using saran wrap in two different ways. 1. Smooch it up and dab ink onto the card 2. Crincle the wrap and lay it out on a surface, then ink the wrap and lay the cardstock onto the inked saran wrap. (We skipped May 12th for Mother's Day)


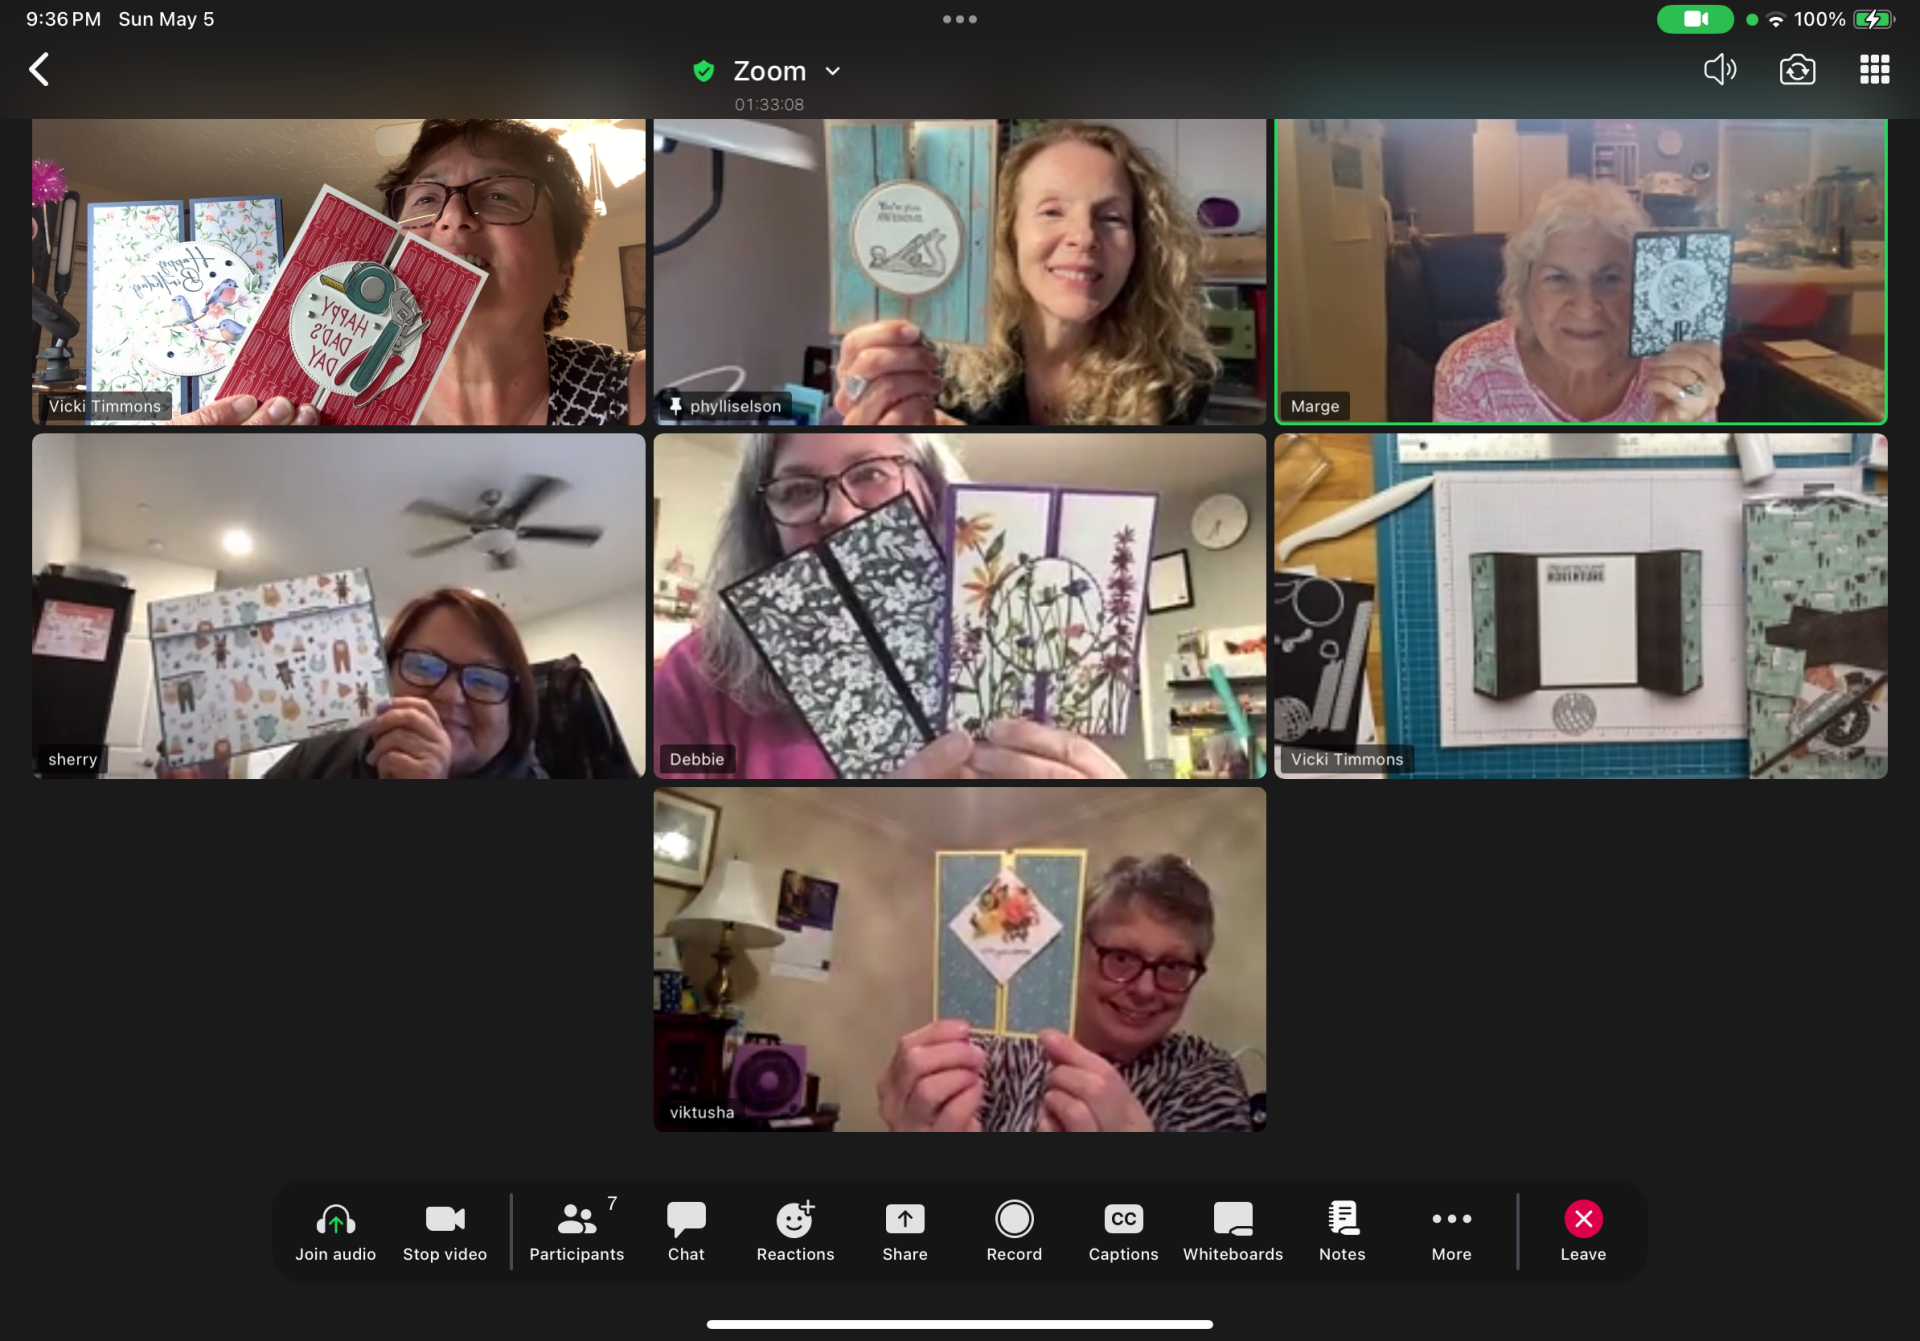
Sunday May 5, 2024 - We made a cute double Z card using this tutorial by Debbie Henderson. It looks like it would be difficult to make, but it is easy and fun!


Sunday April 28, 2024 - Phyllis showed us some really fun stamping techniques, using bubble wrap, painters tape (my favorite), and white crayons. We had a blast!


Sunday April 21, 2024 - we continue with triangle cards using this tutorial from Teri's Stamping Magic.


Sunday April 14, 2024 - We made cute triangle split cards following this tutorial by another stampin up demonstrator. PS Paper Crafts


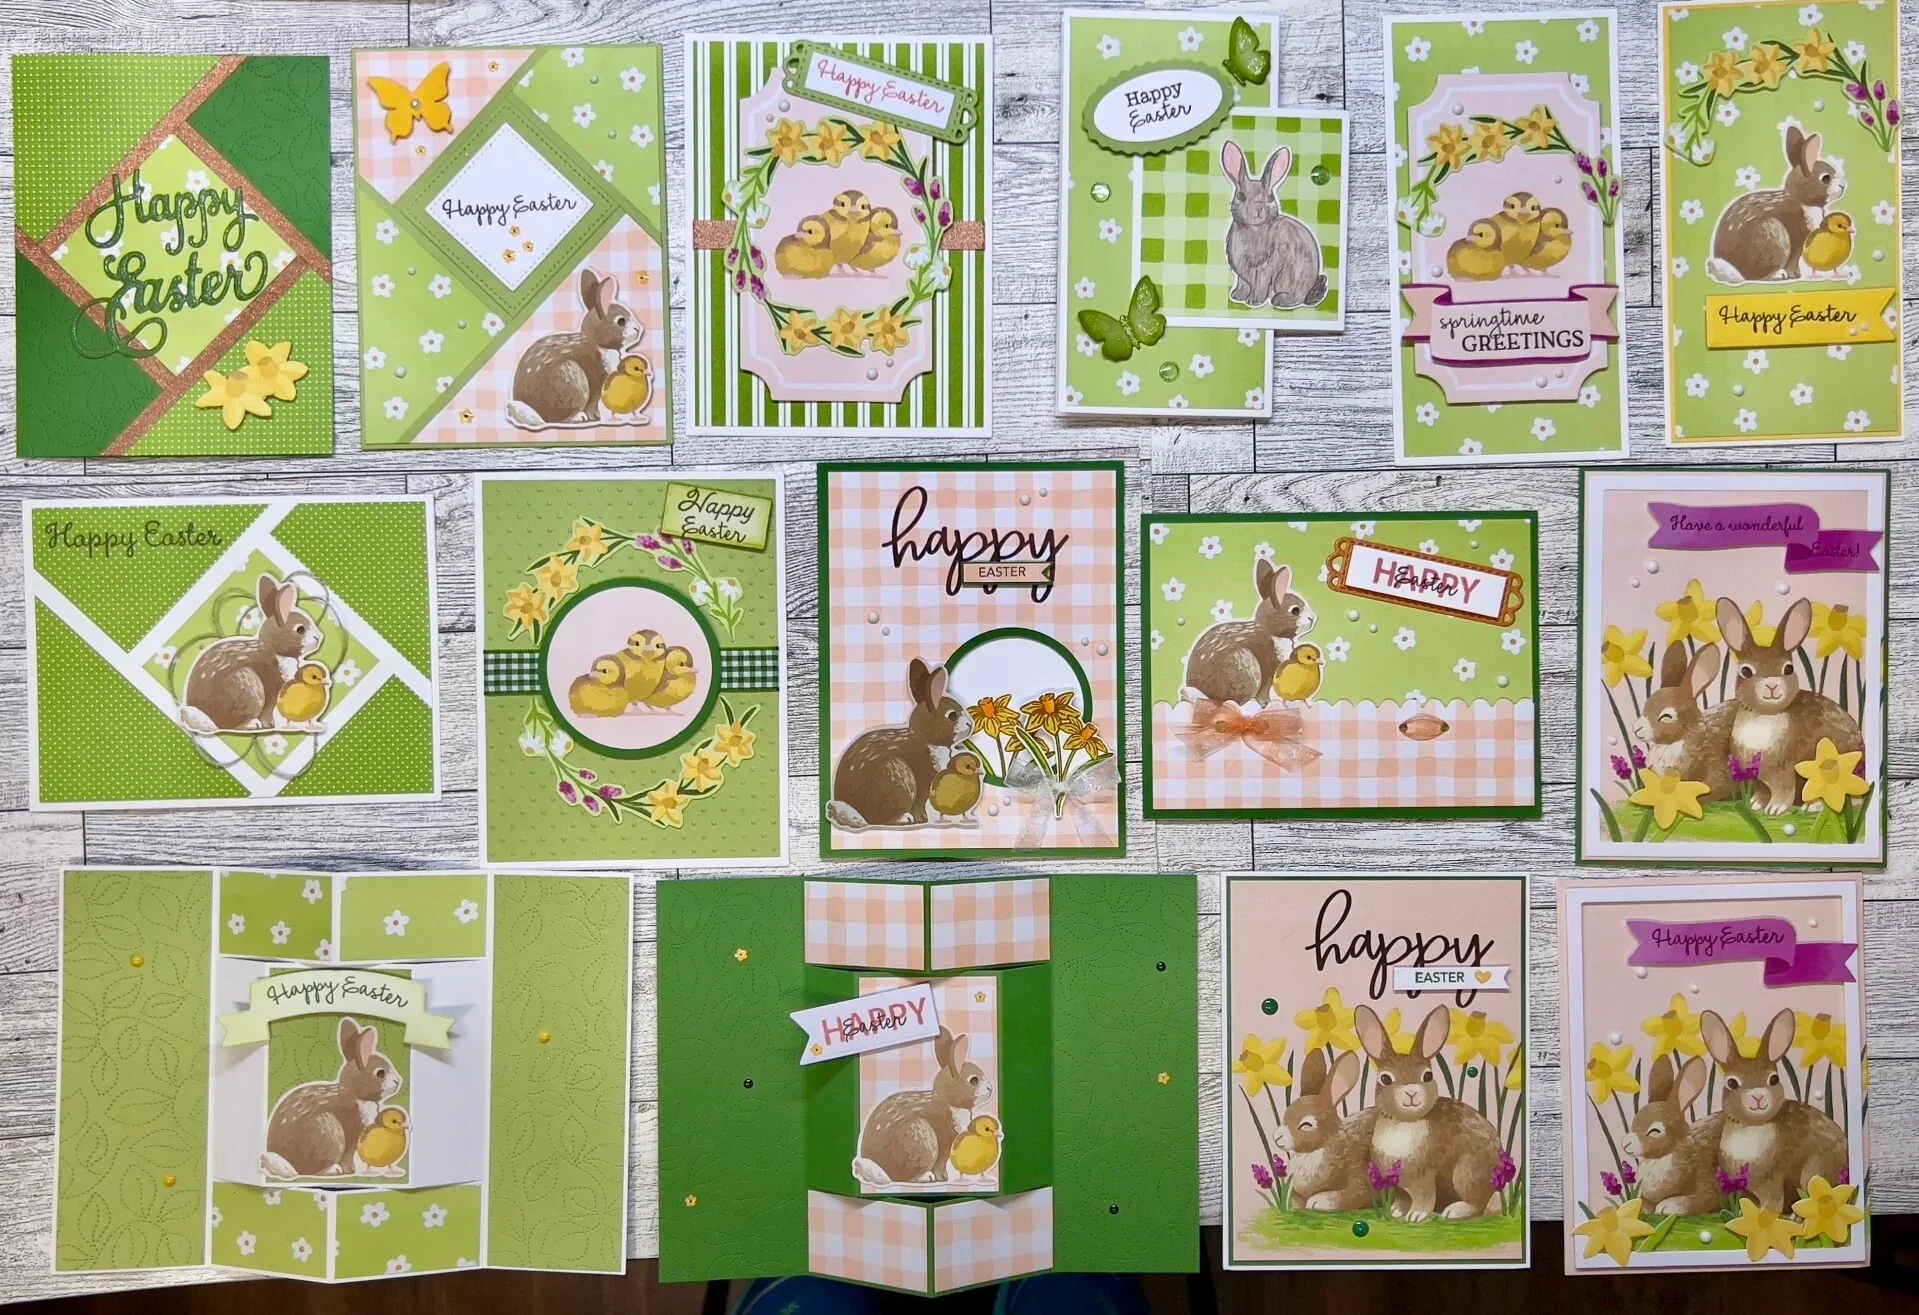
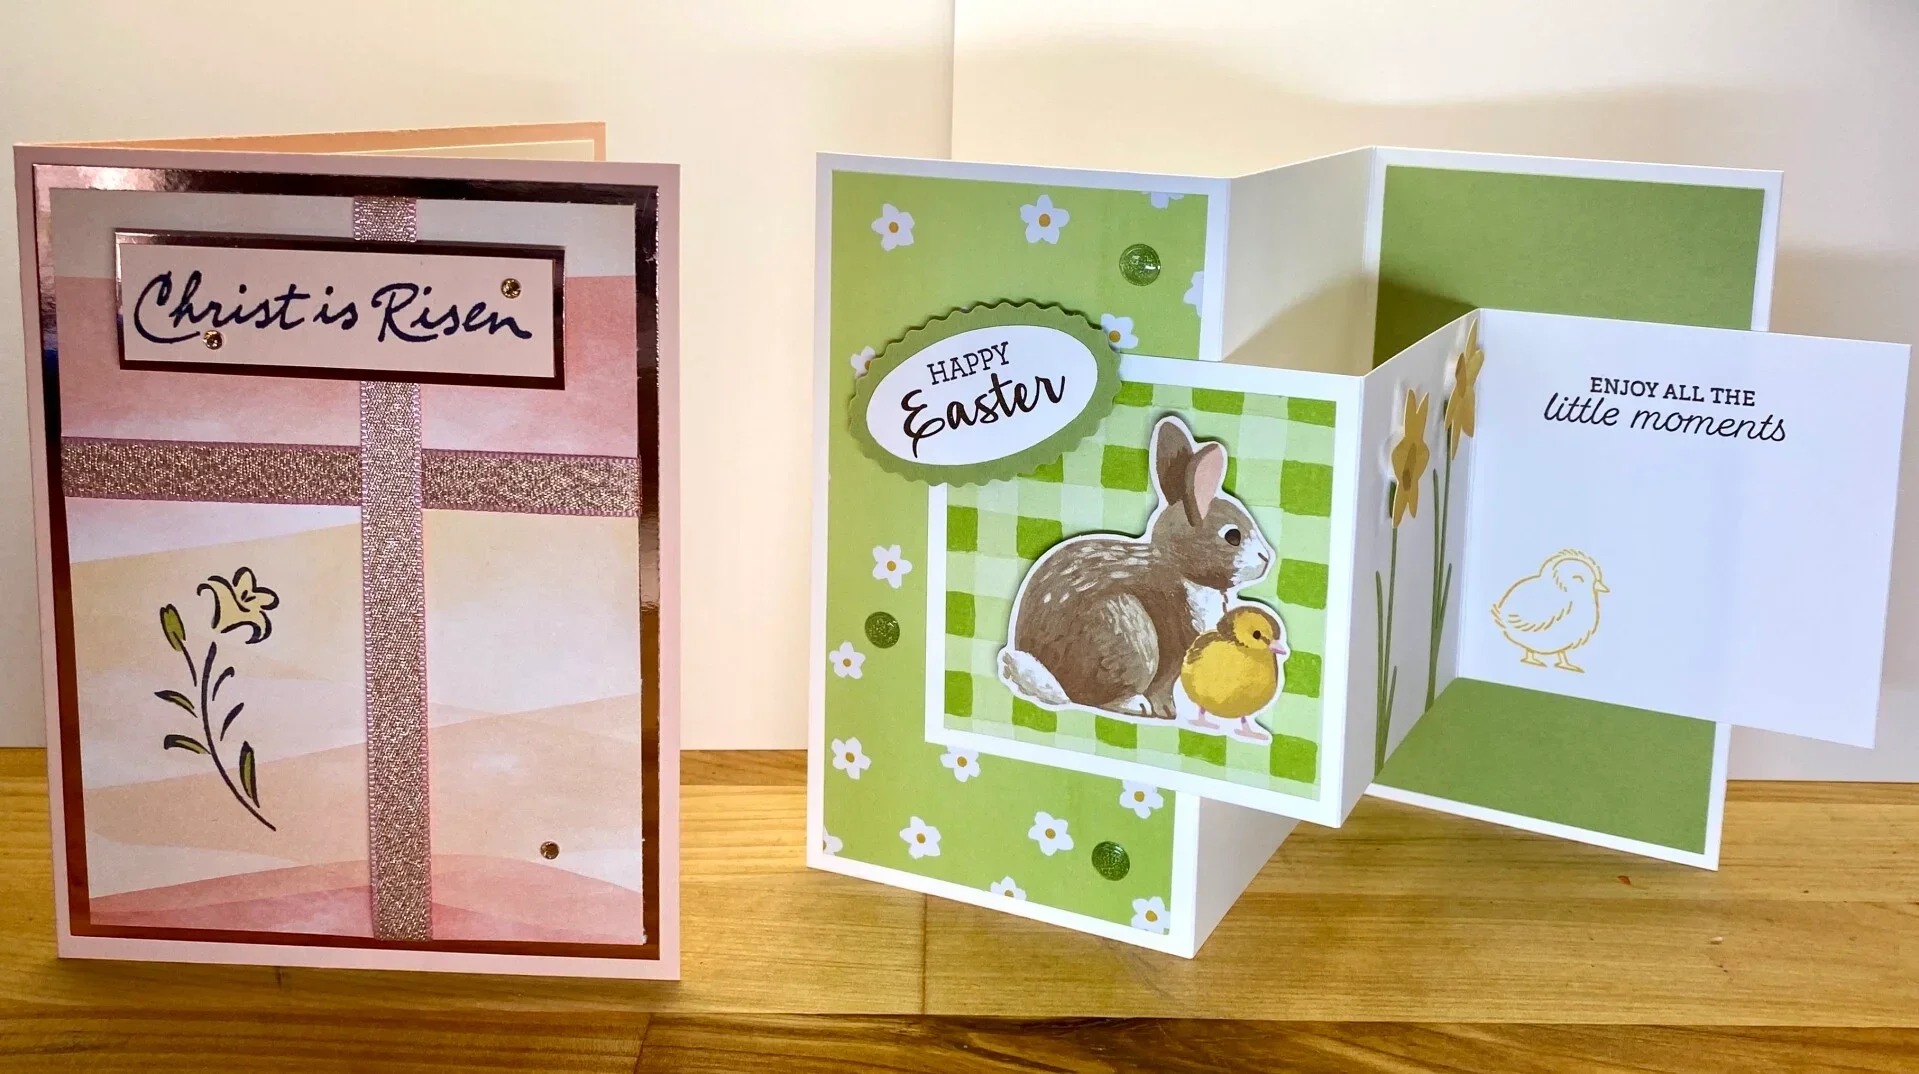
Sunday March 17 -Sunday April 7, 2024 - We all worked on our own projects.
Sharon finished up her One Sheet Wonder Cards, Debbie worked on her Paper Pumpkin Alternates and Vicki designed and cut the cards for card class coming up on Thursday. The bunny card was 'cased' (create & share everywhere) from Debbie's cute bunny card.
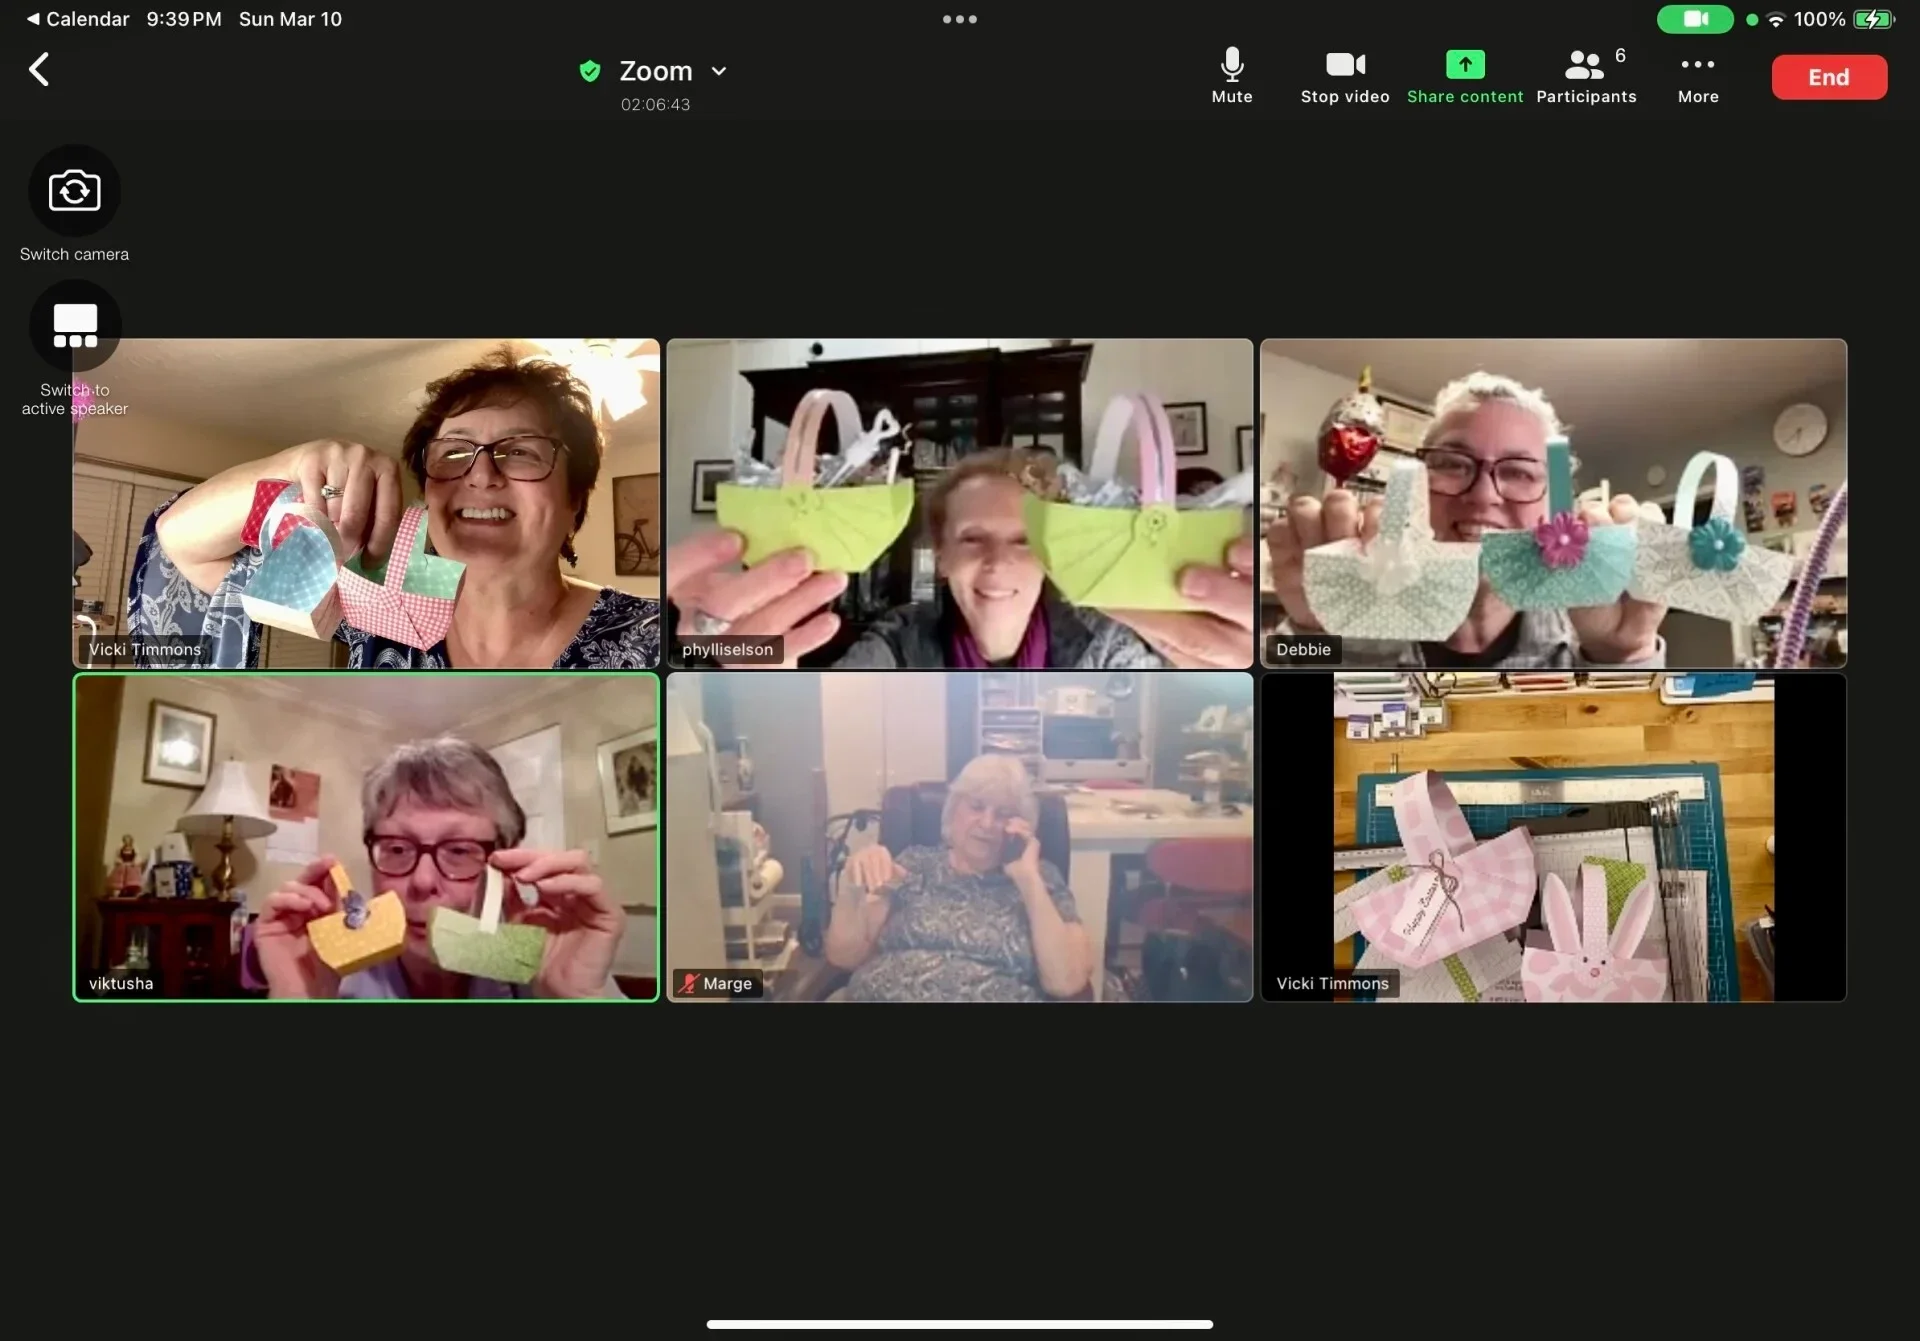
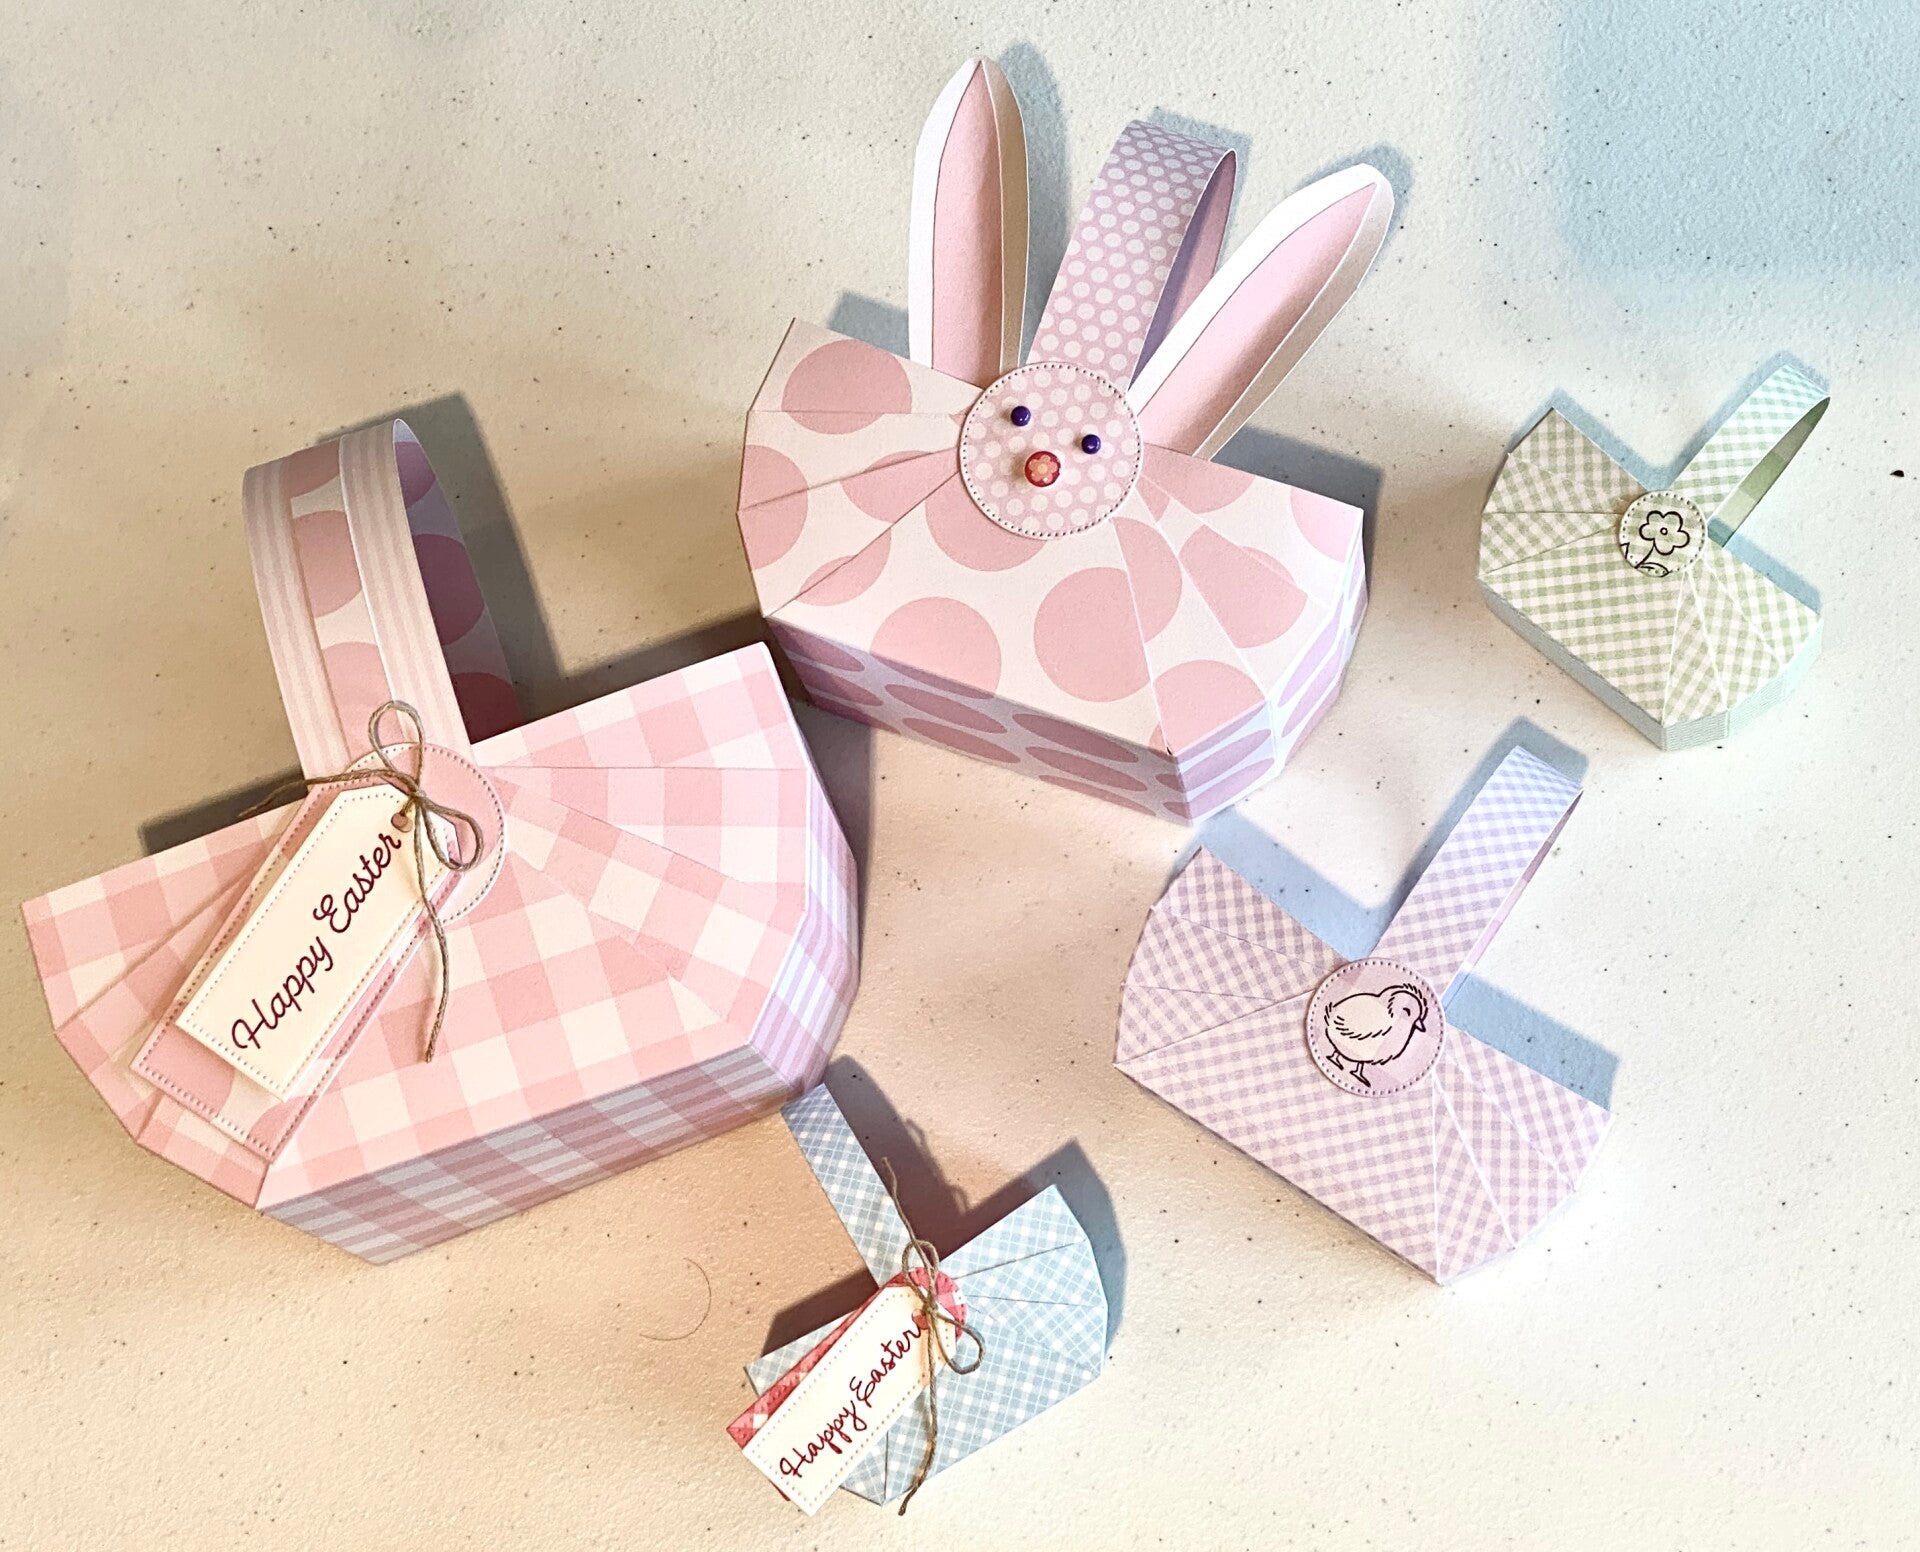
Sunday March 10, 2024. Easter Baskets! Tutorial here.
Sunday March 3, 2024. We all worked on our own projects.
Debbie worked on alternatives for 2024 Paper Pumpkin easter cards.
Sunday February 25, 2024 - One Sheet Wonder Cards - tutorial here. Also see the finished cards everyone made on the tutorial page!


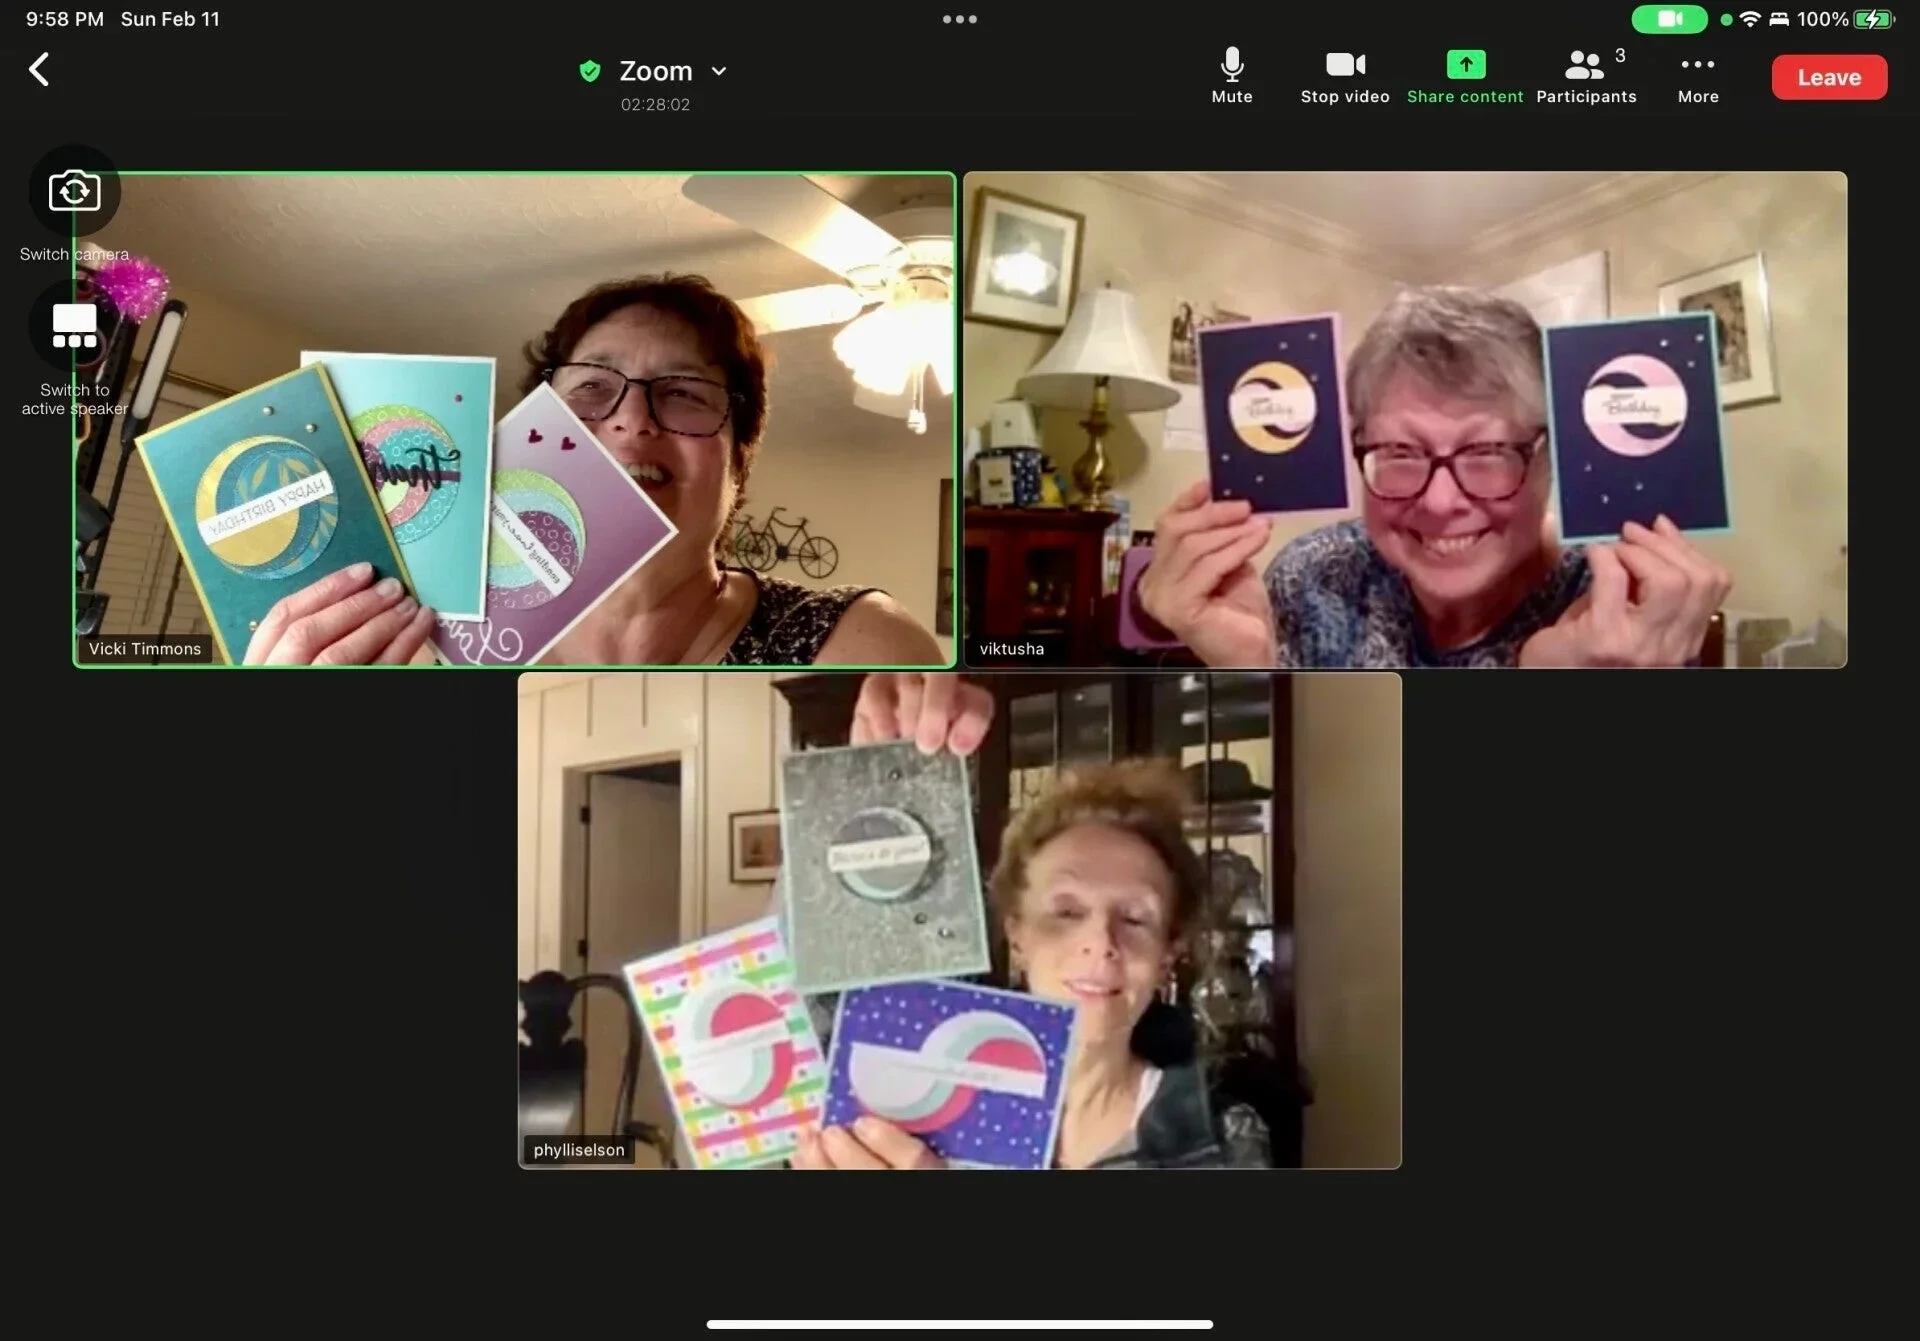
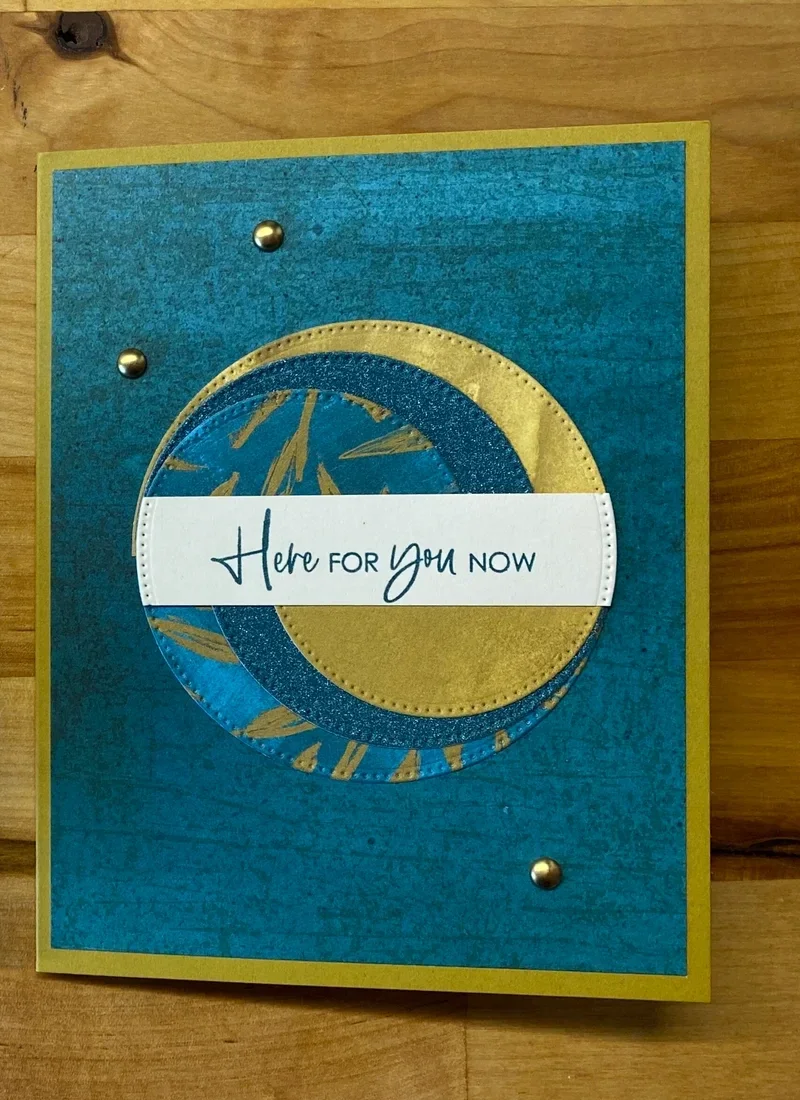
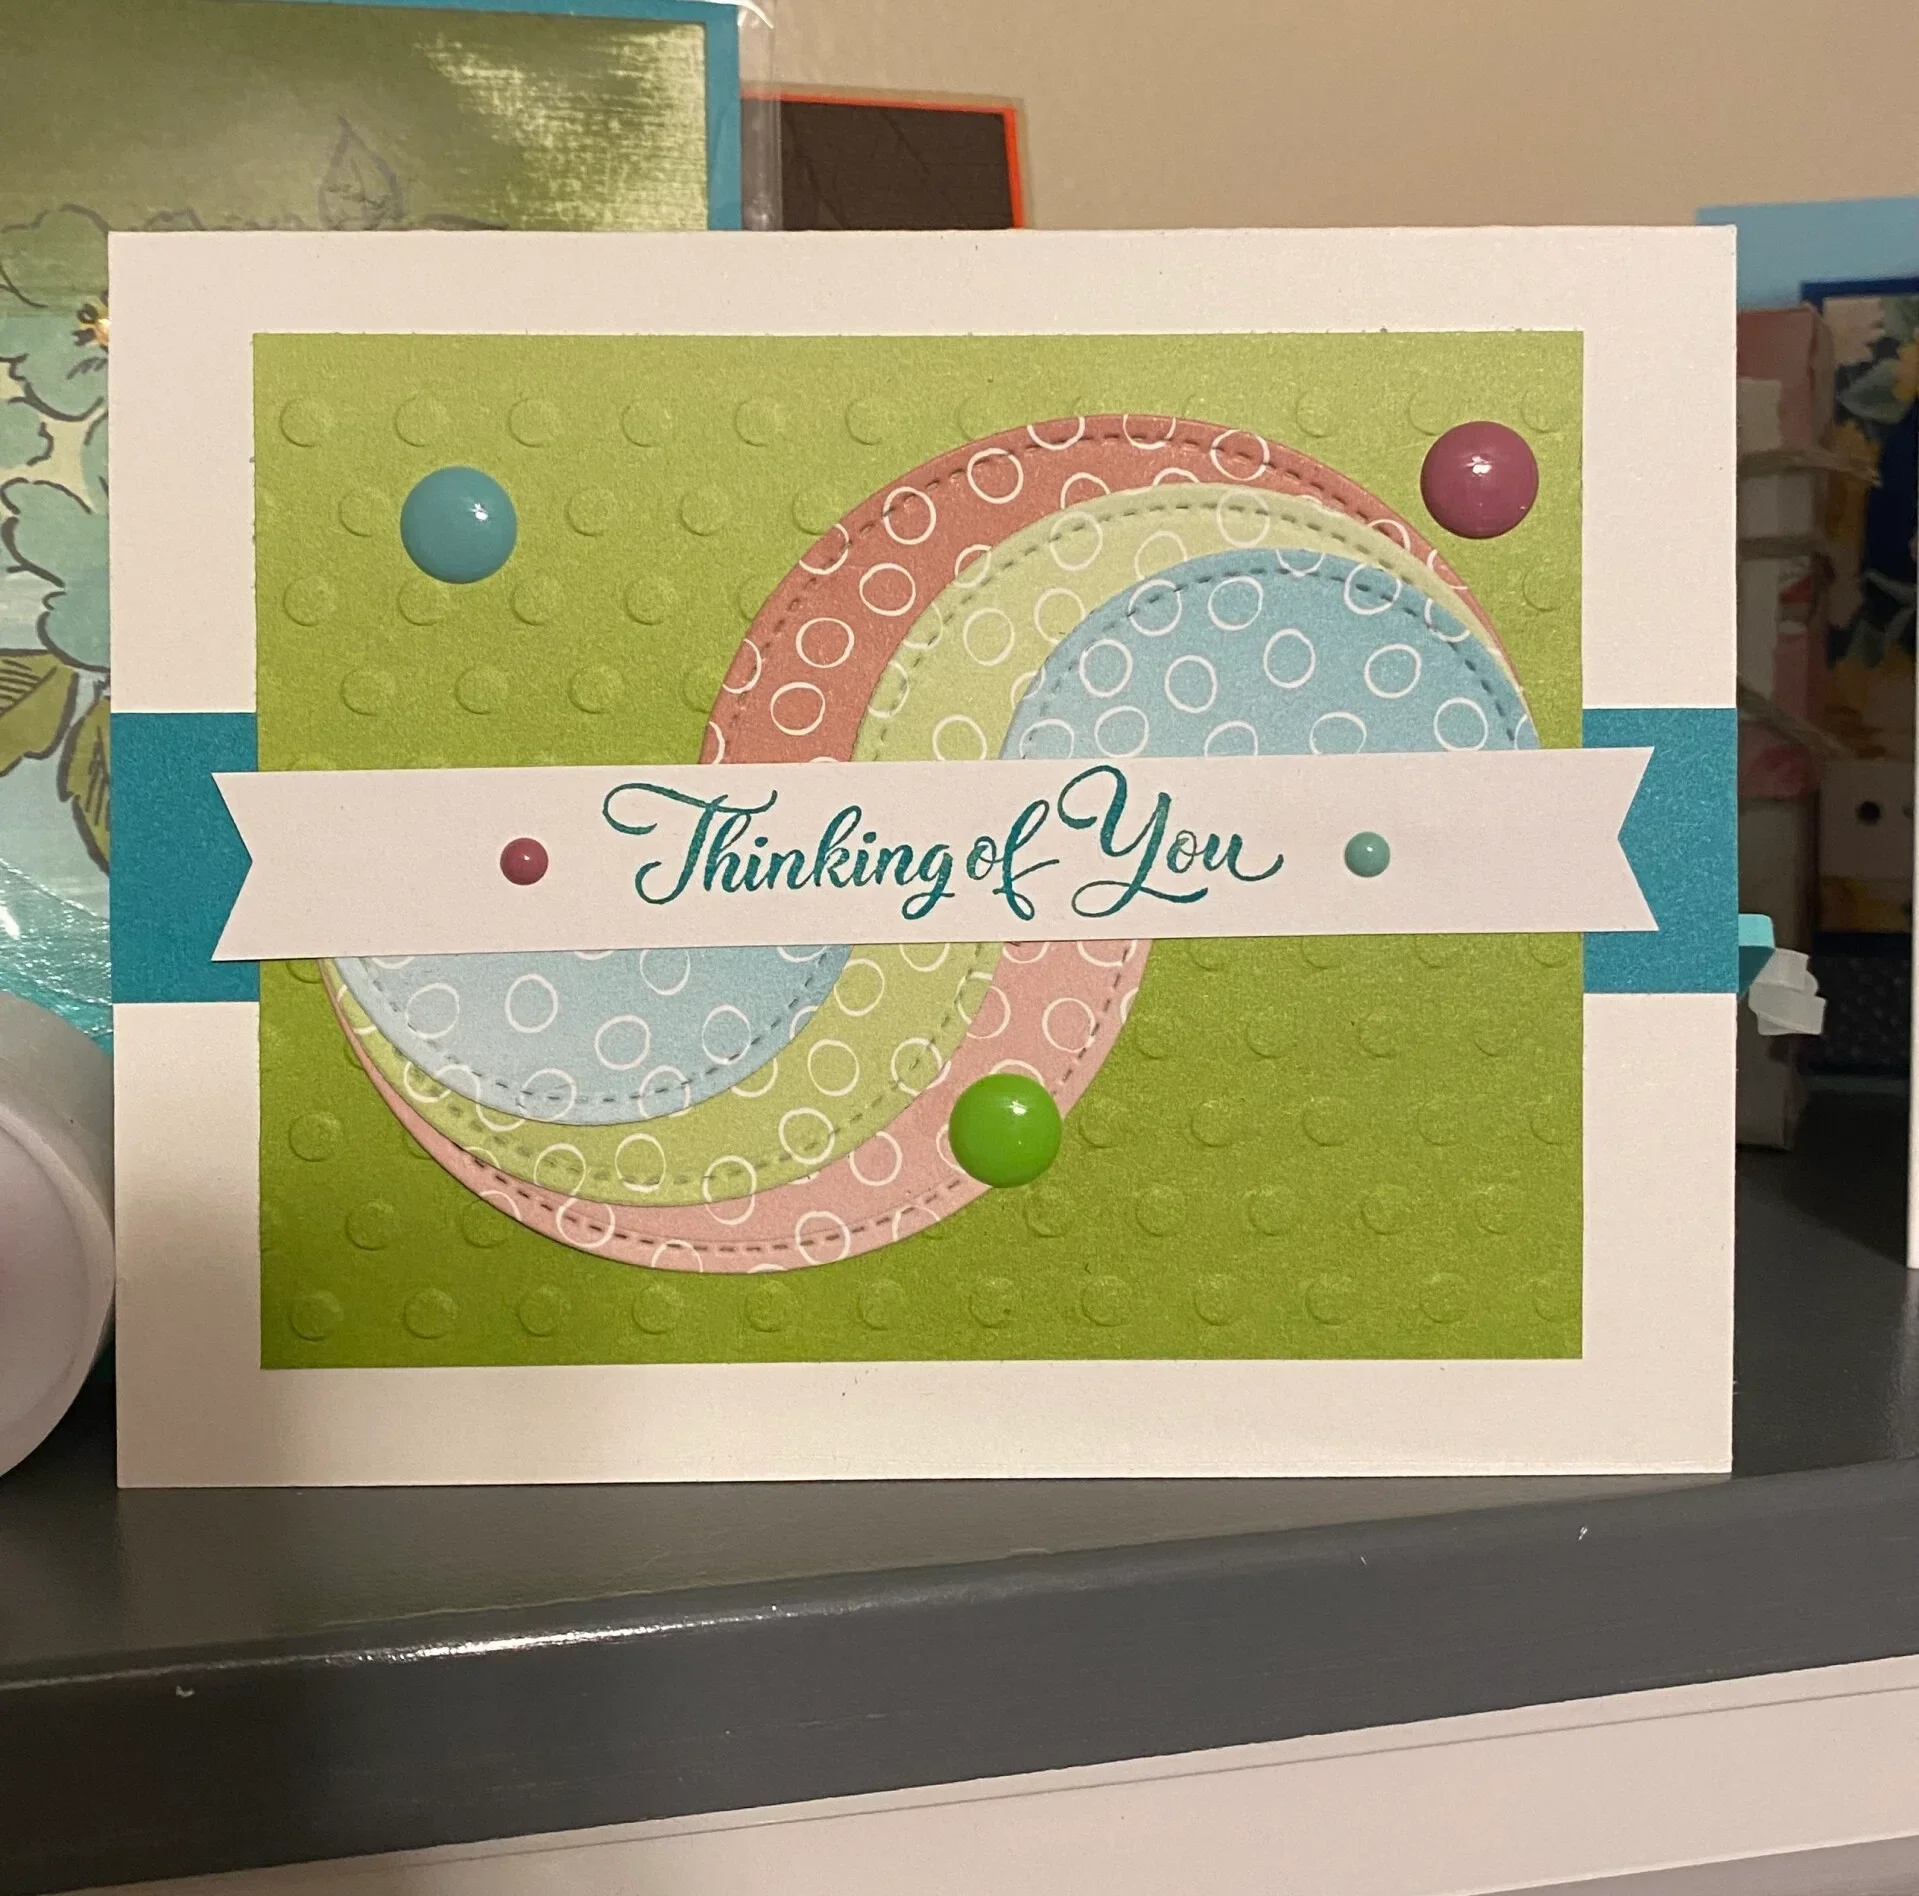
Sunday February 11, 2024 - Circle Swirl Cards